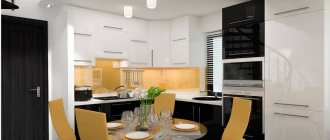
The kitchen is a special territory. It simultaneously performs purely utilitarian, practical functions, such as a bathroom or pantry, and is a place of comfortable, spiritual relaxation for the whole family. It’s not for nothing that the kitchen is called the soul, the heart of any home. Even earlier, the hearth, located in the kitchen, was associated with family and the blessing of ancestors. And today we have special feelings for the kitchen. Where are we rushing to share what is sore? Where can you grab a piece of something appetizing and delicious before dinner? What room in the house exudes special comfort and warmth? Of course, all this is the kitchen!
To harmoniously combine different functional areas, to make the kitchen both cozy and convenient for work, a careful approach to artificial lighting is required. It plays a leading role in ensuring comfort in the room. After all, the advantages of the most sophisticated household appliances and magnificent, expensive kitchen units come to naught in dim, insufficient lighting. Moreover, with a lack of light, the safety of people working and in the kitchen suffers, and traumatic situations are created.
How to properly arrange lighting fixtures in the kitchen? Which lamps are suitable? What do you need to know before starting installation? What mistakes are made during the work process? Our specialists will tell you about all this.
Pros and cons of backlighting
Kitchen cabinet lighting has its advantages and disadvantages:
| pros | Minuses |
|
|
Be sure to look at the options for interior filling of kitchen cabinets.
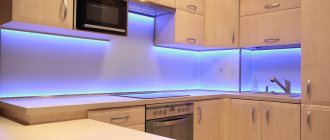
The photo shows the backlight of the glass apron
Types of LED lamps for the kitchen
Surface-mounted linear luminaires. Sold individually. Each of the lamps can be connected separately or connected into long blocks using special adapters.
Spot overhead lamps. These are thin round lamps that consist of several LEDs. They are turned on via a sensor installed on each lamp.
Recessed linear and spotlights. Thin enough to mount flush in ceilings or under wall cabinets.
LED Strip Light. The strip costs much less than ready-made lamps, is easy to install without the involvement of a professional electrician, and usually has several lighting modes of different colors and intensities.
What lighting options are there?
LED lamps for kitchen cabinets come in 3 types.
Check out our article about organizing lighting in the kitchen.
Spotlights
Round, square, rectangular - they can either be built into the bottom of the box or mounted on top of it. Spotlights look good both under cabinets and under open shelves. To ensure there is enough light, choose the appropriate brightness and place the sources at a suitable distance from each other.
LED panels
To achieve soft, diffused, homogeneous light, there is no better option. Unlike strips or spots, panels typically occupy the entire bottom surface of cabinets, ensuring an even flow of lumens. The panels do not heat up, are safe for the eyes, and last about 50,000 working hours (~15 years). Easy to install and maintain. The only drawback is the relatively high cost.
Important! Any diode lamps - strips or panels - are characterized by energy-saving properties. They consume much less energy compared to conventional incandescent lamps and even energy-saving lamps.
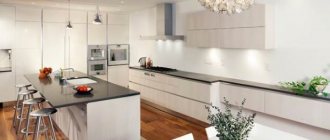
In the photo, illumination with spotlights
LED Strip Light
An affordable option with a low price. Just like panels, tapes do not emit heat and last for many years. They can be installed anywhere:
- the angle between the apron and the bottom,
- in the center of the bottom,
- near the front side.
At the same time, you can install lighting in the kitchen under the cabinets yourself, without the help of specialists. The only disadvantage of the tapes is the serial connection. That is, if one LED burns out, all of them will stop working, which means the strip will have to be changed completely.
Important! Any lamps used to illuminate the work area must be marked IP65 or higher. This marking confirms that the equipment can be used in wet areas.
Directional light
Accent light is designed to draw attention to decorative elements. Using rotating lamps or a diode strip, you can highlight a collection of porcelain on open shelves or a picture on the wall.
Where is the best location?
Kitchen cabinet lighting, depending on its location, performs different functions.
Above the work area
In this case, the lamps are mounted in the center of the cabinets (built-in) or closer to their front side (overhead). Then the light will fall down, creating the right effect and helping to concentrate vision on preparing the products: cutting, cleaning, etc.
Advice! In order not to disturb the appearance, order a special “threshold” along with the cabinets, which will hide the lamp housings.
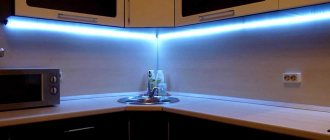
In the photo there is lighting in the corner under the cabinets
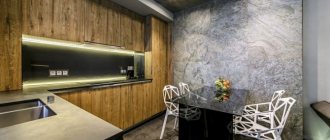
On the apron
Because The main purpose of such lighting is still decorative, so the apron should be suitable. Suitable:
- they threw off with drawings;
- plain tiles;
- textured surfaces.
Of course, part of the flow will fall on the countertop, so you can highlight the apron even if there is a slight lack of light in the kitchen.
Ribbons are usually attached to the top, but can be added to the bottom and sides.
In the baseboard
Basic mistakes when installing lighting
Our experts warn against making mistakes that will later result in discomfort and the need for drastic alterations. Which ones are the most common?
- Planning lighting first. Yes, you can roughly estimate where and what will be located. But these will be rough calculations to which adjustments will have to be made. Correctly install the wiring after the complete project of the kitchen set is ready, all the other furniture has been taken care of, including a seating area, TV and dining area. Only then will the owners know absolutely exactly where lamps will be needed, and in which places they can be dispensed with.
- Standard lighting brightness. The kitchen is the most multifunctional room in the house. And you can’t do without adjusting the brightness of the lighting. In the process of preparing your favorite dishes, bright illumination is necessary. If you want a romantic atmosphere, you need the ability to dim the blinding light to a comfortable twilight. Therefore, experts recommend installing switches with a dimmer.
- One lamp in the center of the ceiling. As already mentioned, the kitchen performs many different tasks. And dark corners in it are unacceptable. This is especially true for the work area - the countertops on which food is prepared, the hob, and the sink. In addition, the central part of the room, as a rule, remains free of furniture. And the only central lamp, in fact, illuminates nothing, wasting electricity. And the owners experience noticeable discomfort when trying to see the right thing in the dark or cut vegetables evenly.
When arranging your kitchen, don’t forget about natural light. To give free access to daylight into the room, the owners are remodeling, demolishing partitions and expanding window openings. Instead of thick curtains, which have no place in the kitchen, light curtains made of cotton, linen or silk fabrics are hung on the windows. Roman blinds and blinds are also in fashion. Walls decorated in light colors effectively enhance the flow of light, creating a mood of lightness and airiness in the kitchen.
Which switch will be more convenient?
Let's start with which option is better to refuse. The most impractical switches for lighting in the kitchen above the work area are those with motion sensors. As planned, they should be as comfortable as possible and turn on the light every time someone enters the room.
In fact, you don’t need to turn on the lighting every time, and the equipment works intermittently and can turn off while you are preparing something and practically not moving (for example, standing still while chopping).
How to do it yourself?
Attaching the LED backlight is not difficult, the main thing is to have all the necessary tools and follow the instructions.
Tools and materials
The main thing that installation cannot do without is the LED strip itself. When choosing, pay attention to the following parameters:
- Color. LED strips glow in the RGB model. Diodes are white, red, blue, green. The remaining shades are obtained by including several basic shades at once. There are RGB strips - they are colored, or WRGB - with colored and white diodes. However, the most suitable for the kitchen are ordinary white ones, which in turn are divided into warm and cold.
- Flow. Brightness is measured in lumens - the more there are, the brighter it will be when the tape is turned on. This parameter depends on the type of LEDs and their number, as well as the density of the arrangement. There are 2 main types: SMD3528 (without RGB) and SMD5060 (5050). The first ones are smaller and are placed more often, the second ones are larger and placed less frequently. For backlighting, a standard double-density SMD5060 or SMD3528 tape is suitable.
- Protection. Let us remind you once again that for a long service life in the kitchen, models marked IP65, 67, 68 are required.
In addition to the tape with diodes, you will need a power supply (adapter), a switch, a wire for connecting with a reserve (section ~2.5 mm), a plug into a socket (or a cable pulled out of the wall), electrical tape, double-sided tape or other fastening. Tools you will need are scissors, a screwdriver, pliers, and a soldering iron.
Important! LEDs operate at a voltage of 12 watts, not 220, so you will need to install a transformer.
Step-by-step instruction
6 steps for successful LED strip installation:
- Cut to the required length. This should be done exclusively in the place indicated on the tape itself. Typically, orange marks are located through 3-4 LEDs, often scissors are drawn on them.
- Connect the cable and power supply. The safest way is to expose the contacts on the tape and solder the wire, but you can also use connectors.
- Isolate. A mandatory step for the kitchen to protect the connection from excess moisture. Use electrical tape or special tubes.
- Attach it in place according to the level. The method depends on the specific model; some aluminum profiles have an adhesive side. If not, use double-sided tape.
- Connect electricity. Insert the plug into the socket or connect the tape to the wire coming out of the wall, and turn it on.
- Complete installation. At this stage, you should attach the switch, secure and hide the adapter, and put a transparent or matte diffuser on the profile.
Important! Do not forget about safety precautions: carry out installation with the power off, observe polarity, insulate all exposed wires immediately.
Video
To understand the LED strip connection diagram in more detail, watch the video using a socket for an exhaust hood:
Methods and places for interior lighting in the kitchen
The number of crystals directly affects the number of colors in the ribbon. In general, LED strips can provide 15,000,000 shades - if they combine crystals of different brightness.
You can make LED lighting for the following purposes:
- Combined lighting for zoning, highlighting cabinets, niches;
- Illumination of paintings or other decorative elements of the interior;
- Illumination of the kitchen apron; lighting looks especially impressive if the apron is made of glass;
- Lighting inside drawers and cabinets;
- Highlighting stained glass or clear glass shelves;
- By installing lighting at the bottom of the bedside tables, that is, under the cabinets, you can create the effect of “floating furniture”;
- Lighting of several ceiling levels;
- Lighting the bar counter with LED lighting creates the atmosphere and style of a real bar.
Warm spectrum LEDs are installed for classic interiors, while in a high-tech style, cold light will be more appropriate.
