- January 9, 2021
- Repair Tips
- Ivan Gresko
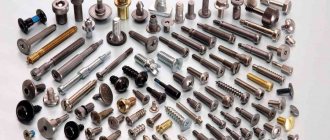
In the production of cabinet furniture, some manufacturers use nails to fasten parts together. Their disadvantage is that they cannot provide repeated assembly and disassembly. In this regard, it is much more convenient to use self-tapping screws. However, they destroy the texture of the workpiece. This is especially noticeable when using fiberboard and chipboard.
Therefore, many craftsmen prefer traditional bolts and nuts. At one time, these furniture fittings provided high strength joints. However, it cannot be called ideal. The fact is that bolts and nuts worsen the appearance of the structure.
According to experts, the furniture eccentric screed is considered the most reliable. Despite the fact that furniture production is a complex technological process, it can be assembled at home. For this reason, many novice craftsmen are interested in the question of how to tighten the eccentric. This fastening method is considered the most reliable. Therefore, many try to use it. How to tighten the eccentric correctly? What are the pros and cons of this type of fastening? The answers to these questions are in the article presented to your attention.
Description of fastening method
Before wondering how to tighten the eccentric, you need to familiarize yourself with the device of the eccentric coupler. In general, it consists of two components. This is an eccentric and a rod. The first is on one piece of furniture, and the second is on another.
The connection of furniture parts is carried out by turning the eccentric in the rod. The sizes of these parts can be very different, for example, 34, 26 or 10 mm. The most common is the 15mm eccentric. The size depends on the dimensions and purpose of the furniture that is assembled. For example, for small shelves a 10mm cam is suitable. To connect parts in cabinet furniture, you will need large parts (34 and 26 mm).
Peculiarities
Furniture intersection screed is the optimal way to connect individual modules together. Home craftsmen use self-tapping screws to fasten the walls of the set. It’s better not to do this: under the weight of the structure, the screws can be torn out and the appearance will be ruined.
The coupler consists of a cylindrical nut with an internal thread and a screw. Hardware is often chrome plated and is not subject to corrosion. This is especially true if the furniture is located in a room with high humidity. On the nut, for reliable fixation of structures, there are slots. An intersectional tie for furniture should be installed without overtightening the fasteners, since if screwed in tightly, the nut or screw head can deform the furniture walls.
It is better to place wide washers under the nut and screw. They will help to tighten the screed as tightly as possible without damaging the polish. To ensure that the screed does not stick out from the inside of the furniture, it is necessary to countersink. This is not a difficult process, so you can do it yourself.
Advantages of an eccentric coupler
Judging by the reviews, many craftsmen prefer this method of fastening. The high popularity of connecting furniture structural elements using eccentrics is explained by the fact that the parts can be assembled and disassembled repeatedly. It is noteworthy that this is done quickly. Great physical effort is not required. In addition, the craftsman has the opportunity to connect products at a variety of angles.
This is also possible with confirmations. However, after the next disassembly and reassembly, the material loses its rigidity. It is worth noting that this method not only ensures the reliability and strength of the fasteners, but also does not spoil the appearance of the furniture. Euroscrew (as furniture makers also call eccentric) is not very expensive, has a long service life and is able to withstand impressive loads.
Corner
The appearance of this screed fully corresponds to its name. When assembling furniture, two types of corners are used:
- plastic;
- metal.
The second ones are a metal element that is bent at an angle of 90 degrees. Each part has one or more holes through which screws are screwed. Plastic corners are a closed structure, similar to a pyramid. An example can be seen in the photo below.
As you can see, the screws are hidden under a small plastic cap, which is very convenient. In the professional field, such a screed is used quite rarely, because it has low strength. Sometimes they are used to assemble parts of the base element of a cabinet. In some cases, a tabletop can be attached to a furniture corner if the table is not expected to be moved. It is better to use rastex instead of a corner.
Weak sides
Despite the presence of undeniable advantages, the eccentric coupler is not without some disadvantages. Weaknesses include:
- The need for accurate calculations. It is important to correctly mark the holes for mounting hardware. Otherwise, the furniture pieces will be fastened crookedly.
- Labor intensity. Due to its complexity, this installation technology is only available to experienced craftsmen.
- If we compare eccentrics with confirmed ones, they are somewhat more expensive.
What you need for work
Before tightening the furniture eccentric, prepare the following tools:
- Screwdriver.
- Screwdriver.
- Ruler and pencil. Many home craftsmen use a template. You can make it yourself or get a ready-made one.
- Drill. They should have a diameter of 8 and 5 mm.
- Milling cutter. Some people call this tool a Forstner drill.
When everything you need is available, you can start doing the work. Let's take a closer look at how to tighten the eccentric in furniture.
What is a furniture jig and how to use it
If you have a furniture jig, this will make it much easier for you to mark and drill holes for any type of fastener. A jig is essentially the same template, which is a special device or bar on which holes of different diameters and at different distances are applied. With their help, you can make perfectly accurate markings and drill passages of the size you need. Various materials are used to make this assistant:
The product is a solid base with many holes at different distances required from each other. Additionally, it can be equipped with a mechanism for fixing and adjusting the distance between the holes.
Use a special drilling jig to help you hold the drill at the right angle.
Thanks to the device, you will install the drill exactly at a right angle to the blade, without deviations. This is a great help when working on narrow surfaces, such as the ends of chipboards. After all, if the groove is not located at an angle of 90 degrees, assembling the body elements into a single whole may become impossible.
Types of conductors
Depending on the functions performed and design features, templates can be of several types:
- Invoices. This type of device serves as an assistant for drilling holes on flat elements by placing it on the workpiece. The device is not attached, but only held by hand. Suitable for use on chipboard or fibreboard surfaces.
- Rotary. The rotating device allows you to move it vertically or horizontally and rotate it at different angles. This device is convenient to use provided that the part that needs to be drilled has a complex shape.
- Tiltable. Tiltable assistants are convenient for working with elements that are located in planes that are different from each other.
- Universal. The devices are convenient because they can be customized for the production of furniture of various configurations.
All types of templates can have a sliding or fixed type of fit to the surface. The sliding type allows you to move the product along the surface of the workpiece. Fixed option - firmly fixed in the desired position and does not move.
The conductor is the furniture maker’s best assistant, without him it would not have been possible to connect furniture so beautifully
Prices for drilling jigs
What to look for when choosing a conductor
When choosing a furniture jig in a store, you should carefully examine the product and pay attention to the material from which it is made. For example, stainless steel products will be high-quality and reliable.
The manufacturer matters too. World-famous brands, as a rule, produce high-quality tools with a long service life and a warranty from the manufacturer.
The more famous the brand, the higher the quality - a rule that works flawlessly in the case of construction tools
When purchasing such an assistant, take an interest in the additional equipment that comes with the kit. The versatility of the device will make your work easier. The more tools included in the package, the more cases you will be able to use it. For example, a set may include
- various bushings;
- drills of various diameters with stops;
- Forstner cutter, for holes for minifixes;
- keys.
There are a significant number of advantages in using this device.
By using a template when manufacturing and assembling cases, you will save yourself from many inconveniences. For example, you don't need to mark places with a ruler and pencil. The jig allows you to fix the distance and drill several absolutely identical holes at the same distance from each other. There is no inaccuracy here.
But a factory-made conductor also has a drawback - its rather high price.
Therefore, craftsmen are quite capable of making such an assistant with their own hands. Our instructions will help you with this.
Instructions for making a furniture jig
Step No. 1 – prepare tools and materials:
- square metal block, section 1x1 cm;
- Bulgarian;
- file;
- calipers;
- awl or thick needle;
- drills with a diameter of 5 mm;
- metal plate for stop measuring 1x25 mm;
- a sheet of sandpaper.
First, let's collect all the tools and materials necessary for the work.
Step No. 2 – make the base and markings. Using a grinder, cut off a piece of the required length from the block. Sand any burrs with a file. Mark the locations for future holes. The generally accepted dimensions are the distance between the grooves is 32 mm, the distance from the centers of the slots to the side edge is 8 mm. To make the markings accurate, use a caliper. It is convenient if you mark the centers of future grooves using an awl or needle.
Where to begin
First of all, you need to do the marking. Using a ruler and a pencil or a template, clearly define the places where the holes will be. Check again whether you have marked them correctly, since further assembly and the final result depend on accuracy. To reliably and efficiently tighten the eccentric, you next need to do the following:
- Carefully drill a hole for the groove in which the rod will be located. To avoid damaging the workpiece, use a limiter at this stage.
- When the hole is ready, insert the rod. It is desirable that it protrudes above the canvas by about 0.6 cm.
Types of eccentrics
All eccentrics are united by the name and the general principle of operation.
But, depending on the manufacturer and time of production, they may differ in some characteristics, which are worth knowing about if you are going to install a furniture tie with an eccentric.
Let's talk about the design. The part that we see in finished structures, similar to a simple screw, is the eccentric itself, which is also often called a minifix.
The most important part of the entire mechanism is always hidden from your view. It consists of a rod and bushing.
The rod, also known as rastex, is a mandatory part and is hidden inside wood, MDF or chipboard. This is noticeable in the video of the installation of a furniture eccentric.
But, depending on the manufacturer, a sleeve may be added to the entire structure, which is made of metal or plastic.
As you understand, the metal version is more reliable and durable, but some unscrupulous manufacturers install eccentrics with plastic bushings in fairly expensive furniture.
During a one-time assembly, you should not notice the difference, but with several moves and reassemblies, the plastic part may break.
Optionally, a plug can be added to cover the minifix hole.
We considered the option with a straight screed, which is universal.
There are separate modifications with an angled rod. It is usually used when screeding on both sides, and in older structures.
Now it is very difficult to find them, because they have been almost completely replaced with a universal analogue.
Installation of the second connection part
Before installing the eccentric, you need to prepare a groove for it. Drill it out using a Forstner bit. According to experts, depth is important for the groove for the eccentric. In general, you can limit yourself to a 15mm hole.
It should be noted that the groove cannot be made through. The eccentric must fit into it completely to its full height and at the same time be flush with the workpiece blade.
To avoid making a mistake with the location for the hole, use a template or ruler. Step back 34 mm from the bottom edge, and 5 mm from the side end. The center of the hole for the eccentric groove will be at the intersection point.
Installation Rules
Before you get started, you need to figure out how to install the fasteners. It is necessary to make 3 holes in the elements to be connected. To do this you will need installation equipment:
- Screwdriver;
- Forstner Fraser;
- Drill;
- Screwdriver.
Self-assembly of furniture parts using an eccentric is extremely rare. This is due to the difficulty of drilling holes. It is especially difficult to make the one reserved for the eccentric. It should not be through, so you will need a special Forstner drill. For standard mounting, its diameter is 15 mm. To avoid drilling more than necessary, it is recommended to use depth stops while drilling.
Afterwards, a passage for the rod is drilled at the end of the same element. A futurka is installed in another part. Both elements are connected to each other. For more detailed instructions, watch the video on installing the eccentric. To assemble the product yourself, you must carefully study the instructions supplied with it and watch the video materials. They are easy to find on the Internet. Thus, the assembled furniture will be provided with reliable fastenings and will last for a long time.
Creating markup
Making holes for dowels
Installing the rod
Drill a blind hole with a milling cutter
Drill a hole measuring 7 mm
Insert and tighten the eccentric
Making a passage for the rod
When the holes for the fasteners are made, begin preparing the passage for the rod. It is performed on the surface of the workpiece where the eccentric is located. The passage for the rod should be located on the end side. To perform this step you will need an 8mm drill bit. It is important that the passage is centered relative to the eccentric groove.
Therefore, at this stage, use a ruler, tape measure or template. If this recommendation is neglected, the prepared grooves may not match. As a result, the furniture will be assembled crookedly.
Where is it used?
An eccentric clamp is used in places where parts are fastened (T- or L-shaped), the connection of which must be hidden from prying eyes. For example, they fasten:
- Table tops for computer and other tables made of chipboard
- Dresser tops
- The bottom and roofs of sliding wardrobes and other parts where it is not possible to drill holes on the front part of the part.
The installed minifix rod of the eccentric clamp is completely hidden in the body of the chipboard, and only the eccentric remains visible, which is installed on the inside of the product.
Final stage
Now you can connect the parts of the furniture structure. For this purpose, attach the workpieces so that the rod is in the passage. How to tighten eccentrics? This is quite easy to do. First, insert the eccentric into the groove, and then carefully tighten it using a Phillips screwdriver.
As a result, the furniture elements will be securely fastened to each other.
What to pay attention to
To properly tighten the eccentric, experts recommend positioning the rod correctly. It should not be twisted too much. Otherwise, the eccentric will not rotate 180 degrees. Then you will not be able to secure the connection. If the rod is not fully tightened, then the parts in the furniture structure will not be connected tightly enough. Which drill bit to choose for an eccentric tie depends on the size of the rod. The hole through which it will be connected to the eccentric is most often made with a diameter of 8 mm.
Eccentric and modern furniture
The popularization of “assemble it yourself” furniture, the main driver of which was the IKEA store, led to the emergence of different options for fastening individual parts.
Engineers were searching for a new type of fastening, which, when assembled repeatedly, would help the object retain its original strength.
Traditional bolts and nuts were quite good in this regard, which cannot be said about self-tapping screws, which each time slightly destroy the texture of the material, which is much more noticeable in the case of chipboard and fiberboard.
The bolts, at the same time, were a reliable fastening, but from an aesthetic point of view they left much to be desired.
This is how furniture eccentrics were born, which are used where the fastening should not be visible to the human eye.
If you look at the photo of the installation of a furniture eccentric, you will notice that the most popular places for its installation are the L- and T-shaped points of the structure.
These are found in almost all modern pieces of furniture - tables, chests of drawers, cabinets, etc.
In the finished version, where the clamp rod for the eccentric is already hidden in the structure, installing the eccentric is no more difficult than screwing a self-tapping screw into the finished hole.
Using such a mount yourself is a completely different story.
