Why is delivery needed? This is an interesting question; some parents don’t know the correct answer. In their opinion, a book can simply be rested against a table lamp and this is quite enough for comfortable reading. But pediatric medicine has its own opinion on this matter.
How to make a book stand with your own hands
- With the stand, the child gets used to maintaining correct posture. Modern medicine claims that poor posture does not go away without a trace, the vital functions of all internal organs are disrupted, and the child cannot develop properly. In addition, a crooked back is an unpleasant cosmetic defect.
- The more comfortable it is to sit reading a book, the more time a child can study, the faster he gets used to reading, the less negative reactions he has to school activities. In addition, the stand makes it possible to adjust the correct angle of inclination of the pages and the distance to them, which has a positive effect on the visual organs.
Book reading stand
- Small children take pride in their personal stand and enjoy using it. Accordingly, they automatically spend more time reading books.
- The supply can serve as a real designer decoration for a child's room. There are exclusive designs; they can be made from expensive and prestigious materials.
Wooden book stand
- Most models can be made together with children. There is no need to talk about the benefits of spending time together with children. In addition to close communication, teenagers gain practical work skills, which will always be useful in adulthood.
As you can see from the list, a stand is needed, try to have one in every children's room.
Wooden reading frame
Wooden stand
The classic material for creating a stand is wood. At the same time, you can use either wooden planks, a wooden block or a log. In this case, an indispensable auxiliary tool will be sandpaper or a sanding machine, which eliminates flaws in the wood and gives it an aesthetic appearance.
This stand can be made from boards or plywood.
You can also make a wooden book stand with your own hands, “breathing new life” into an old kitchen board. It is enough to attach a book holder to the front and a holding bar to the back. The material can be decorated with decorative paint of one or several tones (for example, like the popular ombre). The finished product must be thoroughly dried.
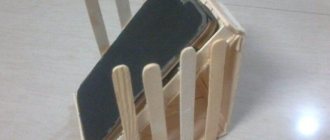
It is suitable for reading books, as well as for tablets and other electronic devices.
Important! There is no rush in carpentry work, so think carefully about how the finished product will look. It would be good to make a layout and take all the necessary measurements, and only then start processing the parts.
It is very convenient to use a stand in the kitchen for a recipe book.
Plywood can be an excellent substitute for wood when making book stands. To do this you need:
- cut a sheet of plywood into 5 parts: 20x1x2 cm - 2 pcs.; 18x3x2 cm – 1 piece; 20x5x2 cm – 1 piece; 34.5x20x2 cm - 1 piece;
- then cut grooves for the legs in the largest board;
- in the place of the cut grooves, glue the front parts of the workpiece in the center;
- put a press on the glued parts and dry;
- Next, you should glue the legs and also dry them under pressure.
A little history
With the advent of the first books, the need arose for special devices to accommodate them. After all, the printed materials, bound in leather, were thick and heavy. It was not easy to hold such a book in your hands while reading. Music stands appeared.
In eastern countries, book holders emphasized the status of their owners. They were decorated in various ways and looked like works of art. In Europe, they treated stands much more simply. These were inclined boards or special prisms. Such differences were associated with reading methods: in the East they read while sitting on a carpet, and European residents did it while sitting or standing.
Modern stands decorate the interior and allow optimal use of the surrounding space. The design of the stationery accessory allows a person to choose a convenient angle of inclination. There are stationary bookends and folding ones. Schoolchildren and students take the latter option with them to classes. They should fit into a briefcase or backpack. Now there are even models that can be mounted on a computer monitor.
When choosing the right item, you should take into account the recommendations of doctors. Children should not sit at the table in an awkward position: poor posture can cause back pain, and problems with the spine in the cervical-collar area arise. Ophthalmologists also set their own requirements: book holders provide the correct angle of inclination and the right distance, making the eyes less tired when reading. In addition, the stand helps to optimally organize the workspace, which increases the efficiency of classes.
When writing essays, term papers and dissertations, you often have to turn to printed publications, and this requires devices for holding literature. They speed up the work and make the process easier. In some cases, coasters come in handy in the kitchen. Experienced housewives place cookbooks or their recipes written in notebooks on them.
Cardboard stand
If you are wondering how to make a paper bookend, use cardboard.
You can also make such a stand from corrugated cardboard.
- Cut out 2 identical rectangles, each 35x42 cm in size. Bend them 14 cm on the long side and glue them into one piece.
- Cut out 2 more rectangles measuring 5x14 cm and also glue them together.
- Glue the small and large triangles together as follows: glue one end to the smaller part of the folded rectangle at the edge, and the other to approximately the middle of the larger part. Carefully lubricate the joints with hot-melt adhesive.
- Cut out the piece 29.5x10 cm and fold it in half.
- Cut a rectangle 2 times smaller in width than the previous one. Glue the parts from steps 4 and 5 to form a triangular cylinder.
- Glue the cylinder to the large blank from below.
- Cover the workpiece with newspapers and napkins, paint and varnish.
Very light, compact. It can also be made from plywood.
AN EASY WAY TO MAKE AN ORGANIZER FOR JOURNALS AND NOTEBOOKS
To get a voluminous organizer that can accommodate magazines or notepads, you need to use a cardboard box as a basis.
Materials:
- cardboard shoe box;
- paper reels;
- colored paper;
- stationery.
We do the work:
- Cut off the lid from the box if it is non-removable.
- Draw a line in the middle of the box to the base and cut out a triangle.
- We bend the box along the drawn line and glue the two parts together.
- We deliver the missing parts on the sides from cardboard and secure them with tape.
- Line the bottom of the pencil holder with paper or white cardboard.
- We cover all the blanks with colored paper, install the bushings, and glue the tape. The organizer is ready. The organizer is ready.
You can give a second life not only to food boxes, but also to used tin cans. As a result, you will get a durable and very stylish organizer.
Materials:
- cans of different heights and diameters;
- board or plastic for the base;
- fabric of different colors;
- fleece, ribbons, ribbon;
- screws, screwdriver, glue;
- sewing supplies.
Making an organizer:
- Trim any irregularities around the rim and wrap the jar in fleece. Make a neat joint.
- Line the bottom with thick cardboard. This will make it easier to screw the workpiece to the base.
- Cut out strips of fabric with allowances. Glue the remaining material on the top and bottom of the can inside.
- Place a piece of white cardboard inside the jar. There should be a small gap between its edges
- Give the cardboard a bend by stretching it along the edge of the table. Glue a piece of fabric onto it, making allowances along the edges. It is necessary to stretch the material to avoid wrinkles.
- Attach the cans to the base using self-tapping screws; they are more reliable than glue. Cover the bottom with fabric.
Ironwork
You can forge a real work of art from iron. But how to make a book stand out of iron if you are not a blacksmith? - using wire. The flexibility of the material can give it any desired shape. For a book accessory you will need a wire with a diameter of 4-5 mm, 4 pins with a diameter of 1.5 mm.
It’s not difficult to make an elegant interior book support; you just need to have imagination and some craft-making skills.
For such creativity, all kinds of, but at the same time, affordable household items will be useful.
How to make an office organizer
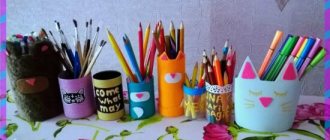
Every home periodically accumulates a huge amount of office supplies: pens, pencils, markers, notepads and other items.
Necessary materials:
- shoe box;
- decorative paper;
- scissors, glue, ruler;
- cardboard and cylindrical bushings.
Manufacturing process:
- Take a shoebox and mark it as shown in the picture.
- After this, use scissors to make cuts along the indicated lines. Next, carefully bend the box exactly in the center and secure it with glue.
- Next, take decorative paper and cover the resulting organizer on the outside and inside. You can use a variety of decoration options.
The organizer can be left in this form to store notepads, notebooks and papers. And, as an option, you can make small compartments for storing pens, pencils and other stationery. To do this, inside large compartments, make partitions from thick cardboard, which are previously covered with paper. On the other hand, cardboard sleeves can be glued into the large compartment for storing pens and pencils.
Plaster stand
No less attractive for designers are handmade book holders. To realize the most intricate ideas, you can use gypsum.
Book holders in the shape of plaster hands will fit into a variety of interiors.
Prepare a mixture of plaster and water.
Important! In this matter, you need an assistant, because it is better to hold the form horizontally rather than vertically.
Such a magnificent designer item can be made from plaster, for example, imprinting your hand, foot or any object. First of all, you need to stir the alginate to a dough-like state. As a form, you can use a regular box sealed with adhesive tape.
To find out the amount of mixture required, pour water into the glove.
Make a hole in the box for the hand and first pour out part of the alginate to the level of the hand, and after a minute the remaining mass. After about ten minutes the arm simply extends. Fill the resulting hole with plaster. Leave to dry overnight. Then cut out the alginate and take out the plaster arm. Cover with paint and glue to a wooden board. Instead of a hand, you can use any other shapes, for example, like the elephant in the photo.
Plaster book stand in the shape of an elephant.
Additional Information. The remaining small lumps and bubbles in the alginate liquid do not affect the result.
How to make a desk organizer - step-by-step instructions
A work desk or desk is an integral part of the interior of any apartment or house. Usually it is in this place that a huge amount of things accumulate, especially in the drawer of the table.
With the help of an organizer, you can quickly and easily put your desk in order and put every item in its place. For this you will need different boxes.
Necessary materials:
- boxes of different sizes;
- colored decorative paper or fabric;
- glue;
- varnish;
- scissors and ruler.
Manufacturing process:
- Pull the drawer out of the table and place the boxes you find in it. They must be positioned in such a way that there is no free space left and so that they do not move during operation.
- Next, cut the top of all the boxes to the same length.
- After this, you can immediately connect all the boxes using glue or paper clips and place them in a box, or you can first glue each box separately using paper.
- Apply varnish to the inside of each box so that the glue does not bleed through onto the fabric or paper in the future. Next, glue the fabric or paper of your choice using glue. To make the organizer look more elegant, you can use fabric of different colors.
How to make an organizer from boxes for a desk - option 2
An easy desk organizer can be made with just a few boxes. Thanks to this, you can get a beautiful and convenient organizer for storing all the necessary office supplies, papers and other small items needed for work.
Necessary materials:
- Prepare several boxes of different sizes. For the base of such an organizer, you can use the lid from a large box. When choosing boxes, take into account their location, as well as the fact that tall boxes should be placed on the far line.
- Small or tall boxes can be made from thick cardboard to perfectly fill the available space in the box.
- Take beautiful decorative paper or speckled paper and use it to cover all the prepared boxes. You can use one color of paper, or you can choose several options to get a more elegant organizer.
- Use glue or a stapler to secure the paper.
- After this, place the boxes in the base lid in an order convenient for you.
- Fill the boxes with all the necessary items. That's it, the beautiful and stylish desk organizer is ready.
From other materials
You can also make a book holder from stone yourself. In the simplest case, you will need two massive stones, spray paint, and cork adhesive pads so that the stones do not scratch the surface and move easily. The stones must be painted, for example, in fashionable gold or silver colors. Glue cork pads to the dried stones.
Making stone book supports is even easier: just find a suitable cobblestone on the street, cover it with paint and varnish.
A holder made in this way can take on any appearance depending on the author’s imagination.
To make a book holder out of concrete on a shelf with your own hands, first of all, you need to oil the mold. Next, knead the concrete until it forms a dough. Fill the molds with concrete and leave to dry overnight. Separate the seized parts from the molds by tapping them with a brick or hammer. Sand the bottom of the future stand. At the end of the form, paint it or leave it as is.
Once the paint has dried, the endpapers are finally ready to hold the books.
Additional information: to get rid of bubbles, you need to tap the container with concrete and shake it.
Minimalist, durable tree branch holder design. A nice addition to a row of titles on a shelf.
Antique-looking owls are massive and detailed.
If the classic options are boring, then the following will help answer the question of how to make a creative book stand with your own hands:
Such a soft pillow stand would be perfect for a child's room.
You can also cut a toy animal, such as a giraffe, horizontally. Glue the back part to the left holder, and the front part to the right one.
A witty holder in the shape of a dachshund is another find for extraordinary people or a gift option.
Good luck in your creative pursuits!
The animal book holders covered with sheep's wool turned out to be soft and textured.
Peculiarities
Furniture and equipment for the library have the following features:
- They must preserve books, newspapers and magazines for a long time. That is why the interior items in the library are made from modern high-quality materials. This prevents the appearance of fungi and insect pests that affect the condition of books during long-term storage;
- Systematization of books, disks, audio cassettes, video cassettes. Library furniture is quite spacious, it allows you to freely place publications. They are arranged in alphabetical order, according to thematic principle, which makes it easier to find the necessary book, thereby extending its service life. Models equipped with wheels help you quickly find the publication you need. These include rotating display cases;
- Demonstration of books, CDs, audio and video cassettes. Furniture can be open access or equipped with glass doors. This allows you to demonstrate new products and exhibition items.
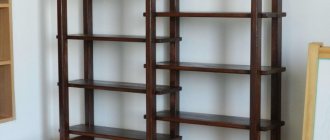
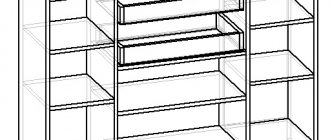
Types of bookshelves and racks with photos
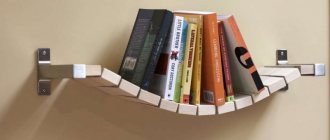
Wall bookshelves
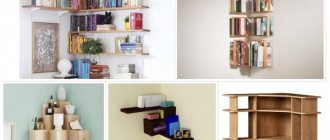
Wall shelves are widely used for storing books, periodicals, figurines, photo frames and other household items. Mounted models are very convenient to use, since their installation does not take much time, and they do not require special conditions of use.
Types of wall shelvesThis type of shelves is hung on the walls of rooms, kitchens and other areas of the house. Usually they are mounted at a height of 1.5 m from the floor level, which allows you to free up a small part of the space in the premises.
Classic wall bookshelves
Classic shelves are suitable for any modern interior design styles. Making them yourself is not at all difficult, since they have a simple design and are easy to manufacture.
Wall corner shelves
An excellent option for wall shelves for books are corner models. They allow you to fill useful space and place a library, as well as various interior items. The peculiarity of this type of piece of furniture is that they are mounted simultaneously on several walls in the room. Corner shelves can be of internal or external type.
Related article:
Floor shelves for books
The shelves are not only wall-mounted, but can also be installed on the floor. For these purposes, the design has special legs. To give shelves greater stability, they can be fixed to the wall, especially if they are tall and narrow. Floor models are made in the form of pyramids, shelves, individual cells connected to each other, screens and racks. This type of shelves is often used to divide the space of rooms into several zones.
Floor furniture section made of individual cells
Montessori book shelf
To briefly describe what Montessori wall bookshelves are, they are a kind of stand on which you can place a large number of different printed publications (as well as toys and other household items). They are either hanging or floor racks. On them, books are placed face down (bound cover) or suspended.
Floor-standing version of the Montessori book stand
Such designs are very convenient to use, as they allow you to display, for example, children’s books and magazines, and not waste time searching for the right copy. The structure can be built independently and installed anywhere in the apartment: children's room, living room or hall.
Different types of Montessori shelves
Portable book shelf
Portable structures are convenient due to their mobility and can be installed in various places in the home. The most commonly used types of shelves and racks are:
- folding structures;
- attached racks;
- structures on wheels;
- stepladder shelves.
Mobile section in the form of a grand piano
You can make mobile book sections from various materials and household items. For example, an old cart with wheels or a suitcase, which can easily be moved within the home if necessary, is suitable for these purposes.
Examples of mobile book shelves
Sawing parts
There are many rules for cutting, but you need to stick to the most common ones. First of all, you need to cut out the internal parts, only then according to the external pattern. There is no need to rush when cutting. The main thing is to always keep the jigsaw straight at a 90-degree angle when cutting. Cut out the parts along the lines you accurately marked. The movements of the jigsaw should always be smooth up and down. Also, do not forget to monitor your posture. Try to avoid bevels and unevenness. If you go off the line while cutting, don't worry. Such bevels and irregularities can be removed using flat files or “coarse-grained” sandpaper.
