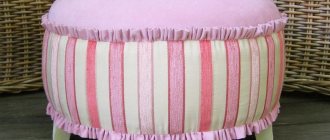
Making an ottoman from plastic bottles with your own hands is not such a strange idea, considering that plastic has long been used to make various pieces of furniture. Such products best complement the interior of the room and are suitable for connoisseurs of unusual, creative things.
Any beginner can handle making such an unusual ottoman, because its design is very simple. In this article we will look at several simple options for creating DIY products.
DIY ottoman made from plastic bottles
Useful tips
Before you begin the process of creating an item, you should study some recommendations:
- First, you need to decide, or better yet, schematically display the design of the future ottoman. This will be required in order to calculate the exact amount of material (bottles). The more massive you plan to make the product, the more bottles you need to take.
- Bottles must first be washed with a special brush, then dried open. This is done in order to remove foreign odors.
- The strength of the plastic can be slightly increased using one trick. So, the bottles should be placed in the freezer for several hours, then you need to tighten the caps of all bottles tightly and leave them at room temperature, due to which the air inside the container will begin to expand.
- In order to make a durable ottoman that does not deform even under strong pressure, it is necessary to fill 1/3 of the container with sand. This manipulation will allow you to get a durable product that will last for many years (the ottoman will be heavier and more reliable).
- An ottoman is a product that will be constantly sat on, so for its manufacture it is better to choose curved bottles, which are much stronger than straight ones.
- If you are going to make three-dimensional objects, then it is better to connect them in fragments using strong adhesive tape. This means that first you should tie together two or three bottles, and then form them into a product. You should not skimp on the connection, because the more tape you use, the better the design will be.
- To make the seat comfortable, the bottle structure is covered with a layer of padding polyester or other soft material on top, and only then can a cover be put on top.
- In order for the product to look aesthetically pleasing, it is important to make the cover exactly the size of the ottoman.
- The color of the product must be chosen in such a way that it looks harmonious with all interior items.
- When creating upholstery, it is necessary to use durable, wear-resistant material that will last a long time. Therefore, do not expect to sew a cover from silk, cotton or other delicate fabrics.
- If pets live in the apartment, then you need to make sure that they do not sharpen their claws and teeth on the ottoman.
Protecting Furniture from Cats
It is recommended to choose durable, shaped bottles for making structures
Determining the design features
In order to make a comfortable chair from plastic bottles, you need to decide on some design features. Let's look at some useful tips.
The most important thing is to determine the desired shape and size of the future product. The most popular shape is the cylinder. Such products are convenient to use.
The choice of containers must also be approached seriously. For example, for seating comfort it is better to choose curly ones. In practice they are more durable. To make children's high chairs, you should choose containers of 5-10 liters.
- To make the ottoman stable, the bottles should be prepared in a special way. You can freeze them, cover them tightly with a lid. Once warmed, the air inside will expand. Another option is to fill the containers 1/3 full with sand.
- If you plan to create a large-sized product, plastic bottles should be connected in parts - three pieces each. Then connect each part with the rest. Then you will have a strong, reliable design.
- For increased comfort, the container should be wrapped in foam rubber. Be sure to put a cover on top. The fabric for making the case must be chosen carefully. It should be practical, non-marking, stylish. You can use fabric left over from furniture upholstery.
Advantages and disadvantages of homemade ottomans
Furniture pieces made independently have a large number of obvious advantages. Firstly, you will have the opportunity to independently decide on the color of the product and the type of fabric. Thanks to this, you will be able to create a product that fits perfectly into the interior.
Secondly, you can change the shape of the ottoman at any time. You just need to remove the cover with the soft base and disassemble the bottles, after which the pouf can be assembled into any other shape.
You can make a different shape and adjust the dimensions of the ottoman at any time as you wish.
Products made from such material are weightless, so they can be moved from one place to another and even taken with you to the dacha. Such furniture is good for a children's room - the child will be able to carry the pouffe himself if necessary. In addition, you do not need to take care of the product in any special way. You can immediately sew several covers for the pouf, which are washed periodically as they become dirty.
Making a structure from bottles will only take about two hours (sometimes more). The cover can be sewn in 35-40 minutes - this is a unique opportunity to show your creativity, because the finished product can be decorated with various decorative elements.
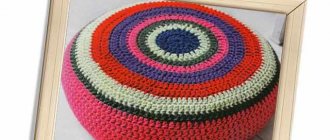
The seat cover can not only be sewn, but also knitted from durable yarn
And lastly, to make an ottoman from bottles you need the most minimal financial investment. At the same time, if you already have bottles and an unnecessary piece of fabric in stock, then you won’t have to spend any money on an ottoman.
It is worth noting some disadvantages of making products from plastic bottles yourself:
- not all people can find even 2-3 hours of extra free time;
- you will still have to purchase fabric for covering the structure, spending some money;
- To sew a cover, you need, although minimal, skills.
It is better to use furniture fabric to cover the ottoman.
Basic Rules
If a person wants to make a pouf from plastic bottles with his own hands, he needs to determine for himself the features of its design. That is, you need to know what size and shape the product will have. The most popular is the cylinder shape.
If a pouf is made for children, then the structure must be stable and durable. After all, children move a lot and can simply break a homemade pouf. To ensure structural stability, bottles must be prepared accordingly. In order for such “furniture” to be durable, you need to add bottles to the structure more than one at a time: first, two or three pieces are connected, then this mini-structure is attached to the base.
To make the pouf more durable, it should be wrapped in either a layer of foam rubber or a layer of thick cardboard. Then it can be covered with a made cover. You can use any fabric for this. The main thing is that it is dense, non-marking and definitely stylish. Many people use already unnecessary jeans or ordinary furniture upholstery, which can be purchased at any furniture store. Modern people like homemade poufs for many reasons.
- First of all, it is light weight. It can be easily transported from one place to another.
- Each person will be able to develop their own design, because you can’t always find what you want in the store.
- A pouf made by yourself will cost very little money. It is enough just to purchase fabric for upholstery and some elements for decoration.
- Making this design is easy and simple, the main thing is to follow certain rules.
- Caring for the pouf is also easy. After all, if you make the cover removable, you can simply wash it in a washing machine.
Among the disadvantages, it is only worth noting that the manufacture of such a design will require too much time and effort.
DIY ottoman made from plastic bottles
In order to make the structure yourself, you will need to prepare the necessary materials. This time you won’t have to use carpentry kits, hammers, or screwdrivers. The manufacturing process will involve the following:
- The first thing you need to prepare is, of course, plastic bottles. Their volume should be at least 1.5 liters, and the quantity depends on the dimensions of the desired product (usually one ottoman takes from 12 to 35 bottles, here it is important to calculate the diameter of the product in advance);
- several rolls of adhesive tape (it is advisable to buy extra);
- durable cardboard (you can use any equipment boxes);
- in order to make the ottoman soft, you need to take a padding polyester - it is better if its thickness is about 30-40 centimeters, then the product will be comfortable;
- scissors and sewing kit for making upholstery;
- upholstery material (you can buy a new piece of fabric or use old clothes for such purposes (jeans, jackets);
- for sewing a cover, it is better to choose raincoat fabric; this material is suitable in cases where the ottoman is planned to be used outdoors;
- zipper (plastic or metal), for the ottoman cover.
Despite the various shapes, all bottle ottomans are made according to the same principle, so even an inexperienced craftsman can handle this process.
Option for an ottoman made from plastic bottles
Step-by-step instruction
Step 1. First of all, all plastic containers must be cleaned of dirt.
Bottles must be clean
Step 2. Next, you need to connect two bottles together using tape. It is advisable to wrap them several times, not sparing the adhesive tape, because this will only increase the strength of the product.
It is necessary to connect the bottles in sections
Step 3. In the same way, several sections should be made, which will then be connected to each other. The result should be a lot of blanks. Then combine three bottles at a time. The main thing is that they are located strictly on a flat surface, otherwise the ottoman will turn out crooked. After which you need to make several sections of four bottles each and stop there.
We connect bottles into several sections
Step 4. Next, all these blanks must be connected to each other. The largest sections are installed in the middle, and the rest along the edges. The result is a round structure.
The result should be a circle
Step 5. Now our workpiece can be put aside for a while and take cardboard, the seats will be made from it. To do this, cut out two round parts from cardboard according to the parameters of the ottoman itself. These circles are fixed at the bottom and top.
Cutting circles from cardboard
Important! If you have thin plywood on hand, it is better to use this material instead of cardboard. Only in this case, instead of scissors, you will have to arm yourself with a jigsaw.
Step 6. The bases are tightly taped to the bottles, forming the frame of the future ottoman.
You will need to secure the cardboard parts to the ottoman structure
Step 7. Next, you will need to take a multi-layer padding polyester and cut out three parts from it, two of which will be round in diameter for the pouf and one rectangular for covering the base. All these parts must be connected with a thick thread and a needle around the frame.
We make blanks from padding polyester
We cover the structure with padding polyester
Step 8. After connecting all the parts, you need to upholster the ottoman with thick fabric. In this case, it is necessary to cut out parts by analogy with padding polyester. Then they should be connected to each other using a sewing machine (if you don’t have one, you can sew it by hand).
Marking required
You can sew a zipper on the side, so the cover can be quickly removed. In this case, you should decide in advance on the length of the zipper so that it does not turn out to be too short or too long. Some crafters use another option; they tighten the cover with a cord at the bottom. This way the drawstring will remain invisible.
Sew the parts together
Pull the cover
If desired, you can embroider the product with all kinds of additional elements. Here it is important to show your imagination.
Video - Ottoman made from plastic bottles: the creation process
Covering the product
The rigid frame for the ottoman stool is ready. Next you need to make it soft and aesthetic. To do this you will need:
- plywood;
- wide tape (50 mm);
- old newspaper for patterns;
- foam rubber with a thickness of at least 50 mm;
- old sheet for covering foam rubber;
- fabric for the top cover;
- decorative material (ribbons, braid, tassels, fringe, etc.);
- jigsaw;
- scissors;
- pencil;
- gypsy needle;
- the threads are strong;
- sewing machine;
- zipper;
- iron.
The bottoms of the bottles are covered with durable material - plywood. You can use hard cardboard in 2 layers. The frame is placed on a sheet of plywood and traced along the contour with a pencil. Using a jigsaw, cut out 2 base squares (top and bottom of the chair). The base pattern is transferred to paper. It will be needed for cutting covers. The bases are attached to the bottles by tightly wrapping everything together with tape.
Decorating an ottoman with weaving.
Now the ottoman needs to be made soft. The seat and side surface are cut out of a sheet of foam rubber. A square seat is made according to a paper pattern, increasing it by the thickness of the foam rubber on each side. The side surface is cut out in the form of a rectangle, one side of which corresponds to the height of the frame, the second to the perimeter of the seat. For greater softness, the seat can be made in 2 layers. The sides of the future pouf are wrapped in a rectangle, a foam seat is placed on top and everything is sewn together with a needle over the edge. The stitches cannot be tightened too much, because... When tensioned, the thread will cut the foam.
To prevent the foam bag from getting knocked down and torn during use, it is lined with any unnecessary fabric. An old sheet will do, or you can use old T-shirts. 3 parts are cut out of fabric: 1 rectangle and 2 squares. Square parts are cut out according to the foam seat pattern, adding 1 cm seam allowance on each side. The height of the rectangle will be equal to the height of the pouf, taking into account the thickness of the foam rubber, the length will be equal to the perimeter of the seat + 2 cm for the seams.
The rectangular piece is sewn along the side seams, then the top square is attached. The bag is turned inside out with the seams and placed on a frame covered with foam rubber. The fabric bag should fit tightly around the ottoman. The bottom square is sewn to the bag by hand, but it would be neater and more practical to sew on a zipper. This makes it easier to remove the cover for washing.
Decorating the ottoman
In order to give the bottle ottoman an unusual appearance, you can decorate it as you wish. In this case, it is necessary to take into account the following nuances:
- the cover should not fit too tightly to the structure, tightening it, or dangle - this looks untidy;
- the fabric must have a design that matches the overall interior;
- It is not recommended to take fabric that is too thin, as it will quickly become unusable.
For upholstery, use only thick fabric
Choosing upholstery material is a responsible process, so it is necessary to first study all possible options before purchasing.
Table No. 1. Case manufacturing options
| Option, photo | Description |
| Fabric | This is a budget option for an ottoman cover, which is perfect if the product is planned to be used only in apartment conditions. In this case, it is advisable to choose the most dense, wear-resistant options - matting, jacquard, flock and the like. |
| Genuine leather or substitute | This style of ottoman design is suitable for office space, a hallway area or a personal office in an apartment. The leather has good durability and does not wear out over time. As a budget option, it is better to choose eco-leather. |
| Patchwork | This technique involves decorating the upholstery with pieces of fabric, as if creating an imitation of a blanket. This pouf gives any room a warm, homely atmosphere. It will fit best into a bedroom or children's room, depending on the choice of material. When designing a product in this style, you can take old jeans and divide them into small pieces. A small pocket for small items can be attached to the case. |
| Knitted from knitted threads | Recently, various clothing and interior items are increasingly being made from such threads. This case will look harmonious in almost any interior. In addition, you can associate the product with a color transition. |
| From carpet fabric | This ottoman will be an excellent scratching post in an apartment where there are pets. Thanks to the super-durable base of the cover, cats and dogs will definitely not be able to damage it. This option will allow you to keep other pieces of furniture intact. |
Patchwork ottoman
Interesting idea for decorating a children's ottoman
Decorative ruffles can be used as decoration; they are sewn along the entire circumference of the ottoman. This product will look especially good in a child’s room. You can even cut various ruffles from old skirts and dresses.
You can decorate a leather or fabric ottoman with buttons - to do this, you will have to first cover them with material, and then make a screed on the surface.
Bottle chair
An ottoman is a miniature product with which you should start making furniture from bottles. A more complex design is a chair, but if desired, you can quickly build it with your own hands.
You must first prepare a large number of bottles; it is better if there are a supply of them. Otherwise, you will need all the same materials as in the previous case.
You can easily assemble even a large chair from bottles
Step-by-step instruction
Step 1. First you need to cut the plastic bottle, after which the upper part will need to be turned over and placed in the lower one. Then a whole bottle is inserted there and closed with a lid, and the top is closed with the lower part of another container. The result is a very strong and stable structure, which is what is required in the case of a chair. Using the same principle, a fairly large number of preparations should be made, so all family members can be involved in such work. If you wish and have a lot of bottles, you can even build a small sofa.
The process of connecting bottles is shown in a detailed diagram
Step 2. You need to connect the resulting modules in four pieces using tape. As in the previous case, it is better to use more of it, especially when creating massive structures. Next, the modules from the bottles must be connected again, wrapping them with tape on all sides.
Connecting the bottles together
Step 3. Using the same principle, constantly wrapping new layers of tape, you should make the back and armrests of the chair. By the way, instead of adhesive tape, cling film in rolls is perfect for such purposes - you can find it in any supermarket. The advantage of the film is that it connects the modules more tightly than any adhesive tape, and it is much easier to work with.
Assembling the back and armrests
Step 4. In this case, you should also make a soft base from foam rubber or padding polyester - then the product will be more comfortable. The parts are cut out to the shape of the chair and sewn together. Next, you just need to make a cover for the chair and you can use it for its intended purpose.
We cover the chair with a fabric cover
Making a frame
To create the basis of our design, you will need to prepare everything you need:
- actual plastic bottles (preferably two-liter bottles) in quantities of up to 40 pieces;
- a large roll of transparent tape, 5 cm wide;
- stationery knife.
Many will note that the vast majority of video lessons use a significantly smaller amount of containers. The design considered here will be much stronger and more reliable. And, in the end, there is no point in saving on garbage.
Before you start work, decide for yourself:
- what shape will your new ottoman be?
- where are you going to use it.
It's really not difficult to build it:
- rectangular;
- oval;
- round;
- square.
In theory, nothing prevents you from making a whole banquette. The classic version is a cubic low stool, covered on all sides with fabric and foam rubber. We will look at it in more detail.
So:
- take 32 empty bottles and arrange them in pairs;
- We cut off the top of every second one (by about a third);
- Insert a whole one into the resulting sleeve (necessarily with a stopper).
By doing this, we dramatically increase the strength of the blanks. Next, we wrap each individual element with fabric (for example, panels cut from old T-shirts, or simply pull on warm tights) - this will save you from annoying squeaking. The fabric is fixed with tape.
Now it's time to create modules. 4 reinforced bottles are wound in a row with adhesive tape. They are connected together in a special way:
- the first and third neck up;
- the second and fourth with the cork down.
In this way, 4 elements are constructed. They are put together taking into account that the lids should be staggered. The base is fastened without sparing adhesive tape. To strengthen the structure, you should attach each bottle to the row separately, each time wrapping it with tape to the others.
A cylindrical stool is made in the same way, but the individual elements are fixed to the central container in concentric circles.
You can create an oval pouf if you put 2 bottles in the middle.
Bottle sofa
You can make a small sofa using exactly the same scheme. Of course, in this case you will need a lot more bottles, but they should be connected in the same way as the options described above. Here it is better to use several times more tape or cling film, because the sofa should be strong.
It is necessary to increase the modules until you get a sofa
You can read about other ways to make a sofa with your own hands in our article.
Video - Sofa made of plastic bottles
Required Tools
Tools you will need are scissors, sewing needles, a stationery knife, and a pencil. For a cylindrical ottoman, you will additionally need a compass; for a square or hexagonal product, a ruler or square.
Use quality plastic bottles.
For ease of sewing, use a sewing machine.
Tip: for work you will need a flat surface on which the bottles are connected to each other.
Other types of furniture made from plastic bottles
Since plastic bottles are a versatile material, they can be used to create various designs.
Bottle picnic table
In this case, we will talk about making a small table that will be convenient to use outdoors.
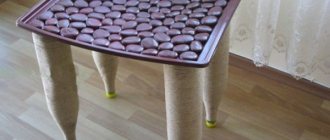
A simple version of the table, which was obtained by gluing bottles to a tray
To make it, you will need four bottles, which are glued with the bottom to a small tray that acts as a tabletop. The tabletop can be painted using acrylic paints. In addition, it is recommended to use pieces of material as decorative elements.
Bottles can be painted with spray paint
You can make a more voluminous table, but in this case it is necessary to provide a durable tabletop. It is quite easy to cut it out of multi-layer plywood or MDF sheet.
In order to make the table durable, it is advisable to take more bottles, because in this case it is better not to skimp on material. Only then can you get a durable product that will last for many years.
A more durable table option
Wall shelves
Such original wall shelves are perfect for a cottage, a children's room or a kitchen in any apartment if the interior suggests creativity. Plus, they are quite easy to make at home.
In the process we will need the following:
- plastic bottles - 9 pieces;
- scissors;
- acrylic paint;
- glue.
Step-by-step instruction
Step 1. To start, the bottles need to be cut - we only need the part with the bottom.
We cut each bottle
Step 2. Next, the bottles must be painted with acrylic paint and joined together with glue. After which they can be fixed to the wall with double-sided tape.
We fix the bottles on the wall
You can do this in another way. To do this, the bottles are first fixed on thin plywood, and only then this frame is installed on the wall.
Hard frame pouf
For work you will need the following materials and a set of tools:
- Sheets of plywood or chipboard, several wooden blocks.
- Soft fabric for upholstery.
- Filler.
- Threads, needles, scissors.
- Screws.
To make a hard ottoman, you can use the following step-by-step instructions:
- First of all, prepare the frame. Two parts are cut out of chipboard for the base and top, as well as a long sheet to form the side.
- Wooden blocks are screwed onto the lower workpiece, and the frame cover is attached to the top.
- A flexible sheet of thinner chipboard is attached to the outer surface of the base, sequentially screwing the material to the bars with screws.
- Now you need to make soft upholstery.
- Blanks of the appropriate size are cut from the fabric base.
- A bag for the frame with a zipper running along the bottom of the pouf is sewn from some of the blanks.
- But the pouf cannot be left without a soft seat. Therefore, we separately prepare two fabric circles according to patterns: one should be larger in diameter.
- The circles are sewn together to form a kind of bag that needs to be filled with filler. To decorate, the circle is stitched with strong threads, making mesh-shaped seams.
- By slightly pulling the seam threads, we will give the pillow an interesting hilly look.
All that remains is to hem the pillow onto the top edge of the fabric cover.
How long will it take to manufacture the structures?
Making any pieces of furniture from plastic bottles will not take too much time. It is important to follow the instructions, then the whole process will be invisible. Of course, this will also depend on the dimensions of the product.
You can make structures either alone or with children - working with bottles is not dangerous and is not difficult. In any case, it is recommended to first check the availability of all materials and fixtures. As mentioned earlier, it is better to make blanks with a reserve in case some elements are missing.
If you involve all family members in the work, you can even make a massive structure in a few hours
It’s very easy to make an ottoman or any other design from bottles with your own hands. At the same time, it is important to adhere to the basic principle of connecting modules, and also to show your imagination better at the stage of creating decor. In addition, the creation of such furniture will not require any serious material investments, which means that in case of failure it will not hit your wallet.
