The creative development of preschool children within the kindergarten is one of the important stages in the formation of a growing personality.
The group environment and surrounding objects promote curiosity, creativity, bold trials and discoveries.
Taking into account the fact that the child spends most of the daytime in a group, the surrounding space and interior in it become part of the gaming and educational process. The more opportunities children have to realize their own fantasies, the easier it is for a teacher to direct the learning process in the right direction.
The child treats objects and space as a resource, seeing in them opportunities for realizing his plans.
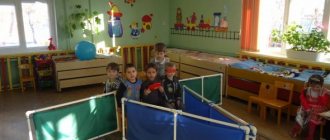
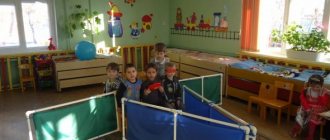
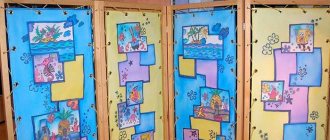
One of the interior details that can help in the creative development and organization of group life is a stylized screen. Being an important attribute of theatrical performances, with a touch of mystery, it evokes genuine delight and curiosity among children.
The simplest puppet theater attracts children much more than painted fictional characters.
Depending on the size, with the help of a screen you can stage scenes both for puppet theater and for real small actors, adding entertainment to the process and increasing interest.
The screen in this case becomes an urgently needed item.
If the group’s budget does not allow for purchasing a ready-made option, but the children have a desire to organize a theater club, you can make your own screen from plastic pipes for the kindergarten with your own hands.
The design of this multifunctional device is very simple.
Choosing design and sizes
Depending on the purpose of use and the age of the children, various designs can be made.
This could be a large full-length theatrical screen.
Or a small tabletop version of the screen to independently show scenes with puppet characters.
An important factor is the lightness and versatility of the design: children really appreciate the rare opportunity to independently change the arrangement of interior items, using them not as a mandatory established order, but as a resource for realizing ideas.
This develops management skills and also gives more space for play and creativity.
As a rule, the standard model of a screen made of PVC pipes is made with three sections.
It is enough to collect 3 frames, connect them together and cover them with beautifully decorated curtains.
However, this is not a mandatory rule, and if you wish and have the material, you can make a larger number of frame components. The design of the fabric stretched over the frame depends only on personal preferences - you can choose it together with your children from several options by making removable covers with Velcro fastenings.
When choosing covers, you can show your imagination and creativity.
Different colors of covers can be associated with seasons or themed holidays. For example, a green background in the spring, yellow and orange - with the onset of autumn, blue or dark blue - in the winter season.
There is a lot of room for imagination here for the teacher.
How to make a screen from plastic pipes
Having assembled all parts of the screen, they proceed to creating the overall structure. It is good to use double fasteners as connecting elements. If these are not available, then you can use plastic ties (clamps), which are characterized by high tensile strength with sufficient elasticity. Despite their versatility and ease of use, nylon ties have one drawback - they can only be used once.
The screen is assembled using double fasteners or a nylon tie
Sections of the screen will be in a movable state. Thanks to this, there will be no difficulties during transportation or moving to another place. This design can be used in a room of any size.
Materials and tools
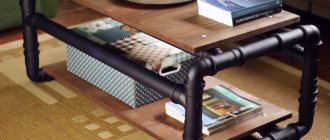
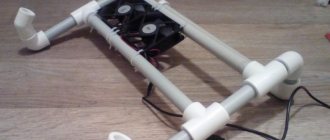
Making a screen from plastic pipes with your own hands will not require large expenses. You will need propylene pipes of various lengths, plastic corners and double-sided fasteners to connect the sections to each other.
It is necessary to think through the design and calculate the amount of material.
All this can be taken after a recent renovation, or purchased at any specialized store for repairs.
The pipes are connected to each other using a plastic corner.
The sections are connected to each other with special double fasteners.
A special machine for welding plastic pipes made of propylene, which is used by professional plumbers during installation, can be a good help.
If you have nowhere to borrow it, you can also use the conventional heating method over the stove.
If desired, PVC pipes can be painted. For durability, you should use a mixture of putty and regular gouache.
Various ways to use multifunctional screens in kindergarten are suggested by the children themselves.
You can use any available fabric to sew covers. It must be remembered that it must be durable and easy to wash, since children's games are fraught with various consequences for any furniture, and the screen will not be an exception.
It is best to choose a bright and colorful material.
Depending on the design, you may need Velcro fasteners, ribbons or cords for garters, additional material for pockets or loops, and reliable adhesive.
Thanks to the principle of accessibility, children have the opportunity to independently change the space in their group at any time.
Making a floor screen
The floor screen is made in exactly the same way, but more materials will be needed to make it. The collection process will take several days. The size of the product can be completely different, it varies from 1 to 2 meters in height. It can be made small in width to save storage space and materials.
It is recommended to focus not on your own height, but on the growth of your children. But it is necessary to take into account that they grow quickly, and the screen will be useful for several years to come.
Drawings and diagrams
There is a high probability that the master will have to draw his diagram according to an individual size. This is due to the fact that not everyone has space to store large screens, and there is nowhere to lay them out for play.
If space is very limited, then it is rational to make a table screen, but of a larger size. It is easier to store it disassembled, and it will stand on the floor in the children's play area.
Required tools and materials
Usually the same materials are used. But you'll have to buy something extra.
The size of flashlights, mounts, and decorative elements should be larger. Otherwise, you will end up with something very low-quality, ugly and non-functional. Or there should be a lot of them. Meager decorations look strange, awkward and awkward.
Step-by-step manufacturing instructions
When creating a floor screen for a puppet theater with your own hands, the sequence of actions is as follows:
- Initially, you need to cut out three main parts from plywood - these are the same side doors and the central part.
- Then process them and attach them to each other. It is advisable to use 4–6 fasteners.
- The material must be painted or varnished. It is recommended to do this in several layers so that the paint lays down in a dense layer.
- Then you need to insert a screen into the screen or hang curtains. They may not exist - the height of the product will allow you to do without them if you screw on homemade shutters.
- The last stage is screwing on the lanterns and decorating the doll screen.
It is important to take into account that if the child is small, then he does not need a high screen. It is difficult for children to move the structure independently; it does not suit their height. And if such a large thing falls, it can cause any injury to a girl or boy.
If the task is to make the screen lighter, then it is wiser to use not sheets of plywood, but wooden beams covered with fabric. But it should be understood that such a design will be slightly less stable.
The plywood is covered with fabric and instead of being painted. Dense materials such as corduroy, velvet, and linen should be used. The wood should not be visible, otherwise it will look unsightly.
Decorating a screen for a puppet theater, made yourself, is an even more exciting process. It is worth paying attention to the color scheme of the playing area. It is recommended to paint the plywood in the same colors as used in the interior. You can also make its design thematic by painting the plots of some fairy tales. It is advisable that the child himself take part in decorating the product.
There is a lot of different decor that can be changed if you get tired of it. Another option is to leave the puppet screen monotonous and decorate it for each performance.
DIY screens for kindergarten - 50 photo ideas:
PreviousOtherReview of accessories for beds: types, materials and functionality
Next
OtherRoller guides for drawers. How are they built?
