The desire for changes and renovation of the interior can be realized through the use of new pieces of furniture that will enrich the design. It’s very easy to make a beautiful and original ottoman with your own hands, and there is always a place for it in the living room, cozy bedroom or children’s room, or hallway.
Poufs come in different shapes and sizes, their design is as simple as possible and therefore even a novice craftsman can make such a design. Moreover, such pieces of furniture have quite interesting features and a wide range of applications, so making them will be an exciting activity.
What is an ottoman and why is it easy to make it yourself?
Many years ago, when ordinary chairs had not yet come into use on a regular basis, and things needed to be stored somewhere, ottomans were invented in the eastern part of Europe. This piece of furniture was used as an addition to the bed, a soft stool on which one could change clothes and put things away. Before the advent of ottomans, this function was performed by ordinary drawers. Over time, storage furniture changed, became smaller and more mobile, and then completely became a full-fledged interior detail and sometimes even a luxury item.
PHOTO: raduga-ufa.ru A classic ottoman used in European homes - an oval chair without legs, but with a hard backing
The base is the most important thing in a good ottoman. You can save money and make this piece of furniture yourself, using anything: a piece of board, cardboard, a tire from a car wheel, or even an ordinary box.
PHOTO: podelki.guru
PHOTO: russianstartuprating.ru
PHOTO: i.pinimg.com
Important! As the main material and frame for the future ottoman, it is best to use a reliable, strong base that will not fall apart if an adult sits on it.
It may seem that there is no need to bother so much if you can buy ready-made furniture in the store. However, often, after the renovation has already been done and it’s time to buy furniture, people discover that the ottoman that is in the store does not match the color of the curtains or bedspread.
You can make furniture of any shape and color yourself, and in order not to make a mistake, you should first study the photographs and find the ideal option that can be repeated.
PHOTO: decorexpro.com The ottoman that you buy in the store may differ in shades from the curtains and bed linen, and may not have unusual decorative elements such as hand sewing
Variety of shapes and sizes: ideas for ottomans
The design of home furniture must meet the requirements of practicality, functionality and aesthetics in a combination of all these parameters. For your own home, you can make frameless and frame models, and choose any shapes that will match the interior design.
The production of any model takes place in stages and during preparation it is important to carefully think through the solution and draw up a sketch. This makes it possible to select materials and calculate their required quantity, and after that select the necessary tools and begin to implement the idea.
When choosing materials, you can be guided by practical goals; improvised materials are excellent for reducing the cost of a product. But for the coating, high-quality and wear-resistant materials are selected, which are characterized by ease of maintenance and long service life.
Making your own ottoman from plastic bottles step by step
Plastic bottles are stored in abundance in many apartments, but instead of throwing them away, you can make simple furniture. People have long learned to make frames for sofas and beds from plastic, not to mention such a simple thing as an ottoman. To get furniture suitable for use, you should study the technology and follow the instructions.
Advice! In order for the future ottoman to get a beautiful shape, it is necessary to prepare all the materials and bottles in advance. Place the plastic in the cold if it’s winter outside, or in the refrigerator. The bottle is closed in cold air, held for several minutes, and then the temperature is sharply changed by placing it on a hot radiator. Thanks to this processing method, the bottle takes on an ideal shape and becomes denser.
| Illustration | Description of action |
| The prepared bottles are pulled together into one pile and tied with tape or twine to form a dense cylinder that does not crumble. | |
| The workpiece is placed on cardboard or a board, outlined, and then the base is cut out strictly according to the workpiece, of a suitable size. Cotton wool or foam rubber and fabric are stretched over one such circle to form the bottom of the ottoman. The entire structure is held together with tape or instant glue. To securely secure the ottoman, it is recommended to additionally use twine and wrap the bottles with it several times. | |
| The entire structure is wrapped in foam rubber. Using thread and an awl, you need to sew the foam rubber and secure it to the workpiece. | |
| The seat is made from thick cardboard or boards. | |
| A cover is put on the finished ottoman, which can be sewn from anything. |
Functional pouf or simple seat?
Creating small pieces of furniture is a fun creative process. A model that will subsequently decorate the room must have a certain functional load.
A homemade ottoman for a children's room is a small seat with a closed body. It can be on a rigid frame or in the form of a frameless product. This stylish pattern can be sewn or knitted in the round.
If children often play on the floor, it is important to consider that a low seat on the mat is not very comfortable; the intensity of blood circulation decreases due to bent knees.
They need comfortable low seats with little weight to carry it to any corner of the room. Two or three products of a similar design can be easily made with your own hands.
For those who don’t know how to knit, a voluminous seating block can be sewn from leather or denim from old trousers. You can make some kind of vegetable or fruit by stuffing an “apple” or “pumpkin” with padding polyester.
The design and functionality of ottomans varies:
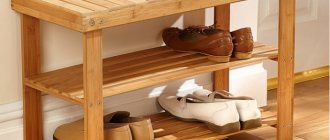
- a seat with a folding top for storing indoor slippers or a closed shoe shelf with a soft “seat” - for the hallway;
- covers for storing winter blankets in the form of soft cylinders - seats for a balcony or loggia;
- an inverted table with soft and hard sides of the “cube” will be an excellent addition to the guest area;
- a soft footrest on casters is an excellent solution to complement a soft corner in the living room;
- flat knitted “donuts” and blocks for storing toys with a folding seat are an original addition to a child’s room.
There is nothing wrong with wanting to give a “second life” to old things. Not everyone knows about our creative abilities; they can be used in the manufacture of budget interior items.
Poufs, chaise longues, shelves for shoes or banquettes in a hallway with a soft top can become a bright design accent.
Ottoman for a children's room from a 20 liter cooler bottle
If there is an empty large-volume water bottle in the house, you can use it to make a very reliable and durable pouf that will support not only a child, but also an adult.
PHOTO: berkem.ru One container is sawn in half, another whole one is inserted into it, after which the structure is glued together
The finished empty bottle must also be covered with foam rubber, after which pillowcases or sewn covers are put on the ottoman and sewn up.
Knitted cover
Knitted poufs
If you don’t have a sweater in your closet that you are willing to sacrifice, but you love to do needlework, you can knit “clothes” for your furniture. Such things look especially cozy in winter, as they create the impression of warmth and comfort. If you knit well, the process will not take you much time. Perhaps all you need to do is sit in front of the TV for a couple of evenings - and the product is ready!
Regular garter stitch will do. Choose your favorite thread color. It is better if the yarn is mostly synthetic (70% acrylic, 30% wool). The product will not stretch or shrink when washed, and it is much easier to care for. If your ottoman is square or rectangular, knit two pieces of the desired size with knitting needles. On average, one centimeter of garter stitch is two loops. This way you can calculate the number of loops based on the width of the pouf. Throw on 4-6 loops so that the parts can be sewn together and the pouf fits freely into the finished product. In this case, the cover will be put on top. There is no need to sew on the bottom.
If you want to knit a “clothes” for a round pouf, then you will need to simply make an elongated rectangle, the width of which will be equal to the height of the pouf, and the length to its diameter. Plus a separate piece for the top. After wrapping the rectangle around the circumference, try it on to see if the size fits. Having removed it, sew its sides from the wrong side, sew on the top piece, turn it inside out and put it on.
How to make your own ottoman from a tire
The process of creating poufs for a room from tires can be called the simplest, since you only need to prepare the surface and cover it with improvised means.
Stages of work:
- The outlines of the future pouf are outlined with a pencil on the plywood.
- Using a jigsaw, you need to cut out a circle and use nails to nail the workpiece to the tire.
- A string is twisted onto a wooden base; to do this, you need to glue the end of the thread to the very center, and wind the rope, gradually gluing it.
- If the cord suddenly runs out, you can attach a new string with glue.
- When the entire tire is glued, you need to attach either the same piece of plywood or legs to the bottom.
- You can paint the finished pouf with acrylic paint.
PHOTO: i.pinimg.com Stages of work
Tools and materials
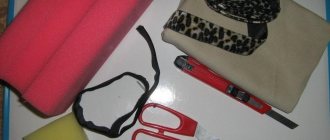
To make a pouffe with a hinged lid you will need the following materials:
timber measuring 40 by 40 cm;- 4 furniture casters;
- two hinges for the lid;
- furniture glue;
- metal corners;
- padding polyester;
- foam;
- screws.
Tools you will need:
- drill and screwdriver;
- furniture stapler with staples;
- hammer and nails;
- Ruler and pencil;
- hacksaw.
Making an ottoman from an old bucket
If there is a leaky bucket lying around in the barn or on the balcony, you can not rush to throw it away, but use it to create furniture for your home.
To get a beautiful pouf, you need to follow the instructions:
| Illustration | Description of action |
| The handle is separated from the bucket, then you should prepare all the materials that are available at home: glue gun, padding polyester, fabric, strong rope. | |
| Large twine or rope can be pre-painted. | |
| The top of the bucket is coated with glue, after which a rope is wound around it. | |
| You need to prepare soft covers in advance. One circle should follow the shape of the bottom, and the other should follow the shape of the wide part of the bucket and the walls. | |
| Any edges of the twine that remain sticking out can be hidden under the fabric. | |
| Instead of a bucket lid, thick cardboard covered with fabric is placed. The top of the bucket should be made soft using padding polyester. It is recommended to make indentations, leaving space so that the seat does not fall into the bucket. | |
| For beauty, you can glue a button to the center of the seat, as is done on decorative pillows. | |
| A small piece of fabric is glued to the bottom of the lid. Now we glue the soft cover to the standard one so that the side is on top. | |
| Using a rope you can finish the job and make a beautiful edging. |
Schemes and drawings
Before you begin the creative process, you need to stock up on diagrams and drawings of the future product.
The drawing is needed in order to draw on it all the details that will be needed for the pouf.
It indicates the dimensions of all parts separately, the materials needed for sewing and, of course, the filler.
On wide paper, to make it convenient to use, the pattern itself is drawn directly. There will be four side parts of the pouf and two circles. Next, the parts are cut out and then transferred to the fabric. Once the patterns are ready, you can start assembling.
Cable reel ottoman
For those who use the entire space of the apartment and love multifunctional things, an ottoman made from a reel may be an ideal option.
PHOTO: i.pinimg.com Such a piece of furniture will not take up much space
PHOTO: i.pinimg.com In such a pouf you can even organize a small hiding place
PHOTO: cdn.lifehacker.ru Such poufs are suitable for any interior
PHOTO: i.pinimg.com A home library can fit perfectly right under the seat
Making a pouf from a coil is very simple, since the base is almost ready. All that remains is to make a soft seat and attach it. The main thing is to make sure that the structure is stable, especially if it will be in a children's room.
An interesting model for your home
Ottoman made from a plastic bottle
A similar model can be made from a durable 19-liter drinking water bottle. This pouf is perfect for a child's room. To work you will need to prepare:
- A 19 liter bottle and 4 1.5 liter bottles.
- Scissors.
- Glue.
- Fabric blanks.
Next, we will use the following instructions for creating a children's toilet seat:
- You need to cut off the neck of a large plastic bottle.
- Glue four plastic bottles to the inner surface of the workpiece (they act as support structures).
- All that remains is to wrap the frame with fabric using glue.
Use brightly colored fabric, as the pouf is intended for a child's room.
Soft square ottoman
The most common and classic option in Europe is a square-shaped pouf, covered with soft material. For the base, you can choose a regular box or a thick wooden box.
PHOTO: mblx.ru An alternative option that can also be made at home is a multifunctional pouf with a hinged lid under which shoes or other things are stored.
Today, soft square chairs are not used to take off shoes. The owners of the house put clothes or books on the pouf, use them instead of a bedside table, or let their pets - dogs and cats - soak up the soft pouf.
Style and design
To give the room an original and exclusive appearance, the pouf should be made bright and colorful. For children's rooms, rich colors of blue, pink, and turquoise are chosen.
Of course, it must be in harmony with the overall interior. You can also decorate a piece of furniture with beads, rhinestones or embroidery.
For classical motifs such as baroque or rococo, it is recommended to attach curved or carved legs to the product . Their upholstery is made of velvet, velor or leather in subdued neutral tones.
For the high-tech style, a metal frame is taken as the basis, the seat is made of artificial leather. Their legs are shaped like arcs and painted chrome.
The minimalism direction requires a minimum of decor and ornaments.
Important: light-colored products visually increase the space. But for hallways this option is not entirely appropriate. Because if they come into contact with dirty shoes and clothes, they will get dirty.
Crocheted round pouf
A popular option today is a round crocheted pouf. You can also use large plastic bottles or cardboard as a base. The soft chair is stuffed with old rags, padding polyester or any other materials, but it is important to take into account the strength of the thread.
PHOTO: avatars.mds.yandex.net
PHOTO: cs5.livemaster.ru
PHOTO: i.pinimg.com
How to choose fabric for covering a pouf
If the user decides to upholster the ottoman on his own, then the first step is to decide on the fabric. If you want the upholstery to be durable and the pouf to have a presentable appearance, then the best option would be leather or its substitutes. If the main role that the pouf will perform is sitting, then it is best to give preference to soft fabrics.
In other options you can use:
- tapestry;
- suede;
- velor;
- velvet.
These are the most optimal and common options for upholstering any ottomans.
Bean bag ottoman: you can buy it, but you can easily sew it yourself
Before you sew a bag yourself, you should make sure that there are enough extra rags in the house, since you will need a lot of them. In addition, you need to prepare a large amount of filler.
To make things easier, you can buy a bag of cheap polystyrene foam. These are light and wrinkle-resistant balls that fill the pouf. They easily take the shape of the human body, providing comfortable sitting.
The process of sewing a cover and stuffing a pouf is not complicated, but to avoid mistakes, you should familiarize yourself with the video instructions in advance:
Features of poufs and their use in the interior
The simple design of the pouf is a defined container of a round or cuboid shape with a soft finish. Such compact and practical furniture can be used in different ways and not only for decorating the interior composition, so when choosing a sketch, this point is also taken into account:
- footrest;
- seating area;
- small table;
- storage system.
Poufs-pillows have recently become very popular; they are made from durable materials and soft or hard filling. Other types of small furniture forms will require a rigid base or frame and upholstery fabric, which can be of different colors and textures.
Techniques for assembling and finishing do-it-yourself ottomans on a rigid frame for the hallway
You can place a homemade pouf not only in the room, but also in the hallway, where it most often serves instead of a chair for changing shoes. You can choose different options for the frame base - boxes, coils or bottles.
PHOTO: auchan.ru Most often, poufs in the hallway have a special device in the form of a “tongue” so that you can quickly open the lid and hide something in the chair
With and without backrest
This furniture comes with or without a frame. Each individual option is unique in its own way. The frame of the products is made of wood or metal . The top of the pouf is upholstered with foam rubber and textiles.
Frame models are most often installed in hallways, corridors or kitchens. They look harmonious in classic styles.
Frameless poufs are softer and more comfortable to use. They are soft bags filled with foam rubber, holofiber or other filler. They are placed in bedrooms, living rooms and children's rooms. It is pleasant to relax on such a product after a hard day at work. Their peculiarity is that if you have free time and the necessary materials, you can make a piece of furniture with your own hands in a short time. The shape of the products can be round, triangular, or pear-shaped.
According to the classification, poufs are also divided into soft and hard . Soft ones, in turn, come with:
- With open frame. They resemble a small chair with a soft seat. Such models are budget-friendly and easy to make on your own. Their frame can be wooden or metal.
- With a closed frame. Outwardly they look like large pillows. Their frame is upholstered on all sides with textiles. They can be equipped with legs or furniture wheels. The shape of the products is most often round or square.
Rigid models are made of wood and decorated with decorative trim . They are used not only as a seat, but also as a coffee table.
By type, ottomans are divided into:
Banquettes. They are found in hallways and are used as additional seating. Their height does not exceed 40 cm .
As for the appearance, shape and decorative finish of the bench pouf, there are no restrictions.- Bedside products. They are installed in bedrooms and are made in the same style as the bedroom set.
- Pouf-box, chest of drawers. Such models are equipped with additional storage space. They have drawers or shelves in the interior space.
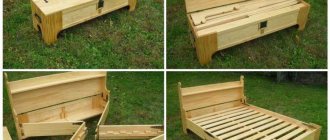
- Transformers. Their characteristic feature is their ease of transformation into a chair, bed or other piece of furniture.
- Poufs with back. They look like armchairs, but they do not have armrests.
Information: in classic interiors, wood is used to make the frame, in modern interiors, metal is used.
Ottoman on wheels with a drawer for small items
Multifunctionality is a trend today, so an ordinary seating ottoman can be turned into an excellent storage area or even a bedside table, especially if you attach wheels to it.
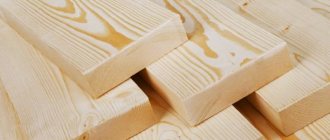
The process is surprisingly simple, and the result exceeds all expectations. The main task is to make a strong and reliable frame. It is best to use wooden blanks or parcel boxes made of plywood.
PHOTO. i.pinimg.com Pouf option made from pallets
If a finished structure is not available, you can make it yourself using several thin boards. First, a base is created, which can be round, square or even diamond-shaped.
PHOTO: howmeb.com First of all, prepare the base
Master class on carriage screed step by step
When making a pouf from leather, it is recommended to use the carriage tie technique:
First, the ornament is selected.- Next, a sketch is drawn up with a diagram of the location of the buttons.
- After making the base of the pouf, foam rubber is glued to the plywood using glue.
- The carriage screed is marked on the foam rubber. The holes according to the markings are made with a drill .
- After the preparatory process, the padding polyester is stretched over the foam rubber and holes are made again.
- The entire structure is covered with upholstery material and fixed on the reverse side with a stapler.
- The material should be pulled neatly and evenly . There should be no folds or irregularities on it.
- In the places where the buttons are attached to the fabric, neat holes are made using a drill with a thin drill bit.
- Now we move on to the stage of sewing on the buttons. A thin wire is attached to them, which is pulled out from the reverse side and fixed with a stapler.
Important: if you are performing the carriage screed technique for the first time, it is recommended to practice a little on a rough version.
Tip : also try making a wardrobe or wardrobe. And next to the ottoman a small coffee table will look great.
Pouf from an old stool
If there are several old stools in the house, you can not rush for a new one, but use the blank and make a chic pouf out of it. The base is cut out of fabric, which is stuffed with padding polyester. You can use a knitted pillowcase, denim or any other fabric you have in the house.
To make a comfortable and beautiful pouf, you don’t have to build a frame; you can simply use chair seats, fill them with padding polyester and sew a beautiful cover.
PHOTO: dommino.ua Exclusive furniture is ready!
PHOTO: joseospina.co You can add chic to the pouf with decorative rivets
Design features
According to their design features, poufs are transformable . That is, with the help of special mechanisms, they turn into:
A folding bed. Such models can be put forward according to different principles. A folding pouf is suitable for both small and spacious apartments. It will not be possible to completely replace the sleeping place with it .
But it will be useful if you suddenly have overnight guests. During the day, such a piece of furniture is used as a seat; at night, it can replace a bed for one person.- Armchair. When unfolded, the pouf will be no different from a comfortable and functional chair. It will harmoniously fit into the surrounding environment and become a beautiful decor for any room.
- Coffee table with two seats. Such a piece of furniture will help comfortably accommodate two people for tea, a board game or for pleasant communication.
Uniform for pouf
To obtain the desired result, you need to make some effort: sewing a cover for an ottoman is not as simple as it might seem at first. Different geometric shapes of ottomans suggest different capes on them.
You cannot put a round cover on a square ottoman and vice versa, so both of these options should be considered, and then anyone can draw an oval from a circle or make triangles from a square.
So:
- For a square product, you need to prepare thick fabric with a beautiful pattern that will fit into the interior of the room, and threads.
- To create a pattern, you need to take measurements of the ottoman in its upper part, length, width, height and side dimensions.
- When transferring dimensions to fabric, you must remember to leave a margin of at least 2-3 cm for stitching.
Attention: In this case, the proverb “measure twice, cut once” is relevant.
- After checking the completed dimensions, you can begin cutting the fabric for the future ottoman.
- The video in this article shows the entire process of making a cover for a square ottoman.
- The stitch line can be marked with a pencil or punctures made with a needle, although experienced craftswomen prefer to make lines with a thinner piece of soap.
- The prepared elements are connected using a sewing machine. Each stitch made is checked for gaps, otherwise it may come apart later and spoil the entire appearance of the finished product.
- The basic rule in sewing is not to forget about the iron, so all seams are ironed with a hot iron. To obtain not just ironed seams, but also clearly defined corners, they must be steamed through a damp cloth.
- This operation is performed with all individual elements of the case.
- When the four components of the ottoman cover have been prepared and assembled into a single whole, you can start making the upper half of the product.
- The four upper parts are attached to the sidewalls, of which there are also four pieces.
- Corners and seams are ironed again, steamed, which gives an aesthetic appearance to the almost finished product.
- After careful ironing, the finished, beautiful clothes for the ottoman are put on.
- The following are instructions on how to sew a round cape and what you need for this.
- Clothes for a round ottoman cannot be sewn without dense fabric, preferably in a rich color.
- Decorative elements in the form of pockets can be made from fabric in a contrasting color.
- You need to stock up on threads that match the color, and since the bottom is attached with a stapler, you need to prepare a furniture stapler.
- The round shape requires measuring the product's circumference and height.
- A pattern is made according to the obtained dimensions with seam allowances of 2-2.5 cm.
- The resulting elements are tried on the ottoman, and the correctness of the measurements taken is checked. If everything is done correctly, the elements will fit together perfectly.
Creative process
- Decorative elements are cut out in different sizes. On the one hand, the larger the pocket, the more things it will hold, but it will look like a woman pregnant with twins wearing a tight T-shirt, so this part can be made whole and stitched around the entire circumference of the cover.
Attention: When making a round cover design, the operation of smoothing and steaming the seams remains relevant.
- A cover for an ottoman can not only be put on, but also stuffed if there is a desire to have a soft product (see Do-it-yourself soft ottomans: what can be made from) and make an ottoman pillow.
How to cover a round ottoman - options for leather covers
Restoring a leather ottoman is a more labor-intensive process, but it can be easily done. When choosing a model, it is important to consider the features of the material available:
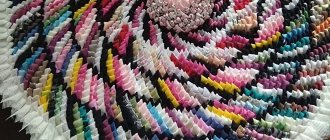
- Covers made from scraps. If the fabric for the pouf is collected from scraps of leather, there are several options to create an original cape. You can work using the patchwork technique or make a multi-level cover. For example, the lower part can be made of a material of one color, above - a strip of a different shade, the seat - also different from the other elements;
- Working with applications. Burning leather is one of the common ways to create a unique design. Cut out a piece of skin, put it in a frying pan and heat it. The material will bend under the influence of hot air. You can work with it as with very soft raw materials. You can draw on the skin with a hot knitting needle or special stamps;
- Large piece of fabric. Working with a solid canvas is much easier. Simply sew the flaps, then attach them to the pouf and secure them. For fixation, you can use special nails;
- Lush covers. For such a product you will need a large amount of finely chopped fabric. These can be thin stripes, scales and other shapes. We sew all the parts together and fix them on a fabric base.
Cylindrical product
The user can also independently make a pouf from plywood and give it a cylindrical shape.
Assembly from base
The algorithm is simple:
- according to the desired dimensions, two identical circles are cut out of plywood;
- then the side walls are cut out: several narrow plywood elements.
Advice! The best option is to take 25 planks, it will not take so long to install and at the same time the shape of the cylinder will be beautiful.
Assembly
Having prepared and processed the parts, you can proceed to assembly:
- plywood boards are attached in a circle using special glue;
- then fastening occurs using self-tapping screws;
- after attaching them to one of the round bases, the workpiece is turned over;
- the second disk is generously smeared with glue along the edges and the finished product is attached to it;
This completes the work process.
How to make something hard soft
To do this, you need to wrap the cylindrical blank in several layers of soft fabric.
This will help smooth out all the sharp corners and make the future pouf more pleasant.
