Hi all! Today you will learn how to install ball-bearing drawer slides. Objectively, these are one of the best extension systems at the moment. They are presented in a wide range and are also offered by various manufacturers.
We’ll tell you and show you what these devices are, what they consist of, which ones have pros and cons, and what the essence of do-it-yourself installation is.
In fact, installing them is not that difficult. All you need is the right approach, the chest of drawers itself, ball guides for drawers and a standard set of tools. Believe me, you will definitely succeed.
Drawer on ball guides
Design features
To properly install such runners on furniture, you first need to understand what the structure consists of.
There are 2 main types of ball guides:
- double row;
- four-row.
Their design is identical. Yes, and installation is carried out the same way. But in terms of operation, two-row ones differ from four-row ones. The first type is more affordable and can withstand a load of no more than 35 kilograms.
Ball type guide design
If you are counting on a long service life, as well as a large loading capacity of the boxes, it is recommended to choose 4-row products.
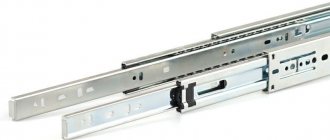
Structurally, the ball type guides consist of 2 metal profiles that contact each other using ball rolling elements. The balls themselves are usually made of steel. But there are also options made of nylon. They are distributed in the recesses of the cradle as evenly as possible.
The length of the profile, as well as design features, allow the drawer to be completely pulled out from the cabinet and chest of drawers. To ensure that the box does not go beyond the permissible limits, the runners are often additionally equipped with clamps (stops) or closers. This is especially convenient if the fittings will be attached to a computer desk.
What's inside the ball guides
Marking the mounting points for the guides
The principle of installing guides is much simpler than it might seem at first glance.
The telescopes (if you pinch the black antennae and pull out one half) can be disassembled into two parts, one of which is attached to the side of the drawer, and the second to the inner side of the chest of drawers.
Our main task is to determine the exact locations of these fastenings, screw each half with three screws and insert the drawer into the chest of drawers, thereby connecting the guide into one whole.
Advantages and disadvantages
Many people decide to use ball guides because they have a wide range of objective advantages. Namely:
- wide extension range;
- large selection of accessories;
- the presence of closers and stops that increase work safety;
- full extension, which gives access to the entire depth of the drawer;
- Possibility of use on different types of furniture;
- the use of high quality metal and components (especially from manufacturers such as Boyard);
- easy and silent sliding;
- no need to mill grooves for installation;
- relatively small size with a solid load capacity;
- collapsible design;
- possibility of installation by yourself.
Full extension ball slides
One of the main competitors is the concealed slides.
As for the shortcomings, everything is relative.
If you take high quality products, as well as from a reliable manufacturer, then the only disadvantage in this situation can be considered only a higher cost. This is compared to roller skids that are noisy, short-lived, and lack the ability to fully extend.
If the ball guides turn out to be of poor quality, then you should expect not the most reliable operation and rapid failure.
What you definitely shouldn’t do is choose roller guides for drawers when it is possible to install ball runners.
Ball type guides
Types of drawer guides
When making furniture, you cannot do without fittings: handles, hinges, legs, etc. Systems that make it easy to pull out drawers and optimize the work area are also widely used.
Types of furniture fittings
Guides are mechanisms designed for quick and comfortable removal of drawers from various types of furniture . Manufacturers produce several types of devices, differing in the principle of operation and method of fastening, full or partial extension and cost.
Drawer slides come in different types
Roller fittings
This version of guides appeared on our market at the end of the 20th century. The sled structures used until then for moving mobile parts of furniture are obsolete. For that period, the invention of metal guides along which boxes moved could be considered a real breakthrough.
Roller guides
They began to be installed on all kinds of retractable furniture elements: in chests of drawers, cabinets and hallways, on computer tables, etc.
The mechanism consists of two strips, one of which is fixed on the inner side of furniture, for example, a table, and the second on the drawer itself. The length of the guides varies between 25...60 cm (you can also find strips 80 cm long). The main element of the design is the roller itself along which the bar moves.
One of the strips is attached to the inner side of the furniture
Since the material from which the roller is made is plastic, it is not intended for moving massive boxes. In addition, noise is heard when driving. Over time, the fittings wear out. The smoothness of the ride deteriorates. Due to the weight of the drawers being pulled out, the edges of the gutter can turn out, which is why when the bar moves, the roller flies out and the drawer falls. However, this type of guides are quite inexpensive, they are easy to fix on the furniture yourself, and, if necessary, repair them.
Roller guides for drawers
The main reasons leading to the failure of the mechanism are those allowed when installing the guides.
- Many assemblers do not tighten the top screw.. As a result, the bar is deformed and the roller bends under the weight of the box.
Often the top screw is not tightened
- Incorrectly made gap between the drawer and the guide . If the bar is not properly fixed on the roller, at some point the box may fall off.
Nowadays this type of structure is not used so often. You can give it preference only because of its low cost, if the product will be rarely used and should not withstand special loads.
Model range of roller guides
Guides with telescopic operating principle
Two guides are also installed to move the drawers. However, unlike the previous option, the slats are inserted into each other, that is, they are fixed both above and below. To move them, a whole system of balls (bearing mechanism) is used, and they are metal, which is already a significant advantage.
The main part of the telescopic guides consists of three parts: counter, middle and main.
Guides with telescopic operating principle
Drawers on ball guides are pulled out almost silently. And such fittings can support much greater weight - up to 60 kg. The system is durable, reliable and aesthetically pleasing, but its cost significantly exceeds the price of its roller counterparts.
Installation of telescopic guides
In addition to the two considered guide options, more advanced systems have recently become widespread - metaboxes and tandemboxes:
- metaboxes (metal boxes) - a roller system characterized by the presence of additional side walls made of high-strength metal and two support elements. This design allows you to increase the load capacity of the boxes to 30 kg. Some advantage can also be considered a reduction in material consumption, since the guides themselves are sidewalls. The material for the production of devices is steel (its standard thickness is 1.2 mm), which is coated with wear-resistant enamel. The rollers, like those of conventional guides, are made of plastic, but they are designed for a thousand extension/closing cycles;
Metaboxes
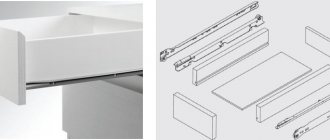
- tandemboxes (mechanisms - tandems) are produced according to individual parameters and are equipped with metal or glass side walls and a tubular railing. Drawers are pulled out using ball guides, which are superior in performance to roller guides.
Tandemboxes
The system can withstand loads of up to 60 kg. The drawers move silently, they can be pulled out completely, which provides full access to the contents and a good overview of it. The design is durable, easy to install and has a wide range for different types of furniture.
Installed dampers, closers that allow you to smoothly close the drawers, drives with mechanisms for opening them with a light touch allow you to open and close the drawers with absolutely no effort and absolutely silently. Hidden installation systems, which are installed under the bottom of the drawer, have also gained popularity.
Concealed guides
An ideal option for home furniture are retractable elements operating on hidden guides with a mechanical “Push” device and a closer . Moreover, today the cost of such components (one set) does not exceed 700 rubles, which allows them to be used in the manufacture of not only luxury furniture, but also interior items for any category of the population.
What is typical for such systems that replace conventional ball guides:
- when opening the drawers, metal structures are not visible (since the guides are located underneath), which affects the aesthetics of the furniture;
The box is open, but no metal structures are visible
- drawers open with a light touch of the surface, eliminating the need to install handles, which is especially attractive to designers;
- drawers slide smoothly and spontaneously;
- the weight of the contents that the boxes can support reaches 40 kg;
- The height of the boxes may vary.
Boxes can have different heights
Using such a system allows you to make furniture not only attractive, but also functional. Particularly attractive is the use of mechanical devices instead of an electric drive, which is not always functional. The use of a set of devices is convenient in room furniture, in hallways, and especially in kitchen sets.
Fittings are usually sold as a set. Having decided on the choice of mechanism, what should you pay attention to when purchasing guides?
- Marketable condition . The product must be inspected for damage.
- Operation of the mechanism . It is important to check how well the rollers or bearings are working.
- The most important thing is to clarify the thickness of the metal from which the guides are made . The optimal option is 1 mm (better if 1.2). This indicator significantly affects the durability of the fittings and its reliable operation. If the strips are made of metal with a thickness of 0.7 - 0.8 mm, they will not function for too long.
Which retractable mechanism should I choose for my drawer?
The highest quality fittings are produced by German, Haefele, Grass, Austrian and Harn. As an alternative, you can purchase Chinese-made mechanisms (of quite decent quality) under the Boyard brand. When using even obsolete roller systems from the best manufacturers in furniture, you can not be afraid of a load on the box of 25 kg and the rapid failure of devices. In addition, each set of devices comes with detailed installation instructions, and special templates have been produced for those who often install guides.
Fittings from BLUM are very popular (in the photo there is a special template for installation)
What you need for installation
Now to the question of how to install ball guides for drawers.
To install the runners that will guide and open the drawer completely, you will need to arm yourself with:
- pencil;
- tape measure or long ruler;
- level;
- screwdriver or screwdriver;
- awl (optional);
- drill and thin drill bit.
If installation is planned on a wooden structure, then it is better to pre-drill the holes for the self-tapping screws with a thin drill. This will prevent the wood from cracking.
For ordinary furniture made of chipboard and MDF, such manipulations are usually not required. Just carefully screw in the screws. You can first make a precise and small recess using an awl.
Now you can install. The installation scheme itself is not particularly complicated, but it requires accuracy, attentiveness, and a sequence of actions.
Ball guides
Installation of roller elements
When the markings have been made, they move on to attaching the guides.
Work begins with the box. Apply the strip to the marked line so that the roller is located at the back wall. Attach it to the bottom using self-tapping screws. It is advisable to pre-drill the holes for them: if you tighten the fasteners right away, the chipboard or wood may split. Then screw the second pair of planks to the furniture body, aligning their position along the marking line.
When assembling furniture, you must ensure that both rollers simultaneously enter the track.
Step two. Fastening the fittings to the drawer
See also
Choosing a bed base: orthopedic or solid, which is better?
The axis is ready. Now the runner is applied to the marking.
To disconnect the guides, simply press the special locking bar. After this, the design is easily divided into 2 components.
How to disassemble the guide
Place the guide piece so that the front edge is flush with the drawer front. It is important to prevent the runners from sticking forward. Otherwise a gap will appear. And we definitely don’t need him.
Regarding fastening, the following recommendations can be given:
- The skids come with factory adjustment holes to aid in proper installation. There are holes for adjustment up and down as well as forward and backward. Made in the form of a vertical and horizontal oval, respectively;
- Using these holes, align the runner so that the marking line runs exactly through the center of these ovals;
- Now insert a self-tapping screw into the hole, which is located horizontally. You can first make a hole with an awl. This way the self-tapping screw will fit accurately and evenly;
- The same adjustment holes will be located in the part of the runner that is at the back of the drawer. Here you need to mount it in a vertical hole, allowing you to adjust the height of the box.
Mounting holes in the guide
In the future, if you need to adjust the position, this will be done extremely simply.
To adjust, unscrew the screw from the hole that is responsible for horizontal or vertical movement. Move the runner and secure it again.
The end result is that you have secured the element to the drawer through 2 adjustment holes on the front and back.
Installation of ball telescopic guides
On the side of the drawer, horizontally, strictly in the center, mark a line and screw one half of the guide along it.
Now we need to mark a similar horizontal line on the inside wall of the chest of drawers.
I took the exact distances and dimensions from the drawing of my chest of drawers; you can use the drawing of your furniture product, approximately as shown in the figure:
That is, we mark 417 mm from the floor on the sidewall and mount the telescope at this height.
This completes the hardest part of the work; now we screw the two halves of the guides strictly along the line to the drawer and to the side and move it into place.
Marking and installation
First of all, draw the attachment lines. It is recommended to mount the guides in the center of the box, but installation in the lower part is also allowed. A similar line is marked on the inside side of the cabinet. The accuracy of the measurements will determine the smooth operation and duration of operation of the mechanism.
Before installation, the guides are divided into halves: pressing the black “antennae”, they pull out the inside of the device. The halves are attached to the marked lines, then they move the drawer into place, try to close it and pull it out.
If everything was done correctly, the latch will engage and a slight click will be heard. This is a signal for the final fastening of the guides. Otherwise, you will have to slightly loosen the fasteners and still adjust the mechanism.
There are oblong holes on both parts of the structure: the vertical ones are designed to move the bar up and down, and the horizontal ones are for horizontal adjustment. Having carefully adjusted the mechanism, you can finally secure the elements with self-tapping screws or self-tapping screws.
Telescopic guides are available right and left; they cannot be swapped.
The guides can provide partial or full extension of the drawers, be with or without closers, be equipped with a Push to open system when the drawer does not have a handle, and you only need to press on it to open it. The products can also be equipped with a reliable lock that holds the drawers in the closed position.
Instructions for replacing guides
To replace broken roller runners, you need to use a screwdriver to unscrew all the fasteners and remove the strips. Ball-type ones are more difficult to remove: pull out the drawer as much as possible, press the latch down with your fingers, and smoothly pull the structure toward you. Dismantle the planks from the side walls of the furniture, removing all the screws.
Installing new guides for dresser drawers is not difficult: they all have a similar design, and the holes for the fasteners match. There is no need to mark. The strips are applied to the holes remaining from the screws and screwed. Check the correct position and, if necessary, adjust it by loosening the fasteners.
Having learned how to properly mount the guides, you can independently repair failed elements or install new ones on your own furniture. When choosing the optimal option, you should take into account the planned load: if it is large, you should give preference to ball structures.
Did you manage to solve your problem using the recommendations from the article?
Yes!
46.84%
No. More answers required. I'll ask in the comments now.
37.31%
Partially. There are still questions. I'll write in the comments now.
15.85%
Voted: 713
Calculation of drawer length
Regarding the calculation of the length of the drawer, you need to first of all know that roller and ball guides come in the following lengths: 250mm, 300mm, 350mm, 400mm, 450mm, 500mm, 550mm, 600mm. These are, so to speak, the most popular sizes. There are also ball guides up to 800mm long. For roller guides, as far as I know, there is a length limit of up to 650mm. Although, you can clarify these parameters with the accessories seller, someone who knows exactly what he has on sale.
It would seem that calculating the length of a drawer is as easy as shelling pears: if we install guides with a length of 500mm, then, accordingly, the length of the drawer will be equal to 500mm. But for our people, 4 centimeters is not just 4 cm. No, for us it’s FOUR CENTIMETERS! And the fight for them will be tough and principled.
So, in our situation, the internal depth of the cabinet is 490mm. It is clear that a box 500mm long will not fit here. It turns out that you need to place the drawer on guides 450mm long. But we have 490mm of free usable space. We will not give 40mm to the enemy! Well, it’s not 40mm, but somewhere around 35mm (5mm can be left for force majeure situations that may arise during the furniture assembly process). In general, we make a drawer 485 mm long and rejoice at the additional space we have gained. True, such a box will not move out completely, because our guides are shorter. But this is not critical. There will still be enough access to the things stored in the box. But we increased the capacity of the structure. Amazing!
I would also like to draw your attention to this. The fact is that drawers come with internal and external facades. So, when calculating the length of a drawer with an internal facade, you must always remember the thickness of this very facade. That is, if the internal depth of the cabinet is 490mm, then the useful free space (provided that the facade has a thickness of 16mm) will be equal to: 490mm-16mm-1mm=473mm. It is from this size that we “dance” when calculating the length of the drawer. And I discarded 1mm so that the inner facade of the drawer was slightly recessed into the cabinet. By the way, we also screw the guides, stepping back from the edge of the bulkhead by about 17mm. So that the facade “goes” inside.
Calculation of drawer width
Now let's move on to specific numbers. So, according to furniture design technology, the width of the drawer should be 26mm less than the width of the opening in which it should be installed. It turns out that 13mm is allocated on each side for installation of guides.
In the figure we clearly see all the design parameters for installing drawers on roller or telescopic guides. Please note that the calculation of the width of the drawer is made not relative to the overall width of the cabinet, but relative to the internal opening for the drawer. In this example, the overall width of the cabinet is 400mm, and the internal width is 368mm. The internal opening is the overall width minus the thickness of the two bulkheads. In our example, the cabinet is made of 16mm thick chipboard. Thus, the internal opening turned out to be equal: 400-16-16 = 368mm. This is such simple arithmetic.
And now it is in relation to the width of the opening that we calculate the width of the drawer. For us it is equal: 368-26 = 342mm. That's all. Although, on the one hand, it seems like everything, but if you think carefully, it’s not quite. Look, if the dimensions of the bottom of the cabinet are exactly 400mm, then the bulkhead will definitely be screwed with a slight offset inward (as a rule, this offset is due to the thickness of the edge, in our case it is an edge of 0.5mm, so the offset will be somewhere around 1mm ). Thus, the internal size of the opening will decrease by 1mm on each side. As a result, we get the following: 400-16-16-1-1=366mm. And the drawer will then have a width of: 366mm-26mm=340mm. As you can see, its width differs by 2mm from previous calculations. And in our situation, it is this width that will be calculated correctly.
You may object: “What are these 2mm? What kind of weather can they do in the process of installing a drawer?” However, in the furniture business, sometimes 2mm can play its evil role. In this case, a wider drawer may cause the drawer to move “stiffly” along the guides. So, it is better to make calculations for installing drawers very carefully and scrupulously, so that later, as they say, “excruciatingly painful ...”
Role in furniture production
And although the useful properties of telescopic devices have been evaluated in various fields of activity, such mechanisms are mainly used in the process of manufacturing various furniture.
One example of such an application is wardrobes using folding hanger rods, various cabinets for shoes and chests of drawers, and cabinets with drawers. That is, any furniture that allows you to save space or increase the comfort of using furniture.
It is worth noting that ball guides have a positive effect not only on convenience, but also on the efficiency of using furniture. After all, getting and putting things away is much easier and more comfortable, and free access makes it possible to take up useful space in the closet.
Calculation of drawer height
The calculation of the height of the drawer must be approached based on the characteristics of our furniture design. However, there is a generally accepted standard for calculating the height of drawers. In narrow furniture circles, it is considered a “rule of good form” to make the height of the drawer 40-50mm less than the height of the facade. This gives some room for maneuver to the furniture assembler in the process of installing drawers and adjusting the facades.
Personally, in this situation, I prefer not to violate centuries-old furniture traditions, and I calculate the height of the drawers using this formula: “Facade height (minus) 40 (50) mm (equal to) Drawer height”
.
I advise you to also listen to this method for calculating the height of drawers, and then you will have an additional chance to make high-quality furniture with your own hands.
Well, it seems I’ve told you everything about calculating the dimensions and indentations for installing drawers. Well, now, perhaps, we can move on to assembling the drawers.
Calculation, production and assembly of drawers "
Recommendations for repairing pull-out chests of drawers
Metaboxes can be an excellent alternative to roller-type guides. The advantage of the structures was the ability to close independently under its own weight. But it is best not to use retractable mechanisms with plastic rollers. At first they will function normally, but after a short period of time the plastic will quickly wear off, a backlash will form and the drawers will no longer close correctly. You can increase the service life of plastic rollers using silicone lubricant, but this is only a temporary measure.
Other tips
In order not to confuse ball and roller guides, you just need to look at them carefully.
In most cases, roller manufacturers paint them white or light gray. The action of their work is aimed at moving the wheel in the runner, which in turn is made of plastic.
In practice, they are not very convenient, parts often deteriorate, and noise appears during use.
What you need to know before installing guides
Almost all guides are attached in the same way. You should retreat 2 millimeters from the front edge and secure it with screws along the edges, gradually moving towards the center.
The only differences are in the calculation of the height for attaching the skids. All guide fastenings are divided into three types:
- To the bottom side edge of the box. Roller guides are attached strictly to the bottom of the drawer base. Just like expensive tandem boxes.
- Towards the center of the side of the drawer. Ball telescopic guides can be attached to any part of the drawer, but it is best to do this to the center in order to simplify the installation process.
- To the top of the drawer. The metabox runners are attached to the top of the box base.
Different types of guides are also installed differently. Depending on the type of furniture, its characteristics and material, you should choose the type of guide structure.
How to install metaboxes
The installation of metaboxes also differs only in the location of the mechanism - the metaboxes are located along the top edge. The design is not the easiest to install for a beginner. To correctly place the metabox, you need to determine the correct height, which corresponds to the dimensions of the front part of the furniture. The guides can be of different sizes: 54, 86, 118 and 150 mm. The guides can be lengthened using two rows of rails.
The diagram shows a metabox measuring 150 mm:
