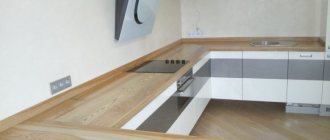
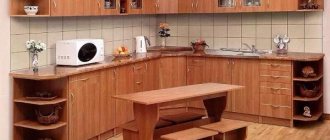
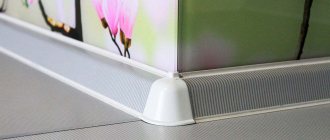
A special plinth, which is fixed between the tabletop and the wall, has several purposes. Many people underestimate its importance, which is why they make a number of mistakes when purchasing and installing it. Today we are going to learn about how to attach a plinth to a countertop in the kitchen, and what is its peculiarity.
We fix the kitchen plinth with our own hands.
Functions of decorative plinth
Since furniture is usually made of MDF or chipboard, the cuts on the reverse side, according to the rules of furniture production, are not protected by any protective edges.
Therefore, as a result of moisture entering from the reverse side, its edges may swell and crack, or it may even begin to rot.
Therefore, the main function of a kitchen plinth is to protect the countertop (if it is made of chipboard) and furniture cabinets from moisture on the end cut, as well as to create an aesthetic appearance for the kitchen unit.
Options for kitchen baseboards suitable for different designs
Experts advise buying a metal kitchen plinth made individually for your kitchen. Installation of granite countertops with natural stone Labrodorid, Lviv cityDifferences in design
The front side of the molding is a decorative profile. During the manufacturing process, a sealant is attached to the back side to fill the gap. Skirting boards are divided by design into two categories - monolithic and universal.
Monolithic products are those that are made from one piece. They have excellent rigidity, so they are not durable in use. And their long-term use is ensured by elasticity.
Moldings are universal and are mounted on a silicone seal. They are more plastic and, accordingly, have a long service life.
Installation methods
First, I will dwell on the design features of the moldings.
Kitchen baseboards can be solid or consist of a base strip and a removable element.
Features of purchasing custom-made kitchen furniture- Choosing the perfect sofa
- Upholstered furniture in Perm
Choose dismountable kitchen baseboards.
- the removable part can be replaced over time;
- fastenings remain invisible;
- you can use self-tapping screws for fixation;
- wide selection of decorative strips;
- ease of installation.
Both plastic and aluminum baseboards, which I have already talked about, can be collapsible.
Depending on the materials used, there are 2 types of fastening:
- On self-tapping screws
. This is how skirting boards with a removable cover are attached. The base strip is fixed, and the molding is already snapped onto it. As a result, the attachment point remains invisible; - For liquid nails
. Or silicone glue. It is the same. Suitable for solid skirting boards. They are not mounted using self-tapping screws. After all, this damages their design.
There are also different types of installation using self-tapping screws depending on where they are screwed:
- On the countertop
. The most practical and common option. The base strip is fastened with self-tapping screws to the tabletop, positioned close to the wall. The main thing is to choose the correct width of the molding itself. As a result, there is no gap between the wall and the set; - Into the wall
. All experienced craftsmen do not advise attaching the baseboard to the wall, as is done when installing floor elements. Even a slight displacement of the kitchen unit leads to the formation of a gap. There will be no protection anymore.
Now you can separately see how to attach the plinth to the tabletop using self-tapping screws, and we will also take a separate look at the option with glue.
Fasten with self-tapping screws
There are also those who use nails. This is a wrong decision. If it is a flexible plastic baseboard, then you should not nail it to the tabletop. It is so easy to damage the molding itself, as well as the headset element.
Self-tapping screws are suitable for dismountable skirting boards. The installation sequence is as follows:
- prepare tools and materials for work;
- remove the decorative trim from the kitchen baseboard;
- attach the base strip and mark for fastening;
- make cuts in the countertop with a small drill for self-tapping screws so that the material does not begin to crack;
- This is especially true for wooden countertops;
- clean the surface and degrease it;
- Apply a layer of silicone sealant along the entire installed baseboard;
- Place the base of the baseboard on top of the sealant and press it;
- screw the base bar according to the markings;
- install a decorative profile;
- install all plugs;
- add sealant where it is missing.
It is important that all possible gaps between the headset and the wall are filled with sealant.
Beds with soft panels at the head: stylish solution and comfort- Ideas for arranging furniture in a small room
- Is it possible to place a bed opposite the door?
If the molding becomes worn out, damaged, or simply becomes boring, it is not necessary to completely replace the baseboard. It is enough to remove the decorative trim and install a new one. At the same time, you can add a little sealant in places where it has worn out.
Fasten with glue
Mainly used for solid plastic skirting boards. Objectively, it is considered a simpler installation option.
An important condition is the purchase of high-quality adhesive-sealant. Nothing will work without him.
The step by step process looks like this:
- take accurate measurements of the kitchen after it is fully assembled;
- determine the size of the plinth itself, as well as the required number of plugs and corners;
- prepare the surface by cleaning and degreasing it;
- if it is a collapsible plinth, then divide it into 2 parts;
- cut the required length of the base strip using a hacksaw or a sharp knife;
- Apply glue to the surface at the junction of the wall and the furniture (table top);
- attach and press the baseboard;
- keep for as long as the glue manufacturer indicated in the instructions;
- cut the decorative strip and snap it onto the base;
- install all caps and corners.
That's all. The work is completed. Nothing complicated.
Differences in materials
- Wood. Typically, this type of molding is used for countertops made of the same material (chipboard or wood). Varieties of such skirting boards have a low cost, but choosing them in combination with the color of the tabletop is quite difficult.
- Aluminum. Such moldings are quite popular. They have a long service life and are not exposed to heating devices and are easy to clean. They can have different shapes and appearance.
- Plastic. This type is made of PVC. Accordingly, they are easy to change, so they are presented in various modifications.
- Stone. A type of molding from the “good” price category. They are installed using glue and are installed in a vertical position.
- Metal-plastic. This type of plinth can be used for any type of countertops. But installing them next to heating devices is not recommended.
Let's sum it up
Finding the best way is objectively difficult.
But I can draw the following conclusions:
- For solid plastic skirting boards, only fastening with glue is suitable;
- if it is a collapsible plastic flexible plinth, then you can use glue or self-tapping screws of your choice;
- You need to drill into the plastic carefully, and you shouldn’t screw a self-tapping screw directly into the plastic without a drill, otherwise it will crack;
- for aluminum baseboards, use self-tapping screws supplemented with sealant;
- if you plan to regularly move furniture and remove baseboards, then silicone will not work;
- try to mount the element to the countertop and not to the wall.
If you disagree with something, you can write in the comments. Let's discuss some additional issues.
- How to sell furniture active sales?
- Adhesive paper for furniture
- How to attach a countertop to a kitchen unit?
By the way, this article contains details about the choice of sealant for our purposes and more.
Which mounting option did you choose? Which skirting board do you prefer and why? Did you make any mistakes during installation, and what were they? What advice can you give to beginners?
All that remains is to hear your answers, as well as stories from your life.
Types of fasteners for baseboards
Kitchen moldings are divided into removable and non-removable. In the first option, the mounting rail can be dismantled when rearranging the headset, and in the second option it is firmly attached.
Removable ones are attached directly to the tabletop itself, and non-removable ones are attached to the wall. It is not recommended to fasten the plinth to the wall and to the tabletop, because in this case they will be deformed.
In addition, they can be collapsible or non-dismountable. However, they can be attached either with self-tapping screws or with glue. In the first option, the seal is fixed, and in the second, the monolithic rail is fixed.
Why is this necessary?
Before attaching the baseboard to the tabletop, many are interested in why this is necessary.
Not everyone understands its functions and tasks. But in vain. An important and also necessary element in the kitchen.
There are 3 main functions:
- Disguise
. The gap between the headset and the wall looks ugly. It should be covered with molding. It's a plinth. It hides all defects and also forms a complete picture; - Protection
. I consider the main function to be protection from moisture. When cooking and cleaning, water and dirt get into the joints. Over time they accumulate there. Water pours behind the furniture. It mixes with garbage there. The process of decay begins. As a result, the furniture deteriorates and an unpleasant odor forms on the furniture. This is a source of mold and mildew. If you install a plinth, all these problems will be eliminated; - Decorative effect
. Modern skirting boards are beautiful and are also made in the style of kitchen furniture. They decorate it perfectly and complement it visually.
These reasons are enough to take moldings from Leroy Merlin or another store and install them in your kitchen.
Installation (step by step instructions)
You should not try to install moldings made of artificial or natural stone yourself. It's better to invite specialists. But the instructions for installing skirting boards made of plastic, metal, wood and composites will be given below.
Required Tools
In order to cut the baseboard to the required size, you will need a hacksaw for wood or metal. A hacksaw is used when installing solid wood moldings. Soft PVC products are best cut with a carpenter's knife. You also need to prepare a tape measure, silicone sealant, screwdriver or screwdriver.
Screw mounting
Using a tape measure, you need to measure the distance of the tabletop plane on which the molding will be installed and cut it to size. Then, using a screwdriver, you need to drill holes for the screws, first attaching the plinth to the site of the intended installation.
The distance between the holes should be between 15 and 30 centimeters.
- Products made of fragile materials must be drilled with extreme caution, as they may crack. It's best to use glue.
- Before fixing the baseboard to the tabletop, the joint can be treated with silicone sealant to prevent moisture from entering.
- But do not forget that when rearranging it will need to be removed from the surface.
The outer part is secured with latches to the base installed around the perimeter. If the kitchen is corner, then a corner element is fixed at the junction. The outer part extends into the corner by 0.5 centimeters.
It is recommended to apply silicone glue to the joints. Plugs are placed on the edges of the molding, which are included in the kit upon purchase.
Adhesive connection
Before starting the procedure for gluing the molding, it is necessary to remove any dirt and dust from the walls and from the surface of the countertop. If there are grease stains, it is better to remove them with an alcohol solution.
It is also necessary to clean the base surface of the baseboard.
- Before installation begins, the outer surface of the baseboard must be removed and the base cut to fit the size of the countertop surface.
- Then coat the base with glue and press it to the place of intended installation, and then hold it there for the time specified in the instructions for the glue itself.
- If the kitchen is corner, then installation is done from the corner. At the end of the installation, it is necessary to install caps on the edges of the molding.
Care instructions
There are special care products for each material. For example, special polishes are used for solid wood. There are cleaning products for aluminum and stone. If the dirt comes off well, it should be removed with a damp sponge or rag. It is undesirable to use chemicals, as it accumulates in the joints, forming a solid deposit.
Do not remove stubborn stains with aggressive chemicals - they can damage the coating. Powders need to be diluted in water to dissolve solid particles - they will leave scratches on the surface.
Photo of installing a baseboard to a countertop in the kitchen
How the device is attached
The set of accessories for the table top is equipped with shaped and shaped profiles of three, three and a half and four meters. The silicone seal is located along the length of the structure.
When fixing the baseboard, the silicone adheres firmly to the surface, sealing the joints and preventing moisture from penetrating the ends of the tabletop.
The wall plinth has the shape of an equilateral triangle or boot, extended upward.
The base is fastened with self-tapping screws, and a decorative insert is secured at the top of the base until it clicks.
Fasteners include right- and left-side end caps and angle brackets attached to the outer sides.
All fittings have the same color as the baseboards.
Installation is easy.
- First, measure the tabletop from the corner and “cut off” the required part of the profile using a hacksaw.
- Clean the end parts with abrasive material. The gap from the tabletop to the apron is treated with sealed material for better adhesion.
- The base of the plinth is placed at the joint and screwed to the tabletop.
If you attach metal or wooden baseboards with screws, then be sure to treat the edges with silicone.
Finally, we secure the corners and the front part by snapping it into the base, according to the instructions.
To accurately fit the decorative insert, you need to cut the strip correctly, subtracting three to five millimeters from the long sides of the tabletop when taking measurements. The insert is fixed in the corners by pressing. A click will notify you that the bar has been successfully and tightly fixed. The side elements of the decorative part are also installed.
Installing the plugs will complete the job of securing the baseboard.
Using silicone sealant, treat all elements before fastening, wait until it “sets.” This procedure is necessary for proper fixation and tight fit to the surface. Then insert and press the plugs.
The baseboard will provide the kitchen with sterility, cleanliness and freshness, which is what this room should have.
The installation of skirting boards using glue is practically the same. This method is less time-consuming, but does not allow you to hide kitchen appliances, since it fits firmly to the wall. And it will be almost impossible to remove the layer of glue after dismantling the kitchen baseboard.
In addition, the kitchen plinth will help you hide defects in the built-in kitchen and make its position visually more even.
What are the differences and which type should you choose?
Composite section
The category is considered the most popular, including products made from aluminum, stainless steel and plastic. The profile is based on 2 parts: the back and front parts. In the first case, the role of the component is fixation (base). The decorative function is performed by the front side. There is also an option to introduce a third panel - decorative tape. It can imitate metal and countertop material.
Such skirting boards have two parts in the profile - front and back. Grooves are provided for tightly holding and fixing the decorative tape. Plastic parts are used as mounting elements.
Complete with:
- plugs (ensuring aesthetics);
- internal corner;
- outer.
Can be equipped with plugs and corners.
Solid section
Found in skirting boards such as borders. This class of products includes a wide variable range of products made to order. For example, artificial stone, granite, wood, ceramics, etc. Not very common, but included in the same group of skirting boards, are made of stainless steel.
The materials for making solid plinths can be almost anything. Disadvantages are manifested in high cost and the absence of a silicone seal. Processing and installation can also be considered disadvantages.
Disadvantages include high cost and complex installation.
How to replace a baseboard
This will require dismantling the old product. In this regard, self-adhesive options and strips installed with glue will be less convenient than material attached to hardware. Removing the old baseboard begins with removing the screws. They are unscrewed after removing the decorative trim or immediately if the latter is not provided for by the design. Before installing a new frieze, you need to make sure that the material is complete and select fasteners. With the second point, everything is simple, but in the first case, you will need to calculate the straight and corner connections of the plinth itself. The upper bar is checked for compliance with the basis, even at the purchase stage. The following steps repeat the principle of conventional installation. First, the parameters of the countertop are measured, then fragments of the required length are obtained, and then gradual installation begins. With drilling holes if hardware will be used.
Subsequent care of the baseboard
Correct installation of the plinth is not the only factor influencing the condition of the product and the length of its service life. It is also important to learn how to properly care for baseboards. First of all, it is not recommended to use any detergents to wipe the baseboard. Dust should be wiped off with water only. Otherwise, dirt may be absorbed into the surface of the baseboard, especially if it is made of wood or chipboard.
You need to properly care for the baseboard
Note! You can also remove dust using a vacuum cleaner - this is the most effective and safe way to clean the surface of baseboards. But before cleaning, you need to put special attachments made of rubber on the vacuum cleaner.
Vinyl and plastic cleaner
If large stains appear on the baseboard that cannot be removed with plain water, you can use an abrasive agent. But before this, you need to test the selected product by using it to wash a section of the kitchen baseboard in an inconspicuous place, for example, behind the microwave. This is the only way to ensure that the powder or other cleaning agent is harmless. If everything is normal and the surface of the plinth is not damaged, then the product can be used to treat other areas of the plinth.
Kitchen baseboard
Even if the care of the skirting boards after their installation was of high quality, the products may still deteriorate slightly over time (their appearance deteriorates). In this case, restoration of the moldings is required. Restoration of wooden products involves applying one or several layers of varnish, and restoration of stone skirting boards involves grinding the surface. The sealant may also need to be replaced, but the old material must be removed first.
Video - Installation of kitchen plinth
MDF skirting boards
Everyone is probably familiar with MDF boards, used as a facing material and widely used in furniture production. They are produced in a wide range of thicknesses and shapes, most often decorated with a special polymer film with a pattern, usually imitating various wood textures. MDF skirting boards are their closest “relatives”.
What is MDF? No matter how hard they try to freely decipher this abbreviation! Some argue that this is a designation for “fine fraction” or “modified fiberboard.” Interestingly, both options are quite close to the truth.
Indeed, MDF is a step forward compared to the usual fiberboard. And in the production of this material, wood fibers are ground to very small sizes. But still, in fact, this is the Russified English abbreviation MDF: “Medium Density Fiberboard”, literally translated - “medium density fiberboard”.
MDF boards are made from crushed wood fibers, which, when heated and pressed, release natural glue - lignin, which is an excellent binder for the created mass. Manufacturers position MDF as an environmentally friendly material, but in fact, to bind fibers, some companies sometimes use formaldehyde resins, which are not at all beneficial to human health. This factor must be taken into account when choosing this material for finishing - it is better to give preference to manufacturers with a consistently high reputation.
MDF skirting board production line
MDF skirting boards are made from boards that are not yet decorated with film. The blanks are cut and processed on special milling equipment, where they are given the intended shape and relief pattern. After this, the skirting boards are cleaned of dust, and their front surface is laminated with a self-adhesive polymer film.
Taking into account the manufacturing technology, MDF skirting boards most often have the form of a profiled smooth board, which is sometimes also decorated with simple reliefs, without any special frills.
MDF plinth with an insert, which is designed to mask the points of its attachment to the wall.
Variants are produced with an insert-bar along the entire length of the plinth. This detail allows you to simplify installation as much as possible - it will perfectly hide all the heads of the fasteners after installing the plinth on the wall.
In addition to lamination, natural veneer and painting are used to decorate the front side of MDF skirting boards.
Prices for MDF plinths
their MDF plinth
Veneered MDF plinth - Italian walnut look
Veneered plinths, instead of PVC film, are covered with veneer made from natural wood of expensive species. Therefore, in appearance they are almost impossible to distinguish from real wooden ones.
Painted MDF plinth
Skirting boards can also be sold in painted form. For such decoration, special paints are used, which are designed to reliably protect the material from moisture, as well as from the effects of household chemicals. If you want to give the products individuality, that is, paint them yourself, you can purchase a baseboard primed with a neutral white or light gray color, prepared for painting.
MDF skirting boards, like products made from other materials, have their own advantages and disadvantages, which you need to know about before purchasing and installing them.
- The MDF plinth has an easy-to-install design, so even a novice craftsman who is inexperienced in construction can handle its installation.
- The products are very well fixed tightly to a flat wall surface.
- The aesthetic appearance of plinths made from this material brings neatness and sometimes exclusivity to the interior design. Especially if the products are made to order or painted independently.
- The fairly high moisture resistance of MDF allows the material to be used in rooms with slightly higher humidity levels. But direct ingress of water should still be excluded.
- The products have a certain flexibility, so they can be attached even to a slightly curved surface.
The disadvantages of products made from this material include instability to fracture, that is, they can easily be broken by hand. Therefore, during installation you should act carefully, without applying excessive force.
Although buyers are assured that MDF is an absolutely pure, harmless material, this statement should be treated with a certain degree of caution. In order to save money and speed up the manufacturing process of boards, some manufacturers (90% of the world production of this material comes from China) additionally use phenol-formaldehyde resins as a binder. And products may have a negative ability to emit toxic free phenol.
Types of moldings for kitchen countertops
Sometimes a kitchen plinth comes complete with a ready-made set, and then all you have to do is install it in place. If not, you will have to go to the store and choose a table molding that matches the appearance and material of your set and kitchen accessories.
Kitchen plinth made of plastic
Kitchen plastic plinth is made from polyvinyl chloride. Co-extrusion, which profiles are subjected to after molding, allows you to give their surface any color and pattern. As you can see by looking at the following photo, such molding can easily imitate artificial stone, marble or wood. This is a fairly popular way to finish a countertop.
Kitchen profiles made of plastic are quite elastic, which means they can repeat small errors in the geometry of the walls. The price of this finishing material is relatively low, and installing it on the countertop will not require much time and effort. The negative point is that installing it next to a built-in hob is undesirable, since PVC does not withstand high temperatures very well. But as a molding for a sink drawer, plastic would be an excellent option.
Furniture and kitchen plinths. Made from polyvinyl chloride
Aluminum profile for table top
The next most popular after plastic is aluminum tabletop plinth. It will cost a little more than PVC molding, but it will perform better in operation. Aluminum will last a very long time and will be easy to clean from dirt. In addition, metal molding has heat resistance that plastic does not, and it can be installed near heated surfaces.
Kitchen skirting boards made of aluminum are available in different modifications and with different types of coatings. The outer surface of such molding can be made of plain, embossed or polished aluminum, with or without replaceable colored trim. In the photo below there is a furniture plinth with a glued-on colored stripe: you can purchase the molding separately and separately the strip, which will match the color of the specific kitchen set.
Skirting board for kitchen, aluminum. The color is changed by gluing a special tape
Kitchen skirting boards made of artificial stone and marble
These moldings are called attached because they are mounted vertically, as if leaning against the wall. They are made from the same materials as countertops. The installation of such molding is carried out using glue, the same one that is used when sealing the joints of the tabletop parts: the sealing of the seams in the end is very good.
Stone kitchen skirting boards have a long service life and excellent appearance, and are not afraid of heating. This molding also has disadvantages: a marble or stone plinth for a table top does not bend at all, and therefore requires perfect alignment of the wall to which it will be adjacent; high price compared to plastic or aluminum.
An example of wall-mounted installation of a ceramic or stone baseboard for a table
The principle of choosing a kitchen plinth for a countertop
The choice of moldings for kitchen countertops is based on two parameters:
- Technical characteristics - compliance of the width of the plinth with the size of the gap between the wall and the countertop, the presence or absence of heating appliances in the immediate vicinity.
- Taking into account the style in which the kitchen set is made, as well as the type of accessories that are located near the molding. So, if you have railings installed under the hanging drawers, then it makes sense to choose a plinth that is similar in appearance to them.
Shape matters
This criterion is selected based on the functional features of the baguette. There is only one rule here: the larger the gap between the tabletop and the wall, the wider the baseboard. Otherwise, he will not be able to hide all the flaws and irregularities. It will also not be able to protect against debris and moisture.
The stores offer kitchen skirting boards of various shapes:
- figured
- flat;
- triangular;
- rectangular;
- rounded.
Absolutely any form can be chosen.
It all depends on your taste preferences and overall kitchen design. On a note!
Baguettes made of wood and plastic have a wide variety of shapes.
As for the sizes, the length of the frieze can reach 3, 3.5 and 4 meters. Additionally, it is equipped with a silicone seal. It helps to install tightly.
Corner kitchen countertops and plastic border
As mentioned above, for a corner tabletop, the border must either be cut off or use a corner, which is often included.
Very often, a plastic border is purchased for a corner kitchen, as it is easier to work with. What can be said for sure is that the density of contact with the surface of a plastic skirting board is actually higher. And even if the wall is not very smooth, the curb will fit quite evenly against it.
You can glue such a border using the same “liquid nails”.
The plastic border has a wide range of colors and looks great in any interior. Despite this, this type of plinth is a matter of taste: some people like it, but others don’t.
Features of fixing the plastic border:
- The holding time of the glue is no more than five minutes, but if the glue, for example, is fresh, then maybe a little more;
- By allowing the glue to sit, you will give it the opportunity to thicken, and you won’t have to press the border against the wall or countertop for a long time.
It must be said that often the plastic plinth comes with fittings that allow it to be correctly fixed at the corners and, for example, to hide the ends of the plinth.
Video
The following video shows the variety of shapes of aluminum baseboards for countertops:
And this is what the installed plinth with guide looks like:
Narrow aluminum plinth
For kitchen
Features of kitchen skirting boards
Kitchen set with aluminum plinth Aluminum plinth attached to the worktop
Plastic or aluminum
Aluminum and plastic curbs are used more often than others . This is due to the large assortment, ease of installation and affordable price (if we do not consider the products of European manufacturers).
Plastic
Plastic skirting boards are most in demand. This is the most budget option that has a lot of advantages.
pros:
- Low price (except European brands).
- Large assortment of shapes and colors.
- Ease of installation.
- Possibility of simulating any material.
- Flexibility.
Cons (for the cheapest ones):
- Low strength.
- Burnout of colored models in direct sunlight.
Plastic borders are decorated with a coating of PVC film of various colors and shades . The second option is a coating made of aluminum foil that imitates aluminum or stainless steel.
Price range – from 50 to 300 rubles. per linear m . A high-quality plastic plinth “stainless steel” or “aluminum” looks no different from its metal counterpart and lasts for many years.
It can be useful:
Everything about do-it-yourself kitchen renovation
How to make a kitchen apron with your own hands
All about sockets on the kitchen apron
Aluminum
Aluminum plinth is more expensive than plastic, but has a number of advantages.
pros:
- long service life;
- strength and scratch resistance;
- heat resistance;
- does not fade in the sun;
- high quality;
- easy installation.
Minuses:
- more expensive than plastic (about 1.5-2 times);
- not flexible (the apron wall must be perfectly flat).
Aluminum skirting boards have a durable anodized matte or glossy finish , sometimes imitating stainless steel. All connecting elements are made of ordinary plastic, without decorative coating. Price – from 150 to 400 rubles. per linear meter.
Reference! Length of finished kitchen skirting boards made of plastic and aluminum: produced in Russia, China and Poland - 3 and 3.05 m, Italy (Opes, Volpato, etc.) - 4, 4.2 and 5 m, Germany (Rehau) - 3.7 , 4 and 4.2 m.
