Dishes cooked over an open fire are incredibly aromatic, crumbly and tasty. The most convenient utensil for such dishes is a cauldron. But you won’t be able to cook anything in it without a stand or oven. Its bottom has the shape of a hemisphere.
You can use, for example, ordinary bricks, but this design is completely unreliable, dangerous and looks ugly. To prepare traditional dishes of Uzbek and other cuisines, you need a special stand or oven. You can buy a ready-made version, but it is quite expensive.
It is quite possible to make a stand for a cauldron or a stove for a cauldron for a summer residence with your own hands. Features of the material, drawings and stages of work can be found in this article.
Types of stands for cauldrons
A cauldron is a cauldron made of cast iron or aluminum with a hemispherical bottom. Its peculiarity is that such a form can be lowered directly into the fire, thus spreading the heat for even cooking of the dish.
The thickness of the walls of the cauldron varies from a few millimeters to 1 centimeter. It is better if the cauldron is thick-walled, this will allow it to retain heat longer and avoid burning.
The volume of the cauldron can be from 2 to 25 liters. If a small cauldron can be placed using a special stand even on a gas stove, then large cauldrons require a special stove.
A cauldron is simply irreplaceable for a summer house where you can cook in the fresh air. To prevent cooking over fire from becoming dangerous, be sure to use a stand. It is needed to:
- do not look for additional devices;
- do not get burned;
- the food didn't burn and cooked evenly.
Stands for cauldrons can be of several varieties, differing from each other in shape, materials and the purpose for which they will be used.
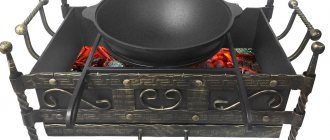
Kazan-tandoor. Handmade bowl with round neck. Can be used as a stand for a cauldron. The only inconvenience is that the height of the fireplace is not visible. To add fuel, you need to remove the cauldron.
Tripod or tagan. It is a metal tube bent in the shape of a circle and three legs. This simple design is perfect for a campfire, picnic or camping trip. For constant use on the site, it is better to choose another option, since in this case the walls do not heat up evenly enough.
4 leg design.
Subscriber. A square-shaped product with a round hole in the center into which a cauldron is placed.
Models for stove and table. Table models are used not for preparing food, but for serving and serving.
Ring-stand , which is put on the grill .
Requirements for the grill
But before you cut and cook, you need to decide.
First of all, take a critical look at your grill: is it strong?
The cauldron stands precariously
Second: the width of the grill. The cauldron should fit the width of the grill.
Third: the depth of the grill. The cauldron is held securely if the ring fits almost under the handles. And in this position, there should be space under the cauldron for firewood or coals.
Some take a smaller ring and it turns out that the cauldron is wrapped in a ring in the lower half. But this is not reliable. Remember how well a wok collapses, the same will happen with a cauldron in such a stand.
Fourth: Grill legs. Considering the weight of the cauldron and the height of the center of gravity, it must be stable.
Stoves for cauldrons and their types
Stoves for cauldrons can be divided into mobile and stationary.
Mobile
Homemade and purchased products are made of metal (steel, stainless steel) and painted with heat-resistant paint. Most often this is an option in the form of a cylindrical firebox with a hole for filling fuel and slots for smoke exit. The design of the cauldron stand itself comes with or without a pipe.
The cauldron is installed on top of the structure. Such ovens can be rearranged and removed.
You can make a mobile stove for a cauldron with your own hands, for example, from a pipe or an old body of a cylindrical washing machine.
Stationary ovens
This is rather an element of the interior, so it is worth paying attention to its location, choosing the shape, type of finish and decorative elements (scoop, poker, blower, door, etc.).
They are made of brick. You can lay out the stove yourself or hire a mason.
Photos of various products
Before we get started, I suggest you look at photographs of products that can be made. There is no limit to the imagination of the authors: you can make a wide variety of designs to suit every taste and complexity. Estimate your strengths and real needs, only after that is it worth purchasing material.
Features of stands and cauldrons made of aluminum and cast iron
Today, most often you can find cauldrons made of cast iron, steel or aluminum on sale. Cauldrons were originally made from cast iron. Models made from other metals appeared much later. Let's look at how they differ, their advantages and disadvantages.
The cast iron cauldron is heavy and takes a long time to warm up. If we consider a stand for a cauldron made of cast iron, then it is ideal for cooking: it transfers and retains heat perfectly.
Aluminum cauldrons are more fragile and lighter. Food should not be left in them for a long time to avoid oxidation.
Aluminum stands are not recommended for use under cast iron cauldrons.
Classification by cooking method
There is a certain classification of ovens depending on the available options for cooking food on them:
- Specialized. They are only suitable for using a cauldron.
- Universal. They are multifunctional and can be used when preparing food in cauldrons and when using other devices, for example, grates, portable smokehouses, etc.
The choice of a specific design is determined not only by personal preferences, but also by the intended cooking features.
We make a simple stove for a cauldron from metal
Before you begin, you need to measure the circumference of the cauldron; the dimensions of the oven depend on this value.
Materials . For work we need thick sheet steel. You can also use an old gas cylinder, a piece of thick-walled pipe, or an old cylindrical washing machine.
We will make the legs from metal corners or tubes.
Tools:
- a machine for cutting and working with metal or a hacksaw;
- drill;
- hammer;
- welding machine;
- protective suit and mask for welding.
It is better to work in the fresh air.
Stages of work:
- We take measurements.
- Using a grinder, cut out a rectangle according to the drawing. The long side should be equal to the circumference of the cauldron (see drawing).
- On one of the long sides we mark holes for the smoke to escape. This will be the top of the oven.
- We cut a hole in the bottom of the sheet into which we will then load fuel.
- We also cut out a circle, it will serve as the bottom for the oven.
- We make a cylinder from the resulting part.
- We make supports and legs for the future stove.
- Let's start welding
- Paint with heat-resistant paint in several layers.
- The oven for the cauldron is ready.
How to use it correctly?
You should not immediately start cooking pilaf on a new device. First you need to burn off the remaining oil from the steel. If an old water pipe was used, all internal surfaces are cleaned with a metal brush to bare metal. Then the oven is washed with water.
Now you can lay the first stack of firewood and heat the stove. During the first “start-up”, firewood can be loaded through the top. Subsequently, they are placed through the door. After thoroughly calcining the pipe, remove the slag and remaining wood from the stove.
Now you can start cooking pilaf on a homemade stove. Firewood is placed along the upper edge of the door and ignited. Now they should burn out a little and only then put the cauldron on the stove.
Sunny option
If possible, you can make a fireplace for a solar cauldron with your own hands. This model is very convenient and efficient to use.
To make it, it is enough to find cardboard, which should be covered with aluminum foil, it can be ordinary baking foil. Please note that metallized plastic is not suitable in this case, since this material is not dense enough.
Note!
- DIY garden paths - varieties of materials. Step-by-step instructions for DIY installation and decoration
Do-it-yourself sauna stove: types of structures and manufacturing materials, technology and stages of work + do-it-yourself construction instructions
- Do-it-yourself shower stall: types of structures, choice of manufacturing and finishing materials, step-by-step instructions for DIY construction
To assemble a stove for a cauldron with your own hands, you will need to transfer the drawings to the material from which it will be made. Assembling the model is extremely simple, the main thing is to find a good drawing.
Sequence of work
We make a step-by-step oven for a cauldron with our own hands. Using a grinder, a partition is cut out in one disk, with holes made for mounting bolts. It is better to cut along the border of the holes, this will reduce the labor intensity of the work.
We find places for spot welding that holds the partition and rim. At this point the metal is cut straight to the rim. The operation must be done carefully so as not to damage it.
Cutting the partition should be done at a distance of 1.5–2 cm from the location of the weld spot. The cut off partition can be easily removed. Just pry it out with a flat screwdriver.
It is very important to preserve the remaining part of the partition directly at the welding point. It forms a gap between the stove and the cauldron
As a result, strong draft occurs and the cauldron is evenly heated.
Then welding work is carried out. The prepared disks are placed on top of each other, and the disk with the partition cut out should be at the top.
The entire fastening partition of the lower disk will play the role of the bottom of the stove. Welding of evenly installed disks is performed along the entire circumference. Then the door is made. In well-welded discs, a vertical cut is made corresponding to the dimensions of the door. You need to leave a small metal strip at the bottom. You will get a kind of threshold that does not allow the coals to fall out of the oven.
1cfa14b5944e00aa051822d85c852f1f.jpe 1170eb1a7b51aacfb0d989ec3b7ecea0.jpeBolts and nuts are inserted into the cut made. These parts will become loops. Bolts are welded to one side of the cut and nuts to the other. Then a hole is cut for the door. A long bolt is welded. It will act as a strong handle. The ends of the opening and the sharp edges of the door are cleaned of burrs. To do this, you can use an ordinary file or an electric grinding disc.
The next step is to make handles for transporting the stove. The wire is taken, inserted into a vice, where it is bent into the desired shape. To work with such wire you will not need much effort. Right angles can be easily made with a regular hammer.
Nuts are placed on the handles. They are welded to the walls on opposite sides. To make it easier to work with such handles, you need to bend the small tails at a right angle. You will get a reliable stop that prevents the handle from touching the stove body.
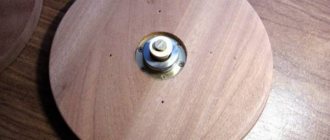
The legs are welded to the bottom. The length of such supports should not exceed 30 centimeters. A hole is welded into the disk through which the wheel hub passed. To do this, you can use any piece of metal of a suitable configuration. The stove is loaded with wood. It needs to be well calcined. During this time, the paint will all burn out. Then it will need to be repainted with good heat-resistant paint.
To create such a design, an experienced craftsman will need 2-3 hours. The appearance will have a compact appearance. Thanks to its light weight, it is easy to transport in a car. Such dimensions fit freely in the trunk.
Doors are used to adjust the draft. Its strength changes when opening or, conversely, closing the door. It is better to use wood briquettes as fuel.
Based on materials: https://topkvadrat.ru/interior/article/kak-sdelat-pech-dlya-kazana-iz-kolesnyh-diskov-svo-38043
