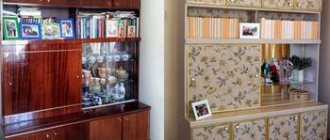
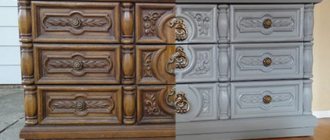
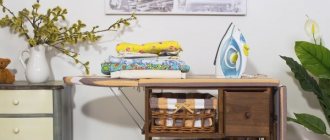
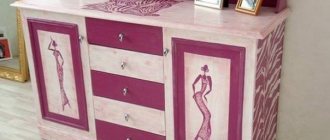
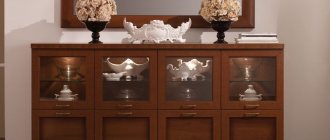
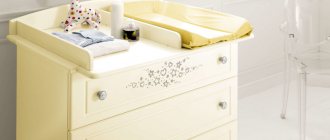
You want to update your old, boring chest of drawers - what could be easier! Our master class is for “dummies”, that is, for those who do not know what decoupage is. Transform a simple thing and make it exclusive - all this is in your hands. Decoupage is the decoration of objects with cut out pictures, napkins, photographs, or fabric. The drawings are beautifully placed on the prepared surface, covered with PVA glue, and then varnished. This way old things will get a second chance and live longer.
Let's try to decoupage a chest of drawers with our own hands in the shabby chic style. The word “shabby chic” is translated as “shabby chic”. In other words, we will decorate and age the chest of drawers.
Decoupage wooden furniture with napkins
Required materials and tools:
- furniture you plan to update;
- wood putty;
- primer (if necessary);
- shellac for wood;
- chalk paint;
- gloves;
- napkins with floral patterns;
- paint brushes of different sizes;
- decoupage glue;
- sandpaper;
- furniture wax;
- wax brush;
- rag;
- awl;
- handles for the chest of drawers.
Shellac for wood is a natural coating for furniture. It perfectly protects wood from external factors and can serve as a coloring component.
Laser printing feature
And then, as usual, the birth of an idea and the beginning of its implementation. But everything would be fine, if not for one BUT. The image format that was needed turned out to be unacceptable for my home printer, and we had to order paper prints from the salon. They printed it out for us on a laser plotter with bright, rich colors and we, inspired, started decoupage. When the matter was slowly and seemingly surely coming to an end, we discovered such an interesting feature of laser printing.
Having lightly touched the chest of drawers with a hard object (it seems that it was the handle of an art brush), we find this not very pleasant, light spot.
It is between the printout and the layer of acrylic varnish that an air bubble has formed. So what does this mean? This means that our varnish can be easily removed from the surface with a film if desired. Here is another ugly picture where a layer of varnish also came off when I carefully tried to remove the corners.
Repairing damage
It is possible that an old chest of drawers will have many flaws that need to be fixed. Repair all damaged items. Then use wood putty to fill all holes, cracks and scratches. When it is completely dry, sand these areas to make the surface as even as possible. It is recommended to start sanding with 80 grit sandpaper and use 220 grit sandpaper at the very end for a smoother surface.
To allow birds to immigrate to the United States, street lights in cities are dimmed.
Leo and 2 other zodiac signs, absolutely indifferent to any reproaches addressed to them
Why did Sergei Yursky's father hide his real last name and not give it to his son?
If necessary, sand all surfaces of the dresser to remove as much stain as possible. The top of the cabinet is always used more often, so give this area more attention.
What can you make from a chest of drawers at home?
Decorating a chest of drawers yourself is not only changing worn-out furniture by hand, but also remodeling it. This is the creation of a completely original household item for a small amount of money.
By carrying out the restoration of a chest of drawers yourself, you can not only save money, but also show your creative abilities.
Restoring a chest of drawers is a very interesting business. There are many methods for creatively remaking such furniture:
- decoupage with fabric, wallpaper, lace, postcards, etc.;
- painting using stencils;
- transformation by aging using different shades of paint;
- gilding - working with gold leaf;
- giving an antique look, creating a cracked effect, etc.
Each of the chosen methods has certain features, but the result is the same - a unique thing, devoid of cliches, a transformed piece of furniture in an interesting style.
Primer
Now you need to paint the chest of drawers white or another light color, because the napkins will be translucent when you apply them. A light tone will contribute to the clarity of the drawing.
So, first apply primer to all parts of the dresser to get an even base tone. It is necessary to cover the surface in several layers, but keep in mind that each new layer is applied after the previous one has completely dried. Leave the chest of drawers to dry.
The US Heart Association considers black coffee beneficial
Nutrition is more important than movement: scientists have broken down the Amazonian diet
Birds in Australia have forgotten their own songs, scientists have to learn them again
Toner composition
Now let’s google and see what is included in the toner used on a laser printer. Then I think it will become clear to us why the varnish did not adhere to the surface of the printout.
Here's what's included. The toner granule consists of a core, a polymer shell and various additives. Drawing of a granule for clarity.
The core is paraffin, which when heated in the printer fuser melts and acts as a lubricant. Thanks to this lubricant, the sheet of paper does not stick to the fixation rollers.
Now the question is, have you tried applying varnish or any water-based composition to the candle, i.e. paraffin. Certainly! This is how we created the abrasions, because the paint does not stick to the candle and is easily removed with sandpaper or a palette knife. It's like in the photo.
So, read on.
The polymer shell is a kind of protractor for the remaining toner particles. Polyester and styrene-acrylic polymers are used in the production of toner.
Well, this is the same polyethylene, on which acrylic varnish or any water-based composition will not adhere, but if it does, it will not last long.
And what does this all mean? This means that we need to start all over again.
Thanks to Marat (my dearly beloved husband) for supporting us and easily sanding our beauty with his miracle machine. Eh.
By the way, I’ll share my husband’s secret: To clean the sandpaper after sanding, he uses hardened silicone sealant, this allows you to prolong the use of the sanding wheels.
Painting
Take chalk paint and apply it to the entire surface of the dresser, using small brushes because it makes it easier to spread the paint. Chalk paint is quite easy to use and goes on easily. After the first layer has completely dried, apply several more. Remember that each layer must dry well before you apply a new one. To achieve the desired result there must be 2 layers of primer and at least 3 layers of paint.
Once the paint has completely dried, you can rub a little around the edges of the chest to give them a slightly distressed look, which will make the piece look a little more authentic.
How to decorate a chest of drawers with your own hands
There are many ways to decorate a chest of drawers.
ADDITIONAL INFORMATION! Numerous ideas from specialists and their recommendations will help turn your bedroom interior into perfection.
There are a great many ways to decorate a chest of drawers.
So, what can you do to decorate your chest of drawers?
The original solution is to add:
- floral print;
- fabric on the sides of the drawers.
Floral prints are one way to make your chest of drawers unique.
Other great dresser makeover ideas:
- use painted toys as handles, or alternatively, use their halves;
- cover it with metallic paint;
- paint in other original ways (for example, in ombre style);
- when painting, you can use magnetic paint;
- decorate the boxes with maps of different countries;
- coat the drawers with different shades of varnish;
- decorate with multi-colored stripes;
- add a sunny accent;
- cover with newspapers;
- update with gift wrapping;
- create an optical illusion on the surface;
- cover with fabric;
- cover with foil;
- create a colored texture on the drawers;
- use house numbers as handles;
- decorate with bright geometric patterns;
- mix prints;
- make color contrast;
- line with colored pencils;
- use a stencil to create an original pattern;
- make three-dimensional decor, etc.
You can experiment endlessly.
Decoupage furniture with paper napkins
Most napkins are 3-ply and you only need 1 sheet of design. This process can be a bit fiddly and requires precision. Fold a corner to separate each layer. Some wipes peel off easily, but others may be more durable, and you may only be able to get two layers of thickness at first.
Alexander Myasnikov decided to refute popular opinions about the dangers of tea and coffee
Cake “Stripe” with butter cream and vanilla pudding: a no-bake dessert
Blue is a reliable color: how people dye their hair, depending on their personality type
Place one of the napkins on your dresser to see how many you need. It's also useful to see how to match a drawing. The napkin should be larger in size than the drawers, that is, protrude beyond them. Don't worry about cutting them to size. Once the decoupage is dry, you can sand them right away.
Now apply a thin layer of decoupage glue to the dresser using a brush or foam sponge. Then you need to glue the napkin, for which you need to attach it to the surface. Smooth it out with a brush, roller or fingers. Try to make the napkin as smooth as possible. However, once dry, the wrinkles can be sanded out to make the design look old. Repeat the steps, overlapping the napkins according to the pattern. Just don't forget to apply glue under the napkins where they overlap.
Look and feel younger: why you need to eat less and less often
Daughter is daddy's love: Yulia Savicheva spoke about her relationship with her father
Fragments of a biblical scroll were found in a cave in Israel
Master class on chest of drawers restoration
On thematic resources, connoisseurs of old things and those who like to create something with their own hands will find wonderful master classes. The videos show how to restore and restore an old chest of drawers, provide detailed step-by-step instructions, talk about the necessary tools and materials, and reveal the features of decoupage.
You can get many ideas for decorating furniture from master classes.
Master classes will help you do everything correctly, in the required sequence.
Decorating a chest of drawers yourself is a great opportunity to show your artistic taste and create an updated and completely unique interior object. A simple thing can be turned into an example of almost any stylistic direction.
Thanks to the art of decoupage, you can turn a simple boring thing into a unique art object.
Sanding and installing handles
Once the tissues are dry, carefully sand the edges to remove any excess paper. It is recommended to use 120 grit sandpaper. Then sand all the creases to achieve a distressed effect. After this, remove the dust.
Apply another layer of decoupage glue on top of the paper. Once dry, coat the surface with several coats of clear wood sealant to seal the decoupage properly. You can use a brush during this process.
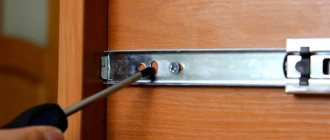
When the chest of drawers is completely dry, you can install the handles. Use an awl to pierce the paper and replace the handles in their original positions.
Found a violation? Report content
Painting with a stencil
If you want to decorate your chest of drawers with monograms, you will need a special stencil. Making a painting is not difficult. Materials needed include:
- stencil;
- sponge;
- acrylic paints;
- scotch;
- varnish
The stencil is secured with tape to the selected location so that it does not move while working. Using a sponge, you need to apply acrylic paint of the desired color to the stencil itself, which at the end of the procedure is carefully removed and washed well. The finished work is varnished in three layers, leaving time for each layer to dry.

