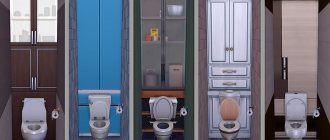
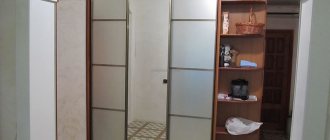
Stages of work on installing a sanitary cabinet
Dismantling works
Dismantling work is carried out at the beginning of work. Rarely are plumbing cabinets done separately from the renovation of the entire bathroom or toilet. To make the cabinet, it is important that the old structures around the pipes are dismantled: the tiles are knocked off the floor and walls, and there is access to the main structures of the plumbing cabin (floor, ceiling, walls). It is better not to install a cabinet on old tiles.
Pipe inspection
Before making a plumbing cabinet, it is wise to inspect the risers and valves in order to protect yourself from repairs after making the cabinet. As a rule, the manufacture of plumbing cabinets is included in the renovation of the bathtub and toilet. Checking and replacing the shut-off valves of the water supply system or organizing a new supply and distribution of water supply throughout the apartment is done before the cabinet is manufactured.
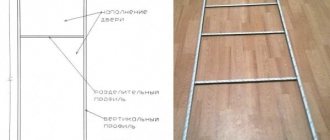
Plumbing cabinet drawing
The frame of the plumbing cabinet must be drawn in advance. The frame design must provide:
- Riser profiles in places where cabinet doors are installed;
- Installation of profiles in places where inspection hatches are installed (if they are needed);
- The frame of the cabinet must be carefully measured so that all the plumbing fixtures can fit. This is especially true for combined bathrooms and toilets. As a rule, every centimeter matters in them. The drawing of the frame of the plumbing cabinet must have all dimensional values.
Note: When marking the cabinet, you need to take into account the thickness of the plasterboard (1 sheet = 12.5 mm or 2 sheets of 9 mm = 18 mm) and the thickness of the facing tiles.
Installing a sink above a washing machine
Whatever lily sink you choose for your restroom, several rules are mandatory in any case:
Parts of the sink - in particular the drain pipes - should not come into contact with the washing machine. The point here is not only the risk of short circuiting, but also vibration - from constant shaking, the pipes can simply “loose”.
The washbasin must protrude slightly forward above the machine. This reduces the likelihood of accidental water entering the surface of the latter.
All wires of the washing machine must be in perfect order - in good condition, with strong insulation. Do not forget that even with the most careful installation there is still a risk of water getting on them.
And finally, before installing the washing machine, you need to read the instructions for it in order to finally understand whether the unit can be installed in close proximity to water appliances.
How to install a sink above a washing machine
To install a sink over a washing machine, you don’t have to resort to the help of specialists - you can do it yourself, there’s nothing complicated here. Installation proceeds as follows.
First of all, brackets are attached to the wall, on which the sink “sits”. Most often they come complete with plumbing fixtures; if not, it’s okay - you can buy them at any hardware store.
Before drilling the wall and screwing in the fasteners, figure out “roughly” whether the washbasin will fit comfortably. In other words, place it a few centimeters above the washing machine and see if this height suits you. If the faucet for the bathtub and sink will be shared, make sure that it rotates freely between them and that the water will not flow onto the floor or along the walls, but evenly into the bowls.
The edge adjacent to the wall must be sealed with a special agent.
Rules for installing a water lily sink siphon
- The siphon is attached before the sink itself is fixed above the washing machine.
- The flexible drain tube is attached directly to the siphon of the “washer”, and on top this structure is strengthened with a “clamp” - this way you don’t have to be afraid that the connection will accidentally break.
- And only after this the drain hose is inserted into the sewer pipe.
It is important to remind once again that parts of the sink should not come into contact with the surface of the washing machine - constant vibration will disrupt the strength of the connections. In addition, after installing the sink above the washing machine, before use, check whether the siphons and pipes are securely fastened, and whether water is leaking from somewhere
Choosing a cabinet door
You can write a separate article about choosing a bathroom cabinet door. There are plenty of options to choose from here. We will focus on the selection of special invisible doors for plumbing cabinets. They are made on a metal frame, tiled, and when the door is closed they merge with the wall.
For the manufacture of the frame, it is not the type of door that is important, but its dimensions. To install the door(s) in the frame, you need to install two frame racks. To install the doors, you need to install wooden blocks in these racks, to which the door(s) will be attached. The timber under the doors is attached to the frame with self-tapping screws. To strengthen the structure, you can attach the timber to the floor and ceiling using mounting angles.
Revision hatches
If in your apartment the sewer riser has an inspection hatch, you cannot sew it up without access. If you cannot reach the inspection hatch through the cabinet doors, you need to make additional inspection hatches in the cabinet. They are quite aesthetic and are sold ready-made.
Types of cabinet designs
The bathroom uses different furniture, which differ in size, purpose, installation method and other parameters.
Standard options
Most often, cabinets have a standard rectangular or square shape.
In most cases, such models are hung above the sink to store personal hygiene products. They are small and are rarely used for storing household chemicals and things.
Corner systems
Such structures are installed in the corner of the room and placed above the bathtub, toilet, washing machine or in empty corners. They save space, and their large depth allows you to store many different things in them. The disadvantages include the inability to install drawers, so corner systems only have shelves. Such furniture is equipped with hinged doors, installed on the floor or fixed on the wall.
With horizontal placement
They have a small height and a large width. Basically, they are installed high from the floor, so they do not interfere with free movement in the bathroom. Such models are most often equipped with doors that open upward, which makes their use more convenient.
Wardrobes
They are installed mainly in bedrooms and corridors. They are large, so they are not suitable for a small room. In a large bathroom closet you can hide a variety of items (towels, bathrobes, household chemicals, a drawer for dirty clothes). Sliding doors do not take up free space - you can install a mirror on them and equip it with lighting.
Built-in structures
Often there are niches or recesses in the bathroom walls that can be adapted for installing built-in cabinets. The main problem is the difficulty of selecting the finished product according to the given dimensions, so it will have to be made to order. It is impossible to rearrange it, and transporting it to a new apartment is irrational. In built-in structures you can hide a washing machine or make shelves and drawers for storing various items.
Hanging wall
All designs that are mounted on the wall save space. They are placed above the existing plumbing fixtures or washing machine in the bathroom. They come in different shapes, sizes and colors, which allows you to choose them to suit your bathroom interior.
Column cabinets
People call such structures “pencil cases,” but their correct name is column cabinets. They are used in small rooms, because... They have a small width and depth, but a large height. It is not necessary that the height of the pencil case be up to the ceiling: it can be level with the bathtub or washbasin. The presence of a large number of drawers and shelves allows you to store different items separately.
Floor furniture
These models are installed directly on the bathroom floor. Cabinets are large in size, so before purchasing them, you need to know where they will be installed. If the bathroom space allows it, this model can store all household chemicals, cosmetics and necessary bath accessories.
The lack of contact with the floor protects the material from direct interaction with water, so its service life is increased.
Making a frame for a sanitary cabinet
The frame of the sanitary cabinet is made according to the drawing.
- First, guide profiles (PN 27×27) are installed along the floor and ceiling;
- Then four (for a corner cabinet) or six vertical racks (PS) are installed at the corners of the frame. Two joining profiles are placed in the outer corners of the cabinet;
- Two racks are placed where the cabinet doors are installed. Wooden blocks are inserted into these racks to install doors;
- According to the size of the doors (hatch), cross members from the PS profile are installed. This creates a frame for the doors;
- To strengthen the structure and transverse fastening of plasterboard sheets, cross members are made in the frame structure from the PS profile.
How to connect profiles read: How to connect profiles for drywall. How to install corners in plasterboard structures, read Corners in plasterboard structures.
Important to note! Since the dimensions of plumbing cabinets are usually small, many craftsmen change technology and replace rack profiles (PS 50×50) with ceiling profiles (PP 60×27) and instead of racks they use guide ceiling profiles PNP (27×28), and crossbars are made from ceiling PP profile (60×27). Example in the photo.
This does not provide much savings, but in home construction it is important to obtain a durable structure. It's easy to explain. Bathroom renovation is done as a last resort and for the sanitary cabinet they use the leftover materials left over from the renovation and therefore you can find the most intricate designs of sanitary cabinets.
Making a shelf with your own hands
When all the necessary tools are in place, you can get to work.
If wood or MDF sheets are chosen as the material, you will need to follow the following procedure:
- make marks with a pencil along the edges of the slats;
- Glue blocks of equal size to the areas of the marks;
- draw additional marks in the center of each block, drill holes in them;
- assemble the structure using screws for the previously made holes;
- cover the finished structure with a varnish base for its presentable appearance;
- make special holes in the wall, fix dowels in them;
- mount the assembled shelf on the installed mounts in the wall.
The homemade shelf is ready! This option is great for any bathroom.
Tiling the cabinet
Before tiling the cabinet, you can seal the seams between the sheets of drywall and seal them with masking tape or mesh. Before laying the tiles, the surface of the sheets must be dust-free and the sheets must be covered with a layer of surface primer.
Laying tiles on drywall is done according to all the rules for tiling work. The tiles are laid using tile adhesive, preferably from the bottom up. You need to leave seams between the tiles, which need to be filled with grout mixture after laying the tiles.
Options for placing a washing machine in the kitchen
In the kitchen, the washing machine is placed so that it fits organically into the interior and does not interfere with the use of the room for its intended purpose.
When choosing a place for equipment, they give preference to the space next to the kitchen sink. This simplifies connecting the device to communications.
We list the options for installing the machine in the kitchen.
Under the table top
The easiest option is to install the machine in a niche under the kitchen countertop. This arrangement allows you to conveniently use the equipment. However, the noise from a working centrifuge may disturb household members.
The open arrangement of household appliances is typical for the high-tech design direction. But only if all the devices are designed in the same style.
Behind masking doors or curtains
If the machine does not fit into the kitchen design, you can hide it by hanging it on the door niche. This option will reduce the noise level, but will require more space. The unit itself should be smaller in size.
Important! If you decide to hide the washing machine behind doors, make sure that they open completely and that the countertop does not block access to the detergent compartment. Otherwise, it will be inconvenient to use the device. If there is not enough space to install a full door, but you need to hide the washing machine, use a masking textile curtain of a suitable color
If there is not enough space to install a full door, but you need to hide the washing machine, use a masking textile curtain of a suitable color.
Embedding
Embedding a washing machine is the most compact placement option. With this method, the device is placed in a cabinet, and the door is hung on the body of the machine itself.
A significant disadvantage of this option is the higher price of built-in washing machines.
Installation in a cabinet
Another functional placement option, suitable for large kitchens. In this case, the equipment is installed in a special kitchen cabinet, possibly together with a drying apparatus.
Such installation and connection require special skills, so it is better to entrust them to a specialist.
Price policy
A built-in wardrobe by default implies individual execution. Moreover, this concerns not only the appearance of the sash, in this case only the size varies, but also the dimensions of the frame, the number of elements and filling.
If the bathroom and the furniture in it are going to be used for a long time, then the material for the cabinet, even a built-in one, must be appropriate: MDF or chipboard with water-resistant impregnation. And, therefore, the cost of the product will be slightly higher than that of the same design located, for example, in the hallway.
The built-in model consists of a frame, filling and door. The material and design of all three components, as well as dimensions, determine the cost.
- The frame is an ordinary wooden beam treated with antiseptic compounds. In some cases, only a frame for the leaf is required, and if the door is sliding, then you can do without it. In this case, the shelves and drawer slides are fixed directly to the surface.
Particular attention should be paid to the decoration of niche walls. Condensation should not be allowed to accumulate here.
- Filling: regular shelves, drawers, drawers, laundry basket. The elements are standard, only the sizes vary, and even then only slightly. However, a large cabinet may include such non-standard cells as a compartment for a washing machine, for a heating tank, etc.
- A hinged door with the same design will cost less than a sliding door. In addition, the latter requires installation into the floor, which is not always possible. For the bathroom, it is recommended to choose an option made from MDF with acrylic film or acrylic panel, which is more reliable. Models with glass and mirror inserts will be more elegant, but also more expensive.
If the goal is not to decorate a built-in wardrobe, but, on the contrary, to hide it from view, then the simplest panel door, which is pasted over or finished to match the wall material, will do.
It is impossible to even estimate the cost of the model. To imagine how much a particular project will cost, you need to contact the furniture company, at least by phone, or use one of the online calculators on the company’s website.
If the bathroom area allows, then you can build a really spacious and stylish wardrobe into it, as in the following video:
Primary requirements
There are several points that you need to start with before building a cabinet in the plumbing unit.
We are talking about the requirements for a future homemade design.
- Depth. Do not overuse great depth. It is better to stay at the minimum values in order to simply use the space behind the toilet, and not completely deprive yourself of space in the bathroom;
- Moisture resistant. Use exclusively moisture-resistant materials that will not deteriorate when exposed to high levels of humidity;
- Availability of access to the riser, pipes and metering devices. The installation of the cabinet should not in any way interfere with the ability to get to the valve, take readings from the meter, etc.
If you have built-in toilets, then the communications are hidden here in advance, and corresponding windows or technological doors usually lead to them. The new cabinet behind the toilet should not block them. This is especially important for valves that may require emergency shutdown of water.
Next, we will consider several design options depending on the materials used.
Application of drywall
It is worth considering the option of how to beautifully make a cabinet, even if the plumbing unit is quite narrow. Drywall works great here. But be sure to take moisture-resistant products.
The process can be implemented according to the following scheme:
- First, a frame is made based on a galvanized profile. Make the drawing yourself, or use ready-made ideas that match the size of your bathroom;
- Using self-tapping screws, the frame is sheathed with sheets of plasterboard;
- The resulting seams are sealed with putty in 2 layers;
- Then the seams are grouted with a sanding mesh, after which the priming stage begins;
- It is also important to reinforce the seams. Moreover, it is better to take fiberglass rather than serpyanka;
- At the end there is another layer of finishing putty, sanding and primer.
Do not forget to provide technological openings, hatches and doors. If you are making a solid cabinet, then you will also need to make ventilation holes at the bottom and top. They can be covered with special ventilation grilles.
It is also worth talking about what to make the doors from and how to veneer drywall. After all, we are still interested in how to make a beautiful cabinet.
Tile is good for upper horizontal surfaces;
The lower and vertical planes are often painted using water-based emulsion;
PVC corners are applied to the corners using silicone sealant.
But these are just options. You yourself must choose finishing materials and decoration methods. Doors can also be made from plasterboard, or take ready-made facades, cut from laminated chipboard, etc.
Using plywood
Plywood is a cheap, strong and durable material. At the same time, these sheets are excellent for self-assembling a plumbing cabinet in a toilet.
The creative aspects of the future design should be formed based on your own desires, needs and vision of beauty.
It’s better to dwell on the technical nuances of manufacturing the structure:
- For such tasks, it is preferable to use moisture-resistant sheets of FK plywood with a thickness of 15 mm;
- Other sheets with increased moisture resistance are not intended for use indoors due to the phenol-formaldehyde they contain;
- If the length of the shelves does not exceed 0.5 meters, it is not necessary to use stiffeners. Enough with ordinary corners with self-tapping screws;
- Longer shelves are recommended to be reinforced with vertical plywood ribs;
- In this case, the rib width should be about 50 mm;
- Cutting sheets should be done with a circular saw. The jigsaw is not able to make the lines straight enough;
- It is recommended to treat plywood with parquet varnish, the base of which is alkyd-urethane. A total of 3-4 thin layers are required;
- Before varnishing, plywood must be sanded.
Plywood will serve as a frame and material for shelves, doors and other structural elements.
Decide on the decoration yourself, since here you can simply paint the plywood, use tiles, mosaics, beautifully paint the panels with your own hands, etc.
Wood
A material that does not require additional decoration. If you are using high-quality wood, it is better to emphasize its appearance by simply covering it with a layer of varnish.
The connection between the elements of a wooden cabinet is carried out with nails, self-tapping screws or dowels, supplemented with an adhesive composition.
To make the frame, you can use inexpensive wood, make shelves from thin slats, boards, or even take plywood, chipboard or drywall.
Laminated boards attract with their low cost, variety of decorative coatings and that’s it.
It is not recommended to use laminated chipboard in rooms with high humidity, since the moisture resistance of the material is quite low. Also, the material does not cope well with constant loads; there are problems with resisting deformation. If you are making a shelf more than 30 centimeters long, you cannot do without additional stiffeners.
If you want to make a toilet cabinet and plan to use chipboard, it will help you a lot when choosing material for the doors.
Standards for the placement of plumbing equipment and appliances
These are common standard values, but with the current variety of manufacturers and models, before laying pipelines, it is necessary to request a technical map with installation dimensions from the seller, and only then proceed to laying pipelines and water supply and sewerage. If nothing unusual is expected, then follow given sizes.
- 49 replies
- Construction vacuum cleaner with Dyson’s “Double Cyclone” I decided to blog about the creation of this vacuum cleaner. After some use of the previous version of the duster, some questions emerged about it.

