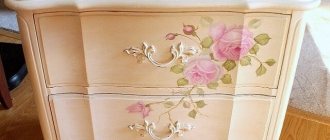
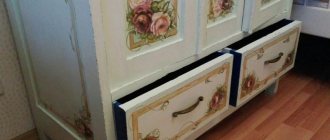
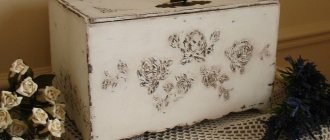
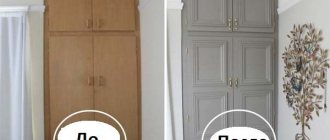
As a piece of furniture, functional and practical at that, a chest of drawers is simply irreplaceable, but as a visual image, especially in a modern interior, it can be archaic or outwardly a bit old. The simplest painting of the chest of drawers will help fix this, which will restore and refresh it and make it more fashionable and modern.
Photo of the change in appearance of the chest of drawers after painting
How to paint furniture without smell?
In addition, there are special odorless coatings that can be successfully used in damp conditions, which will be discussed further.
- Color spectrum
- Super durable acrylic paint
- Tinting paint
- Latex paint
- Silicone paint
18 Jan
2016 Interesting materials:
Where is the most protein in plant foods? Where is the most fiber in foods? Where is the most fiber found? Where do most Ukrainians live? Where is the most iron found in foods? Where can I get a barcode for a product? Where can I get a registration statement? Where will the Navy parade take place? Where is clean ecology in Russia? Where is a patent made in the Moscow region?
Preparing the base
You can remove the old coating from a chest of drawers in various ways: using washing liquids or a hair dryer. Both options are quite effective.
Using flushing fluids
To remove old coating from the wooden surface of a chest of drawers, it is convenient to use removers. This may be the well-known drug Antikras-Universal. The optimal temperature for working with the composition is from 8 to 25⁰C.
To remove grease, it is necessary to treat the surface with a solvent, and to remove dirt, it is enough to rinse thoroughly with water. After cleaning the surface from dirt, treat it with a remover, then leave for 5–15 minutes.
When the paint begins to bubble and crack, you can begin to remove it. To do this you will need a metal spatula. Old paint must be removed within 2.5 hours. Otherwise, the remover will dry out, making it difficult to remove.
After the paint is completely removed, re-treat the work area with solvent.
Many substances are highly toxic or have an unpleasant odor. Do not forget to use personal protective equipment and ventilate the room well.
Using a hair dryer
In order to get rid of paint using a hair dryer, you need to heat the paint layer, moving from bottom to top. Due to the hot air, the temperature of the paint will increase and it can be easily removed with a spatula. This must be done with a hairdryer until the surface has cooled down.
Putty
After you have cleared the chest of drawers of old paintwork, it’s time to start puttingty. Wooden furniture often contains cracks, fallen knots, chips and other damage. Such defects must be puttied, otherwise after painting the chest of drawers they will come out. Acrylic putties are best suited, and they can be applied using a rubber or steel spatula.
Grinding
After puttying, the surface will have various types of unevenness and roughness. For this reason, sanding is necessary to remove visible imperfections. Sandpaper No. 160–200 is suitable for this. If possible, it is put on a grinding machine, and if there is not one, then the surface is leveled manually.
Features of painting depending on the material
Furniture can be made from a variety of materials, so a thoughtful approach is required to avoid problems and damage to parts.
- Tree. A completely natural product that is not used very often due to its high cost. Working with wooden elements requires special care. A prerequisite is the removal of the previous layer and thorough sanding. To paint such material, all types of compositions are suitable.
On a note! Furniture can be partially or completely made of metal. Working with such objects requires precise determination of the type of material and must be accompanied by careful preparation.
Required tools and materials
Only through the use of appropriate tools and high-quality materials can excellent painting results be achieved.
Basic tools used for repair work:
- Brushes – available with natural bristles (for working with oil, alkyd paints) and artificial fibers (for applying latex and acrylic compositions);
- Paint rollers make repair work much easier. Due to the simplicity of the design, no special skills are required. It is especially convenient to paint large areas of the surface with rollers (wood panels, facades). The only drawback is that it is impossible to paint small or narrow areas;
- Paint sprayers/paint guns allow you to apply paint evenly and get a smooth surface (sometimes difficult to achieve with a brush or roller). The time for repair work is also significantly reduced;
- Sandpaper, wire brush, masking tape, spatulas.
For high-quality painting of objects, various compositions are used. When choosing paints, it is important to consider their features:
- Oil paint is created on the basis of drying oil, pigments, and various fillers. The opaque coating is quite durable and can be washed with detergents that do not contain abrasives. It is better to apply paint with brushes. A significant drawback is the long drying time of the painted surface and a strong unpleasant odor;
- Water-based compositions are characterized by harmlessness and quick drying. You can apply the paint with a roller - the layers are uniform. Water-based paints are even used for painting leather furniture (it is recommended to apply the composition with a sponge). The mixtures are vinyl (durable and easy to clean), acrylic (create a protective breathable layer), latex (form durable and strong surfaces). Acrylic paints are great for DIY coating of chipboard furniture. A very popular trend in furnishings is painting furniture with acrylic (photos are presented below);
- Solvent-based paints are used to create alkyd paints (ideal for painting garden furniture and outdoor terraces), silicone paints;
- The technology for painting furniture involves the use of a primer, which ensures adhesion of the paint/varnish and increases the durability of the furniture (disinfects and protects the material). Furniture primers are produced on different bases (acrylic, alkyd, silicone-acrylic, shellac, epoxy). According to their functional properties, they are antiseptic, deep penetration, and universal.
Depending on the type of furniture (room, garden/country) and material, the type of paint is selected. At home, it is better to work with acrylic paint - it is easier to apply, does not have a strong odor and dries quickly.
Oily
Water-based
Alkyd
Master class No. 3. Painting a polished cabinet
Some people can’t believe that you can make such a piece of vintage-style candy out of an old polished cabinet, without losing functionality. And then we'll tell you how to do it.
Materials and tools.
- Old polished cabinet;
- vintage paint (regular acrylic matte);
- white spirit or acetone;
- brushes;
- sandpaper or sanding machine;
- gold handles for drawers.
Painting process
Step 1.
Despite the fact that we are creating a vintage effect, there is no real need for the dresser to look shabby. Therefore, we carefully prepare it for painting.
- To do this, we remove all the old fittings and sand the entire surface of the chest of drawers. First we use coarse sandpaper, then fine-grained sandpaper.
- It is not necessary to putty and prime, except for serious chips on the surface. Degrease the surface with white spirit or acetone and let it dry.
TIP: Since the paint will be applied in several layers, it is very important that it is well absorbed into the wood.
Step 2.
- Cover with the first layer of paint. Very thin, you don’t have to try too hard and leave unpainted areas.
- Sand the first layer with fine-grained sandpaper. We clean off dust, but do not use wet rags, sponges, etc. in the process. Wash only with a dry cotton lint-free cloth.
- Next, apply a second layer of paint, also rubbing it in. Let it dry and rub it in a little again.
- We repeat this until the color becomes even, but a little rough. For this we used matte paint with a vintage effect. After a few days, it will be completely absorbed and dry and begin to turn yellow (pay attention to the instructions on the can so that you don’t have to repaint everything again later). To avoid this, you can try this coloring method on a small and inconspicuous area. Proceed with full coloring when you are satisfied with the result.
How to protect chipboard from moisture?
Methods for treating chipboard from moisture
- Surface treatment of plates
- Lamination
- Laminating
- Paint coating
- Finishing with paper-laminated polymers
- Pasting with polymer films
- Vacuum pressing
- Veneering
17 Jul.
2016 Interesting materials:
How long does it take for money to be returned on Steam? How long does it take for a ticket to be refunded? What happens if you see a lot of money in a dream? What to say when you give money? What is the basis for issuing money from the cash register? What to keep in your wallet to attract money? What do you need to know to transfer money to PayPal? What to put on your desktop to attract money? What is maternity money? What is the cash balance limit?
Veneer covering
To restore a wooden chest of drawers with your own hands, you can use a method such as veneering. To do this, it is better to buy natural (planed) material and glue it to a surface sanded with coarse (P60-P80) sandpaper using contact glue, for example Bindan-S, Moment, etc. For thin materials, PVA construction glue is also suitable.
Also, do not forget that before coating, the surface must be cleaned and hidden with one layer of wood primer, waiting for it to dry completely. Also, the material should be chosen with a moderate thickness, approximately 1.5-2 mm. You can choose the texture at your discretion, taking into account the interior of the room and the cost.
It is better to glue the veneer with small tolerances along the edges, and then cut it off using a jigsaw or plunge-cut saw. Because the edges of old furniture are not always smooth. You can, of course, use a utility knife and a plywood strip as a cutting guide. There are many options.
However, I note that veneer made from softer types of wood (pine, maple, spruce, etc.) or red wood, and a small thickness - 1.5-2 mm, is more or less amenable to processing at home. If you take thicker wood, it will be stronger, but this strength is not determined by anything. 1.5 - 2 mm is enough. It can be cut off with a regular stationery knife in several passes.
Creating a new coating
The type of coating you use will depend on the type of furniture you deal with. Not so long ago, inexpensive wooden furniture was first tinted with stains based on decoctions of various plants, and then covered with pure wax melted in a water bath or mixed with turpentine in a 50/50 ratio. More valuable ones were primed with natural drying oil or alkaline varnish, and then covered with resin varnishes or sanded with an alkaline polish.
It is still possible to create a coating using ancient technologies today, but many novice restorers prefer to use modern coatings - special oils, stains and varnishes for furniture.
If your goal is not to emphasize the beauty and texture of wood using transparent varnishes and stains, you can create an opaque color coating with acrylic paints.
The vintage look that is popular today can be achieved using the decoupage technique and applying craquelure varnish - when it dries, it will “draw” characteristic cracks on the pre-painted surface.
Tips from our forum members on transforming furniture using decoupage and craquelure can be found in this topic.
Master class No. 1. Stencil painting
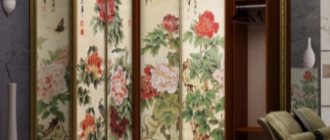
Everything is mixed in this closet - romanticism, Chinese motifs, and even something from Gzhel. Everyone sees something different in him. Let's learn painting techniques.
Materials and tools
- Prepared cabinet;
- white paint;
- solvent;
- blue spray paint;
- gold paint;
- stencil;
- brushes
Step by step guide
Step 1.
- We remove all fittings, locks, handles, etc. from the cabinet. Using familiar technology, we will prepare a wooden cabinet for painting.
- We spread newspapers or a large piece of polyethylene on the work surface (on the floor) so as not to damage other furniture.
Step 2.
- We take white enamel and solvent. In a small plastic jar, dilute paint and solvent according to the instructions on the paint can.
- The paint consumption is also written on the can; it is better to use this information and immediately dilute the required amount. If you mix too little paint, you may end up with a different color the second time.
- We make the background of the picture - apply the first layer of paint . Leave until completely dry.
Step 3.
- If the color turns out saturated and you like it, then take a stencil and apply it to the cabinet . Carefully glue on the front side and side walls so that there are no bubbles.
- Shake the spray paint well and spray it over the stencil . For an even color, one layer of blue paint will be enough, so we do everything the first time.
Step 4.
While the blue paint dries, paint the hardware removed from the cabinet in gold leaf. After the parts have dried, screw them into place.
We remove the stencil from the cabinet and place it in the most visible place in the room - after all, it now deserves special attention!
You can decorate the closet with a stencil, for example, with flowers.
Work order:
At first I wanted to paint it like this without removing the door, then I realized that it would be inconvenient. So I took a risk. and took it off. It turned out not to be difficult. True, worries about how to put them back on were present until the last moment. In the end, I also screwed it myself; I didn’t have the patience to wait for my husband))).
I pulled out the built-in lights and wrapped them in a suspended state with masking tape. The same tape was used to protect the walls on the sides of the cabinet, the floor, and the mirrors on the doors. Prepared the workplace. I decided to paint it. on the bed)))! I covered it carefully with polyethylene. And I have never regretted this choice. The bed was large and high, everything fit, there was no need to bend over and crawl on all fours. I prepared approximately equal stacks of books and wrapped them in cling film. They are needed as substrates so that the doors can be lifted and painted as if suspended; the painted edges will not come into contact with a flat surface.
Stage 2.
I sanded all surfaces that needed to be painted. It is necessary to sand lightly, without fanaticism, with the finest sandpaper. Light circular movements. Purpose: to create roughness without removing the laminated layer. If there are dents and scratches, they should be filled with putty at this stage. After sanding, thoroughly wipe all surfaces with degreaser. It will remove dirt, grease marks, and everything that can disrupt the adhesion of the primer and paint.
Stage 3.
Primer. I went through hard-to-reach places with a brush, the rest with a roller. A thick layer is absolutely not necessary; it must be covered with primer without drips and in a thin layer. Uneven coloring is not a problem, but there should be no gaps. I didn’t prime the rattan inserts; the paint applied well to them anyway.
They are easy to paint - just roll them with a roller; with a brush it is more difficult not to go beyond the edges. Wipe off any blemishes immediately with a cloth. Each layer was dried, as recommended, acrylic dries in an hour and, in principle, you can carefully turn it over and paint the door on the other side.
Stage 5.
I assembled the closet. I screwed the doors and handles. I removed the masking tape and cleaned everything up. At first I planned to keep the doors open for two days, I was afraid that they would stick. Nothing like that - you can close it right away.
Dresser.
Mirror.
Important!
Acrylic paints dry quite quickly “touch-free”, but polymerize for at least a month; with a primer the process can take even longer. The painted product can be used almost immediately (or it’s better to wait 2 days) and even wiped with a damp cloth. But within a month, the coating remains very vulnerable; it must be handled carefully, not scratched or rubbed with force. If shelves or horizontal surfaces are painted, then it is better not to immediately place things on them that may “stick”, wait until the paint “sets”. Although I immediately put everything I needed on the chest of drawers, nothing stuck).
Here you go. The work is labor-intensive, but I was pleased with the result. The paint job ends up looking no worse than the factory paint, no brush marks are visible. It holds up well too. I haven’t tried scratching, I use the furniture as usual. But usually I don’t scratch it))). Although I will conduct an experiment in a month. The room has been pretty updated). Alas, the photos after compression leave much to be desired; in fact, the colors are brighter and cleaner, but this is not so important.
If you also want to redo furniture and have questions, write and I will answer. And if such a rework seems complicated to someone, I assure you that it is not, labor-intensive - yes, but quite doable without any experience. You can just start with internal, unnoticeable parts, or with small furniture, a chair, for example. The rework took three days. At the same time, I managed to cook and... suffer from bronchitis + my leg is still slightly lame after the cast. The “disabled painter” was able to paint, which means you can too))).
How to paint a chest of drawers white and others: do-it-yourself painting instructions, video and photos
As a piece of furniture, functional and practical at that, a chest of drawers is simply irreplaceable, but as a visual image, especially in a modern interior, it can be archaic or outwardly a bit old. The simplest painting of the chest of drawers will help fix this, which will restore and refresh it and make it more fashionable and modern.
Photo of the change in appearance of the chest of drawers after painting
Wallpaper or film
When using film or any other paper covering to update your cabinet, you should remember that we use the cabinet every day. And usually such a coating does not last long, but it is very simple to implement.
We recommend using this method in conjunction with painting: look at the beautiful ideas for decorating a cabinet using film and painting.
Let's talk about the most common floor colors
White floor in the interior
White color is associated with lightness, spaciousness and purity. With such a floor, the room will be visually larger and wider. The feeling of spaciousness will dominate. But there will also be more coldness. Absolutely any interior color can be combined with a white floor. Very good in the style of minimalism, art deco, constructivism, hi-tech, Indian and, of course, everyone’s favorite eclecticism.
What are the baseboards selected for in the case of a white coating? Focus on any components:
- doors,
- platbands,
- window frames
- and even chandeliers.
Since the floor itself is absolutely non-binding, the plinth can simply become a decorative element and a connecting link.
Gray tone
Elegant, discreet, languidly calming grey. It is now so fashionable that it can be found in any collection of finishing materials, be it furniture upholstery, window frames or suspended ceilings.
Gray color harmonizes perfectly with:
- white,
- black,
- red,
- pink,
- turquoise,
- lilac.
A touch of bright yellow also looks great against a large gray background - a small fluffy sunny rug on a smooth floor will look great. In this case, it is best to choose skirting boards that exactly match the tone.
Beige, yellow, golden, brown colors
This is a classic of the genre, especially if you choose wood-style flooring. This floor suits absolutely any interior style in general. There is no escape from the classics; natural shades are combined with everything, so it turns out to be a vicious circle of the rule of permissiveness.
