Plasterboard structures have not lost their popularity for many years, as they can make any design original. Drywall can be used to create unique structures of varying complexity. This material is distinguished by its simplicity and versatility in work, so even a person without experience will be able to create unique items for their interior using it. In addition, there are several types of drywall, which allows you to choose the most suitable one for each case.
Drywall
Features of the material
Drywall is a unique building material produced in sheets. Due to its specific structure and good flexibility, it can be applied to various surfaces without any problems, which makes it possible to realize the most daring design solutions. Among consumers, plasterboard arches and ceilings are most in demand. GCRs are light in weight, so they do not require additional reinforcement during installation.
To make plasterboard shaped parts, you need to prepare a diagram in advance, cut out the required elements according to them and secure them.
The main feature of the material is its ability to change shape after getting wet. This not only makes it easier to create shapes, but also allows you to use drywall to level the surface without much effort.
Experts note several undeniable advantages of drywall:
- creates an excellent even coating;
- can be used as a base for wallpapering, painting and tiling;
- allows you to create an original interior;
- fireproof and durable;
- inexpensive;
- ecologically pure;
- has good noise and heat insulation.
The main disadvantage of the material is fragility. Because of this, it cannot be used on a wall that is subject to strong mechanical stress.
Disadvantages of plasterboard ceilings
Despite the large number of advantages, many consumers prefer to use other types of finishing materials for ceiling installation. This is due to the presence of some disadvantages of this type of material:
- When installing drywall in typical apartments, you should calculate the surface level, since the ceiling can significantly reduce the height of the room due to the thickness of the profile.
Downgrade
- Installing a suspended ceiling from gypsum plasterboard sheets is a labor-intensive and time-consuming process, associated with the formation of a large amount of dust and waste from cutting the material.
- In the absence of experience in installation and an irresponsible approach to the implementation of a design project, the surface of the ceiling turns out to be uneven, and during operation, cracks may form and a rapid loss of attractive appearance.
- The construction of a structure using gypsum plasterboard sheets does not relieve the owner of the premises from wet processes. The most popular type of finishing the surface of plasterboard sheets remains painting in different tones.
Installation defects
Plasterboard ceilings are difficult to repair, and in the event of mechanical damage, as a rule, the entire surface of the previously installed structure must be redone.
Varieties
Plasterboard structures are boxes that are sheathed with sheets and decorated with decorative cladding. It is rational to use them for interior work, thanks to which an original interior is created in apartments and private houses.
Plasterboard compositions are:
- complex;
- simple;
- curvilinear;
- smooth;
- fencing.
According to the area of use, the following design options are distinguished:
- Ceiling. To level ceiling tiles, it is rational to use simple single-level systems. For the original design of the premises, you need to choose a multi-level ceiling containing shaped inserts, lighting and stretch fabric.
Ceiling
- Wall. GCRs are suitable for performing simple finishing in order to hide various surface defects, and for creating chic partitions that divide the room into small zones. Drywall is also suitable for creating a “standard” wall separating rooms.
- Arch. Decorative arches have been in demand among consumers for many years now. The arch can be trapezoidal, rounded and rectangular. An elliptical or semicircular arch would be very original.
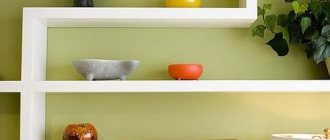
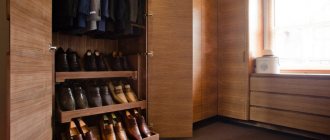
- Furniture. GCR is constantly used to create bookshelves, shelving or fancy niches. In addition, plasterboard makes beautiful bar counters, wardrobes and walls for the hallway or guest room. The finished furniture is beautiful and multifunctional.
- Decorative box. Various wires, etc. are hidden in this design. Drywall is often used to level window and door slopes and to hide the ventilation system.
- Decor elements. Due to its unpretentiousness and practicality, columns, false fireplaces and geometric niches are made from gypsum plasterboard.
Important! In rooms with a high humidity coefficient, it is rational to use moisture-resistant plasterboard sheets.
DIY plasterboard niches in the living room
Any plasterboard structure is based on a frame made of metal profiles and the sheets themselves, which are used for cladding. To make a niche of even the smallest size, you need a special approach. You should definitely consider the following:
- The shape of the niche should be in harmony with the size of the living room. For example, a niche can be placed on the wall along which the sofa will stand. In this case, you will be able to arrange a small home library or arrange various accessories. These could be family photographs, figurines or small vases with decorative plates.
- If there is a niche made of plasterboard in the living room, then the living room no longer needs other bulky furniture, for example, walls or slides. This is an ideal option for a small room.
- The cost of plasterboard structures is much lower than the price tag for cabinets or walls. It doesn’t take much time to make a niche with your own hands.
- The external decoration of a niche made of plaster structures can always be changed if desired.
Modern redevelopment of the living room using plasterboard is an ideal option for decorating a fashionable, stylish and comfortable interior. More and more apartments need zoning, which can also be done using drywall.
Semicircular arch made of plasterboard
Dimensions
As a rule, the size of plasterboard sheets is 250 * 120 * 1.25 cm. Some manufacturers make sheets 1.2 m wide and 2-3.6 m long. The thickness of gypsum plasterboard varies between 6.5-12.5 mm.
The correct selection of gypsum boards is based on their size and the surface on which they will lie. For example, to create a complex structure, it is best to use arched plasterboards: their thickness is 6.5 mm, so they will bend well.
To create partitions, niches or level walls, it is more rational to use wall plasterboard (its thickness is 1.25 cm). It is better to make ceiling structures from ceiling gypsum boards, the thickness of which is 0.8-0.9 cm.
TV stand
Why buy an expensive TV stand if there is drywall left after renovation? You can make a plasterboard cabinet to your liking, the desired length, with an interesting finish. To produce a plasterboard TV stand, you will need dimensions and a drawing. Markings are made on the wall or in the corner with all the necessary points. The drawing indicates the height, length, width of the cabinet. The profile is attached to the wall according to the markings. Another profile is inserted into this profile, and so on. This creates a frame base for the cabinet.
To make the frame rigid, the profiles that create the depth of the cabinet are reinforced either with another profile or with a wooden lath. A sheet of chipboard or other dense material is attached to the top, where the countertop is supposed to be, because drywall can bend and break under the weight. Sheathing with plasterboard does not take much effort and time. You should prepare a plasterboard cutout in advance. All corners and joints are reinforced. Next, the TV stand is subject to the desired decor. The best option is to cover the structure with decorative adhesive film.
Color spectrum
GKL has a wide range and is one of the most purchased building materials. Each type of product has its own size, properties and technical indicator. When purchasing drywall, it is important to remember that its color indicates the features and specifics of the application. You also need to take into account that the color of the material will not affect the external finish.
It is customary to construct interior partitions from gray gypsum boards or use them to line walls. Such sheets are the most affordable material for cladding surfaces in buildings with normal moisture and temperature levels.
Green plasterboards are characterized by increased moisture resistance, so they can be used in rooms with a humidity of more than 65 percent. Red or pink gypsum boards are fire-resistant, so they are used for ventilation and fireplaces. Yellow plasterboard is suitable for external work because it is not afraid of moisture, drafts and direct sunlight.
Finishing walls with plasterboard (step-by-step instructions for beginners)
Drywall is one of the most economical materials for leveling and finishing walls. It is quite easy to work with, so even a person without experience can handle it.
Today we will try to look at a process such as finishing walls with plasterboard, step-by-step instructions.
First you need to make a list of the necessary materials and tools. To work you will need:
- Plasterboard sheets;
- Drill;
- Fastening materials;
- Putty knife;
- Putty;
- Stationery knife, ruler and pencil;
- Level;
- Roulette;
- Screwdriver and screws;
- Wooden slats or metal profile, depending on the installation method;
- Rubber hammer;
- Sandpaper.
There are several ways to decorate walls with plasterboard sheets.
Style and design solutions
From gypsum plasterboard you can make structures that will not only decorate the interior, but also divide/connect the room. For example, an arch serves as a stylish interior transition and blends harmoniously with the interior of the entire room. To make the structure look complete, it can be decorated with wallpaper or masonry.
Plasterboard niches are gradually gaining popularity. They differ in depth, size and shape. For beauty, you can install lighting or colored glass. Kitchen and bathroom walls finished with plasterboard are most often covered with tiles, artificial stone or brick.
Arches
With the help of arches of various types, corners are smoothed out, making plasterboard doorways and other elements of the apartment’s interior softer and more modern. To create an arch, you will need a set of drywall tools and material, which includes an arched profile, drywall, and self-tapping screws.
Plasterboard arches in the interior The profile can be bent by cutting its edges with a certain step. The profile should be secured using self-tapping screws. First you need to attach it vertically, then bend it on top. If lighting is provided in the arch, then you should lay a corrugated wire with wires under the drywall. This must be done carefully. The wires must be solid and not touch metal.
The wires are hidden and laid in corrugation. Drywall is applied to the profile. For better bending, you need to take a sheet 9 mm thick. There are several methods for bending gypsum boards. Having chosen one of them, the bent, cut sheet of drywall is attached to the profile with self-tapping screws.
After installing the gypsum board, you should start reinforcing the corners, joints and subsequent decoration. Plasterboard arches in an apartment or house make the atmosphere more pleasant, the room larger and brighter.
Option for a plasterboard arch in the interior of a room
We choose and do it ourselves
Before placing a plasterboard structure, it is necessary to draw up a drawing with detailed indications of the dimensions and location of installation of the elements.
Grouping parts is not a complicated process, but to make it take as long as possible, it is recommended to follow some rules:
- Determine the center of the room, mark the guides. Then attach the profiles to the points marked according to the drawing. When constructing a profile arch, reinforce it with racks, maintaining a distance of 20-30 cm.
- Fix the upper guide arches.
- Make parts from gypsum board. To make them bend well, wet them a little with water.
- Cut off the protruding drywall with a knife and putty the structure. Primer and putty will help make the arch even.
Let's look at the most successful gypsum plasterboard designs used in various rooms.
Living room
It is best to decorate a room with high ceilings with a suspended multi-level ceiling. In a small room, it is more rational to make a plasterboard niche. The design of plasterboard shelves, especially those decorated with lighting, will look good next to the sofa.
Bedroom
The design of this room is best based on simple shapes and clear lines. In addition to the ceiling, in a gypsum plasterboard bedroom you can decorate the headboard of the bed, creating an original false wall. Plasterboard bedside shelves, illuminated by bright lighting, will add romance and comfort to the room.
Bedroom
Bathroom
In this room, only moisture-resistant gypsum boards should be used. Hanging simple structures look good in a small room. Suspended ceilings with LED lighting are suitable for rooms of any size.
Bathroom
Hallway
A “boring” room like a hallway can be refreshed with a plasterboard structure. Before building a structure, it is important to accurately calculate its size and area of the room. Designers advise installing an arch, a multi-level ceiling or a false wall in the hallway. It is recommended to use non-staining materials for finishing structures.
Kitchen
Only moisture-resistant plasterboard sheets are installed in the kitchen. They can be used to create partitions or corner cabinets.
Kitchen
Briefly about the main thing
Plasterboard ceilings are the most popular modern material when implementing design solutions for decorating the ceiling space. The interior can be decorated in a classic, modern, trendy, ethnic, or purely individual style. When installing a plasterboard ceiling, you should pay special attention to the quality of the material and the subsystem of galvanized profiles, as well as purchase the necessary set of tools. It should be noted that installation of a plasterboard ceiling is only part of the interior design. Upon completion of the work, the structure must be finalized, leveled and painted with special paints and varnishes, the color scheme of which coincides with the solutions reflected in the design project of the room.
What you need
In order for a gypsum board structure to last as long as possible, it is important to use the right tools to create it. The frame for plasterboard is made from cutter 0270 and U-shaped metal profiles 3-6 m long. Also, installation of the frame involves the use of guide and support profiles, which help create the required angle of the metal structure for drywall.
The structure is fastened with hangers, screws and dowels. The building can be sheathed with SP 551012000 sheets. Working with gypsum boards is impossible without a tape measure, level, tape roller and ruler.
Useful tips
If you decide to work with plasterboard yourself, you need to remember a few simple but very important rules:
- Only sheets with a perfectly flat surface are suitable for work. The presence of microcracks makes the material unsuitable for use.
- Installation work must be carried out at a temperature of at least +10 degrees.
- When purchasing material, it is important to consider the humidity of the room and possible temperature indicators.
- It is prohibited to use nails to secure gypsum boards.
- Heavy objects should not be hung on plasterboard walls.
