Restoration of wooden surfaces
No matter how carefully you handle the furniture, abrasions, scratches, and stains still appear. They are easy to eliminate. The main thing is to know how and with what.
- If the wooden surface has simply lost its shine, find a wood care product that contains orange oil. Take a clean sponge, dampen it slightly and microwave for 20-30 seconds. Spray the product from a spray bottle, then wipe with a hot sponge (hands should be wearing rubber gloves with a coating on the inside).
A hot sponge and orange oil will restore the shine of wooden furniture - If there are scuffs or stains on the wood, you can try to get rid of them by rubbing it with a banana skin. It works well for minor injuries.
- More serious stains require serious measures. These are retouching markers (available in furniture stores), denatured alcohol and wax. First, clean the surface (dishwashing detergent diluted in water is the best solution). After cleaning, dry the wood with alcohol: use a moistened swab to rub the lightened areas well. In most cases, the color is restored. In deep scratches, alcohol does not restore the color; they are painted over with a marker of a suitable color. To add shine, the top surface is covered with wax and polished with a soft cloth.
Such transformations are possible using a marker, alcohol and wax. - If you need to smooth out small unevenness, you can use a nail file. For meticulous work, it is easier to use than sandpaper.
- If the wood is locally swollen from moisture: place a leaking vessel, you can quickly get rid of the defect and neutralize its consequences by mixing salt and olive oil. The paste is applied to the damage and rubbed in a circular motion. Leave for 20-30 minutes. The salt will draw out the water, and the olive oil will restore elasticity to the fibers.
- If there are chips, you cannot do without putty. Suitable for both wood and automotive applications. The best way is to buy a light one and add color to it as needed. The chip is covered, a little putty is spread on the adjacent surface. After drying, everything is smoothed out well with fine-grain sandpaper.
You might be interested in reading what types of wall shelves there are (with drawings).
Pros and cons of DIY furniture restoration
Before you begin restoring any piece of furniture, it is worth assessing the advantages and disadvantages of doing the work yourself. Let's figure it out - should you do it yourself, or entrust the restoration to a professional furniture maker?
A simple restoration can be done quickly and efficiently yourself
Advantages of doing the work yourself:
- Saving money. Firstly, you don’t have to pay a restorer for the work, and secondly, to deliver the furniture to the workshop, you may need the services of loaders and a truck.
- Possibility of control. You independently purchase all the necessary materials for furniture repair, and have the opportunity to carry out each stage of the work exactly according to the instructions, thereby obtaining a better result.
- Realization of your own ideas. The furniture will look exactly the way you want. If you wish, you can change or supplement the progress of work without coordinating the adjustments with anyone. So, it may seem to you that the resulting paint shade is not the best and the furniture needs to be repainted, whereas once you receive the furniture from the workshop, you will not be able to change anything.
Complex pieces of furniture are best left to professionals
Disadvantages of home restoration:
- Recreating the original shape of furniture, coverings or complex elements is best left to a professional craftsman. A beginner does not know many of the nuances, and when doing complex work for the first time, you may not guess correctly and ruin the furniture forever.
- Saving effort and time. Having handed over the furniture to a restoration workshop, you forget about it for a while, and then accept the finished result. If you do the repair or restoration of furniture yourself, then you will have to work on weekends or in the evenings - during the time allotted for rest. It may suddenly turn out that work will be a burden to you.
- Lack of space to work. When restoring furniture, you will certainly encounter wood dust in your apartment, the smell of various chemical compounds, and cluttered space. If possible, work should be carried out in a non-residential space - in a garage, on a loggia, in the warm season - on the street.
Many wood products have a strong unpleasant odor.
Advice! If you nevertheless decide to carry out restoration work in the apartment, allocate a separate room for this. All other furniture must either be taken out or covered with film or sheets. The floor should be covered with newspapers to avoid the appearance of permanent stains from spilled removers, varnish or paint.
Disposable protective covers for furniture can be purchased at hardware stores.
Restoring polishing
Restoring a layer of varnish is a complicated matter. Any furniture restoration begins with cleaning and degreasing, and repairing the varnish coating too. We use dishwashing detergent diluted in water: safe and reliable. After drying, we proceed to refinishing the polish.
- On dark furniture, a scratch can be painted over with iodine, achieving the desired color in a number of layers or diluting it with water. If you have furniture markers, you can use them.
- Deep scratches that have turned white cannot be painted over like this. There are other methods: Make mastic from 4 parts melted wax and 3 parts turpentine. This paste is applied to the polish and rubbed with a soft cloth.
- If you have shoe polish of a suitable color, you can cover it with it and then polish everything with a cloth.
Scratches are painted over, then the coating is restored
You can simply refresh the faded polish on furniture using mixtures you prepare yourself:
- Two parts each of linseed oil and turpentine and one part vinegar. Mix everything, apply with a swab, wait until it is absorbed and polish.
- Mix oil and beer in equal parts and wipe the furniture with this mixture. After it has been absorbed, rub.
- The surface will be more shiny if you boil beer with a piece of wax, cool it and apply it slightly warm to the furniture. When the composition is absorbed, the surface is rubbed until shiny.
A few more recipes in the video.
How to remove polish from furniture
Quite often you have to remove the polishing: it is not the most fashionable finish. Modern furniture is most often painted with opaque or tinted paints, and the surface is matte. In any case, the polish must be removed. There are several ways. Since varnishes come in different compositions, you have to select them experimentally. But one of the methods should work.
- You can remove old polish from furniture mechanically. If you have a sander, the process will go faster; if not, take coarse-grain sandpaper and remove the varnish layer until wood appears. Then take a fine grit and sand it to a smooth surface. Mechanical removal does not always work. Sometimes even a grinder does not give results: the polish does not come off, but begins to melt and stink. Then they change tactics.
- You will need a piece of old glass. Put on gloves and break it into several fragments. Use the sharp edges that have formed to scrape the coating down to the wood. If there are chamfers and recesses, it is convenient to scrape them out with sharp edges. After the main layer of polishing is removed, everything is brought to a smooth state using fine-grain sandpaper.
Often, restoring furniture with your own hands requires tough measures: some types of polishing can only be scraped off with glass - If working with glass does not appeal to you, chemical methods remain. There are ready-made products for removing polish. You can work with them either in the open air or in a draft: the fumes are harmful. How to remove polish - you need to read on the packaging. The means are different and the duration and order of processing may vary.
How to paint polished furniture
If old furniture was prepared for painting, it must be cleaned of dust, wiped with a damp cloth and allowed to dry. Then level everything with putty, smooth out all the unevenness, wait until it dries. Take sandpaper and sand again, first with medium, then with fine grain. Next, apply a layer of primer and wait for it to dry.
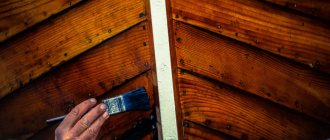
Applying varnish with a brush when restoring furniture polish
You buy a primer for the paint you are going to use, or you can dilute the paint with a compatible solvent and coat it instead of primer. After drying, you can paint.
You can paint with a roller or brush. Usually several layers are needed: do not try to apply a lot of paint at once, as drips may appear. It is better to apply several thin layers. This way the surface will be smooth and uniform. Another trick: for uniform coloring, layers are applied in different directions - along, then across. This also applies to applying varnish.
Some types of varnish are easier to work with when they are warm. They are heated a little and then applied with a spray gun or brush. When heating, you need to be careful: vapors may flare up.
In order of painting: first paint the internal surfaces, edges and joints, then move on to the external ones. With this sequence, there is less chance of getting dirty or touching an already painted surface, ruining it.
If the varnish coating is smooth, without defects, and it needs to be painted over, you can do without removing this layer. There are special primers for complex surfaces. Apply them to the surface and paint after drying. They have components that penetrate even the varnish layer. Therefore, the paint will apply well and last a long time. But such soils have a disadvantage: they are expensive. But they save significant time.
Some secrets of painting wood (including brushing and painting in two colors) are in the article “How to paint lining.” Watch the video for a few secrets to applying acrylic paint evenly.
If the restoration does not bring the expected result, maybe you need to change the appearance? How to remake furniture in a new way is described here.
Necessary tools for work
To perform the re-stretching procedure yourself, you need to have a number of tools in your arsenal that are important for obtaining an effective result:
- screwdrivers, screwdrivers, wrenches - all of the listed devices will be needed in order to dismantle old furniture. Before reupholstering, all furniture parts must be twisted and disassembled, because each element is updated separately;
- pliers or round nose pliers, as well as a chisel or a special furniture staple puller. After disassembling the furniture, you need to remove the upholstery, which is secured with staples. When pulling them out of a sofa or chair, you need to help yourself with pliers;
- Upholstery of upholstered furniture at home is carried out using a furniture stapler and staples of appropriate length. When choosing this tool, give preference to the mechanical option if you plan to cover a small number of products. If large-scale work will be done, it is better to purchase an electric stapler.
In addition to the listed devices, sharp scissors, a construction knife, a hammer and a tape measure will be useful. Immediately after selecting the tools, proceed to furniture repair - reupholstering one small item will not take much time.
How to restore veneer
Veneered furniture requires a special approach. The means are basically the same, the methods are different. For example, if after getting hit the veneer is swollen, fill a disposable syringe with PVA glue, pierce the bubble, and inject glue into the cavity. Place a piece of thick fabric on top and place a weight. If the surface is uneven (convex or concave), use a thick fabric bag with heated sand as a load.
Such veneer damage is restored in two stages. First, the swelling is eliminated, then the scratch is painted over and the coating is restored.
If the veneer is glued with alcohol glue, you can return the swollen part to its place by ironing it through a rag with a hot iron. But do not overheat the iron: the veneer may stretch. Heating level is medium.
If ironing with a dry cloth does not help, try repeating the operation with a damp cloth (wet it and wring it out well). There is a chance that the wood will swell and become more elastic. To reliably fix the swelling, you can introduce PVA there and then heat it with an iron.
If the swelling is cracked, you can also try to seal it with heating (through a rag). If it doesn’t work, tear off the peeled piece. You don’t cut it, but rather break it off: on veneer, breaks after restoration are less noticeable than cuts. Therefore, you break off the lagging piece. Remove the old glue from the damaged area and the piece of veneer (with sandpaper or a nail file, depending on the size). Next, the repair of veneer on furniture is standard: spread it with PVA glue, lay it down, aligning the fault lines, lay a thick fabric on top and place a weight until it dries.
Such veneer peeling can most likely be eliminated simply by ironing it with an iron.
Scratches and traces of restoration on veneer are removed in the same way as on wood: they are painted over with a furniture marker of a suitable shade. If the scratch is deep, a little melted furniture restoration wax is applied to it (with a spatula). After drying, the wax is ground, and if necessary, fine-grain sandpaper is used, but after this treatment, the restored piece is covered with a layer of varnish.
Do-it-yourself furniture restoration requires patience and accuracy. You have to act gradually and methodically: smear it, wait for it to dry, level it, smear it again, etc. Sometimes you have to try several methods: damage varies, as do the materials used in production (glue, varnish, etc.). But as a result, the furniture will look much better.
How and where to purchase products
To buy Novoryt wax for the restoration of furniture, ceramic tiles, doors, various types of floors or other products, select what you need and add to cart. Then you can make a quick order (leave a request by phone number) or place a full order, where you indicate the payment method and delivery or pickup details. You can also purchase Novorit products by contacting our specialists by phone, email and even on social networks. Delivery of orders is carried out throughout Russia. We try to do everything possible to make your purchase comfortable!
