Every family has many abandoned things that have been gathering dust for a long time, waiting for a chance to be useful to someone again. With a little desire and creative skills, forgotten things will shine with bright colors again.
Armed with proven ideas, you can create on your own both a trinket and a practical thing. At the same time, you won’t have to spend money on buying expensive new interior items.
You can create the necessary crafts with your own hands from everything: from buttons and coins to concrete blocks. This process will bring you pleasure, and the trifle you complete will not only please the eye, but also be useful.
Making a stand for dishes
A beautiful and cozy home is the desire of every housewife. This does not always require a maximum financial investment. You just need to try to make beautiful crafts with your own hands. It’s best to make things useful for the home with the whole family.
A very useful and easy craft for the kitchen is a stand for dishes. The main material for its production is jute.
To make a craft, you need to use the following list of materials:
- jute 1 cm thick (10 m);
- glue gun;
- scissors.
All that needs to be done is to lay the rope around the circumference, lubricating it with glue. When the desired size of the stand is reached, the end of the rope is cut and glued to the base.
The home craft is ready!
Materials for work
What are homemade products made from? To answer this question, you need to carefully examine the places where unused, but once very necessary things are often accumulated: a balcony, an attic or other areas fertile for creativity.
Anything that has been lying around unnecessarily for months can be given another life: a torn jacket, a glass pot, plastic, leftover building mixtures, beads or tiny glass.
Creating crafts for the home from all sorts of things with your own hands is not only exciting, but also profitable for the family budget. Let's look at examples of what can be recycled in a new way.
The most convenient and affordable option is paper and all its derivatives: cardboard, wallpaper or gift wrapping. Just a little tape - and your idea has already been translated into reality.
This is how compact things are often obtained, for example, decor for living rooms, glasses for stationery, notepads or boxes. More dense options include: a Christmas fireplace, doll houses for children, tinsel for the Christmas tree or animal feeders.
Such homemade products do not last long and are small in size.
Cords, whips and even wire are a great frame for lamps, various plant holders, key rings and wall key holders. Their essence is the same: everything hard is for giving shapes and guiding ribs, soft thin threads are for finishing touches.
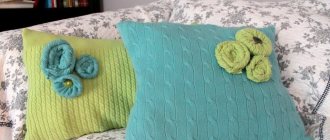
The use of textiles is rightfully considered a popular method in the handmade industry, and especially in transforming outdated sofas or armchairs. Anything will do: old jeans, worn-out carpets, or even mismatched socks.
From fabric you can make all kinds of covers, seats for chairs, thermoses for teapots or mugs, knitted flowerpots, decorative paintings and much more. All you need is fabric, an interesting idea and a little skill.
Recycling disposable tableware or bags is a noble cause. This is how furniture, toys, curtains and, of course, interior decorations are created.
The new use of pet bottles is not only a beauty in the house, but also a plus for your karma and the environment. Cut pet bottles are so pliable that when heated they take any shape from curls to voluminous balls.
Metal profiles, brick, concrete, plaster and everything that remains unused after renovation can easily be turned into: a flower bed, a rack for garden utensils, flowerpots for outdoor plants, barbecues, benches for the garden and many more interesting objects.
Of course, such items have impressive dimensions - a bed made of water pipes can outshine a cute pot of plastic flowers. But the main thing in our idea is the benefits that crafts made from any material bring.
Name day gift
On your birthday you always want to receive an unusual gift made by yourself. One of the brightest ideas for such surprises is preparing a piece of cake with sweet wishes.
By making beautiful paper crafts with your own hands, you can convey all the warmth and love to a loved one.
For homemade creativity you will need the following list of tools:
- ruler;
- scissors;
- pencil;
- thick paper (cardboard);
- glue;
- decorative elements (ribbons, beads, flowers, etc.).
All that remains is to find out how to make a beautiful craft.
paper rainbow
This 3D rainbow is a perfect and easy craft for kids. Even a preschooler can master this manual. In addition, creating a rainbow will be educational for the child.
Ask them to arrange colored strips of paper in the shape of a rainbow. It is not necessary to follow the order of the colors, it is at your discretion.
Consumables:
- Cotton balls
- Thick colored paper
- Glue stick
- Scissors
- Ruler
Operating procedure:
- Cut the colors of the rainbow into two-centimeter-thick strips along the length of the construction paper.
- Fold the edges of each strip up to create ridges.
- Using a glue stick, glue these tabs onto another piece of paper so that the strip forms an arc on the paper.
- Continue gluing rainbow stripes, placing colors next to each other.
This is a great teaching point about the order of the colors of the rainbow. Or you can let your kids put them in any order you want. Once all the stripes are in place, apply glue to the outer edges of the rainbow and place cotton balls there to simulate clouds.
Craft technology
So, the work is carried out in the following sequence.
- Draw an image of the cake according to the template on a sheet of cardboard, then cut it out.
- Bend the cardboard along the marked lines using a ruler.
- Make a cut at the back of the cake to allow it to be closed later.
- Glue the desired parts of the cake using PVA glue.
- Decorate the craft with a variety of decorative particles: beads, ribbons, flowers.
You can insert an envelope with wishes or money into the inside of a piece of cake.
Craft mug: 135 photos and video master class on how to make beautiful crafts with your own hands- Crafts from spoons - 125 photos and videos, tips and tricks with step-by-step instructions on how to make crafts
Crafts from cotton pads - 125 photos of beautiful crafts, features and videos of new cotton crafts
Trees of different seasons
This craft can be made with children at any time of the year. Depending on the current season, we choose a tree and start making it, or we can make all four trees at once.
For this we need double-sided colored paper, thick brown cardboard for the tree trunk, and, of course, scissors and glue.
Crafts for the garden
What gardeners don’t do to decorate their plots. Many of them like the beautiful design of flower beds. For this, ordinary plastic bottles are often used, although there should be a lot of them. Moreover, all bottles must be the same size.
To keep the containers strong, sand should be poured into them. You can use ready-made bottles to fence a flower bed and then paint them in the desired color. If the containers are dark in color, they do not need to be painted.
A beautiful fence made from plastic containers is ready!
Step-by-step master class
We fold a green sheet of colored paper in half and cut it - from the two resulting rectangles we will form the spring and summer crown of trees. Half a yellow leaf is suitable for an autumn theme, and a blue one for a snowy winter theme.
To form the trunk, cut a cardboard strip 20 cm long and 3 cm wide. Bend the brown strip in half and bend its ends.
We cut the prepared halves for the crowns into two parts again and fold each of them like an accordion, bend each of them in half and glue the inner sides.
We glue two small “fans” to the cardboard, forming a tree with a lush crown folded like an accordion.
Flower pots
This garden craft in the form of a plant pot has a beautiful appearance. Options may vary.
So, you can cut a small hole from the side of the bottle and pour soil into it. A living flower is placed in the prepared container. After planting, it is better to hang the pot on the wall.
- Cardboard crafts - 135 photos of useful and beautiful crafts for children and adults
Unusual crafts: we make cool and original things from scrap materials (120 photos and videos)
- Crafts from stones - 145 photos of examples of stone crafts from minerals and pebbles
The plant in its original form can be left outside or moved into the house. Several pots combined give a very unusual and beautiful effect.
For garage
Let's take a look at some useful garage crafts. For some car owners, the garage serves not only as a place to store vehicles, but also as a repair base and they spend a lot of time there.
The minds of a large number of car owners have worked to create a quality and convenient service location. As a result, this made it possible to obtain a considerable number of accessories for the garage.
In a small garage area, the owner needs to conveniently arrange many tools and other accessories. He needs to ensure that they are stored safely and that they are always convenient to take for use.
People thinking about how to improve the decor of their garage often come up with useful fakes that are based on the latest methods of invention.
Taking into account the safety regulations in the garage, you should take care of convenient exit and entrance to the room and avoid obstacles in the way. Tires are stored in the garage with and without rims.
If the tires are located on a rim, then for preservation they are suspended from a support on the wall or ceiling, and a cable, chain or luggage strap is used to tie them together.
To store tires without rims, racks are used, independently made of iron, which are mounted on the garage wall. You can see various photos of useful crafts, think about them, and then make them yourself.
DIY funny piggy
This craft can decorate any garden plot with its appearance. To make it you will need plastic bottles of different sizes.
First you need to make the body of the pig. To do this, take a large water bottle and cut off its side. There will be flowers in this place.
Then the pig's ears should be cut out from the cut piece of plastic.
Four 1.5 liter bottles must be used as legs. Their tops are first cut off. The legs are attached to the body of the pig with a wire.
The next step is to paint the piglet pink.
When the paint is dry, you can fill the inside of the animal with soil, and also make small holes on its tummy.
You can grow seedlings or flowers in this craft. All that remains is to place the beautiful pig among the rest of the flower beds in the country house.
Dinosaur style hat
If your child needs a quick play prop or a special accessory for a dinosaur party, then these instructions will help you with that.
You will need:
- Green thick paper - three pieces
- Any glue
- Scissors
- Scotch
First, cut four long strips about 2 centimeters wide.
- Two of which will be the head mount, and the other two will be the base to which you will attach the spikes.
- Then cut the remaining sheets into strips about 5 centimeters wide along the short side of the paper. Divide these sheets into 5 strips. Align. They will become your thorns.
- Fold each piece of spikes in half. So, the point of the tenon is on the "open" edge of the folded piece of paper, and you will cut it diagonally about 1cm above the folded edge. Cut out all the thorns.
- Glue the spikes in a row to the two longer narrow strips that are your cross members.
- While the glue is drying, take the two headband pieces and measure them to fit your baby's head. It doesn't have to be tight because the crossbar will go across the top of your head and help hold it in place.
- Now let's get back to your spikes. Turn the crossbar over so that the spikes are underneath it. Fold each of the tenons up and around the crossbar to create a nice fold. Then add glue to one side and bring the two sides together so they meet in the middle. Use paper clips to hold both sides together while they dry.
- Once the glue has dried, simply glue the crossbars to the headband. One should sit well in the front and the other should go down.
Your child will be happy, and the game will become more vibrant!
Original pot made of shells
You can also make beautiful crafts from shells at home. One of them will be a flower pot. Let's figure out how to make this unique thing suitable for everyday use.
- Broken shells should be wrapped in a cloth and crushed into small pieces using a hammer. The craft should be done by an adult, not a child.
- The pre-selected stand must be coated with glue, then sprinkled with ready-made shell crumbs.
- Whole shells should be fixed to the outside of the pot with glue.
- After time has passed, when both parts of the craft are dry, you should connect them to each other.
A beautiful flower pot is ready! To strengthen the layer of shells, it is allowed to apply varnish or golden paint to them.
Old T-shirt and sheepskin coat
Before you throw away your unwanted T-shirt, you should try making it into a fashionable teen T-shirt.
You can sew a warm vest or a stylish bag from a fur coat.
Touching dolls are made from worn tights.
A coat that has gone out of fashion and become unnecessary will be an excellent material for a dog overall.
Craft for Christmas
A homemade star would be a great Christmas gift. Orthodox people are familiar with the fact that it was the star that guided the Magi along the right path to find the Savior. Therefore, if children are going to carol, they will definitely need these stars.
To work, you need to have on hand a small stick, felt fabric, sequins, threads and needles, scissors, glue and a brush, cotton wool.
Patchwork technique
From small pieces of rags of different colors, but more or less suitable in density, you can sew potholders and mittens for the kitchen, pillowcases for sofa cushions or a bedspread using the patchwork technique.
The main thing is to carefully select the scraps so that it is beautiful and stylish. It is wonderful that in this technique there are no restrictions on the flight of fancy - sometimes real masterpieces emerge from the most seemingly invisible material.
The process of making a star for Christmas
First of all, you should cut two stars of the same size from fabric material. Using glue and decorative elements, you can decorate the outside of the star. We also decorate the stick with glitter using glue.
Give the craft time to dry.
At the tip of the skewer you need to attach a piece of cotton wool the size of a star to the glue. To make the star look three-dimensional, you need to make two blanks and fasten them together. Ready!
In the photo of beautiful crafts you can choose the option you like. Make your loved ones happy - give them an original, attractive present.
Peculiarities
Homemade decorations come in any degree of complexity. Many crafts can be made even by inexperienced craftsmen; this does not require special abilities or special devices. But the creation of some specimens is only possible for experienced craftsmen.
To make things easier, you can resort to photographs of products made from various materials, of which there are sufficient quantities in the interior, where you can also watch master classes on making crafts. However, you don’t need to repeat everything exactly, you just need to familiarize yourself with the principle of operation and make the craft according to your plan.
Photos of beautiful crafts
Tell your friends

