The open opening in the wall is a very old architectural element. Designers assure that the arch zones the rooms in the best way, while visually adding volume to each room. Making the perfect door arch with your own hands is quite a feasible task. And now we will tell you how to make such an opening in accordance with the interior style and your acceptable costs. After all, it depends on the budget how high-quality and aesthetic material you can afford.
A modern interior arch is made of wood, boards, plywood, brick, plasterboard, plastic, MDF or other materials. Based on the types of openings, a U-shaped portal or vaulted arch is distinguished . Arch vaults can be varied in shape:
- classical (Romanesque) in the form of a half circle;
- modern - a “flattened” circle with small corner radii;
- lancet - a pair of circles are connected, stretching upward;
- romance - a wide opening in which two arcs round the corners and are connected by a straight line in the center;
- trapezoid, prism - straight lines are connected using obtuse angles;
- ellipse - an opening, the upper part of which repeats half of the oval along the long axis;
- semi-arch - an asymmetrical design in which one corner is left straight, and the other is rounded or trimmed with unusual shapes.
How to make an arch with your own hands: portal
In this section we describe how to make a portal-type arch based on a doorway step by step. This is the simplest type of modification of an interior transition with your own hands. In short, you will need to dismantle the door and finish the opening with wood, plastic or plasterboard . And now the whole process step by step:
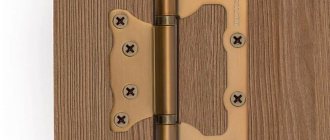
- complete dismantling of the door is completed by removing the trim and door hinges;
- decide on the width of the future arch; it may be necessary to remove the old door frame;
- to expand the opening, you need to remove the door frame and level the opening on all sides with cement mortar;
- in order to narrow the arch, it is necessary to install extensions - nail long strips of chipboard along the inside of the opening with dowels to the wall or nails to a wooden door frame (if it remains); the additional strip should be shorter by a couple of centimeters than the height of the opening , and the width should be a centimeter less than the thickness of the wall;
- The space from the additional strip to the wall is covered with mounting foam, and excess foam is removed.
The finishing stage depends on your aesthetic preferences and repair skills. You can use wallpaper, decorative plaster, interior stone, or a set of solid wood .
Operating procedure
- Removing the door frame. The opening must be completely cleaned; not only from the frame with the sash, but also from sealing/insulation materials.
- Definition of parameters. As a rule, to make an arch in an apartment with your own hands, the opening will have to be slightly widened. In most standard buildings, the internal walls are made of bricks, blocks or simply frame partitions, and therefore increasing their height or width is not so difficult. Moreover, you won’t have to do any special leveling - the defects will be hidden under the lining of the arch.
- Marking. One nuance should be noted on this point; The ends of the wall must be strong. Therefore, if it does not meet this requirement in a separate area, you will have to think about either strengthening it (for example, with a corner), or additionally removing part of the material and then leveling it. But in the latter case, the size of the opening will increase. This is typical for houses made of wood if it is discovered that rot has developed on the timber (log).
- Dimensions should be taken at several levels. Even if the distortion is visually unnoticeable, difficulties may arise when installing the door arch with your own hands.
- There are many discrepancies in the question of what to do first - draw up a drawing of the arch or determine the dimensions of the opening. Here it is worth focusing on local specifics. If the wall material is easy to process, then widening the opening is not difficult. Otherwise, the design parameters will have to be “adjusted” to it.
- Fastening the supporting frame. It is installed in several stages.
- Arrangement of the main circuit. In accordance with the drawing, all external vertical installation slats are “fastened” to the wall.
- Fastening the "vault". Additionally, the upper part of the arch is fixed with hangers, which are located symmetrically across the entire width of the opening.
- Strengthening the frame. For this purpose, transverse elements are used, installed along the arch along its entire profile. Approximately - 50±10 cm from each other. For gypsum boards, the maximum is sufficient (about 55 - 60), but if the cladding is done with boards, then the interval should be reduced to 45 - 50.
- Sealing gaps. In fact, this is one of the ways to insulate an opening. Depending on the material of the wall and frame, the appropriate means is selected - mortar, polyurethane foam, putty or other.
- Wiring. As a rule, all arched openings are illuminated. Therefore, the lines are installed before finishing the frame begins.
- Cladding of the structure. The specifics of fixing the cladding elements depend on their material. But they are attached to the metal profile slats with self-tapping screws; the easiest and most convenient way. You just need to mark the location of the holes and drill channels for the hardware.
- The easiest way to make an arch instead of a door is from plasterboard. But not a traditional design, but a special one, designed specifically for such structures. It is reinforced with fiberglass (on both sides), and therefore does not break when bent. If the frame has a complex shape, then this is the best material for its cladding.
- Changing the geometry of conventional gypsum boards is done using different methods - “wet” or “dry”. This is a separate topic, and before starting work, this issue should be carefully studied. Each method has its own specifics, but one thing in common is increased sheet consumption. Without experience, you cannot do without damaging and discarding drywall.
- When cutting gypsum board or plywood, it is better to use a jigsaw. Precise cutting cannot be achieved with a conventional tool.
- Finishing the arch
- Applying putty. This is necessary to smooth out roughness.
- Primer treatment. Such products simultaneously increase the moisture-repellent properties of the base and the adhesion of the material.
- Strengthening the finish (if necessary). The edges of the gypsum board are reinforced with a small corner (made of plastic, with perforation), the surface itself is reinforced with a reinforcing mesh, which is glued.
- Re-application of putty composition and primer.
- Grinding.
- Finish coating. Possible options are paints and varnishes, decorative films, veneer, wallpaper, stucco, mirrors. There are no stereotypes - your own imagination will tell you what look to give to the opening.
In principle, the process of installing and finishing the arch does not present any difficulties for a business man. And if you take into account in advance such a point as the maintainability of the structure, then they will not arise in the future.
DIY installation of a vaulted arch
And even a more complex arch with vaults can be made a reality during home renovations. An important point is that simply placing a vault on the top of the doorway will not work for aesthetic reasons. You will have to increase the height of the opening so that the passage between the rooms does not resemble a pirate grotto pressing on all sides. Solve the issue of expanding the wall opening or demolish the wall and install a new plasterboard structure . Please note that it is prohibited to violate the integrity or change the load-bearing walls in any way .
And now - step-by-step instructions on how to make a vaulted arch in an interior partition:
- Option with widening of the opening . We mark the boundaries of the future opening on the existing one. To the desired width of the arch, add 4 cm in width and the same in height. Mark with serifs on the wall. Next, every 10 cm you need to punch through holes in the wall with a hammer drill and widen the opening with a circular saw. Then we will organize a base for the side panels made of plasterboard or chipboard with installation on a U-profile. You will see how the vault is made in a separate section.
- Option with an interior arch made of plasterboard on a new wall. Before installing a new plasterboard wall, apply vertical markings using a plumb line on the load-bearing wall to which the structure will be adjacent. Take a piece of profile and transfer the markings to the opposite wall. Install and secure the U-shaped CD profile with dowels according to the markings. From the sidewalls on both sides, place profile sections on the floor equal to the width of the plasterboard wall to the arched opening, and screw these elements. The ceiling profile will take up the entire width of the wall. Next, we draw two slats from the ceiling profile and connect them to the ends of the segments on the floor to form the base of the side arched panels. We install crossbars on the frame with a pitch of 20 cm, which contributes to the stable position of the gypsum boards (plasterboard sheets) that we will lay on this frame. And at the last stage we will make a vault for the arch.
Shape selection
The type of arch can be any, even from several levels, with different rows and functionality; initially, the correct measurement of the door opening is made. The main types of arches are presented in the table:
| Arch type: | Description: |
| Parabolic arch: | A beautiful and easy-to-make arch. Made from flexible plastic, for example, a threshold. A mark is made in the middle, which will be the top point of the arch. Next, the material is bent in the form of an arc. The arch is placed on a plaster or other sheet and a template is made, at which point the arch blank will be ready. |
| Circular arch: | You need to screw a self-tapping screw into the wooden material (plank) and tie the twine to make a compass. They can be used to make an arch template. Next, using a compass, you need to draw a circle of the arch on a sheet of paper. |
Once the contours of the arch have been drawn, you should cut out the shape using a jigsaw or a regular knife. All cuts are made exactly along the lines; the quality of the arched opening depends on this. The classic version of arches is made according to the following principle:
- You need to measure the doorway and calculate the material.
- The instrument is being prepared.
- A template of arches, semicircular, round, oval and others is cut out.
- The frame is mounted in the opening using a metal profile or wood.
- Polyurethane, plasterboard, plywood, fiberboard, chipboard, polystyrene foam or other selected material are installed.
- The bottom of the arch is cut out and screwed to the side parts.
- The arch is being puttyed, finished and decorated.
Important! When deciding on the type of arches, you need to pay attention to the height of the ceiling and the width of the door opening. Some types are suitable for a wide but low opening, while others are the opposite.
The main forms are as follows:
- Portal - U-shaped arch, according to the design it can be in the form of waves or with many angles, one of the most popular types of opening.
- Classic arch - recommended for use for ceilings over 3 m, with a passage width of 90 cm.
- Romance - it is recommended to install it if the width of the opening is large, but the height to the ceiling is small.
- Modern is an alternative to any type of arches; it can be used in Khrushchev, where every centimeter of space is important. The corners of the arch are made sharp or rounded.
- A semi-arch is an ideal arch for zoning rooms.
- Straight arch - suitable for loft, hi-tech, modern style.
The photo shows ready-made false arches from the Leroy Merlin company, which do not need to be framed:
Ready-made false arches
Knowing what types of ready-made arches for doorways exist, you need to decide on the materials and start working with your own hands.
DIY plasterboard arch (video)
How to make an arched vault from gypsum plasterboard
Once you have decided on the shape of the vault, it will become clear which recess for the sides of the vault to cut out of plasterboard. A pencil and a rope for rounded outlines will help in this matter . And if you plan to decorate the opening with a prismatic vault, the arch from the profile will consist of straight segments and will also be covered with straight strips of plasterboard.
The lower inner part of the vault is sheathed with a curved element made of special ceiling plasterboard of smaller thickness . Here are the basic rules for bending gypsum boards using dry and wet methods.
How to dry bend drywall
We build a brick arch with our own hands
A brick arch is popular in country-style country interiors. It is most convenient to work with a special wedge brick. The strength of the vaulted structure is ensured by lateral thrust. If the bricks are laid out with a wedge and secured with a “lock” (a brick for fixation, which is tightly driven into the masonry), you will get a wedge arch, when laid along a truncated arc, a bow arch, and when a semicircle half the width of the opening is formed in the upper part, then experts say about organizing a complete arc.
The technology for constructing a brick arch is divided into stages:
- the master designs and develops a vault template from chipboard sheets and beams;
- installs the template using wooden supports and spacers;
- before laying out, puts fines to clamp the arch;
- the process of laying bricks from bottom to top in parallel on both sides is underway;
- then the structure is crimped and fixed;
- the template itself is disassembled and removed, the surface is cleaned;
- The seams are removed, as is excess mortar, and at the end the masonry is finished.
Try to avoid the main mistakes of beginners when arranging a brick door arch with your own hands. We are talking about the uneven distribution of loads with a low and wide opening, the template’s exposure to moisture ( cover it with polyethylene and dismantle it in time ), as well as the installation of metal corners instead of the template ( metal prevents shrinkage and can cause cracks ). In general, a novice master just needs to watch a few videos to figure out how to make a brick arch.
Making an arched door yourself
Despite the difficulty of making such canvases, it is possible. Now you can see for yourself. You and I will learn how to make wooden arched entrance doors.
It is better to order the box part according to your dimensions, and we will make the canvas with our own hands (see Size of entrance doors).
We prepare everything you need
First you need to prepare tools, boards and available materials.
- Jigsaw with wood saws.
- Electric milling machine with two types of cutters: disk (for grooves) and cylindrical.
- Sanding machine with sandpaper of different grain sizes. The best one is tape.
- Boards, 5 centimeters thick.
- Wooden wedges.
- Two small bars and 4 wood screws. The length of the screws should be 30mm greater than the thickness of the bars.
- Carpenter's waterproof glue. PVA is possible.
Making a blank for the arched part of the canvas
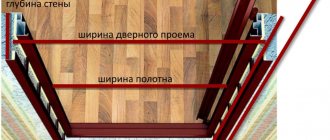
To make the arched part of the door leaf, we first need to measure the final width of the opening. That is, from the total width we subtract the thickness of the “box” part and a 2mm gap between the door and the opening (frame).
After this we do the following work:
- In order for the arch to turn out beautiful, its radius must be made equal to half the width of the doorway. Based on the width of the prepared boards, we calculate how many pieces will be needed. The boards will be positioned horizontally.
Important! Before making an arched door, you need to select well-dried boards. Since if they are damp, the canvas will warp over time.
- Now, using an electric router, we make grooves for a tighter connection. To do this, we take a disk-slot cutter. We make the grooves in such a way that the protruding part is about half the thickness of the board. That is, 2.5 millimeters. The same goes for the internal groove.
- Next, we clean the entire surface of the grooves from dust and apply wood glue to them. After this, we connect all the boards and leave them to dry.
Important! In order for gluing to occur better, you need to take a board and attach pre-prepared bars to it with self-tapping screws. The distance between the bars should be 10–20 mm greater than the width of the glued workpiece. Place the workpiece between the bars and spread it apart with wedges.
Cut out a semicircle from the blank
For this operation, we recall the experience of installing plasterboard arches.
We use one of two options to outline the arched shape:
- If the arch has an even semicircle. Mark the middle at the bottom of the workpiece. Then we take a pencil and tie a non-stringent thread to it. Cut the thread exactly to the length of the arch radius. Apply one end of the thread to the mark and draw a semicircle with a pencil.
- If the shape of the arch (as in the photo) has an elongated semicircular or pointed shape, then we use a different method. To outline the boundaries of the bend contour it is very convenient to use a long metal ruler. We also make a mark for the middle and draw a line from it strictly vertically to the length of the radius of the arch. Next, we place the ruler on the edge and bend it so that one edge touches the radius mark, and the other coincides with the edge of the workpiece. After this, draw a line with a pencil. On the second side we follow the same steps.
Important! Make sure you get a symmetrical arched neckline.
Next, take a jigsaw and carefully cut the workpiece according to the markings. After this, we take a grinding machine with the coarsest sandpaper and process the surface of our arched part of the door on both sides. After this, we repeat grinding with a finer abrasive.
Now the most beautiful part of our door is ready. Arched interior doors can be decorated with the same elements. However, it is worth considering that glazed arches will be more elegant for interior spaces. And their manufacture requires carpentry skills.
Wooden arch: beginning of installation
Choosing a wooden arch is justified if you have a good budget and want to complement the classic style of the interior. This is not only a respectable decoration at the entrance and exit, but also durable protection of the opening. Natural materials always look expensive and reliable, not only in professional interior photos, but also in ordinary apartments. Fiberboard and MDF boards are cheaper and wear out slower than natural wood , so we recommend this material to be tried by beginning creators of arched openings. In addition, fiberboard can be purchased with antiseptic treatment, but the wood will have to be prepared on its own (stain, varnish in three layers).
The main stage is preparing the form. Wooden elements will be attached at the boundaries of the opening, so all measurements must be taken correctly - for accurate cutting and saving material . First of all, we decide on the type of arch: what geometric figure will underlie the arch: rectangle, circle, ellipse, broken line, asymmetry. Then draw a diagram of the future arch on the opening indicating the dimensions and transfer them using a level to the wall, put serifs.
Tile cutting device
It's been a while since I added anything here.
Preface: why exactly this way, and not using a machine.
Firstly, I’m not entirely sure that the so-called wet tile cutter will cope with this task, and I’m sure that a cheap one definitely won’t cope, and an expensive one, let’s say from 50 thousand rubles. Maybe he can handle it, maybe he won’t.
Therefore, with such a daisy, I refused to buy an expensive machine because the work will not pay for such costs, and cheap rubbish is not needed.
This means we work the old way, proven and cheap.
In general, I have a tile cutter, it’s not the worst, it successfully coped with various tasks, but there was a problem with this porcelain tile. It (porcelain stoneware) breaks off along the cut line completely uncontrollably, it can clearly break, or the arrow can go to the side. The second problem is that the surface is very fragile, just like a glass surface; even behind the roller, chips can occur. A diamond cup can also chip even with a light touch. There is no need to talk about a diamond disc at all, the surface after it is jagged and chipped, which means that not every water-powered tile cutter can cope with such a task.
Wooden arch: cutting, assembly, installation
What parts does an arched opening usually consist of? This is a set of platbands on two sides, a pair of side panels, corner roundings and an upper cross member . Straight parts are easy to make with your own hands, but for rounded parts you will need a template for drawing out the contours. The parts of the wooden arch are sawed with a jigsaw so that there are no jagged edges. The surface is additionally sanded with a special grinder or sandpaper . If you have chosen MDF material, after cutting you can cover the clean, grease-free surface with laminate or veneer.
- First of all, rectilinear elements are mounted , ensuring accuracy of coincidence with boundary marks and level.
- The arch parts can be glued onto the puttyed and prepared surface of the opening, and if there are distortions, it is better to fix them onto a frame with insulation . When creating complex shaped curves, we recommend making a metal frame; when repeating rectangular shapes, a frame made of wooden blocks is sufficient.
- Only after securing the sidewalls and the straight top bar do we move on to rounding. The bends must be adjusted to the space of the corners, the joints must be covered with platbands or plastered for finishing.
At the final stage of processing, all that remains is to mask the fasteners and joints . As you can see, a do-it-yourself door arch, both made of wood and other materials, is quite accessible to master in theory and practice.
To create a fashionable interior that favorably emphasizes the individuality of the design, arched structural forms are often used. The technique is becoming quite popular for implementation not only in large, but also in relatively small rooms.
Installing an interior arch in a doorway improves the spatial perception of the room by eliminating doors that clutter it. The arch allows you not only to improve the aesthetics of the design, but also to solve practical problems, for example, zoning an apartment.
Preparatory activities
Choosing an arch type
Experts recommend focusing on the ceiling height and the general style of decoration of the room. There are several options for arched structures, but most of them reduce the opening by installing a supporting frame by about 150 - 200 mm.
- With low ceilings, it is hardly worth getting rid of interior doors. At the very least, you should think carefully. The only possible option for finishing the opening after their dismantling is plastering followed by pasting (wallpaper, fabric) to match the walls. Building an arch using this method is quite simple; it is only necessary to correctly process the end parts of the passage. But this room design option has a significant drawback, and therefore does not suit everyone - the lack of sheathing makes it impossible to install hidden spotlights in the opening.
In some articles on the topic of making an arch, there are recommendations for giving the desired geometry to the passage between rooms using cellular blocks, bricks or concreting. Not to mention the complexity of such work, it is worth considering the additional load on the floor. And since you will also have to deal with the solution, it is not the best option for an apartment.
But if the decision is made, then you should take into account the features of the interior of the home. This will help to correctly determine the optimal type of arch.
- Classical. The upper part is an arc with a constant radius (semicircle). It is relatively easy to make, since it has the correct geometry. But it is advisable to install it only in openings between rooms with high ceilings.
- “Modern”, “Romatica” are well suited for multi-storey buildings. The latter type of arches has a large width, and therefore are recommended for installation in the opening leading from the hall to the hallway.
- "Portal". The fundamental difference from others is that this is a rectangular arch. It is advisable to install it in private buildings. When applied to an apartment, it looks great, but only if straight lines predominate in the design style of the room. A significant advantage of this design is that it can be installed without much difficulty, even if you have no skills.
- "Ellipse" and "Trapezoid" have a more original shape. When deciding how to make an arch in a doorway according to one of these schemes, it is worth considering that the correctness of the geometry largely depends on the accuracy of the calculations of the parameters of all elements and radii (angles).
There are other options for designing openings: Venetian, Florentine, with “shoulders” and a number of others. But it is so difficult to build an interior arch of any of these varieties that you should not choose them for independent installation.
Selection of materials
- Frame. There are only two options here - wooden slats and metal profiles. It is more difficult to work with the former, especially if the vault has a geometry with changing parameters. Bending wood is not only a complex process, but also a long one. In addition, wood absorbs moisture well, is susceptible to drying out, and therefore deformation cannot be avoided. In this regard, a door arch assembled on a metal frame is more durable and reliable.
- Facing. Panels made of plastic or chipboard with lamination look great, and they do not require further finishing. The downside is that it is difficult to choose their shade for a specific interior; besides, such an arch will be more expensive. It is better to use elements made of fiberboard, multi-layer plywood (small thickness) or gypsum board. Working with these sheet materials (cutting, bending) is much easier. Plus, the finishing design can be done in any way you wish.
But you should pay close attention to the recommendations on how to make a wooden arch. There is no doubt that the design will be strong, durable and inexpensive. But there are a number of nuances.
- You must have experience working with wood. It is difficult to bend and, in some cases, to process. For example, the selection of grooves and quarters cannot be done without special tools and devices.
- The lumber still needs to be selected correctly. First of all, by breed. Each has its own characteristics, and its use largely depends on the specific microclimate of the room.
Types of arches
The shapes of arched structures do not abound in excessive variability. All of them, as a rule, are similar to each other. The most common are the following:
- Classic. This is a familiar arch in the form of a regular arc.
- In the modern style. It is distinguished by a slightly raised or completely absent upper part.
- In a romantic style. The arch has a rectangular shape with rounded corners.
- Ellipsoidal. The upper part or arc has the shape of an ellipse.
- Free The design of the vault can have any profile. It all depends on the design idea.
The arch can be installed in an existing doorway, or it can be customized to fit a specific product. When choosing, the dimensions of the arches and openings, as well as the architecture of the building, are taken into account, since the arch reduces the width of the passages.
As for the style, it all depends on the available dimensions. An arch of any shape can be inserted into a very large opening. Arches with rounded vaults are well suited for wide openings, and modern or classic styles for high openings.
What types of arched doors are there?
Arched doors have many varieties and are classified according to various factors: installation location, material of manufacture, design features
Types of arched doors at installation site
There are two main categories here:
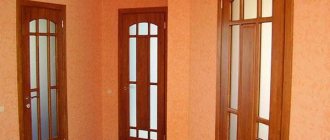
- Arched interior doors are located inside residential and other types of premises. Most often they are made of wood and have glazing. Stained glass compositions are often used for glazing such structures (see Interior doors with stained glass: about beauty and individuality).
- Entrance doors in the form of arches are used mainly in the entrance groups of establishments: shops, organizations, shopping and entertainment centers. Made from plastic profile.
What are arched doors made of?
Due to the complexity of manufacturing this type of door leaf, the variety of material for their production is not very abundant:
- Plastic. This material is used to produce profiles from which not only entrance doors are made, but also windows.
- Solid wood. Wooden door leaves in the shape of arches are used for entrance areas in the private sector, as well as inside any type of premises.
Structural features of arched doors
Based on the characteristics of operation, the complexity of installation and the cost of the finished product, the following arched door structures can be distinguished:
- Canvases that repeat the contours of the opening one to one. The peculiarity of such doors is that their production takes a long time. They stand quite high. Such models are made from wood (see Making wooden doors: technological process), since arched plastic doors are made using a different technology.
- Standard canvases with an arched part fixed above them. Such doors are somewhat cheaper, since their arched part is mounted separately and does not open together with the door leaf. It also becomes possible to use not only hinged, but also sliding versions of the canvases.
Important! The opening height for such doors should be large enough. It is calculated according to the formula: Vpr = 210 cm + half the width of the opening.
- Single doors. They are usually used as interior and entrance options for private houses and public spaces.
- Double doors. For wide openings it is advisable to use two sashes. One of them can be fixed in the opening using a latch. Relevant for entrance groups. In this case, more often than not, the “working” part of the door is 2 times wider than the fixed part.
Design, material and installation features
In general, the arch is a structure made up of the following parts:
- Arch.
- Side racks.
- Decorative elements - overlays, moldings, transoms with and without inserts, stucco molding, etc.
Installing an interior arch in an opening is almost no different from installing a door frame, with the exception of lower strength requirements. Hence there is a large selection of available manufacturing materials. Arches can be made from the following:
- Natural wood.
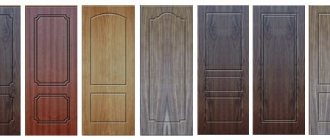
- MDF or fiberboard.
- Drywall.
- Plastic.
As a rule, the installation of the arch is done from top to bottom. However, there may be differences in the installation technology of different types of arches. In any case, to complete the work you will need:
- Roulette.
- Pencil.
- Level.
- Drill, screwdriver.
- Hacksaw, jigsaw.
- Self-tapping screws and glue.
Peculiarities
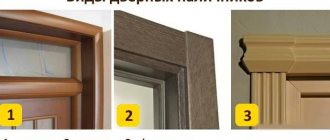
Finished arches are often made of wood. A typical design consists of an arch, posts, upper and lower decorative locks. The arc and racks consist of 2 platbands and a strip.
The arched structure can be supplemented with decorative elements that will hide defects formed during the installation process and adjust the parameters of the opening. Decor includes:
- Pediments, inclined or upright, in a classic style.
- Squares to increase the width of the arch.
- Banquettes. They are installed at the base of the arched opening to correct the height.
Installation of a wooden arch
A wooden arch is the most prestigious, durable and beautiful. The material is distinguished not only by its excellent qualities, but also by its heavy weight.
The difficulty lies in the precision of manufacturing the curved arch and the difficulty of its subsequent correction if necessary. The racks must be strengthened more carefully.
The shape and design must be carefully measured so that changes in the opening are minimal. Installation is carried out using the fixation method in an already finished opening. This allows you to hide minor flaws in the decoration of adjacent walls.
More often, the vault consists of several parts, which are assembled into a single whole and held together with special glue. It is secured in the opening with mounting foam or liquid nails. After fixing the arch, the side posts are installed. The correctness of the exhibition is checked by the level. The width of the opening should be the same throughout its entire height.
If wooden beams are used in the opening, the arch and posts can be screwed or nailed to them. The heads of nails and screws are covered with decorative moldings and trims.
Sometimes the entry points of the fasteners are covered with wood putty, and after it dries, they are sanded. After this, finishing and decoration are carried out.
Installation of an arch made of MDF or fiberboard
These materials bend perfectly. This is done by moistening and fixing in a bent position for a long time. After drying, the material takes the desired shape.
In the case of MDF, you can bend several thin sheets (5 mm) and glue them together. You can also use the so-called bendable sheet with peppered slots 8 mm thick.
For gluing, it is recommended to use a transparent sealant that will not be visible at the seams.
First, the frame is made. It is made from wooden blocks and metal profiles. The frame is mounted in the opening and then sheathed. Fixation to the frame is done with self-tapping screws. After installation, the structure is trimmed and all irregularities are puttied. Then the final finishing is done.
Why is it better to build a house than to buy a ready-made one, especially if this house was built for sale.
Why is it better to build a house than to buy a ready-made one, especially if this house was built for sale.
The beginning of this story was absolutely ordinary.
In a newly purchased residential building, one heating radiator was not heating. The plumber who had been called before “improved” this radiator by removing the control valve and stupidly installing a plug in its place. Remember how Celentano repaired the car in “The Taming of the Shrew”, since then he has had many followers
Installation of a gypsum board arch
A plasterboard arch is the most practical and inexpensive option. Installation is no different from the previous version. First, a profile frame is installed, which is then covered with pre-cut plasterboard elements.
The frame is made of aluminum guide or special decorative profile. The material weighs little and is easy to bend, allowing you to create the most bizarre shapes. Drywall is also easy to process. It is enough to cut the strip along the edges on one side, moisten it and bend it.
In the video you can see how the installation of an MDF arch is performed:
The first step is to install part of the frame under the vault. Profile posts are attached to the walls of the opening using dowels or nails if the walls are wooden. Both parts of the frame are fastened together. Then the finished top and side elements made of gypsum plasterboard are screwed to them with self-tapping screws.
Joints, seams and irregularities are puttied, after which finishing is carried out. If desired, the opening is additionally decorated with platbands, moldings and built-in lighting. Elements of the latter are installed at the stage of frame installation.
Whatever type of arch and installation method is chosen, it is important to follow the technology and order. First, marking is carried out, then the preparation of structural elements and only after that their installation. Only in this case the result can please you.
An arch is an entrance without a door, decorated in a designer style. It visualizes the expansion of space, the illumination of the room, and emphasizes the interior. Installation of an arch in a doorway goes without error if the algorithm of actions is followed and all tools and materials are available.
Advantages and disadvantages of the arch
Usually, owners choose an arch to the kitchen instead of a door, if for some reason it is not possible to completely demolish the wall between two rooms in order to combine them.
So the arch becomes a kind of compromise: its installation will cost less and permission for such a structure is much easier to obtain than for the demolition of an entire wall.
This will be an excellent solution in a small apartment where every centimeter of space is important. Savings occur due to the absence of a door and a visual increase in space - the rooms become a continuation of each other, but the zoning is preserved.
When deciding what to choose - an arch or a door - you should take into account all the pros and cons of both options.
The undoubted advantages of the arch:
- Promotes visual expansion of space.
- It is a fashionable decorative element of the interior.
- Easy to install.
- It looks aesthetically pleasing and is easy to care for.
Installing an arch means it is impossible to install a door in the near future. If you are concerned about this point, then it is better to abandon such a design, because you will have to redo the doorway again.
In addition, the arch is a demanding architectural element, and it requires reinforcement in the form of appropriate interior design. In the photo, despite the simplicity of the furnishings, you can see the interior integrity, where each element is inseparable from each other.
In order to competently play with the structure, you need to take into account the area of the apartment, the intended decorative finish of the walls, floor and ceiling, the appearance of doorways, furniture, accessories and the overall color scheme of the interior.
The most common option is kitchen arches, which is due to the fact that the door between the kitchen and the living room is not always a necessity, but rather an obstacle to creating a spacious and free apartment interior.
Removing a wall between two rooms is not always possible, which may be due to the characteristics of an apartment building or the apartment itself. In this case, installing an arch is the best option. Moreover, such a structure can be as wide as a doorway, and the very fact of the absence of a door contributes to the expansion of the area.
In this photo you can see how much more light and space there is in the apartment thanks to the arched design.
Where is the best place to install arches?
The arch makes the room brighter. This is due to the lack of doors, which even in the open position take up space. If the rooms between which there is a passage are dark, the arch is made with lighting from spotlights or LED strip.
The passage in a designer style is designed by:
- Between the corridor and the living room. The arch has standard doorway dimensions or is wide - decorated in a style that emphasizes the interior of the room.
- Between the hallway or living room and the kitchen. The structure is mounted with lighting, which acts as additional lighting in the evening.
- Arch in a studio apartment. The room where all the functional spaces are located is separated from the kitchen by a bar counter and an arched passage.
- Private country house. Here arched passages are placed not only from the living room to the kitchen, but also between rooms.
- Decorative arch. Installed to highlight the design. This is a niche designed in an arched shape, a small delimitation of space into zones in one room. They also install semi-arches, which, on one side, have a vertical column, and at the top are connected to the ceiling into a single sheet.
Attention! Arched openings are not made between the living room and the recreation room, as well as into the children's room.
Design tips
When choosing a classic, make sure that the ceilings in the apartment are high and at least 3 meters high. If you have a typical panel apartment with a low ceiling, use the “modern” arched system.
The wide pillars of the “romance” model will perfectly complement the arch of the opening with wide pillars. The “portal” arch model is suitable for an interior with clearly predominant straight shapes. This option is an ideal choice for log houses.
How to install an arch in a doorway?
Arches made of different materials have their own installation methods. Structures made of natural wood require certain skills in working with wood, while plasterboard structures require accuracy, evenness, and step-by-step work. Arched openings are assembled from MDF quickly, independently, without the involvement of craftsmen.
Installation with hidden fasteners
This method is used to install an MDF arch. There is a certain sequence for this:
- the finished arch set is disassembled into parts, connected in the correct order and glued together;
- first, make the first side, then the second;
- the finished MDF arch is inserted into the doorway and raised slightly;
- after leveling, the structure is fixed with a clamp;
- the end parts are coated with glue;
- the remaining parts are also coated with glue and installed on the sides of the opening.
Attention! If the width is non-standard, then the kit includes decorative inserts. For widths greater than 1 meter, arch extenders are used.
Manufacturers produce ready-made sets of arches, installed both by the company’s craftsmen and independently. To fix the elements of the kit, “liquid nails” or PVA are used.
Installing a prefabricated arch in the usual way
The installation of a finished interior arch is carried out by measuring the width, thickness, and height of the opening. For non-standard dimensions, when assembling the top of the structure, inserts are made in the middle. They are mounted with protruding “chops” into prepared holes. After selecting the desired size, the half with the decorative insert is left separately from the other half - then vertical inserts are attached to them.
The two parts of the arch are applied to the opening, connecting them in the middle at the top. The finished parts of the arch on one and the other side of the opening are secured with plastic plugs. The middle of the structure (in thickness) is installed according to the dimensions, also secured with plugs.
How to install a folding structure
First, the box is made and installed. It is assembled from additional panels that do not have the usual quarter for the door leaf. The box is made according to the height of the straight part of the sides of the arched opening.
After installing the box, you need to measure the height and width of the resulting opening and only then go shopping for a folding system. This way you can accurately calculate the number of sections and select them according to width.
Important! After purchasing a folding door, you must carefully read the installation manual. Each manufacturer provides their products with detailed instructions.
- In budget models made of PVC, the slats are connected to each other through special grooves or using gaskets. The joining process looks like this: the panels are moved, one lamella is inserted into the groove of the other lamella and pulled to the end.
- The MDF sections have special eyes that fit together and a long pin (axle) is threaded through them.
Assembling folding door slats
- It is better to install the lock and handle in the lock panel before assembling the blade.
- The slats are cut to the required height. When suspended, they should be raised above the floor by 1.5-2 cm.
- The rollers are attached to the upper end of the sections one at a time, starting from the locking lamella. Before installation, it is advisable to treat them with technical petroleum jelly.
- The top profile is cut exactly to the width of the opening, and the side profiles are placed close to it from below.
- The procedure for installing the profile depends on the intended method of attachment to the opening. If the profile is attached to clips, you need to mark and secure the clips around the perimeter of the box. To do this, a line is drawn in the center of the upper jumper, and using a level it is continued on the racks. The clips for the locking vertical profile are smaller than the others. On the top jumper, clips are attached in increments of 5-7 cm, and on the sides it is enough to install 4 pieces. After trimming the guides, all that remains is to insert them into the fixed clips. If they are tight, you can use a rubber mallet.
- If the profile is attached to self-tapping screws, then first install the upper guide. It is screwed onto one screw in the middle. After this, the guide is unfolded so that the sash rollers can be inserted into it. Having inserted the sash, it is assembled in the center, the profile is turned back, finally aligned and the remaining screws are tightened. Only after this the side parts are screwed in level.
- At the end, the blind panel is snapped into the side profile and the mechanism is checked for smooth operation. A strike plate for a lock or latch is installed in the lock profile.
After connecting the lamellas and half-lamellas, a locking panel is attached on one side, and a blind (fixing) panel on the other.
The finishing of the opening with platbands is carried out after the installation of the arched transom.
Installation video of the accordion-type folding system:
In small apartments, doors to an opening with an arch need to be planned before work on its creation begins. And you can close an existing opening without damaging the surrounding space using a folding structure.
Source: mezhdveri.ru
Necessary tools and materials for installation
To create an arched passage you need not only material, but also a tool:
- metal scissors;
- construction knife, set of blades;
- screwdriver;
- jigsaw;
- level, plumb line, tape measure, pencil.
The materials are:
- plasterboard (9.5 mm) or arched KNAUF;
- MDF;
- PVC plates, polystyrene foam.
The most common type for creating a passage is gypsum board. For it you need to assemble a metal base from profiles.
How to make a frame
Arrangement of the arch frame.
To complete the frame, you need a profile prepared earlier. The frame will be made of guides.
First you need to attach two guide profiles along the width of the opening (1000 mm). They will be installed on both sides of the opening. They are fixed with dowel screws if the walls are concrete. If the walls are made of wood, then you need to use self-tapping screws.
In order for the arch to be flush with the wall, its frame must be installed 11-12 mm deep into the opening. After installing drywall and puttying, the plane will be level.
Then, on both sides of the opening, 2 side parts of the frame, 600 mm long, are installed and fixed. To do this, you need to cut off the bottom of the profile at an angle. If this is not done, then this part of the profile will be noticeable, due to the fact that the arch at the bottom narrows.
Options for bending drywall.
The manufacture of the main part of the frame is completed. Next, the front arched elements are installed on it. The work is done with metal screws.
If you want to make an arch of a more complex shape, then you need to make an appropriate frame for it. Next, you will need to close the end part of the arched structure. For this purpose, it is necessary to make a frame on which the bent strip will be installed. This frame must be made from a 27x28 mm profile.
The work is performed with metal scissors, which have a spring mechanism. In order for the profile to have the shape of an arc, you need to cut it accordingly: 2 of its 3 sides. The profile has a U-shape. It is necessary to turn the profile clockwise to the side, then it will be located inside the installed right part of the arch.
The second profile is fixed in the same way opposite it. Then cuts are made along the middle and upper parts of the profile every 40 mm. This creates a kind of snake of the required length. It is installed along the edge of the semicircle. The steeper the bend, the more often the cuts need to be made.
Standard Installation Instructions
Despite the large selection of materials, independent production consists of general rules and step-by-step design. By following the stages of work, you can avoid mistakes that will lead to a short service life of the structure.
Preparing the vault
To prepare, you need profiles and levels. The profiles are fixed to the base with dowels. First, a frame is mounted on both sides of the opening, describing the top of the future structure.
After this stage, a metal profile bent into a regular arc is attached at the required distance - its sides are cut. Stiffening ribs are fixed between the bent profiles at a distance of 20-25 cm.
Attention! All fixed elements are checked with a level, and the strength and rigidity of the frame is also taken into account.
Arch arch installation
The arcs of the arch are made according to a pre-prepared template. It can be made on plywood or paper. An arc cut from the material is attached on both sides to the frame base with self-tapping screws.
For evenness, craftsmen use another method, in addition to the template. A curved profile is attached to the prepared cut material from the back side.
Preparing the side parts
The side part is equal to the distance between the arcs. Depending on the material used, it is bent. For gypsum plasterboard there are 2 methods of bending the sheet - dry and wet. The finished curved panel is placed between the arches in the opening. The part has dimensions equal to the arch of the structure.
Mounting the interior arch post
A plasterboard structure requires a metal frame onto which the rack elements are attached. Other materials are attached to a frame base or glue.
To make an element, the required distance is from the edge of the arc to the bottom. The resulting length is measured on the material and cut. You will need 2 front parts and a strip between them.
All fixed elements must be checked with a level not only vertically, but also the evenness between the left and right parts.
The final moment of installation
The last step is to cover the joints with decorative molding. If the structure is made of gypsum plasterboard, all joints are reinforced, and the fastening points are covered with joint putty. It is necessary to cover the structure with a primer and finishing putty. After drying and rubbing, they decorate (paste, paint).
The arched design is easy to assemble if you purchase it as a complete set. However, it has a number of nuances when installed independently. The evenness of the arch is beauty and sophistication.
Step-by-step manufacturing instructions
When planning home renovations, you can turn to professional finishers who will install arches made of plasterboard and other similar materials. If you wish, you can do all the work yourself if you have the simplest tools.
You just need to choose the type of arch that should correspond to the characteristics of a particular room, make an approximate sketch of the future structure, decide on the height and width of the opening, select the right materials, dismantle the door yourself and make an original and stylish arch.
Taking measurements
Like any other construction work, making a door arch begins with taking measurements. To do this, use a level and a simple tape measure. Measurements are taken from the opening and passage, the optimal height and width are determined, you will need to take into account the dimensions of the span between the walls.
All measurements obtained are entered into the drawing, which greatly simplifies the work and allows you to calculate the required amount of building materials. All work is carried out by checking the sketch, maintaining the calculated dimensions.
Removing the old door
If necessary, the old door is dismantled and removed along with the frame. It is recommended to carry out the work as carefully as possible, preserving all the trim and the canvas itself. You will need a chisel, mallet, chisel and similar tools.
Dismantling an old door takes literally half an hour. If necessary, you will need to additionally level the opening, for which you carefully use a chisel, chisel and hammer: remove large protrusions and clean the concrete from foam and sealant.
Arrangement of the supporting frame
The supporting frame is the basis of the entire structure , which is attached to the doorway and ensures the reliability, rigidity and durability of the arch. The use of metal guides for drywall simplifies the work, while fastening the elements can be done either directly to the walls or pre-assembled, and then fixed using anchors and dowels.
Installation of the frame is carried out as follows:
- Along the lines of the opening, a contour made of a metal profile is fixed using anchors and dowels.
- Vertical guides are installed with a slight ledge from the interior wall.
- Parallel to each other, 2 profiles from a metal contour are installed on each side.
- Having mounted the profile, you can begin fixing the drywall. With a gypsum board thickness of 12.5 mm, self-tapping screws measuring 3.5 by 35 are used.
- Plasterboard covers 2 sides of the frame. It is not recommended to save on screws and fasteners, since the quality of fixation and durability of the completed structure will depend on this.
- The easiest way is to build an arc-arch from a metal profile, for which the metal is cut in increments of 6-7 cm with special scissors. To make an arched structure you will need 2 of these blanks.
- The arcuate profile is installed and secured to the frame. They need to be secured with self-tapping screws or special hangers, the number of which will depend on the width and length of the opening.
- In increments of 50 mm, stiffening ribs are installed along the perimeter of the frame, which are fixed by guides from two contours.
The supporting frame will be durable; the homeowner will only have to cover it with plasterboard, plywood and decorative finishing. On sale you can find a ready-made curved profile, the use of which will significantly simplify repair work and the manufacture of the arch.
Bending a sheet of drywall
Having mounted the supporting frame, you can begin bending the plasterboard sheets, which is necessary to give the arch a decorative and original appearance. GCR is a universally usable, durable and pliable material that easily takes the desired shape and guarantees the highest possible durability and reliability of repairs.
There are two ways to bend drywall sheets:
With the dry method, small cuts are made on the underside of the sheet, located parallel to each other. The material is easily bent and fixed to the installed frame with self-tapping screws or other fasteners.
The wet method takes longer, but it is possible to give the material its original shape. The sheet is moistened, small punctures are made in it, and then, under pressure, it is carefully bent according to the template. After drying, the surface retains its shape; all that remains to be done is to fix the cut and bent parts in the mounted supporting structure.
Rough sheathing and puttying
Sheathing the mounted arch frame with plasterboard is simple. It is recommended to first secure the material with adhesive tape, on top of which screws are screwed. The minimum fastening step is 5 cm. With a larger distance between the screws, it is simply impossible to ensure high-quality and reliable fixation, and the arch will have to be redone.
After fixing the material with self-tapping screws, it is recommended to clean the edges of the plasterboard sheet, which will prevent damage to the edge on which a perforated plastic corner is additionally installed. After attaching the gypsum board, you can begin rough finishing and leveling it using putty.
A primer is applied to a sheet of drywall, and putty is applied on top of it. To improve the quality of work, putty should be applied in several layers, using a special reinforcing mesh and reinforcing the corners of the arch with fiberglass. It usually takes 10-12 hours for the putty to dry completely. You will have to wait a day for the composition to dry completely.
Decorative finishing
A door arch with your own hands can be finished with various materials. Factory-made wooden overlays are very popular, allowing you to give the structure an original look. You can also cover the opening with plastic elements, cover it with wallpaper, paint it, or decorate it with Venetian plaster.
It is popular to decorate doorways with natural or artificial stone, which allows you to create an unusual and original interior. Homeowners who prefer environmentally friendly materials can recommend cork, which is additionally coated with wax or varnish on a natural basis. In private houses, arched cladding is made with clinker tiles; such finishing does not require maintenance and will last for decades.
In each specific case, the choice of one or another finish is made based on the preferences of the homeowner, the style of decoration of the apartment or private house and the overall budget. The easiest way is to make an arch in your apartment yourself and cover the opening with ready-made wooden and plastic panels. Venetian plaster is an original decorative material, working with which will require appropriate experience and special tools, so when choosing a finish, it is best to turn to professionals, which will guarantee the quality and durability of the repair.
Source: 7lestnic.com
