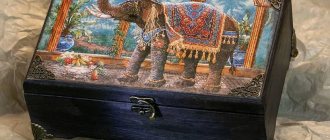
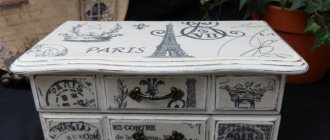
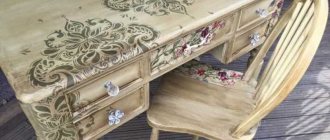
Today, the decoupage technique is gaining increasing popularity, which consists in decorating household items by pasting them with various designs, ornaments and other materials.
Kitchen jars for cereals, decorated using decoupage technique
This allows you to refresh the appearance of outdated furniture and give it uniqueness. In addition, decoupage does not require significant financial costs, and the options for an updated design are limited only by the owner’s imagination.
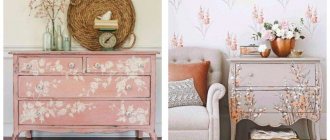
Beautiful chest of drawers decorated using decoupage technique
History of development
The history of decoupage or DIY magic
Many experts believe that the development of decoupage as one of the art directions takes its origins in Germany at the end of the 15th century. At the same time, they first began to use such a technique in China in the 12th century.
This technique was called design for the poor, since very fashionable imported items from China and Japan were available to few and were simply copied
Due to poverty, the peasants could not afford to buy good furniture, so they tried to make their home cozy on their own. To do this, they cut out various pictures from thin paper and pasted them onto interior items.
“Paper mosaic” technique - many details depicting parts of plants were cut out of paper, painted and glued onto a base, mostly black
The decoupage technique reached its greatest peak in popularity in the 12th century, when Europe was swept by the fashion for oriental luxury. However, furniture in Japanese or Chinese style was very expensive and not everyone could afford it. Therefore, the craftsmen cut out individual fragments of oriental patterns, gluing them to the surface of the furniture. To prevent the fake from being noticeable, the design was covered with several layers of varnish.
Vintage drawings for decoration using decoupage technique
Nowadays, decoupage has again become popular. The development of industry and the emergence of new materials allows craftsmen to bring to life the most daring ideas. It should be noted that today folk craftsmen are divided into two camps - some use ready-made pictures when decorating, others prefer to color black and white drawings themselves.
Decoupage - creating home comfort with your own hands
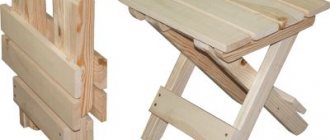
Decorating an old stool
For many, it will not be difficult to find an old, tattered, but still strong stool. These things often sit somewhere in a dark corner of a closet, garage or attic. It’s high time to throw them away, but I can’t help but think they might come in handy during the next repair. This master class, demonstrating the decoupage of a stool, will allow you to move it from a dark closet to one of the central places in the interior of the kitchen, hallway, nursery or bedroom of any modern home.
The product has a simple, uncomplicated design and is convenient in many ways. It is easy to carry thanks to a special hole in the seat. It has a strong and practical surface, which, in addition to its main purpose, can be used as an original stand.
Preparatory stage
The result of the work will be a stool in the shabby chic style - beautiful, sophisticated, but with a noticeable antique charm. Prepare the necessary materials and tools:
- old wooden stool;
- decoupage napkins with floral patterns;
- paraffin candle;
- sponge;
- white and black acrylic paints;
- patination paint;
- acrylic lacquer;
- sandpaper with medium and fine grain;
- hard brush;
- PVA glue;
- brush.
If the stool needs repairs, you will additionally need: a hammer, nails, a jigsaw, putty, a wooden board.
Description of work
- Before aging and decoupage the stool, put the old piece of furniture in order. Repair and replace damaged parts. Then carefully sand the surface with sandpaper, remove everything unnecessary: remnants of old paint, varnish, dirt. Next, wipe the wood and degrease it. Fill the largest cracks and holes from fasteners with putty. Don't overdo it - after all, "shabby" means "shabby." After the filler has dried, go through the sandpaper again.
- To create a distressed effect on the wood, start painting the stool with black acrylic paint. This color will appear in areas where the base paint is damaged. You can cover not the entire surface with black pigment, but only the places that are subject to the greatest abrasion (where we plan to artificially create abrasions).
- After the paint has dried, take an ordinary paraffin candle and carefully mark three places of future scuffs on the stool. As a rule, these are the ends of the seat, the edges of the legs, and a little of the surface of the seat itself. Remove pieces and crumbs of paraffin from the stool. We recommend using a brush or a brush with hard bristles.
- Paint the chair with white acrylic paint in two stages. You can begin applying the second layer only after the previous one has completely dried. It is two layers of the substance that will provide an even, rich color.
- Start aging the surface of the chair. Black paint will show through the abrasions. A layer of paraffin will make it easier to remove the main top layers. Take medium-grit sandpaper and go over all the ends. With a little force, peel off the top layers of paint until it is black. Make the abrasions unevenly so that they have the most natural appearance.
- It's time for decoupage - let's decorate our stool with flowers. Carefully separate the layer with the image from the prepared napkin. Next, we cut out or tear out the floral motifs we need for decoration.
The torn edges of the motifs look more natural on the surface. Since the design does not have a smooth edge, it is easier to adapt it to the main background of the product.
- Since the napkin is thin, we lay it on the surface and, using a soft brush with a small amount of decoupage glue (or PVA), with light movements from the center of the motif to the periphery, attach the design to the stool.
Attention! If you are not using a napkin or rice paper, but a thicker material with a pattern, soak it in water for 2-3 seconds. Then apply glue to the surface to be decorated and glue.
- Take a thin brush and use white acrylic paint to tint the light elements of the design. This way it will blend in with the stool and look painted on.
- Glue and decorate the remaining decoupage elements in a similar way.
- Mix some water, white and black paint. Lightly wet the sponge. Wipe it off until almost no paint remains. Using light tapping movements, add aging to the surface of the stool.
Photo gallery of beautiful chairs decorated using decoupage technique:
PreviousChairs Upholstery of chairs: from concept to result
Next
Chairs How to sew a cover for a chair with a back?
Main types of decoupage
The decoupage technique can be performed in various variations and in various ways:
- straight, or classic;
- reverse (used on glass);
- artistic (imitating painting);
- decopatch (decoupage in patchwork style);
- volume.
Historical reports
The founder of the shabby chic style is considered to be the Englishwoman Rachel Ashwell. In the 80s of the last century, when Great Britain was gripped by a massive obsession with the loft industry, the girl’s romantic nature demanded the atmosphere of traditional old England. Rachel went for a walk around the flea market, where she managed to buy a couple of cute, but outdated, little things.
Ashwell carried out the restoration of the finds through the use of various decoration techniques on them. Updated versions of junk and rubbish after processing by the needlewoman were distinguished by sophistication, sophistication and elegance.
Holiday decor
For the celebration, the room is decorated with various details. It is also worth taking care of the furniture. An excellent solution would be fabric decor for the back of the chair.
- Tabletop decor: the best ways to restore and decorate old and new tables. 125 photos of stylish ideas
- Apron decor: the best ideas for creating a beautiful apron with your own hands (115 photos)
- Decor of flower pots - 85 photos of the best ideas and video instructions for decorating the interior with flowers
Covers for the event are made independently by the hostess or purchased at specialized retail outlets.
Wide strips of material, bows, and artificial flowers are suitable for decorating furniture. The selection of all details is carried out taking into account the style of the celebration.
For a corporate party or other holiday, you can make garlands from flags. One letter is written on each element. The result will be the name of the hero of the occasion or an original wish.
Chair decor by painting
Painting the entire surface is a good way to decorate an old chair that still serves its function, but has lost its attractive appearance.
- Before starting work, you need to lightly sand the surface of the chair to remove uneven surfaces and improve paint adhesion.
- Then collect the dust with a damp cloth or sponge.
- Before starting painting, it is also advisable to degrease the surface or prime it to remove dust and unevenness.
- Then you can start painting: several layers of alkyd or acrylic enamel for wood are applied with a roller or spray can.
Finally, the surface of the chair is varnished.
Style Features
Shabby chic, unlike many other interior trends that were formed under the influence of traditions, culture or geographical location, belongs to the “pen” of a very specific person - the talented decorator from England Rachel Ashwell. It was she who came up with the idea to decorate the room with the attributes of antiquity, successfully mixing luxurious antique finds and simple objects with signs of wear and tear. It turns out that it’s all about the frugality and thrift of the prim British. They try in every possible way to save money on buying furniture, often purchasing unique antiques at flea markets or sales. Another English tradition is to sell a house with absolutely all its contents. It so happened that the furniture passed from hand to hand, was painted several times, and through the cracks one could see the true age of the chest, chest of drawers or sideboard.
Shabby chic interior
In decorating the premises, Rachel Ashwell used elegant, but very “shabby” furniture, which added a unique charm to the stylish design with a touch of antiquity. Over time, the shabby chic style in the interior fell in love not only with the British, but also with Americans and Europeans, firmly “settled” in the rooms of apartments and country houses.
Bedroom in stylish design
Initially, only fashion designers were involved in recreating it, but today it is quite possible to create a stylish design on your own, without involving expensive decorators. At first glance, it may seem that gentle and sophisticated shabby is similar to aristocratic retro, provincial country or Provence styles, but in fact these styles have a lot of differences.
Interior in Provencal style
The main difference from Provence or French country is that shabby chic is still luxury, although worn out, it has not lost its exclusive splendor.
The first thing you need to create your own shabby chic at home is to become familiar with the features and distinctive features of the style:
- Vintage and aged surfaces. This is the main difference, because in translation “shabby” means “shabby”. The touch of antiquity can be very real, due to the venerable age of the furniture. You can achieve an equally striking effect by artificially aging the surfaces using various artistic techniques.
Living room with aged coffee table
- Airiness of design. Lightness should be evident not only in the arrangement of furniture, but also in the choice of color palette. The most desirable shades are pastel tones, creamy or vanilla colors, light azure, noble turquoise, lilac or lavender. For the harmonious design of the living room, shades such as fawn, pale blue, and the color of a withered rose are especially relevant.
Kitchen in soft fresh shades
- Prints. As in the Provencal style, shabby chic design has its own unique character, which is expressed in accessories, prints and ornaments. For decoration, frescoes on the walls, stucco on the ceiling, fine embroidery on textiles, delicate prints depicting luxurious roses and touching angels are used.
Everything about this room speaks of shabby chic style.
- Furniture. Any antiques, antique furniture with inlay or carved patterns are a design classic. Don’t despair if you don’t have such attributes at your disposal and you can’t afford the purchase. You can restore chairs, chests of drawers, cabinets and bedside tables with your own hands without extra costs if you know a few simple secrets.
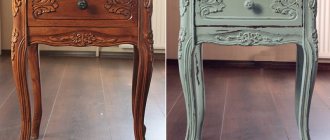
Sideboard with signs of wear
- Decor. Shabby design is splendor and sophistication; this effect can be achieved by choosing the right decor and placing accents in the interior. Expensive candlesticks, porcelain, beautiful vases, expensive fabrics, bronze and crystal - all this can emphasize an exclusive aristocratic atmosphere. The main thing is that every detail or decoration openly declares its venerable age.
An interior with antique elements is all shabby chic.
Many products can be made with your own hands; handmade items such as boxes, photo frames, small chests of drawers, paintings or panels can add that same shabby charm to the design of rooms.
DIY decor
Materials and tools
For any of the techniques, working material is required. A set of objects and tools with which decoupage is performed directly:
- brushes of various widths and densities;
- vinyl glue (can be replaced with regular wallpaper glue);
- napkins with images or printed pictures;
- felt-tip pens, paints, pencils that may be needed to complete the image;
- varnishes for surface coating.
- auxiliary elements for decoration (glitter, stickers, shells);
When using images printed on a printer, you need to make the paper with the image as thin as possible.
For this you will need scissors and tape. Place some tape on the back of the image and carefully tear it off. At the same time, he takes with him a certain layer of paper.
It is necessary to repeat the procedure until you obtain a paper base as thick as a napkin..
Decoupage can be done on any surface: wood, plastic, glass and even fabric.
Attention! To prevent your brushes and other tools from becoming disposable, do not forget to thoroughly wash them of paint, glue and varnish immediately after use.
How to make chair seats with your own hands, read this article:
DIY crafts: useful ideas
Homemade products can be made from various materials and in different styles. The main goal in such decoration remains to create a beautiful space and increase its functional use.
An unusual solution for napkins will add a festive atmosphere to even the most ordinary dinner or lunch.
This decor of napkins will make any lunch or dinner festive.
The most popular crafts are:
- cup stand;
- potholders;
- shelves for spices;
- topiary.
Spice boards are usually made of wood, and potholders are made of fabric. Coasters for cups are made from CDs, which are decorated with various designs. Topiaries are made from foam plastic.
Next, we will take a closer look at the manufacture of all these accessories.
Perhaps you will find useful information about creating a design for a small kitchen of 4 square meters. m. in "Khrushchevka".
https://youtube.com/watch?v=NwYB59CWUUU
Decorative effects
To achieve the desired texture, different surface decoration techniques
- craquelure;
- attrition;
- artificial aging ;
- patination;
- toning;
- shading;
- gilding.
As a rule, several decorative effects are used in combination .
You may also be interested in an article on how to make a wooden chair with your own hands. You can find out how to make a highchair here.


