Tools for furniture assembly
It should immediately be noted that the assembly process will seem more difficult for beginners, since they lack the necessary skills. And until they are well enough developed, it will not be possible to learn how to quickly assemble furniture. However, this is not a reason to give up. Any master in the past was a beginner.
Having decided to assemble previously purchased furniture, you should first purchase all the tools that will be required for the work. It is a mistake to believe that only 2-3 tools may be needed for this purpose. In fact, the work requires a whole set, which consists of different devices.
First let's look at the important types of fasteners that can be used:
- screw tie - it is usually used for assembling furniture made from solid wood or chipboard. This is a high-quality connection that has low cost, so it is often used;
- furniture corners - they can be not only metal, but also plastic, they are easy to install, but at the same time provide reliable fixation. They are used for assembling upholstered and cabinet furniture;
- minifix is another type of connection that can withstand many assembly cycles;
- rafix - it is fixed using two small holes;
- self-tapping screws - the main advantage of fastening is its low cost. However, it is less reliable than minifix.
Sometimes screws with a countersunk head are used for fastening. Many craftsmen give advice on assembling furniture for beginners not only to help them simplify the process itself, but also to improve the result. And these tips often include the use of such screws.
This may be necessary if we are talking about installing a shelf or the back walls of a cabinet, as well as some other elements. As a rule, this type of fastening is never included in the kit by furniture manufacturers. Therefore, you will have to purchase it yourself.
Now let's talk about the tools that you may need. It should immediately be noted that depending on the specific situation, this list may change. Consider a standard set, which consists of the following items:
- screwdriver - you can use it to perform almost all operations in the process of assembling furniture;
- bits for magnetic holders - there are three types of bits, each of which is suitable for working with a specific type of furniture. For example, star-shaped bits are commonly used for mounting household appliances. Of course, we are talking about built-in technology;
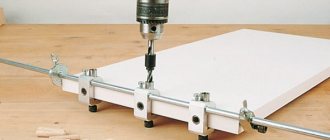
- hammer drill, drill and jigsaw - if you need to make holes for inserting any furniture, then you won’t be able to do without these tools.
It is also necessary to prepare a level and tape measure in advance. Instructions for properly assembling furniture often indicate that it is necessary to use a stationery knife.
Before you start assembling furniture, you need to check how accurate the cutting is for the screws. After all, no one has abolished such a concept as a manufacturing defect. Inaccuracies are also possible if the furniture was made by a novice craftsman.
Assembling the upper cabinets
Assembling these items is not particularly difficult. These elements consist of a minimum of parts and fittings.
What they consist of:
- Two side walls.
- Top.
- Bottom.
- Back wall.
- Doors.
At least this is how the simplest type of cabinet is designed. However, there is no particular design difference.
Assembly:
- Installing hinges. As a rule, this is a four-hinged hinge - the most popular type of fittings for hanging doors. It fits tightly into a hole with a diameter of 30 mm and is installed at an angle of 90°. Attached to the door with two self-tapping screws. The holes can be drilled at the factory or simply marked. Then the side frame, in which there are holes for attaching the mating part of the hinges, is joined to the door (in a lying position), and also screwed with self-tapping screws.
- Housing assembly. The sides are connected to the top and bottom by means of confirmations, which are tightened with a hex wrench or a screwdriver if the required bit is available. Now the almost assembled cabinet is placed face down.
- Rear wall mounting. First you need to check the diagonals of the case. To do this, two measurements are made. There shouldn't be any difference between them. If it still exists, you need to eliminate it by slightly deforming the furniture body in the desired direction from the corners. Now the back wall is applied and nailed with small nails. Instead of nails, you can use staples if you have a special furniture stapler.
- Installation of shelf holders. Despite the difference in design, hinges are almost always inserted (hammered) into blind holes in the side walls. Then the shelves are placed on the holders - but this is after the cabinet has been hung. Sometimes the bushings are driven under the shelf supports first, and the latter are already in them - there are different design solutions.
- Installation of hangers. Fastening depends on the design of the enclosed canopy. They are unregulated and adjustable.
- Assembling cabinets with drawers. The bedside table and drawers are assembled similarly to all cabinet structures, with the difference that guides are attached to the inner surface of the sides. It is better to install the guides before assembling the cabinet. The counter part of the guides is attached to the bottom of the drawers. They are fastened with 6x134 mm self-tapping screws.
Advice: it is better to hang the doors after the cabinet is hanging on the wall. This makes it easier to hang the element.
Hinges with an oil closer are very popular, through which doors are closed smoothly.
Step-by-step furniture assembly technology
Some may think that assembling furniture is a trivial matter. However, this is a common misconception. Such work must be approached with the utmost seriousness to avoid mistakes. After all, furniture can even be damaged if you do not adhere to all the rules during work and forget about caution.
In general, the entire assembly stage can be divided into several stages for greater convenience.
- Unpack all the details of the ordered furniture, check the set of fittings and fittings. Check that the fasteners match the color of the furniture. Be sure to compare the stated number of parts with the one actually available. Perhaps some detail is missing.
- Find the assembly instructions, which the manufacturing company must include with your order.
- Take out all the necessary parts, prepare tools for assembly.
- Check that the mounting holes are the correct size. Pay attention to the correctness of their location.
- It is better to start installing large furniture after its small elements have been assembled. This is extremely important if the master has no experience in such work.
- After installing the doors, shelf supports, hinges and strips, the step-by-step assembly of furniture with your own hands involves the installation of shelves and drawers. If decorative hardware is present, it should be installed last.
- At the last stage, it is necessary to adjust the facades and check the quality of the assembly.
It is important to remember that cabinet furniture can be completely assembled at once and then installed in a pre-selected place in the room. But when installing a wardrobe, this is unacceptable. You must first install the sliding system and only then fix it to the wall.
Furniture fittings
The choice of fittings for cabinet furniture is a moment no less important than the assembly itself.
Cabinet hinges Poorly selected hinges can negate the results of your efforts.
Hinge mechanism with four hingesToday this part is increasingly used. Adjustment is carried out both at the fastening stage and after completion of the installation work.
Guides for drawers You can take roller or ball-type ones. Handles for the lids of drawer compartments and cabinet doors They need to be matched to match each other. They may differ in style - it is important to adhere to a single design for the facade or interior content. For children's cabinets or chests of drawers, it is recommended to choose streamlined handles so that the child does not get hurt while moving or playing.
Any material you are going to use must be of high quality and well dried.
Common mistakes while working
When a person who has no experience in this takes on the task of assembling furniture, mistakes are not easy to avoid. Especially if the necessary tools for assembling furniture are missing. Let's look at the most common mistakes that novice masters most often make.
Refusal to study the instructions. Some people believe that reading the instructions is completely unnecessary. But manufacturers provide this manual for a reason. Therefore, before you start assembling a piece of furniture, you need to familiarize yourself with its contents.
Incorrect installation sequence of structural parts. For some reason, craftsmen without experience believe that it is first necessary to secure all the large elements, and only then begin installing smaller ones. However, this is the wrong approach. First, small elements are fixed, and then larger ones.
Incorrect product specification. Oddly enough, experienced professionals sometimes make this mistake. Without studying the instructions, it is simply impossible to determine which parts are left and which are right. This causes confusion.
The surface for assembling furniture is dirty or uneven. Before starting work, you must clean the surface and check whether it is level.
Refusal to measure the diagonal of furniture. This makes it more difficult to avoid distortions. It is imperative to use a level to prevent this.
Complicating the work process due to confusion. By violating the order of work, you can complicate your task.
Refusal to verify the length of holes for fasteners. Schemes for assembling furniture with your own hands must contain information regarding all important quantities. And they need to be checked to avoid errors during the assembly process.
Calculation example
Let's look at the details of the cabinet with dimensions of 720 mm high, 500 mm wide and 450 mm deep. Furniture consists of parts, the name of which indicates their location in the structure - bottom, sides, slats, lid, shelf, back wall and facade.
Bottom
Cabinet depth 450 mm. The depth of the bottom is separated from the total depth by the facade, the thickness of which is 20 mm. This means the depth of the bottom is 450 - 20 = 430. The width of the bottom is 500 mm, this is clearly visible in the diagram - no parts separate the bottom width from the total width.
500*430 – 1 Bottom
Planks
The strips are located between the sidewalls, and the total width of the body is 500 mm and the thickness of the plate is 16 mm. From the width of the cabinet we subtract two sidewalls 500 mm -32 mm (16+16) = 468 mm. Let's set the width for the slats to an arbitrary one - the smallest is 60 mm. As a result:
468*60-2 Planks
Sidewalls
Total height 720 mm. The sides are located in height between two parts, namely the bottom and the lid. Accordingly, 720 mm – 32 mm (16+16) = 688 mm. The façade is separated from the total depth by 450 mm -20 mm (façade) = 430 mm. We get:
688*430-2 Sidewalls
Lid
The size of the lid is equal in width and depth to the dimensions of the cabinet. The lid overhangs the facade, so the depth is 450 mm. In order for the lid to well cover the ends (cut of the plate) of the sidewalls, I add 1 mm to the width of the lid. As a result:
501*450 -1 Cover
Removable shelf
The shelf will be removable for ease of use. It is located between two sidewalls, which means its width is 500 mm -32 mm = 468 mm. Because The shelf is removable; we make a gap of 1 mm on the sides. The depth of the shelf is 20 mm. As a result:
466*410-1 Removable shelf.
Rear wall and façade
The back wall and facade are separated from the total height of the cabinet only by the lid, so 720 mm – 16 mm = 704 mm. A technological gap of 3-4 mm in height and width is required. Accordingly, the size of the facade is:
700*497-1 facade=rear wall fiberboard or HDF.
Total:
- 500*430-1 bottom
- 468*60-2 strips
- 688*430-2 sidewalls
- 501*450-1 cover
- 466*410-1 removable shelf
- 700*496-1 facade
- 700*496-1 rear wall
Example of kitchen wall cabinet detailing
It is important for me to see the location of the part in the design and then the process goes smoothly. Moreover, you can always check the dimensions of the parts when the diagram is in front of your eyes
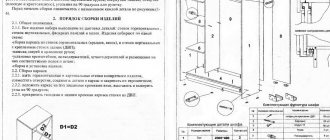
The picture shows a diagram of the assembly of a standard kitchen cabinet.
- 720*280-2 sidewalls
- 268*280-2 horizons
- 266*260-1 removable shelf
- 716*296-1 facade
- 716*296-1 DVPO
Example of cabinet calculation
Let's complicate the task a little. Let's calculate a cabinet wardrobe with hinged doors, where the internal size will be specified. I recommend that you calculate it yourself and then check it with my details.
Click here to see cabinet detailing
- 2168*500-2 sidewalls
- 900*500-1 bottom
- 902*520-1 roof
- 1680*495-1 partition
- 868*495-1 horizon
- 318*495-5 shelves
- 2180*446-2 facades
- 2196*896-1 rear wall
Even if they made mistakes, it was simply due to carelessness. I admit that technologists make most mistakes this way. Because it is difficult to make a mathematical mistake in such simple actions.
Conclusion
In conclusion, I would like to draw your attention to the assembly diagram. Draw by hand, drawing every facet of the part and then you can easily cope with the task
This is how I learned to calculate furniture and still do.
If you need detailing of cabinet or built-in furniture, please contact us. We will definitely discuss the terms of cooperation and come to a common opinion. For a moderate percentage of my work, I will prepare a detailed project for you on time.
What would you like to add to this article?
I will be very interested to hear your stories!
With good thoughts about you, always in sawdust
Rekun Dmitry.
Photo of DIY furniture assembly
Constructors for PC
Most desktop programs for furniture modeling are paid. But many developers provide access to trial versions of the software with a limited trial period. Trial versions of programs often have reduced functionality, but even they are enough to calculate the size of cabinets.
Furniture designers come in two-dimensional and three-dimensional forms. 2D programs create drawings and carry out calculations. They are used in workshops to produce parts for furniture sets. Three-dimensional programs allow you to create three-dimensional models. The user will be able to imagine what a cabinet or set will look like in the living room or kitchen.
Furniture designers belong to specialized programs. They can only be used for modeling kitchen units and cabinets. But there are also more complex programs like 3ds Max, LightWave 3D, etc. Such software can be used to create any three-dimensional objects, including furniture.
Basis-Furniture Maker
Program features:
- automatically generates drawings based on three-dimensional models;
- the designed furniture fully complies with all current GOSTs and ESKD;
- you can import models from 3ds Max;
- an assembly diagram of the finished product is automatically created.
K3-Furniture
The program is designed for designing cabinet furniture. Popular among workshops making custom kitchens.
bCAD Furniture
Program features:
- supports the development of individual furniture elements;
- you can import drawings from 3ds Max and other object modeling software;
- libraries contain a lot of materials and fixtures.
T-FLEX Furniture
This software package is designed for the development of various types of cabinet furniture. Presented in 4 editions: salon, designer, expert, server. Modules can be downloaded to your computer individually or paid for all at once. The program is quite demanding on computer performance.
Program features:
- suitable for developing furniture of any complexity;
- the library with objects is loaded separately;
- reads files created in other 3D modeling programs.
PRO100
Software benefits:
- clear interface;
- you can work in 2D or 3D mode;
- not demanding on computer performance;
- there is a function for generating assembly drawings;
- The preinstalled base provides many interior elements, materials, etc.
Sawyer
A program for creating material cutting maps. Also used for designing cabinet furniture. Currently, the project is closed, development and support of the program has been discontinued. The application calculates the percentage of leftovers after cutting and is more suitable for furniture manufacturing companies.
WOODY
Software Features:
- clear interface;
- you can work with complex parts;
- joining of elements automatically, taking into account technological gaps;
- import textures from PC;
- you can create assembly drawings;
- support for 3DS, OBN and other formats.
Astra Furniture Designer
Advantages of the software:
- large library of finished products and materials;
- free designer and cutting for all users;
- you can calculate the approximate cost of the finished product;
- high-quality 3D visualization of designed products.
KitchenDraw
A program designed specifically for kitchen design. There is a free trial version. The user works with two-dimensional drawings, but if necessary, can switch to three-dimensional visualization mode. This designer is aimed primarily at experienced designers.
Advantages of the program:
- large catalog of ready-made elements;
- a lot of materials to work with;
- There is a clear tutorial for beginners.
Solidworks
This program is designed for engineering design and three-dimensional modeling. It is most often used in industrial production conditions. It will be quite difficult for beginners to understand this program. The program is paid, but if necessary, you can download a trial version.
Features supported by the program:
- three-dimensional modeling;
- animation of finished furniture;
- calculation of product strength;
- creation of flat and three-dimensional sketches of furniture.
Kristina Gorbunovaauthor
Woody software
This product is ideal for those who are just starting to learn how to make cabinet furniture. Woody can be used by ordinary users who want to design furniture for their home themselves.
Benefits of the program:
- A friendly interface that allows you to learn the basics of the Woody program in a short time;
- Creating a bill of materials automatically. The specification will contain all the necessary dimensions, part numbers and even their approximate cost;
- An extensive library of materials used, in which you can find products from the most popular brands.
Interface of the Woody program for furniture development The functionality of the Woody program allows you to take standard parts as a basis and change their parameters to suit specific conditions; - The presence of three-dimensional visualization allows Woody to successfully compete with many similar products;
- The Woody program allows you to create a whole range of drawings that can be useful in production, from assembly drawings to individual drawings with all dimensions and mounting marks.
The main disadvantage of Woody is the lack of online technical support for developers. Even the most current version of the program already conflicts with newly released operating systems, which makes its own adjustments during use and scares off many users.
Additional Important Details
Of course, more storage is the most important part of any computer desk. A table cannot be called a complete structure if this interior object, in addition to computer components, has nowhere to fit other things.
All other storage areas must also be assembled yourself. Below is a detailed plan for how to assemble a two-door workstation for working at a computer. For this:
- The top 2 shelves and the crossbar for stability are cut from a furniture panel 40 cm wide, and the middle wall is made from a 20 cm panel.
- The central wall is attached to the tabletop; we screw a transverse strip behind it.
- The upper shelves are placed on the central wall. Be sure to check the level and secure everything tightly.
- The side shelves are screwed on with self-tapping screws.
- We attach the entire structure to the middle wall.
- We cut out the shelf above the cabinet to the dimensions you need, for example, for a printer. We use a 20 cm shield.
- We cut out the drawers for the cabinet from 1.2 x 12 cm boards. We use plywood for the bottom of the product.
- There are 2 side guides for the entire tube. Keep the same distance between them.
- Next, we attach the guide beams for the keyboard stand.
In the end, the table is ready and looks like one single integral structure. Once you are sure that the table suits you in all respects, you need to disassemble it.
A handmade computer desk is, in principle, not a difficult task, especially for people who have excellent basic knowledge of handling tools, etc.
Choosing this option instead of buying expensive furniture will save a lot of money and allow you to realize your individual potential.
Be confident in your abilities and you will succeed!


