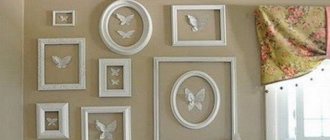
Almost every apartment has paintings or photographs hanging on the wall. But if you just stick a piece of art to the wall, it won't look good. For this purpose, frames were created - the design of paintings and photographs. They allow you to improve the design of the room by adding a little coziness.
Stores sell various frame options, but not all of them are suitable for a specific interior. Therefore, many craftsmen prefer to make such frames themselves, using different types of materials. This article will tell you more about how to make a wooden photo frame with your own hands.
DIY wooden photo frame
Design selection
Before you begin the frame manufacturing process, you need to decide on the design of the future product. When choosing a design, attention should be paid to the following nuances:
- will the finished frame fit the overall interior of the apartment;
- the frame should not match the walls of the room, but the image;
- the finished wooden frame should complement the photo or painting.
DIY craft - photo frame made from twigs
To achieve the desired result, attention should be paid not only to the design of the future structure, but also to the material from which it will be made. The frame can be made from various wooden products, for example, from sushi sticks or old unnecessary boards.
DIY photo frame made of wood
How to decide on the size
It is determined by the interior of the room in which you will hang the picture, and the actual size of the picture itself. If the canvas is small, it does not need a large frame with a wide mat.
Process Features
There are no restrictions as such when choosing material for the frame. The base can be made from different items, and choose decorative decorations at your discretion . The only condition is that the material must be strong and dense. The simplest option is old boards, from which you can easily make a frame of different sizes. The finished product needs to be painted or varnished so that it fits perfectly into almost any interior.
DIY photo frame
For decoration, improvised means can be suitable, for example, beads, small clothespins, sea pebbles or even pasta. You need to choose the material for decoration so that the finished frame complements the picture. For example, if the photo was taken on the beach, then it would be logical to decorate the frame with small shells or pebbles.
Original options for photo frames
Natural styles, or the charm of handy materials
Your choice is a light Provence style, airy ethno, good-natured country. The materials and decorations that you have in your home and your own efforts are appropriate here. Give yourself some space to be creative and create an extraordinary frame!
Decorating a mirror frame using stained glass technique
Ceiling plinths or moldings are a simple option with which you can practice the grace of a mirror frame. You can choose a skirting board with a pattern and protruding elements, wide or narrow, paint it in a monochrome shade or several colors.
At the same time, do not forget that the baseboard can become the basis for decoration. For example, by attaching beads, feathers, coins, buttons, and rhinestones to the plinth, you will get a bright solution for the shabby chic style, and shells, pebbles, pebbles, dried seaweed, and even multi-colored sand will help create a sea melody. A little training - and the miracle masterpiece is ready!
Decorating a mirror with plastic spoons
Another option for a frame made of plastic spoons
Mirror frame made of painted shells
Mosaics and ceramic tile pieces are great options for natural styles.
At the same time, such materials are always available in the house, and creating a single ornament, a mini-picture from them is even magic! The use of dried flower buds, ribbons, beads, embroidery elements, and lace in decorating frames is a charming option for ethno or eco style, ancient styles that require wealth, luxury from simple objects, and a unified style. A single-color frame tone is a harmonious idea for the interior, but different colors and shades are an opportunity to make a frame with a mirror the main decorative object, the basis, the starting point. That element that will outshine everything!
Decorating a mirror frame with mosaics
Decorating a mirror frame with rope
Preparing tools
As the main material, you can use various wooden products, for example, plywood or parts of pallets. You can easily make frames or other products from them. After choosing the design of the future frame, you need to prepare working tools.
Preparing tools
Table. Tools for making a wooden frame.
| Position name, photo | Description |
| Wooden elements | Various wooden options will work, such as popsicle sticks, unnecessary slats, or part of a pallet. Alternatively, you can buy ready-made wooden baguettes and make an elaborate frame out of them. |
| Fasteners | You can use wood glue or special finishing nails to join individual pieces of wood together. If the structure is very large and reliable fixation is needed, then these types of fastening can be combined. |
| Saw and miter box | Using these tools, you can cut pieces of wood at a certain angle, which is very important when creating a frame structure. The resulting joints are of the highest quality, which has a positive effect on the appearance and reliability of the frame. |
| Clamp | If you plan to seriously engage in the manufacture of frames in the future, then a clamp will allow you to obtain ideal quality products. It is needed to press the parts of the structure while gluing them, thereby maintaining the ideal geometry of the wooden craft. |
Note! Be sure to buy paints and varnishes to process the finished structure. For this purpose, acrylic paints, stains, impregnations, varnishes or other wood compounds can be used to give the frame an elegant appearance.
Master class: birch bark photo frame
Natural color
There are a stunning variety of photo frames with this theme. And almost all of them are made at home, using absolutely any natural materials.
Decorating the frame with moss, pine cones and acorns
While relaxing on the sea coast, do not forget to collect beautiful shells. Buy a regular frame and have a glue gun ready. From everything you have, first assemble the composition on a separate piece of paper. Carefully transfer your creation, insert your best vacation photo and enjoy the memories.
To decorate such a frame you need shells of various sizes.
And while walking through the forest, you can pick up not only mushrooms and berries, but a lot of material for decoration. The easiest option would be to take a cut of a small stump or a piece of tree bark. Treat the surface of the wood with termite repellents and varnish. And try a frame in the form of an ethnic wattle fence. To do this, you will need to collect small but elastic branches.
To decorate a small frame you will need a branch no more than a meter long, which must be peeled and cut into rings
Plywood photo frame
One of the simplest options for making a photo frame is using a plywood sheet. Thanks to its simple design, you can make such a frame in just a few steps.
Step 1. Prepare all the necessary tools for work.
Tools and materials
Step 2 . Paint the pre-cut boards some color, preferably dark tones.
Painting details
Step 3 . Wait a few minutes for the paint to dry.
Wait for the paint to dry
Step 4 . Apply double-sided tape to the wooden board.
Double-sided tape attached
Step 5 . Remove the backing from the double-sided tape.
Removing the backing
Step 6 . Carefully place your photo onto the tape.
Photo is pasted
Step 7: Adjust the dimensions of the photo if necessary - you may need to trim the edges of the photos so that the dimensions exactly match the dimensions of the frame.
The edges of the photo may need to be cropped.
Cropping a photo
Result of work
Step 8 . That's all. The plywood photo frame is ready.
Finished frame
You can make several of these frames
Such products are beautiful and elegant, and they are very easy to make. All that remains is to hang the finished craft on the wall and enjoy its look.
The process of making a baguette on a mirror from a ceiling plinth with your own hands
We start by making the main element:
1. Measure the dimensions of the existing mirror and the width of the baseboard 2. Mark the fiberboard or plywood with a pencil according to the dimensions of the mirror and plus the width of the baseboard, cut it out. 3. Make 2 holes in the base for the loop and thread the cord. 4. Apply glue in a zigzag pattern in the rectangle where the mirror sheet is marked. 5. We try on and carefully glue the mirror, place it under a flat press (you can use an inverted coffee table).
Stages of preparing a do-it-yourself baguette for a mirror:
1. We measure 4 pieces of plinth, which in length will ultimately correspond to the cut base.
2. To match the pattern at the corners, cut off the edges one by one at an angle of 45 degrees, trying on the connection, try to continue the pattern.
3. We get 4 trapezoidal blanks, which we lay out on a hard surface and, if necessary, we adjust the joints as carefully as possible so that they are invisible.
4. Glue the cut corners, connect them perpendicularly to each other, squeezing them tightly with your hands until they set, and wait for the time specified in the glue instructions.
5. Most often, cracks still form at the joints of parts. Therefore, after the glue has dried, we fill the cracks on both sides with white universal putty (you can use acrylic putty, but I prefer plaster). We coat the sides of the frame with putty.
6. Don’t worry if the putty turns yellowish during work; when it dries, it will become pure white. We leave everything to dry for several hours.
7. When the putty is completely dry, we begin painting. It is best to use acrylic or white water-based paint. If you want to get a certain color, you can tint the emulsion with pigments. A sponge is the most successful option for painting convex surfaces, as it is easy to use and does not leave streaks.
8. Let's wait for the paint to dry and finally coat it with clear acrylic varnish.
9. The finished baguette for the mirror in the shape of a frame remains to be glued to the previously prepared base.
Popsicle stick photo frame
Popsicle stick frames are beautiful and easy to make. Even children can make such crafts and give them to friends, family members or teachers. With a little time, you can also create your own stick frame.
Simple option
Step 1: Find 4 Popsicle sticks. You will need one stick for each side of the frame. If you need a thicker frame, glue 2 sticks together to make one wide one.
Popsicle sticks
Step 2 . Glue the sticks together to form a square and wait for the glue to dry. To do this, use regular PVA glue.
Gluing sticks
Step 3 . Paint and decorate the frame. This can be done using markers or acrylic paint. Let the frame dry and then decorate it. You can write something on the surface of the product, such as “Daddy and Me” or “I love you, Mommy.” You can also glue items such as glitter, gems or buttons onto it.
The frame of the product is decorated
Step 4 . Place the finished frame on the photo and trace it from the inside using a pen. Photos can be valuable, so it's best to use a copy instead of the original.
Marking is being applied
Step 5 . Cut out the photo. Try to go a little beyond the line you drew. This way your photo won't stick out from the frame.
Photo cut out
Step 6 . Glue the photo to the back of the frame. This manipulation will make the frame and photograph a permanent structure.
Pasting photos
Step 7 . Add ribbon to the back of the frame if you want to hang it on a nail. Cut a piece of tape, flip the frame over, and apply some glue to the top left and right corners. Press the ends of the tape for a few seconds to secure the tape. Let the glue dry and then hang the frame.
The tape is fixed at the back
Step 8 . If you wish, you can glue magnets to the back of the frame so that it can be attached to the surface of the refrigerator instead of a wall. Turn the frame over and apply some glue to the top and bottom of the frame. Press the magnet and wait for the glue to dry. Place the frame on the refrigerator door.
Gluing the magnet
Step 9 . The popsicle stick photo frame is ready. If desired, it can be hung on the wall or attached to the metal surface of the refrigerator.
This is what the finished craft looks like
Reusable frame
Step 1 . Line up 8 popsicle sticks side by side. Lay them horizontally. This will form the basis of your photo. You shouldn't glue them together.
8 popsicle sticks
Step 2: Use a hot glue gun to glue three sticks on top of the horizontal sticks. Place three sticks vertically. Glue one stick in the center of the base of the frame. Glue the other two sticks to the left and right of the base. This will serve as the basis for the entire structure.
3 more sticks are glued on top
Step 3 . Turn the frame over and place a photo of the appropriate size. Place the photo in the center of the design, but do not glue it. You will use the photo as a template.
Photo is placed
Step 4 . Draw a vertical line of glue on both sides of the photo. Make sure the line goes from the bottom of the frame to the top. Be sure to leave a small gap between the glue and the edge of the photo. This way the glue won't get into the photo.
There should be a gap between the glue and the photo
Step 5 . Place the popsicle sticks on the glued surface and press them with your fingers. Hold the chopsticks upright. Make sure the inside edge of each stick overlaps the photo. This will help secure the photo inside the frame. Otherwise, it will simply fall out.
Sticks are pressed with fingers
Step 6 . Glue one stick on top and bottom of the frame base. Apply glue to the surface of the sticks to be glued and fix them in the position as in the photo.
The same is done at the top and bottom of the frame.
Step 7 . Place three sticks on top of each other and secure them with glue. Make another element as in the photo. These will support the bottom of the frame so it can stand.
Creates additional frame support
Step 8 . Glue each stack to the bottom of the frame base. One of them will be in front of the photo, and the other will be behind. This will make the entire structure more stable.
This will make the frame more stable.
Step 9 . Decorate the finished product. Paint the frame and let it dry before decorating. You can write something on the surface of the frame, such as a name or a short message. You can also glue on various small objects, such as glitter, gems or buttons.
The frame can be further decorated
Step 10 . Slide the photo across the top of the frame. To put another photo or image, simply pull it out and replace it with a new one.
A photo is inserted at the end
What materials can be used
Decorating any interior item with your own hands is a game of fantasy and imagination. But in this matter it is very easy to “overdo it” and go overboard, carried away by creativity.
It is better to use one type of material for finishing and decorating a mirror. For example, if you decide to make a frame from the remains of ceiling plinths, then you do not need to add parts from another material to the structure. They may be structurally incompatible and difficult to connect, and the structure may be heavy.
The frame for the mirror can be of a familiar design, or it can be made in the form of stucco molding from any available materials, in the form of a mosaic directly on the surface of the mirror itself. There are a lot of design options for this item and the most important thing is to choose one of the methods.
The mirror frame is covered with bright variegated fabric
A great idea for an eco-style interior - a frame made of plant branches
Round mirror frame covered with beads and sequins
Wooden half frame
Another option for making a photo frame using wood. Such a product can fit into more modern designs, and its manufacture does not require special skills. It is enough to follow all the rules and recommendations.
Tools and materials
To create a half frame, prepare the following:
- photo in the size you choose;
- two light wooden strips;
- a piece of fabric;
- natural rope;
- special eye screws large enough to pull the rope through;
- some polymer clay;
- stapler;
- universal glue;
- scissors;
- pencil and knife.
Making a wooden half frame
You also need to prepare a ruler or other measuring instrument. Once everything is ready, you can start working.
Instructions
Step 1 . Set the recommended temperature to preheat your oven to make polymer clay. Then, using a knife, cut the clay into two even pieces. Roll them in your palms to form smooth balls. Use a pencil to make a hole. The diameter of the hole should be slightly larger than the thickness of the rope. Place the finished clay on a baking sheet and bake for a few minutes until the material hardens.
A hole is made in the ball
Step 2 . While the clay is baking, use a cloth to rub the varnish or stain into the wood, giving it a deeper shade. Don't forget to add old sheets of paper to avoid damaging your home surface. Leave the wood until completely dry.
The wood is given a deeper shade
Step 3 . Take one of the wooden strips and, measuring about 3 cm from both ends, make marks with a pencil.
A wooden strip is marked
Step 4 . Screw both eye screws into these points until they are tight.
The eye screws are tightened
Step 5 . Place the top of the photo or painting face down on the top strip of wood (with screws). This will be the back of the picture. Carefully align the paper so that it is centered and straight. Then secure the canvas with a stapler and glue.
The paper is neatly aligned
Step 6 . Place both clay balls onto the rope and thread the end of the rope through one of the eye screws. Tie a tight knot and then do the same on the other side. Remove any excess rope and use all-purpose glue to secure the edges. This will protect the clay balls from wearing out and the knot from coming undone.
The edges of the nodes are fixed with universal glue
Step 7 . Now all that's left is to hang your new wall art in a place of honor.
The finished frame is hung on the wall
Photo half frame
Another photo of the craft
The simplest children's crafts - photo frames that a child can make himself
A 6-9 year old child is very eager to do everything on his own. This quality is worth developing both in everyday activities and in handicrafts. You should trust the child to do the craft himself, without the help of adults. But for this you need to choose the appropriate difficulty level. At first it may be simple applications from colored sheets, but over time it is worth moving on to more interesting materials.
For example, you can make a photo frame and decorate it with buttons.
Necessary materials:
- corrugated cardboard;
- 2 sheets of A4 white cardboard;
- scissors;
- glue;
- buttons of different shapes, sizes and colors;
- pencil;
- ruler.
Frame making scheme accessible to children:
- Draw a frame silhouette on the back of regular cardboard. Cut out the shape.
- Make another such part from a white sheet, but make a hole for the photo card. Repeat these steps using corrugated cardboard. There should be three parts in total: 1 solid white, 1 white with a compartment and 1 brown with a similar slot.
- Glue two frames together. Glue must be applied around the entire perimeter, not forgetting the corners.
- Using all-purpose glue, add buttons. You need to place them very tightly, moving from top to bottom.
- Apply glue to the reverse side of the decorated part from the bottom and sides. Attach a white sheet base. There should be a slot at the top to place the photo inside.
Pallet picture frame
If you don’t know what to give to a friend or loved one, then a frame made from a pallet is a great gift. To make it, you don’t need any special tools or skills, so anyone can make such a picture frame. You just need to follow the step-by-step instructions below.
Step 1 . Find a whole pallet or small parts of it. Select four small boards to form the frame and make sure they are all long enough.
The boards must be long enough
On a note! If you have spare parts from an old pallet, you can use them to decorate the finished structure. They may also be needed if you made mistakes while working.
Step 2. Decide on the photo size. Take measurements and use them to control the wood you cut.
You need to decide on the size of the frame in advance.
Step 3 . Cut the wood pieces to size. Using your measurements, cut the pieces of wood to the width and length you need for the frame.
Elements of the future frame
Step 4 . Sand the surfaces of the wood pieces using a plane (or have someone do it for you). This must be done with each of the blanks.
Workpieces need to be processed
Step 5 . Form a square frame on a flat surface. Glue the four pieces together at the junctions. Use clamps to tightly connect the parts. Aim for a very neat and tight fit at every corner. Clamps (such as clamps) will help create the necessary pressure. Leave until the glue is completely dry before removing the clamps.
Glued frame
Step 6 . Apply varnish to the surface of the frame. If you want to decorate it, then after varnishing the product can be painted in different colors.
Frame after applying varnish
Step 7 . Glue a thick piece of cardboard to the back of the frame, leaving the top part unglued. The picture or photograph will need to be inserted into the frame through the top. Glue some string to the back and hang the finished frame on the wall. Instead of a loop, you can make a cardboard leg that is attached to the back of the product.
Corrugated cardboard is glued to the back
Step 8 . Insert the photo and hang the frame on the wall in a suitable place. Everything is done, all that remains is to enjoy the result of the work done.
Finished photo frame
The old fashioned way
Artists painted pictures when there was no trace of mechanization of production and mechanized tools. Since those ancient times, the traditional design of frames for prestigious paintings of high artistic and material value has developed.
The carved wooden frame with the painting is shown in section and from the back in pos. 1 pic:
Traditional expensive picture frame design
Mechanically (technically, structurally) its essence is that the main force load (including from the frame) is borne by the painting’s subframe (a frame made of wooden beams on which the canvas is stretched); The stretchers of large canvases are reinforced with crossbars, steel corner plates or plywood gussets. In the event of a painting falling, the frame acts as a collapsing damper - it falls into pieces, but the canvas (perhaps of immeasurable value) remains intact or, at least, suitable for restoration.
Such frames are made individually for paintings. The stretcher with the canvas is inserted into the frame and secured in it, using traditional technology, with small wooden wedges. The rope suspension is attached to the subframe.
Just because of the carved wooden frame alone, its cost is truly royal. The frame parts are connected by joinery joints, bevel tongue and groove (positions 2 and 3 in the figure on glue, and then the frame is held together in a wedge wedge, position 4. The whole technology requires a well-equipped carpentry workshop and worker(s) with solid carpenter skills -cabinet maker. This did not bother the medieval customers at all, on the contrary - since he can afford to order or buy a painting, then the frame should match it. A unique frame, a work of art in itself, frames the painting of the great master, and this lord (sir , sir, Herr) their owner - isn’t this evidence of nobility and dignity?
The original oil painting is still of great value, but line monochrome images and drawings (engravings, etchings, watercolors) in the old days were quite widespread in the homes of the middle classes and the poor. Works of applied art - embroidery, applique, modular (from real objects) compositions even more; The human attraction to beauty is eternal and ineradicable. Simpler pictures were inserted into cheaper frames made from profiled wooden slats; While there were no wood milling machines, the slats were planed into profiles manually using special planes - zenzubels - with shaped pieces of iron. Slatted picture frames are still in use today, but to make them you still need an equipped carpentry workshop, see for example. video:
Video: simple and durable picture frames (in the workshop)
Tree as a canvas
A truly unusual way to present a photo or any other image.
Such a gift will definitely surprise and delight and will not leave its owners indifferent.
To work you will need:
- board of the required size;
- acrylic gel medium;
- brush for applying gel medium;
- wood paint or stain, but optional (in this case it is used to give an antique effect);
- matte decoupage glue or soft paraffin;
- image printed on a LASER printer.
The following process is simple and straightforward:
- print the selected image;
- cover the tree with gel and place the image face down on it, carefully so that there are no air bubbles;
- leave for 12 hours;
- remove the layer of paper by moistening it with water;
- cover with stain, but this step is not necessary;
- cover the dried image with wax.
Photo instructions are included.
Photo source: www.make-self.net
Baguette width:
- The larger the picture, the wider the image baguette should be. This correspondence favorably emphasizes the significance of the picture. Such compositions are placed at the central point of the interior and become accent elements.
- Small paintings are decorated with wide frames. At the same time, compliance is maintained when the total area of the baguette is larger than the area of the image. This option looks very impressive. But you need to take into account that such a design requires a stylistic approach for other images in the room.
- When choosing frames for small images, thin baguettes are often used. This choice looks stylish and modern, especially suitable for a whole group of paintings.
How to paint a frame to suit a specific interior style?
Stylishly designed frames can emphasize the interior design, so you need to choose the color scheme of the baguette, depending on the style of the room. How to paint a picture frame with your own hands, depending on the style of the interior:
- Wall decorations made from carved frames in dark gold or dark bronze tones complement fashionable glamorous interiors and are suitable for a classic option.
- Vintage style is characterized by a composition that may contain aged frames, a candlestick and various accessories such as a mirror on a stand, figurines, boxes, and antique perfume bottles.
- Pretentious frames painted in white, black and silver highlight the modern interior in the Fusion style.
- In a minimalist interior, standard square frames in white or any color that contrasts with the walls look great.
Baguette color and width
When processing a picture frame yourself, it is important to choose the right shade. The color of the baguette should be complementary, shading the picture image
It is also important to consider the colors in which the picture is painted. A warm image is combined with a light-colored baguette, but cool tones are used with a similar frame.
- If the picture is small, then the baguettes should be thin.
- An alternative solution is to use a wide frame for a small picture, where the area of the baguette is larger than the area of the image.
- In general, it is better to adhere to a simple rule: the larger the picture, the wider the baguette.
