How to update an old cabinet?
In any home, the closet occupies a very important place.
It is a pity that over time it loses its original appearance: the appearance of cracks and faded paint make it unattractive, it goes out of fashion and looks out of date. We have to think about his future fate. There are at least two ways out of this situation:
- buying new furniture;
- updating an old closet.
With your own hands you can give your wardrobe a new life, turn it into a unique object, while saving significant money.
Overlays for decorating the end of the cabinet
Usually the ends of the cabinet or any cabinet furniture are covered with simple melamine tape or PVC edge. If the equipment uses an overhead facade, this is quite enough. After all, the end of the cabinet will be completely closed by the door.
But there is always an opportunity to play with this inconspicuous element of furniture in a beautiful and interesting way! Moreover, the thickening on the sides gives the cabinet a more solid and respectable appearance. There are several ways to do this.
For example, use special overlays for the end of an MDF cabinet. At the same time, some changes are made to the design of the box.
A simpler, budget-friendly way is to cover the end of the cabinet with a plank made of the same material, chipboard. It will cost much less than MDF overlays, and the look of the furniture will become more interesting.
How to restore?
Any antique cabinet requires a little restoration, which will significantly improve its appearance.
You can restore the wardrobe yourself if you use the advice of experts:
- A metal brush is used to treat decayed wood, after which the dead tissue is removed.
- The fine dust formed in this case is washed off under running water.
- Sometimes there are holes from nails, some unevenness and cracks in the wooden elements of the cabinet. All this must be cleaned with a spatula. It is necessary to apply several thin layers of putty to match the wood. Each layer must dry before applying the next.
- Then dry all layers in fresh air for 1-2 days. Do not dry wood in the sun.
- Sometimes there are metal parts in furniture that have become covered with rust over time; such places should be treated with a special solution.
- The restored surface can then be painted or decorated at your discretion.
- A self-adhesive film that imitates wood, stone, or metal is perfect.
Varieties
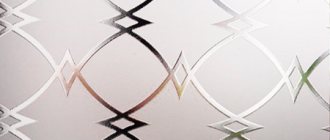
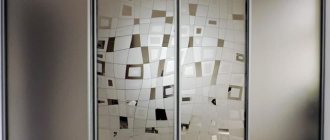
Today, sandblasting mirrors involves the use of several types of artistic work. The very essence of the process is that a jet of abrasive particles under high pressure is applied to the surface of the material. She draws an image according to a given stencil. This is how mirrors are matted and subsequently pictures are formed. Let's highlight the popular types of work:
- mirror with matte pattern. In this case, the background of the image is not painted over, that is, the owners can easily see their reflection. The design itself, made on the stencil, is covered with abrasive substances;
- matte mirror with a transparent pattern. Craftsmen sandblast most of the surface of the mirror. The drawing remains transparent: only small parts of the reflection are visible;
- bronze mirror with sandblasting. Bronze paint is used for matting. This option is perfect for classic interiors, where the decoration is done in brown and beige tones;
- matting the entire surface to varying degrees. The finished stencil is painted over with a jet under different pressures. Some areas of the drawing are painted more than others. In this way, you can highlight individual details of the picture;
- deep sandblasted patterns. To do this, first the entire surface of the mirror is matted, after which a stencil is pasted and with its help three-dimensional images are applied, creating a 3D effect.
Mirror bases are treated with both colored and luminous substances. The latter option accumulates natural light during the day, and at night, when the lights are turned off, it begins to glow. This treatment will fit well into a child’s room, who will be delighted by the funny glowing pictures.
Deep
Sandblasted bronze
Matte
Transparent
How to paint?
A cabinet that has gone out of fashion, but is still quite strong and will last for many years, can simply be repainted. In this simple way, a new design of cabinets, chests of drawers and any other old furniture is created. In this case, we are talking not only about giving freshness to dull surfaces, but also about completely replacing the color scheme, which will add originality to the product. Painting is the most common option for updating an old item. Despite its simplicity, it is necessary to approach this process correctly. For a long-lasting result, you must first prepare the furniture walls.
Below is a step-by-step master class.
It will help you to carry out high-quality and competent painting at home:
- it is important to first clean the surfaces of paint residues: one layer will easily remove the sanding disc; special brushes can handle several layers as an attachment;
- all walls, doors and other parts must be sanded manually or using a tool;
- leveling occurs by applying a primer or putty to hide defects that have arisen during many years of use;
- you need to wait until the leveling layer has completely dried, and after that you can start painting;
- To apply a layer of paint on all sides, take a brush, roller or sponge; however, it is faster to use a spray gun or spray gun. With this method, the paint is applied under pressure, so the doors, shelves and walls inside the cabinet are well painted;
- As a rule, several layers of paint are applied. This ensures rich color and good surface preservation. It is better to paint the cabinet with acrylic, alkyd enamel or other high-quality paint;
- the paint must be allowed to dry completely, after which a layer of varnish can be applied. It makes the cabinet look glossy and shiny. If you prefer a matte surface, you can skip varnishing. However, the use of this coating has a protective function, prevents abrasion and gives the tone greater depth. You can use not only glossy, but also matte and silky finishes.
How to decorate the ends of kitchen cabinets
The desire to somehow decorate the ends of kitchen cabinets can be dictated by several reasons:
- Due to the standard sizes of the facades, there was an unoccupied bottleneck that needed to be somehow used. Various variations of open shelves come to the rescue.
- It is necessary to give the end of the kitchen row of cabinets and cabinets some kind of streamlining in order to visually make the modules less massive. Here they mainly use beveled and radius closed modules or open shelves.
- I would like to use the free sides of kitchen cabinets more functionally and use some original and effective solution.
Although the tasks are different, their solutions are somewhat repeated.
To “conceal” the depth of kitchen furniture, the best technique is to use rounded or beveled modules. They can be either closed or open.
In general, you can decorate the ends of kitchen cabinets with open shelves. This solution looks equally appropriate in both classic and modern kitchen interior styles, in small and large spaces.
The functionality of the kitchen will be added by placing such shallow “secret” cabinets with doors at the ends of the kitchen cabinets.
It is very convenient to store household products and household equipment for cleaning and maintenance separately from food and kitchen utensils. Interested in the storage idea?
Decor
If you decide to keep and decorate an old cabinet with your own hands, you can decorate it in different ways. There are many techniques that are used for decoration.
Decorative plaster
This is a rather complex decoration option. First, a product covered with old paint must be treated with sandpaper. Using a stencil, it is necessary to apply decorative plaster to the volumetric elements on the cabinet facades. The stencil itself must be removed before the plaster dries. Then the uneven parts are smoothed using a spatula. Finished decorative elements are varnished or painted; gilding or antique patina is possible.
Photo printing
A sliding wardrobe or just an old wardrobe can be greatly updated with photographs or photo wallpaper. Any photographs are enlarged using large format printing in a printing house. The surface is decorated with a panel or a collage of photographs, most often these are sliding wardrobes with smooth doors. However, the service of such printing is expensive, so a budget option is often used - photo wallpaper, which is sold in any repair store. Choose a wide variety of themes - nature, beautiful cities, animals and much more. If you use starch-based glue, you can later change the boring pattern.
Stained glass film
You can decorate an outdated piece of furniture yourself without having any special skills. It’s very easy to stick stained glass film, which is fashionable this season, onto the glass cabinet door. This will add presentability to old furniture. In addition to its decorative function, the film protects the glass from impact and scratches. Removing the film is very simple, and this decorative technique looks very impressive, because the imitation is as close as possible to real stained glass.
You can make patterns with plaster
You can apply a three-dimensional ornament. To do this, you need a design stencil, a spatula and special decorative plaster. After repairing minor defects, do the following.
- Secure the stencil to the surface to be decorated with tape.
- Apply plaster to the stencil.
- Remove the stencil and stick it on the next section.
Plasters are excellent for creating decorative coatings. - Dry the plaster thoroughly.
- Cover with acrylic paint in several layers.
- Apply a final coat of varnish.
Decorative plaster today is an excellent alternative for interior decoration.
ON A NOTE! It is better to make a stencil from plastic or PVC. Cardboard quickly wears out, gets wet and loses its shape.
Decorative plaster will appeal to those who appreciate the sophistication of interior solutions.
"Dress" for an old wardrobe
Yes, you can cover the body and doors with cotton fabric with a suitable pattern! You will also need PVA glue, acrylic paints and varnish.
One of the original and affordable ways to decorate a cabinet is to cover it with bright fabric.
After priming, do the following.
- Carefully coat the outer surface of the cabinet with glue.
- Gently apply and roll the pre-made fabric blanks. Avoid bubbles and creases.
- Apply a second layer of glue.
- Dry thoroughly.
- Paint the drawing.
- Make inlay from available items - beads, buttons, multi-colored pieces of glass of the correct shape. You can make edgings from braid along the edges of the door. Glue it all together using Moment glue.
- Coat several times with acrylic varnish.
It is better to cover large elements such as wardrobe doors with fabric.
Useful tips
It’s a pity if you have to throw away old but high-quality furniture, especially wooden ones. But such products can be updated and used for more than one year. To choose the right decoration method, it is important to take into account the material and degree of wear of the old cabinet.
Natural wood
Previously, wooden furniture was made of very high quality. Before updating, remove dust with a dry cloth. Then check the fasteners and if they are broken, they need to be repaired or replaced. It would be nice to treat the inside of the cabinet with an antibacterial agent; a more budget-friendly option is simple vinegar. It will destroy the unpleasant odor.
Then the choice of decoration method is made.
- Toning. First, all surfaces are leveled using wood putty, matched to the color of the cabinet. After the layer has dried, uneven areas are sanded with sandpaper. Treated and even surfaces are treated with a special structuring tinting for wood. Choose a decorative tinting color darker than the original shade of the cabinet. This treatment will completely transform the appearance of the product.
- Aging. Furniture made from natural wood can be “aged”. The antique-worn effect of the cabinet surface is achieved as follows: light wood tone is painted in any dark shade depending on the color palette of the room. Then, after the paint has completely dried, you need to rub several fragments with a candle, after which light paint is applied, for example, beige, white, cream. When the second painted layer is rubbed with sandpaper, abrasions will be visible through some light areas. which are darker. When decorating a dark cabinet, make craquelures. To do this, apply craquelure varnish to the surface. After it dries, small cracks form, which are highlighted using dry pigment or oil paint of the desired shade.
Ideas for transforming modern cabinet furniture
Many years ago, unable to change the kitchen, I covered the facades with napkins, having learned about this method on one forum in a decoupage thread. The furniture lasted a couple more years, and now it lives in a relative’s apartment as a temporary option.
Photo of an old kitchen
Now I'm annoyed by the closets in the bedroom. They are still strong, quite comfortable, just tired. In times of crisis, it’s not yet possible to dream of new ones, so I decided to look for ways that would help me modify them. It turned out that this is possible, and there are many options and all of them are quite budget-friendly.
I share my research.
Idea 1: applique
Applique or decoupage is the simplest and most common way to give new life to old things. The drawing or image can be anything. Quite often, three-layer paper napkins are used for decoration, using only the colored top layer.
But these can be special decoupage cards sold in art stores, wallpaper, photographs, pictures printed on a printer, and magazine clippings.
The decor of the old cabinet is made using applique
In order for the furniture to look decent and serve for a long time, you need not just cover it with paper with a pattern, which will quickly get dirty or tear, but perform a whole series of works:
- First of all, the doors and sides of the cabinet are cleaned of dirt using a soap solution. Sometimes they even have to be treated with sandpaper or a sanding machine - you need to look at their condition.
- After cleaning, degreasing and drying, the furniture is primed, and if it is dark, then painted with light paint. Although if you use a pattern on a dense opaque base for appliqué, this is not necessary. You can use regular PVA glue as a primer for napkins and decoupage cards.
- When the paint has dried, carefully stick on the image - a whole sheet to fit the door or cut out elements, it depends on your imagination. The main thing is that you like the decor of your closet with your own hands.
Detailed applique
- To ensure that the applique stays firmly in place and does not come off, and that the cabinets can be subjected to wet cleaning, they are coated with colorless varnish after the glue has dried. Preferably in two layers.
Idea 2: painting
The simplest solution that makes it possible to update an old cabinet with thousands of options. The most affordable is painting in one color. But not the only one. You can paint the body and shelves or drawers in different colors, or highlight the part of the facades limited by moldings or panels in a different tone.
Old bookcases can still serve in a children's room
Using masking tape or stencils, you can apply colored stripes, geometric shapes, and ornaments to furniture. And if you rub certain places with a candle before painting, and after the paint has dried, rub them with scratch paper, you will get an artificially aged surface.
Such furniture facades will fit perfectly into the Provence style
As in the previous case, the surface of the cabinet needs to be prepared for decoration:
- Remove the fronts and fittings from them, take out the shelves and drawers, and clean everything well.
- If there is polishing, it must be removed using a sanding machine, since the paint will not adhere to it.
- Then all the details are painted with your own hands in the main tone. The number of layers depends on the desired result.
- Next, act according to the circumstances: if you are satisfied with a monochromatic cabinet, simply assemble it after the paint has dried, returning the handles to their place.
- If you are planning transitions of color and pattern from one part to another, then first insert drawers and shelves, hang doors, and then proceed to the second stage.
There will be dark stripes where the masking tape used to be.
You can buy figured wooden slats or polyurethane moldings, paint them in the desired color and stick them on the facades in the form of a frame. In general, there are a lot of options.
Idea 3: upholstery with sheet materials
Instead of paper, you can paste over the facades or nail thin sheets of plywood, laminated fiberboard or mirrors onto them.
Such a chest of drawers in a hallway with mirrored facades will visually add space and light
Pre-sheet materials are cut and cut to size. You can enclose them in a frame made of wooden slats.
Idea 4: decorating with fabric
If you've made new curtains or a bedspread and you have a lot of material left over, use it to update your furniture. Decorating with fabric is no more complicated than appliqué, the main thing is that it does not stretch and is dense enough.
All work is carried out using the same technology, only instead of a paper base, a textile base is used. But you can do it even simpler and fix the fabric using a furniture stapler on the back of the walls and doors. Of course, to do this, the cabinet will have to be disassembled and then reassembled.
Built-in wardrobe and door after decorating with fabric
You can go further and place a layer of thin foam rubber under the fabric. This is an excellent solution for a restless child’s nursery, but not only that. Such a soft wardrobe would also look good in an adult bedroom. You just need to carefully select the color of the fabric to match the wallpaper or decorative elements.
The upholstery here is also quilted, which gives it additional volume.
Idea 5: fittings and decorative overlays
It happens that the closet is also strong, and beautiful, and comfortable, and the color matches the interior, but the style does not. Shouldn't you throw it away? In this case, the usual replacement of fittings - door handles, hinges, legs - often helps out.
You can transform it beyond recognition with the help of decorative furniture overlays made of wood, bronze, PVC and other materials.
Carved wooden decor
Openwork vinyl napkins, ceiling polyurethane rosettes and friezes can become such decor that transforms the appearance - whatever your imagination suggests and will help change the style of the furniture.
Corner cabinet with decorative overlays
If, on the contrary, the furniture needs to be “modernized,” then it can be decorated with old CDs, interior stickers, or letters, numbers, and signs cut out of plywood and painted.
Wheels instead of legs add not only functionality and mobility to the chest of drawers, but also make it more modern
How to update wardrobe doors: photo
Sliding wardrobes are easy to use and suitable even for the smallest apartments. They are often built-in, so it is difficult to change such furniture, and over time it begins to look worse and worse, especially against the backdrop of a new renovation.
You can update your closet doors yourself. The main requirement is that the decor should not be too bulky so as not to interfere with their opening.
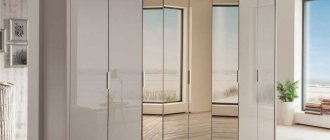
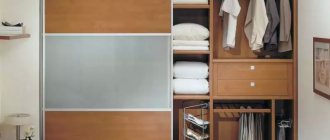
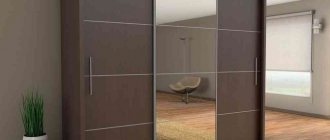
The easiest way is to attach mirror plates to the panels. A mirror will add a sense of space to the room.
Liquid nails are suitable for installing mirror panels. Apply several strips of glue to the back of the mirror and then follow the instructions on the package. This installation method is quite reliable and does not require special skills.
Mirror panels look great with designs printed on them. In industrial production, the pattern is applied using a special apparatus. Such designs are applied manually using special paste and stencils.
An unusual solution may be volumetric plaster.
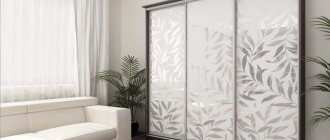
Another simple way is to cover the doors with wallpaper or film. In construction stores you can purchase ready-made photo wallpapers on the subject of interest or order photo printing with your favorite images on self-adhesive film. A closet covered with wallpaper that matches the main ones in the room will fit harmoniously into the interior.
Old, shabby doors can be repainted. Using stencils, apply a design and color it. The work is painstaking, but the result is worth it.
There are many vinyl stickers available in stores today. The designs and color palette are varied, and gluing them is easy.
Transforming a wardrobe with your own hands is much easier than ordering new furniture. And most revision methods assume that in the future it will be possible to change the design again and again.
Mirror on the end of the cabinet, how to attach it?
If the closet is located at the end of the hallway, then you can hang a mirror on its side and attach a couple of shelves with hooks for all sorts of small things. This method expands the functionality of the furniture and adds convenience to its owners.
You can stick a mirror on a cabinet in any of three ways:
- Using double-sided tape. Degrease the surface well with solvent and alcohol so that the chipboard-mirror “adhesion” is as reliable as possible!
- Using special glue or liquid nails . In construction stores you can purchase special glue designed specifically for gluing mirrors. Before gluing the mirror onto the chipboard, you must also degrease the connecting surfaces. It is recommended to apply the glue in strokes in one direction to avoid excessive tension inside the mirror sheet.
- Overhead fastener . Special corners and clips can be either extremely simple or interestingly designed; they will allow you to not only securely, but also beautifully fix the mirror on the chipboard. Be careful when choosing: some fasteners are designed for mirrors with through holes.
If there is no need to expand the functionality, you can simply decorate the front side of the cabinet with special interior decor - acrylic mirrors in various designs. Such decorative elements are glued to double-sided tape.
If you are interested in decorating the end of a cabinet specifically from a design point of view, we recommend reading about furniture decoupage. Perhaps this will help you decide on a way to beautifully beat the “boring” standard look of the cabinet.
DIY cabinet decor
Restoration and decoration work can give a second life to old furniture. After the renovation, sideboards and shelving become bright accent details in the interior. The decor of the cabinet is done using the techniques of decoupage, gilding, artificial aging, artistic painting, wallpapering, etc. Updating standard furniture is possible with your own hands.
Decor options
Old furniture can become an original interior design decoration using decorating techniques. Many ideas have been developed on how to make a new cabinet out of an old one. These are dyeing and artistic painting technologies, methods of decoupage and wallpapering, and adding decorative inserts.
Upholstery and upholstery with fabric or leather will change the style of items in accordance with the updated interior of the room.
An original and effective solution is mosaic decor. The technique suits Art Nouveau and Art Deco styles. The elements used are ceramics, glass of different shades, etc.
How to decorate the end of a cabinet? Easy to implement and effective ideas
The end of the cabinet is usually called the front edge of the side panel. Most often, it is hidden by an overlay facade and covered with a simple melamine tape or PVC edge. Also, the end of furniture is sometimes called the entire plane of the side, and there are many more ways to decorate. Let's look at how to decorate the end of the cabinet beautifully and effectively in both cases.
How to update an old cabinet?
In any home, the closet occupies a very important place. It is a pity that over time it loses its original appearance: the appearance of cracks and faded paint make it unattractive, it goes out of fashion and looks out of date. We have to think about his future fate.
There are at least two ways out of this situation:
- buying new furniture;
- updating an old closet.
With your own hands you can give your wardrobe a new life, turn it into a unique object, while saving significant money.
Review of beautiful cabinets, tips for choosing
Wardrobes are one of the most essential pieces of furniture in a home. Everyone strives to equip their home not only as rationally as possible, but also to choose furniture that will look as impressive as possible, without cluttering up the free space of the room. The developers offer a wide selection; anyone can purchase beautiful cabinets for their home. The variety of materials from which furniture is made is enormous, and the creativity of designers in the design of facades truly knows no bounds. Cabinets are produced in different shapes and sizes, using high-quality, environmentally friendly materials; the walls and doors are decorated with patterns, colors, glass and mirror inserts.
How to restore?
Any antique cabinet requires a little restoration, which will significantly improve its appearance.
You can restore the wardrobe yourself if you use the advice of experts:
- A metal brush is used to treat decayed wood, after which the dead tissue is removed.
- The fine dust formed in this case is washed off under running water.
- Sometimes there are holes from nails, some unevenness and cracks in the wooden elements of the cabinet. All this must be cleaned with a spatula. It is necessary to apply several thin layers of putty to match the wood. Each layer must dry before applying the next.
- Then dry all layers in fresh air for 1-2 days. Do not dry wood in the sun.
- Sometimes there are metal parts in furniture that have become covered with rust over time; such places should be treated with a special solution.
- The restored surface can then be painted or decorated at your discretion.
- A self-adhesive film that imitates wood, stone, or metal is perfect.
How to paint?
A cabinet that has gone out of fashion, but is still quite strong and will last for many years, can simply be repainted. In this simple way, a new design of cabinets, chests of drawers and any other old furniture is created. In this case, we are talking not only about giving freshness to dull surfaces, but also about completely replacing the color scheme, which will add originality to the product. Painting is the most common option for updating an old item. Despite its simplicity, it is necessary to approach this process correctly. For a long-lasting result, you must first prepare the furniture walls.
Below is a step-by-step master class.
Wallpaper
Wallpaper provides more options than film, since it comes in matte, textured, and generally suits every taste. If you wish, you can choose photo wallpaper that will visually expand the space. Wallpaper is applied using PVA; the surface must be prepared in advance for better adhesion. You can decorate not only the front doors with wallpaper, but also the interior shelves or the back wall of a cabinet or rack.
Decor
If you decide to keep and decorate an old cabinet with your own hands, you can decorate it in different ways. There are many techniques that are used for decoration.
Decorative plaster
This is a rather complex decoration option. First, a product covered with old paint must be treated with sandpaper. Using a stencil, it is necessary to apply decorative plaster to the volumetric elements on the cabinet facades. The stencil itself must be removed before the plaster dries. Then the uneven parts are smoothed using a spatula. Finished decorative elements are varnished or painted; gilding or antique patina is possible.
Photo printing
A sliding wardrobe or just an old wardrobe can be greatly updated with photographs or photo wallpaper. Any photographs are enlarged using large format printing in a printing house. The surface is decorated with a panel or a collage of photographs, most often these are sliding wardrobes with smooth doors. However, the service of such printing is expensive, so a budget option is often used - photo wallpaper, which is sold in any repair store. Choose a wide variety of themes - nature, beautiful cities, animals and much more. If you use starch-based glue, you can later change the boring pattern.
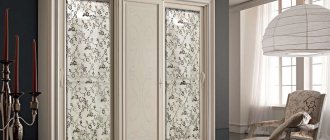
Stained glass film
You can decorate an outdated piece of furniture yourself without having any special skills. It’s very easy to stick stained glass film, which is fashionable this season, onto the glass cabinet door. This will add presentability to old furniture. In addition to its decorative function, the film protects the glass from impact and scratches. Removing the film is very simple, and this decorative technique looks very impressive, because the imitation is as close as possible to real stained glass.
New fittings
There are no trifles in the decorating process. Every designer knows that 40% of the success of any interior is details and accessories. In this case, you can transform the cabinet beyond recognition by changing all the fittings on it. New pens are important.
Design options
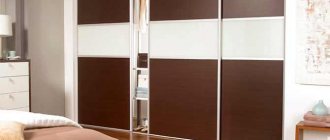
There is a huge selection of facades with different decor options. First, you need to choose the material from which the furniture will be made: chipboard, MDF, plastic, mirrors, glass, plain and with colored film, bamboo, rattan and much more. Once you've chosen your color and material, you can think about how to combine them to achieve the desired aesthetic effect.
Wardrobe doors can be:
- plain (suitable for office, office);
- with inserts (glass, mirror, eco-leather, stained glass);
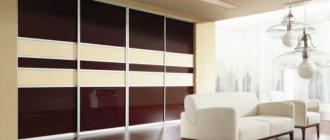
- with aluminum dividing strips (vertical or horizontal);
- with frosted glass or with a pattern on it;
- with photo printing;
- with mirrors of various shades;
- with sandblasting pattern;
- with the effect of artificial old age (for Provence style, for example);
- with pilasters, carved plinth and other decorative elements.
As you can see, there is more than enough money to decorate your closet. If your interior is decorated in a classic style, then it is best to opt for doors made of natural wood with carved patterns or other discreet design. Bright furniture made of plastic of different colors or Lakobel or Oracal glass is perfect for modern interiors.
Design for different rooms
The design of the cabinet is also influenced by its model: sliding system or swing doors. You can choose one option or make a combined cabinet, where one part will slide and the other will open. Mirrored facades always visually expand the space, and light ones help illuminate a dark room.
Doors that expand space can be:
- light color;
- in the form of full-length mirrors;
- glossy texture with reflective lighting;
in the form of an arrangement of materials of different degrees of reflectivity (plastic and mirrors).
Sliding doors are best chosen for cramped spaces, while hinged doors are suitable for spacious living rooms or halls. Sliding doors are often chosen for bedroom closets to increase the space between the bed and furniture and make passage more free.
Using closet doors alone, you can make a room feel less elongated. This happens due to the fact that the closet becomes a bright color accent of the interior, and the attention of everyone who enters the room involuntarily turns to it.
Useful tips
It’s a pity if you have to throw away old but high-quality furniture, especially wooden ones. But such products can be updated and used for more than one year. To choose the right decoration method, it is important to take into account the material and degree of wear of the old cabinet.
Natural wood
Previously, wooden furniture was made of very high quality. Before updating, remove dust with a dry cloth. Then check the fasteners and if they are broken, they need to be repaired or replaced. It would be nice to treat the inside of the cabinet with an antibacterial agent; a more budget-friendly option is simple vinegar. It will destroy the unpleasant odor.
Then the choice of decoration method is made.
- Toning. First, all surfaces are leveled using wood putty, matched to the color of the cabinet. After the layer has dried, uneven areas are sanded with sandpaper. Treated and even surfaces are treated with a special structuring tinting for wood. Choose a decorative tinting color darker than the original shade of the cabinet. This treatment will completely transform the appearance of the product.
- Aging. Furniture made from natural wood can be “aged”. The antique-worn effect of the cabinet surface is achieved as follows: light wood tone is painted in any dark shade depending on the color palette of the room. Then, after the paint has completely dried, you need to rub several fragments with a candle, after which light paint is applied, for example, beige, white, cream. When the second painted layer is rubbed with sandpaper, abrasions will be visible through some light areas. which are darker. When decorating a dark cabinet, make craquelures. To do this, apply craquelure varnish to the surface. After it dries, small cracks form, which are highlighted using dry pigment or oil paint of the desired shade.
Ways to transform wooden cabinets
The texture of natural wood is very beautiful, and it’s simply a shame to hide it under a layer of paint, paper and any other materials. If you want to get real designer cabinets from old and dry ones, you will have to work hard.
Firstly, most likely, you will have to replace the hinges and other fittings; as for the surface itself, it all depends on its condition and what you want to get in the end. But in any case, you first need to fill up all the potholes, scratches and other defects with a putty or furniture wax that matches the color, and then these places, and if necessary, the entire surface, are sanded with sandpaper.
The old varnish must be completely removed
Next, you can choose one of the following decor options:
- Toning . Cover the entire cabinet with stain, choosing a color slightly darker than the original.
- Craquelure . Paint the furniture with glaze paint, and then apply a special varnish on top, which, when dry, “breaks” the base layer, creating characteristic cracks on the surface. They will be more noticeable if the paint color and the original cabinet color are different.
This is the surface you will get as a result
- Patination . Softwood and softwood furniture can be brushed with a stiff wire brush to create grooves. Then it is painted with acrylic compounds and, without waiting for the paint to dry, it is lightly wiped with a cloth. At the end of the work, the surface is varnished.
The price of such an independent restoration cannot be compared with the cost of work performed by a master, and the result may not be worse.
