Furniture production has come a long way in recent years. However, sometimes there is a specific idea of what furniture should be like and those models presented in furniture stores are not suitable.
There are two ways to implement the desired project: custom manufacturing or independent design and assembly. Today’s material is about how to properly make drawings of furniture for self-production.
Drawings of furniture for self-production
The advantages of making furniture yourself
Making furniture yourself has its advantages, so you shouldn’t immediately give up the opportunity to create furnishings taking into account personal preferences and interior features. If you lack experience, you can start with simple things - a cabinet, a cabinet, a table, a stool.
The main advantages of making furniture yourself include the following:
- The first and main advantage is the ability to manufacture furnishings according to individual sketches, when there are no restrictions or frames.
- Personal execution is personal control of the quality of execution of each stage (selection of material, its processing, assembly). The result is a high quality product.
- When choosing materials and fittings, when making furniture yourself, the emphasis is not on reducing the cost, but on quality and durability.
- There are no restrictions on the number of items made in the same style - this allows you to create an organic atmosphere in the interior of all rooms of a house or apartment, rather than looking for suitable items in different stores.
- Making furniture is a creative process that allows you to escape from current worries, get a lot of positive impressions and pleasure from time spent usefully.
- Even when purchasing high-quality materials and fittings, we can talk about preserving the family budget, since furniture made with your own hands will last for decades.
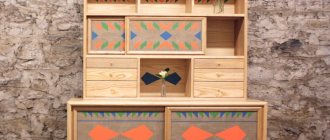
If you make it yourself, you can decorate the facades as you wish.
Note! Over time, after gaining experience, a hobby can become a good source of additional or even main income.
How to make a furniture wall with your own hands
Preparatory work
Selecting a wall style
What types of filing cabinets are there, selection rules
The main compositional task is to make the interior harmonious by arranging individual elements in the same style in the available space. The material can be purchased or homemade - in this case, you need to be able to have a good understanding of wood species, among which experts recommend choosing hard varieties (oak, larch, maple and others).
To make your own wall, carefully select materials. Such solutions for the hall are quite expensive, but with skillful processing they will decorate any home for many years. And for the health of the household there will be only advantages.
It is better to give preference to natural wood.
Drawing selection
First, a drawing is created and calculations are made to calculate the volume of costs relative to materials. How accurately the work is done, the quicker it will be possible to assemble and install the finished set. A DIY furniture wall will turn out to be of high quality if you calculate not only the dimensions of the niches, width, height, number of furniture elements, but also the thickness of the material.
An example of a drawing for making a furniture wall yourself. Experts do not advise blindly copying drawings and diagrams from the Internet, but many of them can become an excellent teaching aid, the basis for your individual design work.
Selection of tools and materials
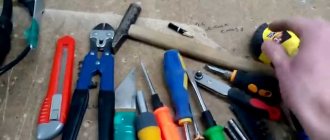
To carry out assembly work you will need the following tools:
- Measuring accessories - tape measures, rulers, levels, plumb lines, squares.
- Bolts, screws, nuts, sealing elements.
- Tools for installation operations - screwdriver, drill, hammer drill, polyurethane foam, jigsaw.
- Cleaning operations - sandpaper, sanders, spatulas, epoxy glue, primer.
In order to make a wall with your own hands, of course you will need a set of certain tools. The main materials for the manufacture of modern furniture walls are solid wood, MDF boards, laminated chipboard and chipboard. The components of the complex may be glass or have an aluminum frame, which will make the project more expensive.
Build process
Initially, after finishing work on the drawings, a frame is made - the supporting structure and the main support of the future set. Guides made of timber are attached to the walls - shelves are attached to them. Then the structure is sheathed with decorative panels from the selected material. Wide, glued boards are better suited for assembling tubes. It is more convenient to cut fiberboard elements with a jigsaw.
Before final assembly, all elements are carefully polished. The next stage is finishing the product, which is carefully polished, irregularities are removed, which allows the formation of continuous smooth transitions. An experienced craftsman can make decorative carvings of patterns on wood, and make unique carved doors for cabinets, which also make it possible to hide seams and joints. Black and red wood is ideal for noble decor.
If desired, the furniture can be decorated with a variety of patterns.
For a slide in a classic style, a restrained style of fittings made in strict tones is more suitable. For Provence style, light colors look good. An important emphasis is placed on the application of paint, before which the surface is sanded and primed.
Final stages
After completing the horizontal work, the modules are lifted, followed by arrangement according to the sketch and leveling. If the legs are non-adjustable, you can use special spacers.
Assembly and installation of the wall occurs when all parts are completely ready. Safety will ensure good stability of the structure. This is ensured by precise installation work relative to the horizontal and vertical planes, eliminating the risk of the wall tipping over in the future.
Following completion of the installation of the main structure, decorative fittings are installed in their places: linings, handles, glass stickers. Many today prefer to use slides with smoothly opening drawers and doors - this is achieved by installing mortise closers, bumpers, and door hinges with a spring mechanism.
For decoration, you can use all kinds of accessories and decorative stickers.
Nuances that need to be taken into account when making furniture yourself
Making furniture yourself involves some nuances that you need to know about in advance. It is advisable to have minimal skill in working with tools and to know about the properties of the material that will be used to make furniture.
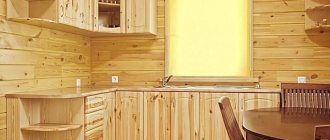
Solid wood furniture for baths
You will need to consider the following:
- The cost of raw materials indicates its quality. Therefore, as a furniture material for a dacha, you can choose cheaper raw materials than for an apartment. Operating conditions will also have to be taken into account.
- The work of making furniture requires physical strength, especially when working with solid wood.
- You should not expect that it will take little time to manufacture the product. On the contrary, especially with a lack of experience, a high-quality result of your work can be obtained after a few days, or even weeks.
Solid wood dining group
Note! In the process of manufacturing parts, you will have to work on machines and use power tools. It is important to follow safety precautions and use personal protective equipment.
Important step: drawing
To make furniture yourself, you will need to develop a drawing and assembly diagram for the product. This is a must. The basis for the drawing is a sketch - an idea embodied on paper. The sketch reflects the main nuances: the shape of the product, proportions, quantity and presence of basic elements (shelves, doors, drawers), design of the facades.
Children's furniture - drawing with dimensions
As a basis for preparing documentation for furniture manufacturing, you can take a standard list of diagrams and drawings provided by the cabinet furniture manufacturer to facilitate and simplify the assembly process. This list consists of the following documentation:
- General view of the product.
- Assembly drawing.
- List of accessories.
- Drawings with details of all elements, indicating places of fastening of parts, types of holes and fittings used, location of edges.
- Specifications.
Product detailing for assembly
This is an optional list - some items can be removed, others can be added.
What does ergonomics say?
At the furniture design stage, regardless of whether it is a stool or a kitchen set, ergonomic requirements are taken into account. Namely, it will be necessary to take into account the correspondence of furnishings to the anthropometric data of a person. Thus, when making furniture for children, the height category to which the child belongs is taken into account. When making chairs, tables, and kitchen furniture, average indicators calculated for the average person are taken into account.
Basic ergonomic requirements
As an example, we can consider the requirements for the main parameters of a kitchen set:
- To draw up a sketch, first measure the height of the room, the length of the walls along which the set will be located, the distance to protruding elements: pipes, window sills, window openings, doors, mark the location of sockets, switches and ventilation holes.
- The standard dimensions of floor cabinets are 850 mm in height, 300 – 800 mm in width and no more than 500 mm in depth.
- The width of the wall cabinets is duplicated by those below, and the depth ranges from 300 to 350 mm. The height can be chosen so that there is a free space of 200 mm between the top of the cabinet and the ceiling. Some design solutions involve placing wall cabinets the entire height of the room.
- The height of the working apron is 600 - 650 mm.
Ergonomics in the kitchen
Note! If the owner of the kitchen is taller or shorter than the average height (165 - 175 cm), then the furniture parameters are selected individually. So, the distance from the working surface to the bend of the elbow should be 20 cm.
Ergonomics depending on human height
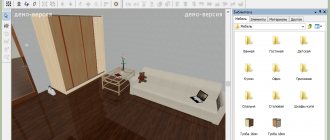
When developing a furniture project, you will need to take into account the area of the room and choose a place to install the furniture so that it does not interfere with movement around the room. Now there are a large number of computer programs that allow you to visualize a project under given conditions.
Computer program for visualizing a kitchen project
When developing a set of furniture, you will need to prepare explanations not only for the entire set, a wall of furniture or a set of children's furniture, but also for each item separately. Detailing should concern all elements.
Detail drawing of kitchen cabinets
For example, for a kitchen cabinet you will need to reflect the parameters of the back panel, side walls, front and shelves. If it is equipped with a drawer, then its detailing is carried out separately, noting the attachment points of the guides and handles, the dimensions of the sides, front and bottom.
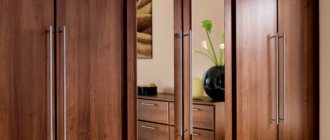
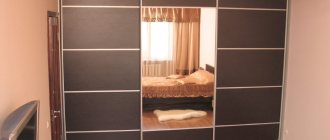
Features of the wardrobe
Sliding wardrobes are distinguished by design, they are:
- Built-in.
- Corpus.
Its presence will save free space in the room.
As the name implies, the main difference is in the way such furniture is arranged. For a cabinet cabinet, a free wall of any room is sufficient; a built-in cabinet must be installed in a separate wall niche.
There is no difficulty in making and assembling it yourself.
The most important opportunity that a sliding wardrobe offers to each of its owners is to plan and manufacture a model to suit their personal needs, to think through each individual element of equipment. If you also do the assembly yourself, you can get an excellent functional piece of furniture on a very limited budget.
Carrying out the work yourself will not only bring pride and pleasure, but will also allow you to save on the services of a specialist.
Wood as a material for making furniture yourself
After making a sketch and a drawing based on it, you can proceed to the selection of material. Before choosing a particular material, you need to study the features of working with it and learn about its performance properties.
Solid wood stools
Natural wood
Due to the wide variety of natural shades, patterns and textures, natural wood is very popular in the manufacture of furniture. Wood is malleable and allows you to create objects of interesting shapes, decorated with artistic carvings.
The advantages of the material include the following:
- Strength and durability. Solid wood furniture lasts for decades.
- The array can be easily restored by removing scratches and gouges.
- Environmental friendliness and naturalness are the main advantages of the array.
- Solid wood furniture looks expensive and will be appropriate in any interior.
- When making a chair, table, chest of drawers or cabinet from natural wood, you are guaranteed to obtain a piece of furniture with excellent performance properties.
Solid wood furniture looks rich and luxurious
Wooden furniture is made from solid or press-glued panels, which are not inferior in strength to solid wood.
Properties depending on breed
Soft and hard wood is used to make furniture. Soft wood (alder, poplar, aspen) is used to make parts that will not be subject to stress during operation - decorative elements and facades with an original design.
Modern style bedroom set
Table 1. Popular wood species for making furniture
| Breeds | Description |
Oak | The most popular type of wood for making furniture, which is characterized by high strength and wear resistance. The advantage of the material is the presence of a beautiful natural pattern. |
Beech | It has a creamy yellow tint with brown specks. Due to its high flexibility, it is used for the manufacture of furniture of complex, including round, shapes. |
Pine | The material is durable, low cost and accessible. Contains natural antiseptics, so it lasts for many years and has a positive effect on the indoor microclimate. |
Cherry | An expensive type of wood with a characteristic reddish tint, which becomes more saturated over time. |
Walnut | A material with a luxurious brown tint, allowing you to create exclusive interior items. |
Sequence of actions when making furniture
Table 2. Manufacturing of furniture from solid wood
| Illustration | Description |
Step 1 | Markings are applied to the wood material. |
Step 2 | Cut out the details. |
Step 3 | Perform grinding of parts. |
Step 4 | The parts are treated with antiseptics. |
Step 5 | Connecting holes are made. |
Step 6 | The parts are painted. |
Step 7 | The parts are varnished. |
Step 8 | Start assembling furniture. |
When making furniture from solid or glued solid wood, two methods of connecting elements are used - detachable and permanent.
Wood based materials
Working with wood requires skill and knowledge about the properties of the material; moreover, the cost of high-quality raw materials is quite high and it is not rational to “get your hands on” with it. Beginning craftsmen prefer materials that are easier to process and inexpensive.
Table 3. Wood-based materials
| Name | Description |
Chipboard | Used for the manufacture of cabinet furniture. It has a low cost. It is important to choose high-quality material that contains an acceptable amount of formaldehyde that is not dangerous to humans. It is also necessary to use protective edges on the cuts of parts, which not only protect the environment from the release of formaldehyde, but also give the product a neat appearance. |
laminated chipboard | It has a protective laminated layer that protects the material from mechanical and thermal stress. The laminated surface is not afraid of moisture. It is highly decorative and allows you to create furniture not only in different colors, but also using photo printing. Can imitate any material. |
Fiberboard | Used for making furniture of curved shapes. The material is inexpensive, durable, with good thermal insulation properties. The disadvantage is low moisture resistance. This material is recommended only in dry rooms with normal humidity. |
MDF | It is environmentally friendly due to the reduction in the percentage of formaldehyde in its composition. The material is durable, resistant to moisture and fire. The material is available for fine processing. However, its cost is higher than the materials listed earlier. |
Plywood | It is widely used as a material for making furniture - very durable, reliable and easy to process. Often used to make children's furniture. |
Classification by functional purpose
1) Storage furniture (cabinet furniture) - designed to accommodate various items
This category includes:
- functional cabinets (bookcases, linen cabinets, clothes cabinets, kitchen cabinets, with a display case, under the sink, buffets, cupboards, wardrobes);
- wall cabinets;
- partition cabinets for dividing rooms into certain zones;
- multi-purpose cabinets that do not have a specific functional purpose. These include: secretaries, sideboard cabinets, chests, cabinets, open and closed shelving, wardrobes.
2) Furniture for lying and sitting:
- beds (single, double, multi-tiered);
- sofas are a combined product designed for sitting (and sofa beds - and lying) for several people;
- couch, ottoman, ottoman;
- banquette;
- stools, chairs, benches;
- armchairs – a category that includes: working chairs, chair-beds, rocking chairs, chaise lounges.
3) Furniture for dining
Furniture for eating and working includes all types of tables:
- dining,
- serving,
- toilet,
- writing,
- the Bureau,
- magazine,
- console,
- desk (student's table),
- music stand,
- dressing table
4) Other products
– this category includes wooden furniture of non-standardized terms, for example, various screens, hangers, etc.
The complete list necessary for cataloging furniture and its certification for certain groups can be found in the All-Russian Classifier of Products (class 56).
Tools
To make your own furniture, you will need the following tools.
Tools for sizing and marking
To apply markings and carry out measuring operations, you will need a tape measure, a ruler, a pencil, a construction square, a stationery knife, and an awl.
A circular saw
To cut parts, use an electric jigsaw or circular saw. A hacksaw is not used because it is impossible to get a neat cut with it, and it will take much more time to cut the parts. To reduce the formation of chips when working with a jigsaw, use the cutting method through tape or use a special attachment. Using a circular saw, the cut is neat, and this tool also allows you to make neat rounded corners.
Screwdriver
When assembling furniture, a screwdriver is used to tighten bolts, self-tapping screws, and confirmatories.
Hole for confirmation
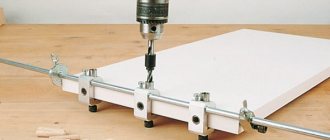
To make holes for fasteners, you will need different drills with a diameter of 4.5 to 10 mm - it is advisable to have them on hand.
The hole for the confirmation is drilled with a special drill, and the fastener itself is tightened using a hexagon
There are bits for a screwdriver, but it is not always possible to use the tool in a hard-to-reach place.
Forstner drill
A Forstner drill is used to make holes for hinges and fittings.
Clamps are useful for securing parts when gluing
You will also need a hammer, a hair dryer and clamps.
How to install a kitchen unit
As already mentioned, the order in which the lockers are installed is arbitrary. You can hang the top ones first, then the bottom ones, or vice versa
It doesn't matter. The installation order is important: always start from the corner
How smooth this first cabinet will be will determine how easy the subsequent installation will be.
The installation height of wall cabinets depends on the height of the “users”, but not lower than 45 cm from the level of the countertop. When hanging cabinets on the wall, mark a horizontal line. It can be drawn using a bubble or water level, but the easiest way is to expand the plane to the required height using a level or plane builder. The upper edge of the mounting strip is installed along this line or the cabinets are aligned when installed on conventional canopies.
The task is both simple and difficult at the same time - to arrange the cabinets so that they are on the same level, and their walls are vertical and horizontal. In this case, there will be no problems during operation.
Furniture intersection ties
Since kitchen furniture consists of separate cabinets, they are fastened together. There are two options - install, then fasten, or first fasten, then hang. The second option is possible if you have helpers - hanging even two fastened cabinets alone is not an easy task.
The cabinets are fastened together using intersectional ties. They are of different diameters and different lengths - under laminated chipboards of different thicknesses. At least two ties are needed for one wall. They are placed in the area of the loops - a little lower or a little higher. Two cabinets are placed in the same plane, their walls are fastened with clamps, a through hole is made - along the diameter of the tie, into which the fasteners are installed, tightened with a screwdriver or screwdriver.
What else to consider: fittings and end finishing
When making furniture from laminated chipboard, chipboard and MDF, you will need to edge the ends. To do this, use end tape. When cutting parts in a furniture shop, it is advisable to immediately order finishing of the ends with PVC tape, which is applied using special equipment.
The application of PVC edges is carried out on special machines
To do this, in the detailed drawing, the ends of the parts on which the edge will be applied are highlighted in color. It is worth considering that a thicker edge is applied to the visible ends of the parts, and a thinner one to the hidden ones.
Melamine tape
At home, you can only apply melamine tape yourself - it is the cheapest and is fixed to the end with an iron. However, its quality and service life are much less than that of PVC edges.
Ball guides
You should also purchase drawer guides in advance. Depending on the opening method, there are ball and roller guides. The first ones allow you to open the drawer to its full depth, therefore they are considered more convenient. Read more about installing guides in a special article.
Furniture fittings
Furniture fittings also include: canopies, handles, legs, wheels. All these elements must be of high quality and their appearance must correspond to the design of the furniture.
Location of buildings
Depending on the size of the piece of furniture, the features of its assembly will differ. The tall cabinet can be assembled in a lying or standing position. The first option is easier to implement. To determine whether the pieces of furniture can be fastened in a lying position, lift the side wall of the piece up and lean it against the wall. If the part does not touch the ceiling at an angle, then the work will be much easier. Once assembled, the structure can be lifted and installed in the desired location.
If a furniture set is created from separate modules, it is important to check the bodies of each module using a building level. The side parts are checked for deviations from the vertical, and the tops, shelves and bottoms are checked for deviations from the horizontal.
Otherwise, gaps will appear between the modules in which dust accumulates, and the appearance of the furniture will suffer.
Making a drawing
A drawing begins with a sketch. Sketch - from an idea. On a piece of paper you need to draw several options for future furniture, determine its shape, design, proportions. You can look for inspiration among ready-made solutions on the Internet and in special printed publications.
Sketch sketches allow you to choose the best option
After the best option has been selected, we begin to develop a drawing that reflects the main dimensions of the product and the parameters of all parts, as well as the places and methods of their fastening.
Designation of main dimensions
So, when making a drawing of a kitchen set, the following are taken into account:
- The area of the room, its configuration, dimensions (height, length of walls, along which the set will be installed, distances to protruding elements).
- Choose the type of arrangement of the headset (linear, L-shaped, U-shaped, island, peninsular, parallel).
- It is also necessary to take into account the average values of furniture, which are calculated for the average person: the floor stand has a height of 850 mm, a depth of 500 mm and a width of 300 -800 mm. The wall cabinet has a depth of 300-350 mm, its width corresponds to the width of the lower modules.
- The distance between the lower and upper modules is 600 – 650 mm.
Drawing basic dimensions when designing a kitchen unit
You can develop a drawing on a computer using one of the many design programs. A special article will tell you about the main nuances of making kitchen furniture drawings yourself.
Having a drawing of the product with the main dimensions reflected on it, you can make detailed detailing, as if disassembling the drawing into its component elements.
Parts for making furniture from plywood
When making a furniture drawing, you must consider the following:
- It is important to assess the dimensions of the room and choose a place in it to place the piece of furniture so that it does not interfere with free movement around the room.
- When making built-in furniture, it is necessary to take into account the size of the gaps.
- Take into account the free space for hidden fittings (guides) when choosing the module size.
- Take into account the upcoming load that will be placed on a single element. Select a suitable design and provide stiffening ribs.
- Take into account the dimensions of the sheet material and the possibility of manufacturing parts of one format or another from them.
- Try to reduce the load on the fittings as much as possible. So, when attaching a facade to hinges, to reduce the load, the width of the parts is made smaller than the length.
- Consider the proportions of the product and its stability.
Video - How to draw a kitchen drawing
Making a drawing of a chest of drawers
Table 4. Nuances when drawing up a drawing for a chest of drawers
| Illustration | Description |
| As an example, we can consider a chest of drawers with overall dimensions of 1200 x 832 x 500 mm. | |
| The product consists of three sections. The central one is equipped with drawers, and the side ones have hinged doors. | |
| The modules will be independent. | |
| To install the modules, a common base and cover are provided, the dimensions of which will be the same. The width of these elements will be equal to the width of the modules. Some craftsmen recommend making the cover longer from the wall side, so that there is room at the back to leave free space. | |
| The width of the central section, which will be equipped with drawers, is 600 mm. With a total overall size of 1200 mm, the outer sections will have a width of 300 mm each. | |
| With a cover width of 500 mm, the depth of the modules is reduced by 20 mm and is 480 mm when the facade is made from the same material (16 mm thick chipboard). It is important that the gap between the drawer and the stiffener ensures free movement of the box. | |
| The height is selected depending on the width - the product must be stable. It is also necessary to maintain the proportion: distance between shelves/height of drawers: height of the chest of drawers. |
Let's transform! Review of folding and simply compact furniture that does not encroach on the living space
Receive one of the most read articles by email once a day. Join us on Facebook and VKontakte.
Sometimes the only way to unload the kitchen is to compress the set to the size of the table. Modular kitchen-table 360 Mobile Kitchen is a solution that is relevant for narrow apartments with an area of 8 m², mobile homes and small-sized housing, such as Khrushchev apartments. Farsiska Winter, Ulrike Sandner and Katrin Sillman are working on bringing the conceptual ergonomic kitchen to life. German designers assure that their design, convenient from all sides, is also suitable for use in the fresh air.
Latvian designer Rolands Landsbergs specializes in designing space-saving, futuristic Boxetti furniture. For example, Boxetti Private is a modular bedroom that includes a double bed, a night table and a wardrobe. In addition, the furniture unit is equipped with spotlights. And thanks to the remote control, folding the “platform” for sleeping is as easy as turning on the TV. The closet has all the necessary compartments - from shelves and drawers to a clothes hanger. A bedroom in the style of films about the future can be purchased on the manufacturer’s official website for € 7,866 (about $ 10,438). The Rolands collection also includes a fold-out kitchen, living room and study.
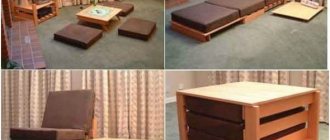
No matter how trivial it may sound, Café&Leche from Spanish creatives from Ebuala is more than an ordinary sofa. The flexible design from a sleeping place for two persons can easily be transformed into a sofa, a sitting area and even a pair of armchairs with a table in the middle.
German “interior designers” Sebastian Mühlhäuser and Marcel Krings have found a fundamentally new solution for saving square meters. When disassembled and put together, the pieces of furniture from the Casulo set look like an ordinary 80*120 cm box. However, a whole room fits inside it. At the same time, the useful area of the table in “unfolded” form is 80*160 cm, the bed area is 200*80 cm. Assembly does not require any tools and takes about ten minutes. The Casulo box furniture set is an ideal solution for owners of small spaces and those who do not like to live in one place for a long time. By the way, Sebastian and Marcel are not the only ones who thought of inventing compact and mobile furniture.
Aspiring Kharkov designer Yulia Kononenko quickly realized the benefits of multifunctional furniture with transformable capabilities. And she designed the Convertible Sofa - a sofa that can be transformed into a dining table with ottoman chairs at the request of the owners. According to Yulia, such interior solutions will help end the eternal struggle between people and furniture for living space.
Made from a thick layer of plastic, the chairs from Daniel Milchtein Peltsverger are good not only because of their colorful colors and minimalist design. Individual seating areas stacked on top of each other create a stable sofa that takes up less space.
With the help of hidden mechanisms, a standard-looking “single-seater” sofa Doc sofa bunk bed folds out into a two-story bed. The area of each bed is 0.9*2 meters, the height of the “attic” is 1.39 m. You can get more detailed information, find out prices or purchase Doc sofa bunk bed on the manufacturer’s website.
Philippe Malouin prefers to expand space using non-standard and, from the point of view of critics, controversial methods. The concept of almost universal furniture, Unit, developed by Philip, involves combining a kitchen... with a bathroom. A long table for culinary experiments and eating is connected to a refrigerator and a sink. If you remove part of the “countertop” from the sink, the place for washing dishes is transformed into a full-fledged bath.
The Circular sofa bed from the Italian brand Saba will appeal to owners of studios and one-room apartments in which the bedroom is combined with a living room who do not want to live in cramped spaces. After lifting, the Circular sofa bed can be “split” into two sofas.
The Tavoletto Collection modular dining table is an ergonomic invention by Italian designer Federico Floriani. The shape and size of the parts make it possible to assemble completely different combinations from them - from a coffee table and a workplace to a bed with a shelf for lovers of late-night snacks.
Did you like the article? Then support us, click
:
Self-made furniture technology
The process of making cabinet furniture yourself can be divided into several stages.
Stage 1: design
This includes creating a sketch and detail drawing. This has been discussed in detail earlier.
Kitchen sketch
It is also worth noting that in addition to information about the dimensions of the product and its components, the project must contain information about the material, color, and texture of individual elements.
Applying dimensions
In order to be able to quickly make adjustments to the drawing being developed, it is recommended to carry it out using one of the special graphic programs, in which it is possible to set the necessary parameters and see clearly what the final result will look like.
Choice of colors
Stage 2: manufacturing parts
Table 5. Algorithm for manufacturing cabinet furniture parts
| Illustration | Description |
Step 1 | Select the material for manufacturing the parts. |
Step 2 | A drawing of the part is made. |
Step 3 | A pattern is made on a scale of 1:1. The pattern is outlined with a pencil or a bright marker when transferring the part to the surface of the workpiece. |
Step 4 | Using a jigsaw or circular saw, cut out the part in accordance with the markings. |
Step 5 | The parts are polished. |
Step 6 | Process the edges. |
Stage 3: making holes for fittings
Table 6. Making holes for fittings
| Illustration | Description |
Step 1 | The parts are laid out on the floor surface or work table. |
Step 2 | Places for fixing the fittings are marked on the surface of the parts, taking into account the drawing data. |
Step 3 | Drill holes. |
Step 4 | Attach fittings. |
Stage 4: machining the ends of parts
You can start assembling furniture only after carefully processing the cuts. To do this, remove excess, grind the ends and fix the edge tape. As previously noted, PVC edges are made in a factory, but at home you can use melamine tape with an adhesive layer.
After fixing the edge, use a utility knife to trim off the excess and clean the edges with fine-grit sandpaper
To work you will need tape, a stationery knife and an iron. The edge is applied to the end and pressed with a heated iron for a short time. If you overexpose it, the edge will be damaged.
Stage 5: furniture assembly
Table 7. Furniture assembly process
| Illustration | Description |
Step 1 | Fittings (hinges, locks, guides) are attached to the main parts. |
Step 2 | The supporting frame of the product is assembled. If there are any, fix the mirrors. |
Step 3 | The remaining parts are attached to the supporting frame. |
Step 4 | Fix the handles, wheels, put the drawers in place. |
Step 5 | Attach decorative caps to the fastener heads. |
Video - How to make a sofa body yourself
Final assembly
Features of combining beds with a carriage frame with interior styles
The assembled part of the pencil case, the TV stand and the section with shelves are installed along the wall and aligned. The stiffening rib between the sides of the pencil case and the section with shelves is secured with Euroscrews. Then install the shelf on the dowels of the stiffening ribs and secure it between the sides.
Fix the decorative horizontal shelf on the side of the pencil case with euroscrews, having previously installed it on the dowel of the decorative element.
Double-sided tape is glued to the mirror at the location of the horizontal slats of the pencil case and installed, pressing it against the slats.
The assembled structure of the rotating bar is carefully installed on the lid of the cabinet so that the intersection tie connects the base of the rotating element, the plastic separator and the lid. Similarly, an intersection tie connects the upper part of the bar and the cap.
Install drawers and doors at the place of use.
Glass shelves are installed on the shelf holders.
All Euroscrews are closed with plugs. Through holes are sealed with adhesive plugs.
