As a rule, after replacing or constructing a water supply system, plastic pipes and fittings often remain. Of course, such material is no longer suitable for reassembling communication networks, but it can be used to make various decorative crafts and practical things.
If you wish and have free time, you can make a chair from polypropylene pipes with your own hands - the assembly technology is very simple and can be done by any home craftsman. Do you want to collect original furniture, but don’t know where to start? We will help you realize your plans.
The article describes in detail three technologies for making various crafts. By following the instructions, you can assemble a children's high chair, a kitchen stool and a portable fisherman's chair with your own hands.
There is something attractive about furniture made from scrap materials. Thus, plastic pipes make it possible to produce structures of ideal geometric shapes. They will add zest to the interior of the room. In addition, the owner of such furniture will have an excellent chance to show off to his friends the masterpiece he created with his own hands.
Chairs made of plastic pipes have the following advantages:
- ease;
- compactness;
- strength;
- ease of manufacture.
And the most important thing is that you can build them with your own hands in a relatively short time. This will require a minimum set of tools and materials, and a little patience.
You need to start making a chair from polypropylene by choosing the design of the product and its design implementation. In this case, you need to start from the function that the furniture will perform.
If there are a lot of pipe scraps left, then you can use them to build a chic, creative chair or bar stool. To fasten parts together, it is not necessary to have a soldering iron; this can be done using special glue
Having decided on this, they begin to select the parameters of the product: the size of the future structure, its type (collapsible or solid), the method of connecting the parts. You need to draw a rough sketch of the future product in order to understand how much and what material will be needed for the work.
The design of PVC chairs is limited only by human imagination. To get ideas, you can look through interior design magazines or furniture catalogs. You don’t have to look only at plastic products; you can get ideas by looking at furniture made from any material.
Stools made of plastic pipes can be placed in the kitchen, country veranda, garage, and just in the yard - everywhere they will look stylish and original.
For trips to barbecue or fishing, you can build folding chairs that are convenient to store and transport when folded, and they do not take up much storage space.
You can make comfortable and bright chairs for children by covering a frame made of polypropylene pipes with brightly colored fabric.
The process of constructing a chair
Creating an original chair from plastic pipes is within the capabilities of any home craftsman or craftswoman. To work, you will need a minimum set of tools, which are likely to be found in every home and, of course, the remains of polypropylene pipes.
Step 1 - design of the future chair
At the first stage, you have to decide on the purpose of the chair and its design. If you decide to make a bright high chair for a child, you should definitely take into account the height of the little owner.
If you plan to use the stool in the kitchen or cottage, in order not to make a mistake with the size, be sure to measure the height of the existing furniture.
Those who have decided to try their hand at this creative and creative work for the first time may want to start by making the simplest design - a stool. This does not require a lot of skills and materials, and having coped with this task, you can begin to manufacture more complex structures.
Image gallery
Cut a piece of fabric 18 cm wide. It is better to opt for dense material with water-repellent impregnation. A piece of tarpaulin may also work
Using reinforced thread, sew along the narrow sides of the rectangle to create holes for the pipes. If threads are fraying from the fabric, it is better to tuck it in and stitch it on all sides, but allowances must be taken into account even before the fabric is cut
All pipes must have a threaded end
1 x 1540 mm; — 2 x 1000 mm; — 4 x 930 mm; — 2 x 880 mm; — 2 x 530 mm; — 7 x 350 mm; — 4 x 120 mm.
In order to connect them together, you will need:
2 couplings; — 8 tees with internal thread; - 4 squares of 90 degrees; — 8 flanges for legs.
Wooden slats required for the bed:
16x40 mm; — 10x10x2000mm — 2 pcs. (transverse); — Wooden slats along the length of the bed, directly for the bed.
Additionally:
Wrench; - Latex gloves; — Colorless varnish.
Coffee table
Don’t think that this item in the interior will look ridiculous or massive. If you assemble it correctly, add decorative elements, and paint it in one or more colors, then this attribute will fit into any design.
Use your imagination and look for non-trivial approaches.
At the first stages of drawing up drawings, you need to decide on the material for the countertop. It can be plastic, tempered glass, wood, steel. You can use the old surface of a disused table.
A glass tabletop is usually attached to the top of the plastic frame.
After this, the pipes are cut and connected using fittings. If you include jumpers in the design, this will make the coffee table more durable. The tabletop can be secured with self-tapping screws. A great idea is to attach wheels to the legs of furniture fittings. This will make this product mobile.
Carefully consider the size and design of the future piece of furniture.
Manufacturing instructions
Pipeline preparation
Since the galvanized pipes from which the bed frame will be made will stain the bed linen and also rust over time, protect them with clear varnish. Just do not varnish the threads, otherwise connecting the pipes will cause you a lot of trouble.
Assembly
Connect the pipes together, gradually moving towards the head of the bed. It’s best to attach the legs right away so you don’t have to worry about them later. After the connection is completed, you can varnish the frame again.
Wooden slats
Place wooden slats on the metal frame, distributing them so that the distances between adjacent ones are equal. When each is in place, turn the structure over so that the boards are on the floor and the metal pipes are above them. Place the transverse boards as the third tier of this “sandwich” and secure them. If they turn out to be too long, cut off the excess.
Try
Pipes with double-sided threads were used for the legs, so screw stainless steel flanges onto the bottom edge so as not to damage the floor and floor covering. The bed turns out to be quite strong, so you don’t have to worry if children decide to jump on it.
Headboard
If you decide to make a headboard, then coat both the pipes and the wooden boards with clear varnish.
Original post in English
To toys for children, thereby saving a considerable amount of money.
From this article you will learn what you can build with your own hands from plastic PVC pipes. The technology for manufacturing forged products from profile pipes will also be considered.
Contents of the article
Assembly steps
First, we determine the dimensions of our future rack. Here are some recommendations:
- for storage rooms, the height of the shelf should be at the ceiling, the depth should be at arm’s length (to make it convenient to reach the item);
- if the rack can be approached from both sides, then its depth can be increased;
- for storing tools: height – 2 m, depth – 50 cm, number of shelves – 4, distance between them – 45 cm;
- for storing canned food, the step between the shelves can be reduced (up to 30 cm), and their number can be increased.
Typically the dimensions of the shelf are:
- 180x50 cm – with 4 shelves;
- 200x60 cm – with 3 shelves;
- 180x50 cm - with a high bottom shelf, the rest - in increments of 35 cm.
Of course, these dimensions are not absolute; they can be changed when making them yourself.
When this stage is completed, prepare the drawing. As a last resort, a diagram. But be sure to indicate the dimensions that need to be maintained during assembly.
Important! Always practice safety precautions, especially when working with sharp objects and power tools. Do not neglect the protective cover on the angle grinder. To protect against plastic and metal dust, use a respirator and goggles.
When this documentation is ready, production can begin.
- Cut the profile into equal sections. If this does not work, bring it to the desired length by grinding the end of the workpiece.
- Clean off burrs and chamfer.
- If the pipes will be connected with fittings, the protective varnish must be removed from the ends of the workpieces. To do this, use sandpaper again. In addition, a rough surface adheres better than a perfectly smooth surface.
- Start assembly with the vertical posts. Then connect them with cross beams. Fasten the parts together in the desired sequence. The method of fastening depends on the material of the workpieces and the type of connections.
- Be sure to use a level - the product must be level. The more often the checks, the fewer errors.
- Using this method, assemble the entire frame.
- Install shelves. If the fastening is through, then the frame is assembled to the height of the lower shelf, which is then placed on the pipes. After this, grow the frame to the desired height.
- If the bookcase is high, secure the top crossbar to the wall with anchors.
- Once the shelving is assembled, paint it. Preferably in several layers.
The structure is ready. Both plastic and metal shelves are assembled using this system. A homemade rack does not have to be rectangular; it can also be made angular. The general assembly technology does not change.
And finally, an important tip. Load both factory and homemade shelves correctly. Place heavy things on the lower shelves, light ones on the upper ones. Periodically inspect the fastening points, because this is where destruction begins.
Products made from plastic pipes
Plastic PVC pipes have exceptional performance qualities - they are low weight, high strength, resistance to deformation and aesthetic appearance - you do not have to paint your homemade products, since visually they will look great.
When working with PVC pipes, you will need to connect individual sections to each other, which requires the use of tees, couplings and crosses. Pipes and fittings can be joined by soldering (a special soldering iron is required) or glue. It is better to use glue, since it is easier to work with; a good composition is Tangit (costs up to 200 rubles for a tube weighing 125 g).
Making a practical chair from PVC
A chair made of plastic pipes can be used in the house, in the country or in. It is quite convenient, and the cost of pipes for its manufacture will cost you 3-5 times less than buying a finished factory product.
To make a chair with your own hands you will need:
- PVC pipes with a diameter of 30-35 mm (length depends on the size of the chair)
- plastic tees – 8 pieces, corner couplings – 4 pieces, – 4 pieces;
- glue for PVC pipes;
- plywood, foam rubber and seating material.
Manufacturing technology:
- According to the selected dimensions, PVC pipes are cut into sections of the required length. You can take the dimensions of the structure from furniture already in use at home.
- corner couplings (90 0)
are mounted on the upper section of the legs pipes for the armrests are inserted into them and the constituent elements of the structure are joined together. - The back of the chair is connected to the legs using fittings. The transverse jumpers can be made straight or curved; in the latter case, you will need to heat the PVC pipe over an open fire so that the plastic acquires sufficient plasticity.
- A seat made of plywood or solid wood is attached to the pipes using self-tapping screws, foam rubber is nailed to it with a stapler and the seat is covered with leatherette or fabric.
Forged products from profiles
Forged products made from profile pipes, manufactured by master blacksmiths, deserve special mention. With the use of artistic forging the following can be performed:
- forged gates and gates;
- fences and fences;
- , railings, window bars;
- furniture and interior items;
- forged decorative elements - chandeliers, candlesticks, art installations.
If you want to make forged products with your own hands, you will need to take a training course and acquire the required equipment and tools, which include:
- A forge is a source of open fire for heating metal. There are forges that run on solid fuel (wood, coal) and gas. The cost starts from 20 thousand rubles.
- An anvil is a working surface for metal processing, the mass of which can reach up to 300 kilograms.
- Impact hammers are a broad class of equipment that includes: rolling pins, chisels, smoothers and sledgehammers.
- Pliers for fixing the workpiece;
- Welding machine, grinder.
There is also a technology for “cold” artistic forging, the essence of which is the processing of steel blanks on special press machines in which the products are given the required shape. Almost all forged grilles, gates and factory-made ones are made using this method.
The initial cost of machines for cold forging starts from 250 tr. The production of forged structures can become a profitable business; such products are widely in demand on the market - 1 m 2 of forged ones costs from 15 thousand rubles.
You can make furniture from pipes with your own hands from leftover materials that are used during installation and repair work on the arrangement of various pipelines. For example, shelves, tables, chairs, and organizers are made from such unusual material.
They are distinguished by their original appearance and can last for several decades without losing it.
Despite the fact that some craftsmen make furniture from metal pipes with their own hands, it is still better to use plastic for this. In this case, polyvinyl chloride or PVC is usually used for such crafts as the cheapest type of plastic. Sewer pipes are mainly made from it because, having all the advantages of polymers, it is quite inexpensive.
Plastic pipes are resistant to rot and rust
If we mention the advantages of plastic products that allow you to make furniture from propylene pipes with your own hands, then these include:
- high strength;
- durability;
- resistance to rot and rust;
- ease of installation.
At the same time, it is always worth remembering that this type of pipe is afraid of exposure to high temperatures, under the influence of which the plastic is deformed. In this regard, in the case when you are going to assemble furniture from water pipes with your own hands and install it in a room where a high temperature will be maintained, for example, in a bathhouse, you should use polypropylene products for this rather than polyvinyl chloride .
Service life of polypropylene pipes
Polypropylene can withstand temperatures up to +60°C and is much stronger than polyvinyl chloride, but products made from it are more expensive.
PVC pipe bone lamp
Important!
The popularity of using plastic pipes in design is explained by the ease of their installation.
The fact is that any product can be assembled from them quite easily using fittings and gluing. At the same time, you can not only make furniture from a profile pipe with your own hands, but also make many other products from them:
- stands;
- decorative elements;
- portable structures;
- small architectural forms.
For example, in the garden you can make original gazebos or benches from plastic pipes. By the way, if necessary, they can be disassembled quite easily. It is also worth noting that some owners of personal plots build completely functional structures from pipes, for example, greenhouses.
Scheme of a gazebo made of PVC pipes
In any case, in order to make various products from plastic pipes, it is enough to know the basic principles of their installation and have a healthy imagination. There is no need to meet any other requirements for this. Therefore, collect the remains of plastic pipes, and also study how you can make furniture from a profile pipe with your own hands in the photo. You can get such educational material on the Internet on specialized sites dedicated to interior design.
Which covering material for greenhouses to choose
After assembling the frame, it must be closed; you will need covering material. Glass is not suitable for covering a greenhouse made from pipes, as it is heavy and fragile.
Cellular polycarbonate is suitable, it does not break, is easy to cut, is easy to attach, withstands slight deformations and has less heat transfer.
An excellent option for a greenhouse is polycarbonate, which has a thickness of 4 - 6 mm, but in this case, polypropylene pipes with a diameter of 32 mm or more must be taken. Despite the fact that polycarbonate is quite expensive, it will last longer.
You can buy a cheaper option for covering a greenhouse, this is:
- polyethylene film;
- reinforced film 11 mm thick - it is stronger than polyethylene, so it will last longer;
- bubbly - is an excellent heat insulator;
- non-woven (agrospan, agrotex, spunbond, agril) - more durable compared to film, retains heat well and allows rain to pass through, not transparent, which will protect plants from excessive sun.
We attach it to the frame
The method of covering the greenhouse depends on what material you choose:
- Film - there are several ways to attach it, using ropes, tape, mesh or self-tapping screws. When using self-tapping screws, you can use linoleum or pieces of plastic bottles as a washer to protect the film from damage. You can purchase special clamps; they will simplify the work and ensure reliable fastening. In addition, unlike self-tapping screws, some of them can be removed during the day to open the greenhouse. And the film is attached to the wooden box using a strip. The film should be cut immediately on the greenhouse; the strips are made slightly longer than the size of the ribs, this is required for fastening.
- Polycarbonate - attached to the frame with special thermal washers, at a distance of 0.3 - 0.5 meters from each other. The polycarbonate leaves are connected to each other by a profile. Polycarbonate should be laid so that its internal channels are vertical. The edges of the sheet must be covered with caps.
- Non-woven material - fastening methods are the same as for film.
Basics of working with plastic pipes
In order to be able to make furniture from pipes with your own hands, you need to understand the general algorithm for working with plastic.
Types of plastic pipe connections
So, working with them usually includes the following operations:
- selection of installation diagram and drawing up a sketch of the product;
- cutting pipes of the required size in the required quantities;
- assembly of the frame and individual elements using fittings, glue or soldering;
- checking the resulting product for strength.
You can develop an assembly diagram for a particular type of furniture yourself or take it from specialized websites. For example, you can use any classic furniture as a sample. In this case, of course, it is necessary to make allowances for the specific technical characteristics of plastic pipes.
Metal-plastic pipe design
If we talk about small furniture that will not be used in high temperature conditions, then there is not much difference in choosing the type of plastic. The only thing worth paying attention to is the price. The fact is that polyvinyl chloride is much cheaper than polypropylene, so it is quite suitable for such crafts.
You should make furniture from polypropylene pipes with your own hands when increased strength of the product is required. The fact is that such products have walls several tens of mm thick, which allows them to withstand very serious mechanical loads. In the same case, when you need to assemble large furniture, it is recommended to combine pipes made of polypropylene with PVC pipes. For this purpose, PVC products are used to install elements of lightly loaded areas, and polypropylene is used to create a supporting frame.
If you buy pipes, do not purchase products with reinforcement. The fact is that they cost much more than simple ones, but there is no particular benefit from them. In order to distinguish simple pipes from reinforced ones, it is necessary to study their surface. If there is a red, blue or green stripe on it, then these are reinforced pipes and there is no need to buy them.
Important!
To cut the prepared pipes to the required length, you will need to use a pipe cutter or special scissors.
In order to make furniture from pipes with your own hands, you will also need fittings for diffuse welding. In addition, they can be connected with a special glue for plastic. This method is very relevant when you do not have a special welding machine at home. Also in this case, you can use threaded fittings.
Soldering iron for welding plastic pipes
Let's sum it up
Don’t rush to throw away pipe scraps, because it’s easy to make high-quality modern furniture from these materials. If you have any questions about assembly work or want to learn more interesting things, watch the video in this article.
Did you like the article? Subscribe to our Yandex.Zen channel
November 29, 2022
Furniture,Pipes
If you want to express gratitude, add a clarification or objection, or ask the author something, add a comment or say thank you!
Making a chair from plastic pipes
In order to learn how to assemble furniture from pipes with your own hands, you need to start with fairly simple products. For example, a novice furniture maker can make an ordinary chair. This very simple design consists of a basic frame, legs, a back, and a stand to sit on. In this case, the backrest can be installed here if desired.
This simple design consists of a base frame, legs, a backrest, and a stand on which to sit.
The immediate stages of work on this product are as follows:
- assembly of legs;
- frame installation;
- installation with self-tapping screws to the frame of a stand made of a sheet of plywood;
- welding chair legs;
- testing the structure for strength.
You can make furniture from PVC pipes yourself using this method using fittings. In this case, you can disassemble the structures, if necessary. If you don’t need to do this, use welding. By the way, you can install a seat made of foam rubber on a stand screwed to the frame.
A seat made of foam rubber can be installed on a stand screwed to the frame.
In addition to a chair, a novice home craftsman can gain experience in making plastic products by creating stands and shelves from pipes. There are a huge number of options. For example, the simplest design is made on the basis of a single frame on which special holders are mounted. With their help, a shelf or stand can be attached to the wall.
The simplest design is made on the basis of a single frame on which special holders are mounted
By the way, many people forget that plastic can be further decorated. So, it can be painted quite well with acrylic paints. Another option for decorating products made from it is the use of plastic pipes of different colors. Unfortunately, the range of colors here is small: white, black, gray and brown, but with their help you can create a product that is quite interesting from a color point of view.
However, experienced designers can use such a tool to decorate almost any room in a very unusual way. For example, you can make several original organizers for cleaning products, shoes or toys. Here it is enough to simply glue several tubes together.
You can also make ordinary decorations from plastic, which can combine the functions of the same organizer. For example, using scraps of plastic pipes, mirrors, wooden furniture and room walls are decorated. As a result, a space that is unusual in terms of design and at the same time functional is created.
DIY clothes dryer made from PVC pipes
Curtain rod
Any craft made from scrap materials must be made with high quality. A curtain rod is a durable structure that must withstand loads. A large number of different design projects contain original works of such functional products. Arch house, hi-tech - for these designs, using a plastic pipe to make a cornice will be an original and practical idea.
When thinking about design, you can be inspired by looking at furniture magazines and catalogs, and websites about furniture on the Internet.
How to do the work:
- Using a tape measure, measure the required length of the cornice. If there are two windows in the room, then you can make a continuous cornice on the entire wall with or without a lintel.
- Prepare a pipe of the required length. If necessary, put rings on it to attach curtains.
- Prepare fastenings for holders. They can also be made from PVC scraps and secured with fasteners.
- Assemble the structure.
- Attach the curtain rod to the wall in a pre-marked location.
- Hang curtains.
It is necessary to consider how you can use the materials that are already available, as well as availability if materials need to be purchased.
Features of manufacturing furniture for children's rooms
If you decide to seriously make furniture from plastic pipes with your own hands for use in everyday life, you must remember that for a children's room such products must be made taking into account special requirements. The fact is that safety is of great importance to children. In this regard, it is better not to use plastic pipes in the children's room, which can release harmful substances. In addition, furniture made from it should not have sharp corners.
DIY canopy over the crib
If you are going to assemble children's furniture from plastic pipes with your own hands, a photo of each element is worth studying separately. This way, even before the installation process, you can identify the most dangerous elements of the same bunk bed and eliminate them. In addition, based on the photo, you can coordinate the future situation in the child’s room with other members of your family.
10618 0 0
Tired of the same type of flimsy beds that mostly fill the shelves of furniture stores today? No, of course, there are original reliable models, but their cost puts a lot of pressure on the family budget, and not everyone has the opportunity to purchase them. In any case, you always have an alternative: you can make your own copy from profile pipes.
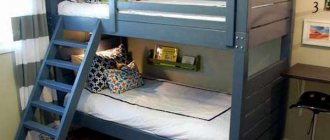
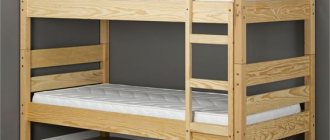
How to make a bunk bed with your own hands, drawings and diagrams
In modern apartments, rooms vary significantly in size, so the room that is not the largest is often chosen for the nursery. The best option for increasing free space is a self-made bunk bed, drawings and diagrams of which will be presented below. The only drawback of this option is the age of the child, since during adolescence he will be uncomfortable on the second floor. By replacing the lower bed with a sofa, you can create comfortable sleeping conditions even for an older child.
Stages of work
How to make a bunk bed yourself? This question is asked by everyone who has decided to correct the problem with the lack of sleeping space in the children's room. Let's try to consider the stages of making a bunk bed at home. Step-by-step instructions will help you complete this work without outside help.
The manufacturing process looks like this:
- the first thing you need to do is choose a bed model;
- draw up a drawing and diagram;
- purchase materials and prepare tools;
- based on the drawing, prepare parts of the required sizes;
- assemble the main frame;
- make the back, side walls, stairs, legs;
- assemble the overall structure.
During design and development, drawings of the bed are prepared. Particular attention is paid to the safety of the entire structure as a whole: strong frame, reliable side walls (fences), easy stair climb.
Drawings and diagrams
All work requires care and precision, so each stage is accompanied by a drawing. It is prepared not just for one, but for all parts. The exact dimensions of the parts, height, thickness will help you get the result that the master strives for.
What is indicated on the drawing:
- dimensions of the final structure;
- assembly diagram of individual parts;
- methods of connecting nodes;
- installation procedure for each part;
- dimensions of structural parts and fastening elements.
Assembly diagram
Model with drawers
With side ladder
With perpendicular floors
With built-in wardrobe
Bed for children
Loft bed
With wardrobe and steps
With work area
Materials
When making a bunk bed at home, you need to choose the right material. Experts recommend paying attention to the following types:
- solid wood - from which beautiful, strong and durable structures are obtained. But working with it requires construction skills and abilities;
- lumber - which must be selected from high-quality dried specimens. Raw wood will not retain its shape, it will begin to move away, and cracks may appear;
- MDF is a modern analogue of ordinary wood. The products look attractive and stylish. You can choose laminated MDF boards. There is an option for a regular untreated slab, then it is finished finished with stain and varnish. If parts of the bed are ordered from a furniture factory, then specialists will process the edges with a special finish. The furniture will be neat, no different from the factory one;
- Chipboard (chipboard) is a material that is not suitable for all parts of the bed. You can use it to make drawers under the base of the frame, back, or panel. It is important to consider covering the ends of the parts with film;
- furniture panel - consisting of pieces glued together into a single whole. Natural wood is not just beautiful, it allows you to make carvings, make other ornaments, and implement interesting design solutions. Only a craftsman with carpentry skills can work with furniture panels.
Tools
Making two-tier furniture for children will not be difficult if you prepare all the necessary tools and remember your existing construction skills. Of course, it’s good if the master has already made something from wood and knows how to work with it.
To work you will need:
- saw - hacksaw;
- screwdriver;
- plane or grinder;
- knives;
- jigsaw (preferably electric);
- sandpaper;
- drill.
We need instruments and devices for measuring and fixing. You can't do your work without a simple pencil.
Frame
Making the frame begins with measuring the mattress. The base and its shape correspond to the selected size of the child's bed. If the design is with a sofa, the lower part of the seat is measured.
Segment No. 1: decision making
In fact, deciding to spend time and effort on assembling a bed is also not so easy. After all, we get used to working all our lives and using the money we earn to buy things we need at home. And here you need to take actions that go beyond the usual framework. So here are a few reasons that motivated me.
Motivation to help you start building your own
You will get the following benefits from making your own sleeping bed:
- Uniqueness of design
. It will be enough to make small original changes to the original drawing to end up with a bed that you will not find anywhere else. Well, if you wish and have the appropriate skills, you can even get a unique work of art;
- Possibility of realization of any shape and size
. There are tall people whose legs hang from typical models, and there are non-standard rooms where a store-bought copy simply does not fit. All these little things can be easily solved in the situation under consideration;
- Use of high quality materials
. The fact is that many manufacturers, in order to ensure that the price remains acceptable to a wide segment of buyers, resort to the use of low-quality wood chips. This, of course, affects the durability of the product, which, unlike most furniture items, is regularly subjected to dynamic loads; - Saving
. The cost of the final product will be significantly cheaper than store-bought analogues, which will allow you to direct your family budget in a different direction.
Reasons for choosing profile pipes
After I decided to take on the work, I immediately began to think about the most suitable material. And we were not talking about the upholstery, which can be changed if desired even during the product’s operation, but about the frame, which takes on most of the load and sets the shape of the entire bed.
Very quickly the idea of using profile pipes came to me. There are several reasons for this:
- Very high strength indicators
, justified by the presence of stiffening ribs, which absorb all mechanical impacts exerted on the product;
- Ease of use
. Elongated parallelepipeds are very convenient to fold, transport and, what is especially valuable, connect;
- Reasonable price
. Profile pipes are, as a rule, cheaper than their cylindrical counterparts; - Wide range of structural elements
. You can easily select samples with the most suitable section sizes for your case; - Durability
. Steel at home will serve you for decades.
In addition, you can even make a bed from polypropylene pipes with a rectangular cross-section, which will be even cheaper and simpler. But this is only if the design will be used by a child or at least a teenager. Although with such low loads you can get by even with ordinary cylindrical products that are easily soldered together:
For myself, however, I chose more reliable steel.
Connecting elements
Polypropylene or PVC is widely used in areas such as baths, kitchens, and toilets. But besides plumbing tasks, they can serve as an excellent basis for creating original pieces of furniture.
Quite often you can see something like this:
- shelves;
- awnings;
- folding chair;
- bunk bed;
- stool;
- swing;
- rocking chair;
- racks;
- hangers;
- whatnot;
- garden furniture;
- arches, etc.
Looking into your garage or storage room, you will probably find a lot of scraps from old plastic pipes that turned out to be unnecessary after renovation. And for some reason you were in no hurry to throw them away.
I think you just knew that sooner or later you would read this material, and there would be an irresistible desire to make something out of them. But what exactly is still an open question. I would like to start not with what to do, but how to do it.
Section No. 2: preparatory work
Before starting the assembly itself, I did a number of preliminary steps, for which I needed the following supplies:
And here are the steps themselves:
- First of all, I made a drawing with an exact indication of all dimensions
. This will be your guide in all future work, so give it due attention. In addition, if you are not very familiar with descriptive geometry, then keep in mind that the Internet is full of ready-made diagrams that can be used in their original form or after making your own adjustments;
- I purchased pipes
with the following parameters:
- I took a “grinder” and cut the required number of sections from solid pipe pieces
in accordance with the drawn up drawing;
In order for the cuts to be as smooth as possible, I recommend fixing the angle grinder in a special device, as shown in the photo below. Such equipment is sold in construction stores.
- Then I changed the cutting wheel on the grinder to a flap grinder and carefully processed the ends of the created workpieces with it
in order to remove burrs;
- Next, I took acetone, soaked a rag in it and wiped the surface of all the pipes, removing the factory grease. If this is not done, then it will be inconvenient to assemble the structure, and it will not be possible to paint it at all;
- Now I took up the drill and drilled the necessary holes
, also strictly adhering to the drawing diagram. If you plan to cook, then of course this step is eliminated.
Section No. 3: assembly process
Before assembling the bed with my own hands from a profile pipe, I painted all the structural elements in the desired color.
I recommend not saving at this stage and giving the blanks for powder coating. Taking into account the operating conditions of the structure being created, this option for finishing its structural elements can be considered eternal.
To complete further work I needed:
- I took pieces of pipe with a cross section of 60 by 30 mm and assembled them into a rectangular base
, using steel corners to reinforce the connections. In the middle of the resulting rectangle, I installed a longitudinal crossbar, dividing it into two sleeping places; - From the inside of the frame I screwed support legs to it
, the ends of which were sealed with plastic plugs, which in the future will protect the floor from scratches;
- I attached support guides
to the inside of the sidewalls and both sides of the longitudinal crossbar , the role of which was played by fragments of pipes with a cross section of 40 by 20 mm; - Now I screwed wooden slats
in increments of 15 cm, which eventually covered the future sleeping areas.
If your drawing takes into account the back, then it, of course, is also assembled at this stage, and then the frame may look like this:
How to determine sizes
When making a metal bed with your own hands, you need to select the dimensions based on what kind of mattress you plan to install on it. The second point, which is also quite important, is the location of the bed in the room. And the third point is what size people will sleep on it. If you are modernizing a room or apartment, then take the advice and move away from all stereotypes, choose a new, non-standard place for the bed. There are several standards by which modern beds are made. There are double, one-and-a-half and single rooms. Remember that ideally the bed should exceed the person’s height by about 30 cm. The standard length of beds is 2 meters. But depending on the models, it can fluctuate in the range of 191-213 cm.
- 5 x 1-1/4” PVC end caps
- 5 x 1-1/4” PVC table end caps
- 4 x 1-1/4” PVC 4-way T-connectors
- 4 x 1-1/4” PVC regular T connectors
- 2 x 1-1/4” PVC cross connectors
Section No. 4: sheathing
The steel “skeleton” is certainly very strong and stable, but it cannot be called particularly beautiful. It lacks coziness, and I used particle board to give it to the finished structure. For the purpose of decoration, this material will cope quite well, since the load-bearing functions have been removed from it.
My actions:
- I screwed elongated thin laminated chipboard panels
to the sides of the frame with M6 furniture bolts 7 cm long . At the same time, their finished edges were raised above the structure by several centimeters, due to which small walls were formed; - A wider panel was similarly attached to the front part of the frame in such a way that its lower edge dropped almost to the floor;
- At the back, where the pillows would presumably lie, I installed a wide canvas, which also forms the headboard of the bed;
- placed an orthopedic mattress
in the resulting box , on which all the work on assembling the bed from a profile pipe was completed.
Of course, you can choose other materials for cladding, or even leave the steel uncovered and simply decorate it using other methods. Everything is in your hands, and the manifestation of originality in this case is only welcome.


