SHARE ON SOCIAL NETWORKS
FacebookTwitterOkGoogle+PinterestVk
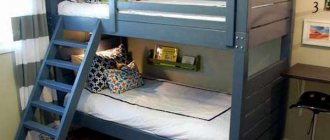
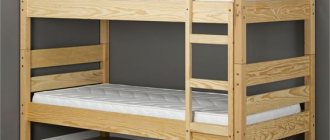
The main area in the children's room is occupied by beds. As children grow older, there is a shortage of free space in the room. A DIY bunk bed will help solve this problem. There are many design models that are selected based on the age of the children, the size of the room and personal preferences. You can learn more about the types of bunk beds and options for making them yourself in this article.
A bunk bed will help solve the problem of lack of free space in the room.
Requirements for a bunk bed
If there are two children in a family, but not many square meters, then a bunk bed would be an excellent option for organizing sleeping arrangements for the children. Such a bed makes it possible to economically use the interior space of the room. For children, this type of furniture (IMAGE 1) will bring only joy. In most cases, bunk beds are delivered to your home unassembled.
Image 1. Assembly diagram of a bunk bed.
To avoid additional costs, you can try to do this yourself. This article provides instructions for assembling the structure. The bed kit includes the necessary parts to assemble the bed. If you have basic furniture assembly skills, then detailed assembly instructions will help you save money and assemble a bunk bed yourself.
An integral condition is that children's furniture must be absolutely safe.
For this reason, the assembly process must be approached with the utmost seriousness. The bed must be strong and carefully assembled. You need to start the assembly process by marking the places on the main supporting walls of the crib where the wooden bases or boxes that are intended for mattresses will be fixed.
The instructions for assembling the bed include the following materials and tools:
Assembly diagram for a bunk bed.
- boards;
- beam;
- plywood;
- screws;
- euroscrews;
- hacksaw;
- drill;
- chisel;
- hammer;
- screwdriver;
- jigsaw;
- roulette;
- pencil;
- ruler;
- level;
- sandpaper.
Return to contents
Stages of work
Design option for 2 tiers for children's sleep
Before purchasing materials and direct assembly, determine the main stages of creating a bed yourself:
- Selecting a model (shape, design)
- Collecting measurements (room area, height of children who will sleep in the bed)
- Drawing up a diagram, drawing with specific parameters
- Selection and purchase of materials (wood, chipboard, metal, profiles)
- Preparing the necessary tools
- Manufacturing of parts in accordance with drawings
- Assembling parts into a common structure
- Painting, varnishing, decoration
- Mattress installation
Bed assembly
The mattresses must be measured and the plywood backings cut to size. A margin of 2 cm should be provided so that it is convenient to cover the mattresses with sheets. After marking, you can proceed directly to installation work.
First, 2 side frames are made. For this, a beam with a cross section of 5*10 cm is used, which is fastened with screws. A board (15*2 cm) is screwed to one of the frames. Moreover, the joints must be both strong and neat. Self-tapping screws should not pierce through wooden elements, protruding with their pointed ends outward.
The second frame is similarly equipped with a side. It is made from a board with a cross-section of 20*2 cm. For the legs of a bunk bed, a 5*10 cm beam is used. Their length must correspond to the size of the second tier of the structure.
Holes for screws are made in the vertical bars located on the legs. The screws are screwed in:
- at the location of both tiers of the structure;
- in the side frames.
Small recesses are created in the legs with a drill. The washers and heads of 6 faces should fit into them. Screws are screwed into all holes. The recesses with their heads are sealed with putty.
The instructions for assembling the bed provide for the correct positioning of the structure in relation to the wall. If the wall is ordinary, then it is better to use a laser level to level the bed. For plasterboard walls, holes are drilled into vertical profiles.
It is necessary to install transverse slats under the mattresses. This ensures the creation of a reliable and comfortable bottom of the mattress. It is especially important to do this efficiently on the upper tier so that the mattress does not fall on the child lying below. We carry out this operation by attaching transverse mattress strips to longitudinal bars. The screw fastening pitch is 25-30 cm.
Both mattress box designs must be covered with laminated boards. These boards are attached using special screws with countersunk heads. Sides can be used as an additional element. They will prevent the baby from falling out of the crib.
How can you turn a crib into a full-fledged one?
When remodeling a small crib, you will need to purchase some additional materials.
We disassemble the old bed and sort out those parts that can be reused. We build a frame of a certain size for the required mattress. It is best not to redo this part, but to purchase a new one. You should not skimp on stiffening ribs or jumpers , since the more there are, the more functional the bed will be. They will give her reliability. The best frame option would be a metal structure. In the absence of it, chipboard or wood will be suitable for work. In this case, it is necessary to expand the thickness of the frame parts around the perimeter so that they fall on the planks. Including them will result in the most appropriate extension.
Using timber blocks, you need to reinforce the supports. To evenly distribute the load, they are fastened using the letter “G”. To make it easier to screw the screw into the wood, you need to lightly lubricate it with soap. Then the legs of the support are attached at the feet of the headboard. At the same time, do not forget about the back wall. The frame needs to be connected to the back and a decorative panel installed.
After attaching the frame at the feet and headboard, the main parts are connected to the frame with furniture screws so that they coincide with the headboard. This condition is necessary to create a strong bed (how to strengthen a bed?).
Important
For fastening, you can use the back wall, which will be the most economical, since it will serve as a support. The back will never break or bend when the child jumps or leans on it.
Requirements for a bunk bed
If there are two children in a family, but not many square meters, then a bunk bed would be an excellent option for organizing sleeping arrangements for the children. Such a bed makes it possible to economically use the interior space of the room. For children, this type of furniture (IMAGE 1) will bring only joy. In most cases, bunk beds are delivered to your home unassembled.
Image 1. Assembly diagram of a bunk bed.
To avoid additional costs, you can try to do this yourself. This article provides instructions for assembling the structure. The bed kit includes the necessary parts to assemble the bed. If you have basic furniture assembly skills, then detailed assembly instructions will help you save money and assemble a bunk bed yourself.
An integral condition is that children's furniture must be absolutely safe.
For this reason, the assembly process must be approached with the utmost seriousness. The bed must be strong and carefully assembled. You need to start the assembly process by marking the places on the main supporting walls of the crib where the wooden bases or boxes that are intended for mattresses will be fixed.
The instructions for assembling the bed include the following materials and tools:
Assembly diagram for a bunk bed.
- boards;
- beam;
- plywood;
- screws;
- euroscrews;
- hacksaw;
- drill;
- chisel;
- hammer;
- screwdriver;
- jigsaw;
- roulette;
- pencil;
- ruler;
- level;
- sandpaper.
Return to contents
Design options
Bed with perpendicular tiers
Homemade beds for 2 separate beds according to the arrangement of the tiers are:
- perpendicular
- parallel
According to the type of staircase, furniture is divided into beds with:
- retractable ladder
- built-in steps
Furniture for children's sleep can be:
- national team
- whole
The lower tier with drawers is one of the popular designs of two-story children's sleeping furniture
The following design solutions are also distinguished:
- loft bed
- with retractable tier
- with double bed on the lower tier
- with wardrobe and steps
- bed over sofa
- with work area at the bottom
- retractable (roll-out) drawers, cabinets
The staircase, as an important element of the bed, is designed as:
- flat design on one side, additionally acting as one of the sides for the lower tier
- inclined or curved shape with flat steps and protective railings
- designs where drawers serve as steps
Bed assembly
The mattresses must be measured and the plywood backings cut to size. A margin of 2 cm should be provided so that it is convenient to cover the mattresses with sheets. After marking, you can proceed directly to installation work.
First, 2 side frames are made. For this, a beam with a cross section of 5*10 cm is used, which is fastened with screws. A board (15*2 cm) is screwed to one of the frames. Moreover, the joints must be both strong and neat. Self-tapping screws should not pierce through wooden elements, protruding with their pointed ends outward.
The second frame is similarly equipped with a side. It is made from a board with a cross-section of 20*2 cm. For the legs of a bunk bed, a 5*10 cm beam is used. Their length must correspond to the size of the second tier of the structure.
Holes for screws are made in the vertical bars located on the legs. The screws are screwed in:
- at the location of both tiers of the structure;
- in the side frames.
Small recesses are created in the legs with a drill. The washers and heads of 6 faces should fit into them. Screws are screwed into all holes. The recesses with their heads are sealed with putty.
The instructions for assembling the bed provide for the correct positioning of the structure in relation to the wall. If the wall is ordinary, then it is better to use a laser level to level the bed. For plasterboard walls, holes are drilled into vertical profiles.
It is necessary to install transverse slats under the mattresses. This ensures the creation of a reliable and comfortable bottom of the mattress. It is especially important to do this efficiently on the upper tier so that the mattress does not fall on the child lying below. We carry out this operation by attaching transverse mattress strips to longitudinal bars. The screw fastening pitch is 25-30 cm.
Materials
Professionals advise making homemade sleeping places for 2 children from the following safe and reliable materials:
- Wood (solid or board) . A durable, eco-friendly choice for a child's room. However, the work will require construction skills. It is not recommended to use lumber, deformed or undried wood. Experts call a balanced choice a pine board with a cross-section of 5x15 cm or a furniture board glued together from bars of different types of wood.
- MDF . Modern material has reliable operating characteristics. If assembly is carried out carefully, a bed made of sheet material cannot be distinguished from the factory model
- Metal . The design is considered the most reliable, but assembly requires welding and the cost of the resulting product is high. The work uses round bars, pipes, wire
- Chipboard (fibreboard) . Suitable for the manufacture of individual elements (drawers, side panels of the frame, backrest). Due to the use of formaldehyde in the production of building materials such as laminated chipboard, beds are not made from it
Assembly instructions for standard beds
After purchasing furniture, each person decides for himself: to assemble it himself or invite specialists. Finding a furniture assembler will take time, as well as additional financial costs. However, if a person is familiar with the tools, then assembling the furniture following the manufacturer's instructions will not be difficult.
Schematic representation of the bed
Attach the necessary fittings to the headboard and footboard of the structure.
- If the purchased bed has a middle support, then you need to connect this element (the base and the transverse support need to be fastened).
- Attach the drawers to the headboard and to each other (if a footboard is not provided). When it is there, the drawers are attached to the walls of the furniture.
- Assemble the base for the mattress: attach special slats or plywood strips.
- Final check of fastenings on the product. After inspecting the structure for stability, the bed is ready for use.
Conclusion
Now you know about all the features of collapsible bunk beds and can easily choose the right model using this review as a guide. The video will provide additional information on the topic so that you can delve even deeper into it. If anything is unclear or you have any questions that require additional clarification, write in the comments under the review.
Address: Academician Anokhin Street, Moscow
See also:
Similar tasks
Other tasks in the category "Repair and construction"
- 2,000 rub.
A private house with an autonomous 2-circuit diesel heating system. The boiler is working and 1 circuit out of 2 is working. In the second circuit, hot water is supplied to the comb and then to the incoming pipes (sinks.
Vladislav N. village of Manyukhino
Ksenia Aviatsionnaya street, 59, Moscow
The most hygienic shower was purchased for this purpose, what is needed along the way, please buy it Payment via Sberbank online We will discuss via WhatsApp Thank you
Guide to assembling a bed with a lifting mechanism
When working with furniture that has a lifting device, you will need an assistant. Assembling a bed with such a mechanism is difficult to do alone. After checking all the components and fittings, you can start working:
- We assemble the base of the bed; to do this, we connect 4 drawers and a backrest in series.
- Installing furniture legs. Initially, they are removed from the mounting plates. The plates are connected to the side drawers, and then the legs themselves are inserted into the fastenings.
- The bed lifting device is attached to the side drawers.
- Install the screws that will connect the side, central drawer and back of the product.
- After making sure that the corners of the base are straight, you can tighten the screws tightly.
- Assemble the laundry drawers: attach the bottom to the central and side drawers.
- Attach the structure with the lifting mechanism to the orthopedic frame. Install shock absorbers.
- Attach the handle to the footboard, and attach the mattress stopper to the headboard.
Please note that the assembly recommendations are general for products with a lifting device. For each model with this design, special instructions are provided from the manufacturer in the package.
How to change a single bed to a double bed?
The easiest way to remodel is to combine two single beds into a single structure. To do this, they are moved close to each other, tightly connected:
- The legs are tied with durable material, for example, rigid ropes or wire.
- Secure the sidewalls with bolts.
- Combine the frames of two beds to remove the space formed between them (gap).
- One side panel is removed from each single product and cut lengthwise with a saw so as to reduce the height of the panels to the level of the base of the mattress.
- The frames of both beds are bolted together tightly and with a certain tension so as to reduce the possibility of the legs swinging.
- To strengthen the structure, two legs are left in the middle.
Instructions for assembling a bunk bed
In order to save space, parents quite often purchase a bunk bed. However, purchasing such furniture is expensive, so it’s easier to assemble the product yourself.
Bunk bed diagram
Required materials and dimensions:
| Quantity | Thickness, mm | Width, mm | Length, mm | Part name | |
| A | 4 | 38 | 76 | 1730 | legs |
| B | 4 | 38 | 76 | 1730 | external leg pads - cut to the required length |
| C | 4 | 38 | 140 | 2030 | side walls |
| D | 4 | 32 | 44 | 1850 | support bars |
| E | 8 | 20 | 140 | 914 | upper and lower back boards |
| F | 4 | 20 | 90 | 914 | central back boards |
| G | 24 | 20 | 76 | 1000 | bottom slats |
| H | 1 | 20 | 90 | 1510 | vertical staircase element |
| I | 3 | 20 | 64 | 482 | steps of the stairs |
| J | 2 | 20 | 90 | 1800 | side rails - cut to the required length |
Dimensions and manufacturing diagrams, drawings
Before you make a bunk bed with your own hands, you need to take measurements of the room and decide on the desired size of the bed. Next, drawings are drawn up for all parts of the structure. Maintaining precision and accuracy in dimensions will allow you to get exactly the result that is needed.
You must first measure the room and determine the dimensions of the future bed.
The do-it-yourself bunk bed drawings for children indicate the following information:
- dimensions of the integral structure;
- methods of connecting nodes;
- parts assembly diagram;
- dimensions of fastening elements and parts;
- installation order of each part.
Beds with lifting mechanism
Products with a lifting mechanism significantly save space. Before starting assembly, you should check the completeness of all accessories and invite an assistant for the process.
There are three types of mechanisms:
- Manual mechanism on hinges - lifting is carried out manually.
- A spring-based lifting mechanism is quite inexpensive, but over time the springs will stretch a lot and will need to be replaced.
- Beds with gas shock absorbers have a long service life and can withstand heavy weight.
The top bar of the lifting structure is attached to the bottom of the sleeping frame. The other two are the basis of the lifting mechanism, so they need to be attached to the frame itself. The next pair of slats help adjust the height and help keep the structure raised. The lower one is tilted at an angle and is attached with screws.
It should be taken into account that all parts of the lifting device and its fittings must be strong enough, because the main load will be on them. It is better to purchase a ready-made mechanism at a hardware store.
What to look for when purchasing
Now let's look at the most important factors that you must consider when choosing. All of them are important, and if you miss at least one moment, then instead of joy you will receive disappointment from the purchased furniture.
Material of manufacture
Unlike traditional non-demountable structures, cheap chipboard and MDF are not used here, which is very good, because all the furniture produced is durable and reliable. As for specific solutions, there are only three of them:
- High reliability and resistance to deformation. Metal can withstand heavy loads without compromising the integrity of the structure; this is the most durable solution to date.
- Metal beds weigh little. This is due to the fact that hollow tubes are used in production.
- The material does not have a negative effect on the child’s health, does not emit harmful substances and does not absorb odors.
The smooth surface of the metal is easier to care for and you can maintain perfect cleanliness.
Bed size
This aspect also requires special attention, since the convenience of placing children and the duration of use of the bed directly depends on it. Let's look at the main parameters:
- Width . We advise you to start from the figure of 70 cm, since this is what is suitable for both children and teenagers; the 60 cm option is good only up to 7-8 years. It is best to use beds 80-90 cm wide; they are comfortable and will provide a comfortable sleep even for those children who toss and turn a lot in their sleep.
- Length . The generally accepted norm is that the length of the bed should be at least 20 cm greater than the person’s height. But since we are selecting furniture for children, we should be guided by the fact that they are constantly growing, and roughly estimate for what period of time the bed is being purchased. The length of the beds is usually 190-200 cm, which allows you to use the bed for more than ten years without spending money on new furniture.
The length of the berth in a children's bed determines the period of use of the structure
- Height of berths . Typically, the lower level is located 40-50 cm from the floor, and the upper level is no higher than 180 cm. Another important indicator is the height of the space above the sleeping area, it should be at least 60 cm, or better yet, 70-80 cm You need to measure from the mattress of the lower bed to the partition of the upper and from the mattress of the upper bed to the ceiling.
Stair type
The safety of using the bed directly depends on this element, so you need to choose it responsibly. First of all, make sure that the steps are strong enough and that the ladder itself is well secured to the body. As for the varieties, there are three of them:
Other Important Aspects
Now let’s look at a few more nuances that directly affect the safety and comfort of the bed:
Remember that options with an independent spring unit are not recommended for children; they can only be used from 12 years of age.
The height of the structure is also important; it must be at least 25 cm above the level of the mattress, this is the only way to guarantee complete safety.
The most durable is metal
Metal products have the greatest strength and reliability.
Note!
Do-it-yourself sliding wardrobe - manufacturing manual with a full description of the stages, types of structures, choice of manufacturing materials (photo + video)Do-it-yourself carriage screed: step-by-step instructions for creating it yourself, diagrams and drawings for beginners, selection of materials and tools (photo + video)
DIY stool - types of stools, manufacturing materials, step-by-step master class with simple diagrams and drawings for beginners
A frame made of any type of metal profile, round, square, rectangular or flat, looks stylish, ensures structural reliability, withstands significant loads, is not subject to mechanical damage, is easy to wipe clean, and has a service life of several decades.
Compared to other materials, metal will be more expensive, but with welding skills you can save on the services of a welder.
Video: DIY crib for girls
A children's bunk bed will last a long time if you take care of it. At least once a month you need to check all fastening points and corner nodes. After all, children not only sleep on such a structure, but also jump and crawl on it. If you find any component loose, you just need to tighten the screws or self-tapping screws.
If the bed is made carefully and with imagination, it will perfectly decorate the interior of a children's room.
- Author: Vladimir Molotilov
I live in Tyumen, worked as an engineer in the construction industry, but at the behest of my soul I am a writer. Therefore, I write with pleasure on construction and repair topics. Rate this article:
- 5
- 4
- 3
- 2
- 1
(3 votes, average: 3.7 out of 5)
Share with your friends!
Applying primer
Once all parts of the bed are sanded, use a high-volume, low-pressure paint sprayer to coat all surfaces, front and back, with an even coat of primer. For best coverage, hold the sprayer tip about twenty centimeters from the surface of the bedding, moving back and forth in a slow, controlled motion.
Tip: For finishes that highlight bright colors such as red, black or yellow, it is recommended to mix tinted acrylic primer. This will reduce the number of top coats needed for a proper final coat.
