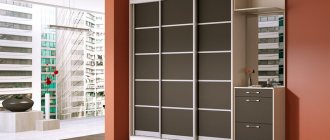
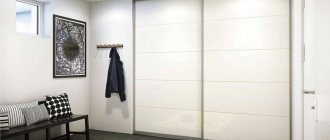
The second way is to carry out rough preparation of the room, then measure it and order a built-in wardrobe using this data. The preparation is as follows:
- level the walls if necessary;
- whitewash or paste over the ceiling;
- tidy up the flooring.
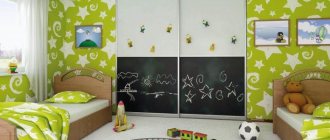
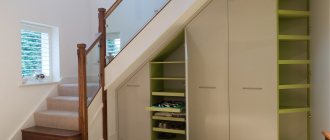
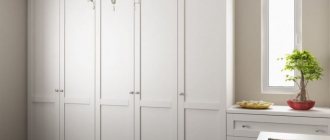
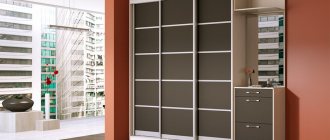
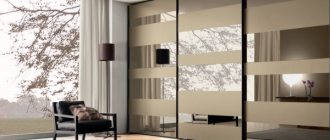
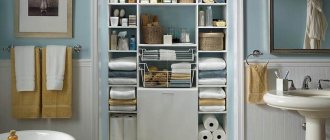
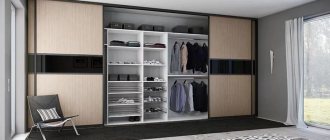
The filling of the closet is up to the taste of the owners; there are many options. There are metal structures, drywall, and standard shelves. You can equip the space in the style of a dressing room with shelving. It is better to make cabinet doors sliding or accordion-style - they save space and can also be decorated.
A budget option is a floor-length sliding textile curtain. In this case, it is better to choose spot lighting - you will get a bright, visually expanded space.
Why remodel
The motives are to increase comfort, create amenities for a specific family, rational use of space, designate places of work, recreation, children's leisure, etc. Most often the layout is changed as follows:
- combining two bathrooms into one;
- connection of the kitchen and living room, with zoning of the dining room;
- creation of niches, mezzanines, dressing rooms, storage rooms;
- insulation of the loggia, connecting the balcony with the living room;
- changing the location of doors, entrances (in load-bearing walls);
- connecting rooms, etc.
The use of dividers – curtains, furniture and other easily portable structures – will help solve the problem of zoning in a small apartment. This does not entail mandatory registration and is not included in the technical passport.
Before you remodel your home, you need to find out what can and cannot be changed in the apartment, and also read how to independently legalize redevelopment in the apartment.
Every room has its own secret
If you have any questions, you can consult for free via chat with a lawyer at the bottom of the screen or call by phone (consultation is free), we work around the clock.
So, as you already understand, Khrushchev should not be cluttered and filled with unnecessary things.
It is better to use folding tables and folding surfaces. Everything is also clear with the color scheme - a small area loves light and warm colors , for example: milky, white, light gray, pale pink and cream.
Is dismantling a built-in wardrobe a redevelopment?
No registered user is viewing this page.
Why you should choose a white kitchen: 8 convincing reasons for it
Ideas from design projects: 6 options for decorating a panel kitchen
Test: What IKEA item does your kitchen need?
- Construction and repair
- Foundation
- Roof
- Walls
- Window
- Doors and partitions
- Ceiling
- Balconies and loggias
- Internal structures
- Floor
- Water supply and sewerage
- Heating
- Ventilation and air conditioning
- Gas and energy supply
- Lighting
- Plumbing equipment
- Security and home automation
- Baths, saunas, swimming pools
- Construction Materials
- Decoration Materials
- Tools
- Technique
- Laws and finance
- TechnoNIKOL
- Design and decor
- Apartment
- Bedroom
- Kitchen
- Dining room
- Living room
- Bathroom, toilet
- Hallway
- Children's
- Attic
- Small rooms
- Workplace
- Wardrobe
- Library
- Decoration
- Furniture
- Accessories
- Vacation home
- Landscape
- Redevelopment
- Catalog of houses
- Magazine
- News
- Events
- about the project
- Advertising on the website
- Advertising in a magazine
- Terms of use
- Contacts
- about the project
- Advertising on the website
- Advertising in a magazine
- Terms of use
- Advertising on the website
- Advertising in a magazine
- Terms of use
- Contacts
How to find out if a threshold can be demolished
You need to consult with the company that designed your home.
The main developer of standard buildings in Russia is the Moscow Research and Design Institute of Typology and Experimental Design (MNIITEP). You can find out the series and type of house in the Register of Housing Facilities. In Moscow, series of houses are also reflected in the data of the city portal for managing apartment buildings. The list of companies that design monolithic houses is much wider, and it is more difficult to find them; each such house is built, as a rule, according to an individual project. If you can’t find a designer, you can order an inspection of monolithic structures (the average cost is 18 thousand rubles).
Contents and required elements
In order for a built-in wardrobe in a Khrushchev-era apartment to have all the convenience features, we must not forget that it is built in for more than one year. Therefore, in order to immediately find out which sections are needed in the interior, it is worth considering the following photo design:
- main - this zone is intended directly for outerwear. It is divided into two sections. One side should be equipped with a bar for outerwear. In the second, it is recommended to build in drawers for storing gloves, scarves, and hats. Lower built-in shelves in this compartment would not be a bad idea for storing bags;
- upper - this part is used to store clothes that are rarely used. This section is small and does not require additional elements. Things can be placed simply on its surface;
- bottom - shoes are located in this part. For convenience, it is recommended to install shelves of different sizes in this area, for a certain type and size of shoes;
- additional - such a section can serve to hide household appliances. Additional drawers in this area can also help store cleaning items for clothes and shoes.
Hallway interior in Khrushchev - 40 real photos with ideas
The Soviet Union has long since fallen, but everyone’s “beloved” Khrushchev houses have safely survived all the political cataclysms and delight their owners with coziness and comfort as much as, of course, they are able to do so. However, the small size of the apartment should not serve as a limiting factor to your imagination. You can thoroughly think through its design and perhaps start with the hallway, especially since this room is a kind of face of your “home.” For inspiration, we offer you 35 real photos of the interior of a hallway in Khrushchev.
How to make the hallway in a Khrushchev building larger?
Perhaps the main problem with any hallway in a Khrushchev-era building is that it is, as a rule, small and narrow, so the design must be developed taking into account this far from joyful specificity. However, there is no need to bury all your great “projects” - you just need to use a few tricks from the arsenal of interior masters, and now a small hallway in a Khrushchev building seems not so small. What mysterious manipulations are we talking about? Nothing supernatural!
More mirrors and light
Perhaps one of the most famous ways to make a small and narrow hallway in a Khrushchev building larger. The light source can be lamps, lampshades that are in good harmony with the main lighting.
In this case, the mirror completely transforms the room. You rarely see such a hallway interior in a modest Khrushchev-era building, but it’s still good that the owners are gradually getting rid of the design templates that constrain them.
Selection of the optimal shade
Pastel colors are the most flattering. They help saturate the room with warmth - and at the same time visually make it wider.
In this photo, the owners clearly made a mistake in choosing the main color of their room. Already small, with this color scheme it looks even smaller. Still, bright yellow is not for small apartments.
We also confidently recommend a classic beige color for decorating the interior of a hallway in a Khrushchev-era building. In the example in the photo we see how successfully it is played with bamboo motifs.
Glossy stretch ceiling
Want your ceilings to look taller? Use a stretch ceiling with a glossy fabric. Such a ceiling will advantageously reflect everything that is below, creating the illusion of a high and spacious room.
Options for redevelopment of one-room "Khrushchev" apartments of different sizes
Correctly completed redevelopment of a 1-room “Khrushchev” apartment of 30 sq. m., makes the apartment more spacious and brighter. Every available square meter is used here as rationally as possible. The standard landscaping option is a separate hallway and bathroom, a built-in wardrobe, a partial combination of the living room and the kitchen.
It is possible to demolish the partition between the toilet and the bathroom and combine these rooms. It is also permissible to expand the bathroom through the hallway.
29 sq. m.
Here it makes sense to combine the only room with the kitchen, separating it from the latter with a bar counter. The hallway is enclosed with a closet, a sliding radius door, an arch or a screen.
It is appropriate to expand or lengthen the living room, connecting it with part of the corridor space.
31 sq. m.
This space allows you to place a large built-in wardrobe next to the hallway; the wall between the room and the kitchen can be partially or completely removed and replaced with a sliding glass partition.
You can combine the kitchen with an adjacent room, most often the living room.
33 sq. m.
In such a room it is easy to create a beautiful design if you divide the room in half, combining the kitchen with one of the halves. Entrances to the premises are made separate or one of them becomes a passage. If there is a built-in closet, it is attached to the room.
Installed an interior partition
If you installed a partition in the living room to zone the space (a corner with a sofa and TV and a bedroom), then you need to coordinate this. By law, the installation of partitions is considered redevelopment. Their installation or transfer requires mandatory approval. Moreover, this applies to houses with wooden and reinforced concrete floors.
But there is an exception here. The installation of a partition is considered a redevelopment only if it creates an excess load on the floors. The law stipulates the maximum thickness for partitions made of brick, as well as tongue-and-groove, expanded clay concrete, foam concrete and gas silicate blocks - no more than 10 cm. Partitions made of any other material should not create a load of more than 150 kg per square meter.
If the partition does not touch the capital ceilings at all or touches but does not increase the load on them, then its construction can be classified as repair or reconstruction work. In this case, installation permission is not required. But it is better to first consult with the relevant local administration authorities, study the Housing Code and Construction Norms and Regulations on your own, or contact private specialists. The services of the latter can cost from 1 thousand rubles (average cost in Moscow). However, some companies are willing to provide consultations for free.
Final stage
The resulting joints are sealed with plaster, and several layers of putty are applied to the surface itself. The main one is made inside the joint, and its excess is smeared on the sheet around it. Then the reinforcing tape is applied. It is made at the rate of 10 cm on all sides of the seam and is laid in such a way that there are no swelling or waves. When the putty dries, it is cleaned off and a layer is applied again, followed by grouting using sandpaper.
The final stage is the application of the final coating. It could be: painting, wallpaper, special film.
Closet
The built-in wardrobe in the hall has the same technology, with one nuance. The depth of the device must be at least 60 cm. This is required so that clothes that are hung on hangers can fit freely in it. Thus, the depth of the side walls, floor and ceiling increases by 10 cm. Due to the fact that compartment doors take on 10 cm when deepened. The panels located at the top and bottom are fastened with corners or using Euroscrews, which are then closed with special plug elements. The sidewalls are also designed accordingly.
After finishing the seams with plaster in the door gap, guide profiles are installed and then a door is inserted, fixed in angle and height. For beginners, the easiest and simplest model will be the built-in wardrobes in the living room in the photo. Here the only thing to consider is the width and number of proposed sliding doors. After all, they can put pull-out drawers and block access to the shelves.
Since the room in the Khrushchev-era building has small dimensions, it is recommended to make the furniture not very voluminous and without any special decoration. The best alternative is considered to be a built-in wardrobe in a hall in a Khrushchev-era building.
Remodeling methods
Do-it-yourself furniture remodeling begins with examining the product. It is necessary to determine the condition of the furniture, its rotten places and breakages. To update the product, different methods and technological processes are used.
Painting
This method is used to update all wooden products ─ tables, chairs, chests of drawers, cabinet walls, cabinets. Water-based paint is used to refinish wooden furniture. It is characterized by high moisture resistance and heat resistance.
For work, use acrylic paint, which dries quickly and does not have an unpleasant odor. The texture of the plastic surface on the product can be obtained using thixotropic paint. It does not leave streaks and goes on in an even layer. To remake furniture with your own hands, you need to follow the sequence of work:
- Disassemble the structure ─ unscrew the fittings, remove the doors, pull out the drawers;
- Cover mirrors, glass, and parts that cannot be painted with construction tape;
- Wash each part with soapy water;
- Work in glasses and a respirator;
- Clean wooden surfaces with fine-grained sandpaper;
- Prime the parts of the product;
- Putty on existing cracks and chips;
- Eliminate dust formations;
- The product is ready for painting.
The paint in the can is applied with smooth movements at a distance of 30-35 cm from the surface. To obtain a good result, it is recommended to apply the paint in 2-3 layers to the product. You can open the surface of the product with varnish, and after the varnish has dried, remove the construction tape.
Film
A special decorative film is used to remake Soviet furniture. Furniture structures decorated in this way turn into beautiful and presentable products with different images. How to remodel furniture using decorative film:
- Clean the surface of the product from paint and varnish;
- Open the surface of the product with a degreasing liquid;
- Cut the film to the dimensions of the parts;
- Remove the protective film, apply it to the product and smooth it with a plastic spatula to remove bubbles.
