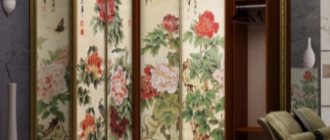
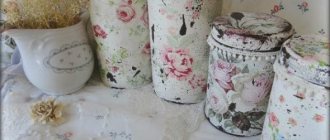
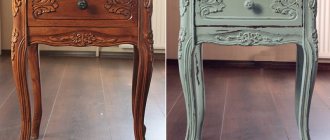
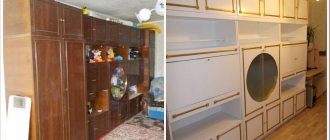
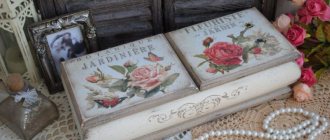
Do-it-yourself decoupage of old furniture is a decorative method of finishing material, wooden objects and other surfaces.
Pictures from a napkin are cut out using scissors and glued (attached) to the tabletop or facade.
Furniture decoupage dates back to the Middle Ages, but is becoming increasingly popular today among people who love handmade items. Without being a craftsman, it is easy to create a beautiful appearance for the surrounding things.
A large selection of materials in stores allows you to work with almost any surface, be it ceramics, wax (paraffin), fabric, wood.
First, it is worth replacing the fittings on the item, treating the entire area, preparing it for decoration. If you cannot disassemble the set, then you need to contact a specialist.
There is room for imagination in the variety of techniques used in this applied art (gilding, three-dimensional gluing, craquelure, etc.)
Types of decoupage techniques
To decorate furniture with your own hands, images are attached to the facades in various ways.
- Standard furniture decoupage technique.
Pictures are cut out from napkins or images printed on paper. The resulting element is applied to the object, and glue is applied to it. After drying, this area is varnished with a colorless composition.
If necessary, we add the necessary details ourselves (the pictures take on a three-dimensional appearance) or “age” the resulting image.
- Reverse furniture decoupage technique. They are made to decorate glass and sometimes objects.
A picture cut out of a napkin is glued to the back side; after it has dried, the necessary elements of the image are drawn in for three-dimensionality.
- The artistic technique of decoupage is cutting and gluing.
Effect: a single image on a plane with shadows drawn and shading manually.
It is not expensive, does not require special skills, is quite fast and very beautiful!
- "Decopatch".
This is the use of various materials from which the necessary components are torn out by hand, for example, silky designer paper, material with the effect of plastic or glass surface, napkins.
In decoupage, this is a torn edge and a frank demonstration of the decoupage technique itself.
- Volumetric decoupage technique.
It is based on an imitation of a painting created on a decorated plane using images cut out of a napkin.
You don’t have to be an experienced craftsman to create such works with your own hands.
How to correctly assemble the simplest option at home?
To make the simplest chest of drawers with your own hands, you need to: draw a drawing of it, select the optimal manufacturing materials, prepare tools and have some free time.
Scheme and drawing
Designing a piece of furniture is necessary in order to avoid errors in the manufacture of parts and when assembling the structure. At the design stage, it is necessary to think about its location in advance. The size of the chest of drawers and the type of construction will directly depend on this. After all, a chest of drawers can be made high and narrow, wide and low, and with any number of retractable drawers.
You can make a drawing of a future chest of drawers in different ways:
- find a suitable option on the Internet;
- draw it yourself with a pencil on a piece of paper;
- use special computer programs for cutting furniture items.
Important: the drawing must indicate the height, depth and width of the product, as well as the installation of fittings and guides.
Tools
The materials we will need are:
- screws;
- confirmations;
- plastic mounting angles;
- nails;
- MDF;
- chipboard;
- Fiberboard.
Prepare the following tools:
- screwdriver;
- drill for confirmations;
- confirmation bat;
- Phillips screwdriver;
- awl;
- ruler and pencil.
Step by step manufacturing and assembly instructions
In this article we will look at making a simple chest of drawers with four drawers, measuring 1100 by 800 by 500 cm. Its facades will be made of MDF. To reduce the cost of the chest of drawers, chipboard can be used to make the sides.
The most important and crucial step in making furniture yourself is detailing. We will need to prepare:
- tabletop measuring 1100 by 500 cm;
- top insert 1100 by 50 cm;
- bottom insert 1100 by 66 cm;
- 4 facades – 1100 by 162 cm;
- bottom – 1100 by 484 cm;
- rear wall with dimensions 1100 by 678 cm;
- 2 stiffening ribs 1028 by 100 cm;
- 8 drawer fronts with dimensions 970 by 127; 8 sidewalls for drawers 450 by 127 cm;
- 2 bottoms for drawers 970 by 418 cm;
- 3 partitions for drawers 418 by 127 cm;
- 2 bottoms for fiberboard boxes measuring 100 x 448 cm.
As for the principle of assembling a piece of furniture, everything here is extremely easy and simple. All details are collected by confirmation:
- First, the frame of the product is assembled, consisting of the sides and bottom.
- Next, markings are made for the guides.
- Now let's move on to assembling the chest of drawers
- We attach the back wall to the box at a right angle.
- We install the drawers and check them for ease of opening and closing.
- We fix the tabletop of the chest of drawers with self-tapping screws.
- We begin installing the fronts on the drawers and screwing on the handles.
That's the whole simple process of making and assembling a chest of drawers from MDF with your own hands.
Tip: if you need more capacity, try making a cabinet from chipboard, furniture board or even cardboard. And a rocking chair or corner sofa will sit comfortably nearby.
Stylistic directions of decoupage
Furniture decoupage is performed in different styles. The following are widely used.
A design style that came from France. It is characterized by a whitewashed background and an image in pastel colors. Often craftsmen complement it with craquelure and floral print.
Simple rectangular furniture made by local artisans is often decorated with discreet bouquets or single wildflowers inscribed in a square arrangement.
- Simple City.
It is done using the decopatch technique. Use newspaper clippings with torn edges or old photographs.
This is the most current style of the people of the big city, which emphasizes its immediacy and democracy.
- French vintage.
Features: decoration in two colors (white and black, less often pastel colors are included). Can be used for dresser, table top and other items.
This is a variation of the simple city style, which is influenced by minimalism.
- Shabby chic.
This is decoupage, making the surface look like an antique item. Features: blurred borders, frayed edges.
The craftsman is recommended to make prints with roses and angels on the item.
- Victorianism.
To decorate in this style you need to have a number of skills. Characteristic features: combination of gold, blue, green paint. Topics: still lifes, hunting, bouquets of flowers, wildlife.
This style combined old English traditions and the luxury of the south-eastern English colonies.
Recommendations for surface preparation
- Glass products are degreased. To do this, wash the glass well, dry it and wipe it with a lint-free cloth. After this, it is degreased with dye-free dishwashing detergent.
- Before decorating tin surfaces, they should be treated with a solution based on water and vinegar. To do this, the ingredients are diluted in a ratio of 1 to 1. After washing in vinegar water, it is passed with a metal brush. After removing dirt with a brush, the top layer is removed.
- Before working with wood or chipboard, they are sanded with fine-grain sandpaper to smooth out any unevenness.
Before decorating the surface, it should be treated.
Restoring a table with colored wallpaper
We decorate the table in two monochrome colors, so it will easily fit into the modern style. For work, we will need a white primer, black and gray paint for exterior decoration, medium-grain sandpaper, brushes, a paint roller, wallpaper with 2 types of black and white patterns, dark-colored wax, and glue.
- We prepare the table: we wash it, repair defects, tighten the fittings (replace them if necessary).
Let the table dry and begin decorating.
Apply one layer of primer to the prepared surface, which will provide good adhesion and protect the paint from peeling.
Decorating an old coffee table
First you need to prepare the surface of the furniture for work. The plastic is degreased. The wooden table is disassembled and sanded with fine-grained sandpaper to remove the layer of paint and varnish.
The table is reassembled, all cracks and defects are puttied, and its entire area is primed.
After the primer has dried well, apply several layers of paint. For the effect of additional cracking, craquelure varnish is used. It is applied, then, until it dries, painted with white acrylic. After the acrylic has dried, we glue the motif (if we are not using craquelure) and cover it with colorless varnish. Can be varnished using spray varnish. This will make the application more even.
Each layer of paint must dry well so that the paint composition does not crack and stains do not form on the surface.
After the varnish has dried, you need to “pass” it with fine-grained sandpaper. This ensures stronger adhesion to the surface. Prepare napkins for gluing: cut out the desired image with nail scissors, soak in water for 15 minutes, place on a paper towel to remove excess moisture.
Decoupage occurs in one of three ways: hot (a motif cut from a napkin is glued and passed through with a hot iron without steam), dry (the motif is glued and the remaining glue is removed with a cotton swab), wet (the motif is soaked in diluted glue or varnish, applied to a multi-forum and carefully re-glue it onto the surface).
After gluing the image from the napkin, we bring it to its logical conclusion (finish drawing, add a shadow, tint, etc.) and leave it to dry.
Varnish in two layers. To obtain a smoother texture after varnishing, pour water into a container and smooth out the traces of brush lint with a wet finger while the varnish is still wet.
Dimensions and functionality
Before you start creating a homemade bedside table, you should decide on its size and functionality, and also decide what material it will be made from. So, in order to decide what size to make a cabinet, you need to measure the available free space near the bed and pay attention to the dimensional parameters of the room. If the space allows you to install any cabinets, then you can make them, adjusting them to standard sizes. In any case, you need to make a drawing of the product and apply all the necessary dimensions to it. Having a drawing will greatly simplify the work in the future.
Bedside table drawing
Advice! If there is not enough free space in the room, it is recommended to install simple hanging bedside tables. They will not load the room and visually will not take up much space.
As for functionality, it is important to decide what structural elements the cabinet will have. So, these can be shelves, drawers, doors. It will be more convenient to use a cabinet that has a door and an upper shelf that is not covered by it. But, however, it will be more convenient for someone to constantly pull out the drawers. By the way, making a cabinet with drawers is not much more difficult than making a simple one with a door.
Small bedside tables for the bedroom fit perfectly into the interior of small rooms
On a note! Cabinets can only have shelves that are not closed by a door. This is the simplest design option, functional and easy to use, but often requires cleaning, since the inside of the cabinet is not protected from dust.
Decoupage chest of drawers
To decorate furniture in the shabby chic style, shades of pink, blue, gray, and green are used. This technique is not used to treat polished surfaces, or it is removed with a sandpaper (grinding) machine. The top is “painted” with an acrylic-based primer or primer.
It is recommended to use chalk paint as it adheres better to the surface.
- We prepare the furniture by removing the coating with sandpaper, removing all dust, priming or painting with acrylic.
In those places where there will be abrasions, we paint with black paint.
We cut it along the contour and apply it to the furniture to visually form a pattern.
Coat the top of the image with adhesive solution.
The varnish can be any at your discretion.
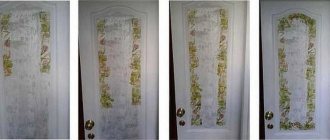
Decoupage interior door
- Prepare the surface: sand the wood with fine-grain sandpaper and prime it. You can work on MDF without preparation.
We prime our door with dark paint.
We use fine-grain sandpaper after the paint layer has dried.
Carefully glue the design and smooth it thoroughly so that there are no folds or air bubbles.
The door turns out to be in the style of the 30-40s of the last century.
How can you restore an old bedside table?
In order to carry out the transformation you will not need a lot of time and money. To do this, you only need basic tools that are available in every home:
- Hammer with nails.
- Wrench.
- Sets of screws, nuts, bolts. Moreover, it is not necessary to find the same ones. You can, for example, make stylish art using screws of different sizes. It will look bright and defiant.
- Pencil.
- Some nice boards.
- Hacksaw.
- Sandpaper.
- Additional materials for decoration and decoration: paint, colored mosaics, decorated wood.
IMPORTANT! Before you begin, clear the field for your future activities. Carefully inspect all defects and the degree of deterioration of the wood. Organize your nightstand. Pull out all the shelves and clean them, and do the same with the inside surface. If there are rotten or cracked boards, they should be removed and subsequently replaced with new ones.
How to decoupage a nightstand?
- We prepare the bedside table for decoration: wash it well, sand it, remove all dust, let the material dry and paint it white with acrylic.
If the old color of the cabinet shows through, then you need to paint it again, if necessary, prime defects and chips.
Choose a suitable floral pattern on napkins.
Apply glue to the designated areas, press the cut-out images, carefully smoothing them out during the design process.
The top of the old cabinet is coated with water-based varnish so that moisture does not spoil the decorated furniture.
Contrasts for every taste
The easiest way to make furniture that will be noticed is to use two contrasting colors: black and white. For example, paint the legs and body black, and drawer fronts white. The solution is simple, but visually very impressive.
buybuy
Black and white shades set a rhythm around which the entire room design can be built
buybuy
Behind the bright facade you don’t immediately notice that the cabinet stands on five legs
Contrasts are created not only with the help of shades. For this purpose, materials of different textures are used. For example:
- metal frame and facades upholstered in fabric or leather;
- solid body and glass legs;
- wooden body and molded metal doors
buybuy
Textile inserts give this model a pouf-like feel.
buybuy
Stylish wooden nightstand for the bedroom
Interesting solution. To create contrast, you can place a round bedside table on one side of the bed and a square one on the other. Play with the height of the cabinets: place the low one on the right, the model with long legs on the left.
Decoupage of kitchen furniture
To decorate old furniture, you can paste it with scraps of newspapers, magazines, special or your own kitchen napkins, and wallpaper.
For a smooth surface, almost any materials with pictures or original texture are taken. They lay easily on the surface without wrinkles or creases.
The reverse technique is well suited for working with glass. Smoky design can easily replace artistic painting, but it lends itself better to the hand of a master. Materials with fruits, vegetables, and dishes are perfect for decorating old furniture in the kitchen. Decorating with rice, mulberry, and banana textured paper looks good.
For vertical surfaces, a good choice is the volumetric technique.
PVA is well suited for gluing; for artificial “aging”, acrylic paints, bitumen and paste with metal effects are used.
Decoupage decorative technique - features
Decoupage is a special art of decorating surfaces with cut and pasted pictures from paper, photographs, lace, napkins in combination with paints and varnishes. Since decoupage has nothing to do with artistic painting, anyone can master this simple but fascinating type of creativity.
The peculiarity of the technique is that you can decorate absolutely any thing with pictures, from candlesticks to large pieces of furniture. The main thing is the presence of imagination and desire.
The history of the origin of the technique of imitation painting goes back to the Middle Ages. Decoupage as an art form was first recognized in Germany in the 15th century. But the decor reached its peak of popularity in the 17th century, when oriental-style inlay, which Italian craftsmen skillfully imitated using the decoupage technique, came into fashion throughout Europe. These, at that time cheap counterfeits, which have survived to this day, have today become a real standard in the manufacture and decoration of furniture.
Great admirers and masters of decoupage were: the French Queen Marie Antoinette, Madame de Pompadour, Matisse, Picasso, Lord Byron.
Decor ideas for bedside tables
You shouldn’t limit your imagination when choosing a bedside table, because it’s not only a place to store an alarm clock, but also a bedroom decoration.
Types of decoupage cabinets
There are 6 main techniques for performing decoupage. Moreover, they can be used either individually or combined:
- Direct decoupage, it is also called classic, since it is the basic technique for all other types and is essentially an applique on the front side of the surface.
- Back. This is the application of decorative elements to the inside of a transparent surface.
- Artistic or smoky. The background and glued motifs do not have clear distinctions, and when merging, they create the effect of haze and fog.
- Volume. During the decoration process, some elements are given volume; for this purpose, pastes, fabric, small pebbles and even eggshells are used.
- Decopatch. This is decoupage using the patchwork technique. The surface is completely filled with torn pieces of paper to create a shredded effect.
- Three-dimensional. Looks like a 3D picture.
To give the image originality, decoupage is combined with other decorative techniques, such as abrasion, craquelure, patination, shading, tinting, gold leaf.
A variety of materials for decoupage allows you to apply applique to any surface. The most popular of them are special napkins. In addition, photographs, fabrics, printed pictures, rice and decoupage cards are used.
Acrylic paints and varnishes are also used for creation and coating.
Decoupage cabinet in interior styles
Decoupage of the bedside table must be created taking into account the interior style of the room in which it will be installed. Today there are 5 main styles in which objects decorated using the decoupage technique will fit harmoniously.
- Provence. This is a style that combines provincial simplicity and French sophistication. Pastel colors, whitened surfaces, and deliberate aging are relevant for him. Natural motifs are used in the decor - images of vineyards, lavender fields, small, provincial houses.
- Shabby chic. The style is characterized by blurred images, delicate shades, floral patterns, images of palaces, birds, angels and roses. The name of the style itself translates as attrition, wear and tear, which is why the furniture is specially given an aged appearance.
- Simple City. This is a distinctly democratic style. Most often, newspaper and magazine clippings are used as decoration. Mostly all items are decorated using the deco patch technique, with its characteristic torn and burnt edges.
- Victorian style. The interiors combine classics and luxury. The design uses predominantly intense gold, red and green shades, stripes and checkered patterns. To give the furniture an aristocratic feel and the luxury inherent in the Victorian style, you can decorate it with images of roses, animals, bright still lifes, hunting scenes and romantic scenes.
- Ethnic style. It is possible to use the design style inherent in any country. Often, such cabinets can be decorated with patterns of animal skins, images of landscapes and fruits.
Glamorous option
A glamorous bedside table in a delicate shade is suitable for a girl’s bedroom. To make such furniture you need to take:
- Glaze with glitter or light satin paint in a soft blue color.
- To decorate the door leaf, you need to take straws or light fabric in a small floral pattern. Tapestry, velvet, and brocade are perfect for this.
- Elegant metal door handle.
- For the outer part of the bedside table, you need to take 3 special elements that will play the role of a parapet.
Related article: How to make a hygienic shower
For the cabinet you can use a variety of design elements:
- Instead of blue, it is good to use a pale pink or lilac version, but a rich burgundy or fuchsia shade also looks great. It all depends on the overall interior and its color scheme;
- To decorate the door, it is allowed to use gold or silver paint, but in this case, a subtle contrasting pattern must be applied to its background. This is done using a stencil;
- For the top, which can be used as a tray, frosted glass with a pattern works well.
DIY decoupage of the cabinet
To decoupage a cabinet with your own hands, first of all you should prepare all the necessary tools and materials:
- Decoupage card or napkins.
- Synthetic brushes.
- Coarse and fine sandpaper.
- Sponges or foam sponge.
- Acrylic primer.
- Acrylic paints.
- Colorless furniture varnish.
- Varnish glue for decoupage or PVA.
- Scissors.
- Containers for paints and water.
- Masking tape.
- Palette.
When everything is ready, you can start working:
- First of all, you need to remove the handles and other fittings.
- Now we sand the surface to remove roughness and the original coating and finish. Be sure to wipe the cabinet after this.
If there are scratches, grooves, chips and depressions, they must be leveled with putty or primer.
- After the primer has dried, you can begin covering the bedside table with acrylic paint. The color is applied with a brush or sponge, after which the paint must dry. The coating process is repeated three times with mandatory drying after each application.
- Then you need to prepare the drawing. Carefully cut out the ornament, remove all the extra layers of the napkin, take only the top, colored layer.
- Transfer the ornament to the prepared surface. To do this, coat the place where it will be with glue and carefully attach the picture, but only very carefully so that bubbles and wrinkles do not form, and the edges do not come off.
- If desired, you can tint the area around the drawing with a paint different from the color of the base. The color is applied carefully with a sponge, and after the paint has dried a little, correct it with a damp sponge.
- So all the motifs are glued in turn. They can be glued overlapping or end-to-end.
- After the glue has completely dried, the surface is covered with several layers of varnish, with the obligatory drying of each of them.
Banquette
We cover the bedside table with soft foam rubber, taking into account the distance of the legs. Then we cover it with thick fabric so that there are bulges.
Reference! Convexities are made simply: Sew small squares of the same material on top of the sheathed fabric in a checkerboard pattern. But if there are no legs, then sheathe it completely, except for the lower part for the floor. The seating bench is ready.
DIY bedside table decoupage
The bedroom is a room where comfort and harmony traditionally reign. If it is decorated in light or pastel colors with floral motifs, then shabby chic furniture will fit perfectly into such an interior with its light colors, smooth lines, scuffs and floral patterns.
For work you will need: a primer, structural paste, a stencil with an ornament, sandpaper, acrylic paints, brushes, PVA glue, transparent matte varnish, two-component craquelure, napkins with roses.
1. So, first you need to prepare the surface for work: wash it, degrease it with any alcohol solution and remove the fittings.
2. Apply one layer of primer to the prepared surface, which will provide good adhesion and protect the paint from peeling.
3. Since our bedside table is quite angular, and smooth lines look better in the shabby chic style, we will apply three-dimensional ornaments to the façade using structural paste. The structural paste is applied with a palette knife to a stencil with an ornament. After the patterns have dried, remove the stencil and lightly go over them with fine sandpaper so that the pattern becomes smooth.
4. To give our ornaments a sense of 3D effect and “age” the surface, we apply dark acrylic paint - this is what will appear through the cracks on the white bedside table. To get this gray shade, you need to add a little black to white acrylic paint. So, we apply a dark shade only to the facade and corners, and only white to the tabletop.
5. Next, we move on to decoupage the tabletop: select a suitable floral pattern on napkins, carefully tear it off and peel off the two lower layers. Glue the ornaments onto a dry surface in the corners using PVA glue. If the glue is too thick, it is better to dilute it with water 1x1. For gluing, choose a wide flat brush or a fan brush - it will be more convenient. You can apply glue directly to a napkin: apply the ornament to the desired place and apply glue on top with smooth movements. After the glue has dried, coat the tabletop with clear varnish. It is better to use a matte varnish, since glossy surfaces do not look very good in the shabby chic style.
6. The next stage: paint over the remaining surfaces with white acrylic paint and sand the protruding parts of the bedside table and volumetric ornaments made from structural paste with sandpaper - a dark shade appears, and the bedside table acquires an “aged” vintage surface.
7. Then we do decoupage on the front of the bedside table: select a floral pattern on a napkin, peel off the top layer and glue it with PVA glue. To prevent the flowers from appearing too flat, you can lightly paint on the shadows with pale pink paint. As soon as the glue dries, we varnish everything with a transparent matte varnish. You can apply 3-4 layers of varnish: the more layers, the longer the furniture will last.
8. The tabletop of a bedside table can be aged in another way: there are special craquelure compositions that allow you to create this effect quite quickly. We used two-component craquelure: strictly according to the instructions on the jar, we first apply the first composition, and after a certain time - the second. Within a few minutes, spectacular cracks appear on the surface.
9. The final stage: screw in the fittings - gold-colored handles will fit perfectly into the shabby chic style.
Decor of a bedside table in Japanese style - master class No. 2
In this master class we offer you the styling of a bedside table to look like a Japanese lantern. From the inside it can be additionally equipped with a battery-powered lamp, and on top it can be covered with a “mat” made of bamboo mosaic.
To work you will need:
- sandpaper;
- primer;
- rice paper;
- glue;
- jigsaw;
- liquid Nails;
- wood dye;
- sheet bamboo mosaic.
Paint your nightstand with several coats of wood stain.
Cut out a “mat” from bamboo paper of a suitable size and fix it to the surface of the cabinet using liquid nails.
Seal the seams between the bamboo tiles with a beige-colored primer and remove excess with a damp cloth.
Make a panel in the cabinet door using a jigsaw, sand the cuts with sandpaper, glue rice paper on the inside, covering the resulting hole with it.
Screw a suitable handle to the nightstand. Bronze will look good.
