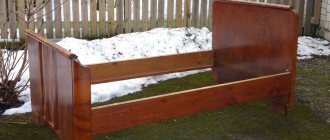
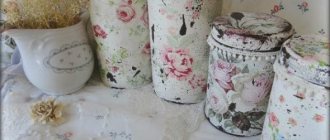
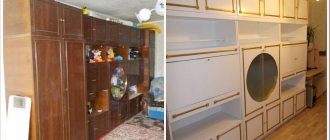
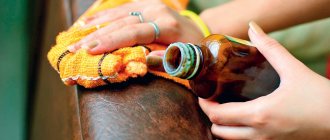
Restoring furniture with your own hands at home is a fun and creative activity that allows you to give new life to your favorite items. At the same time, self-restoration helps you save a lot of money, because the services of professional furniture makers can be so expensive that it would be easier to buy a new cabinet, armchair or sofa.
You should only contact specialists when you want to restore expensive furniture or valuable, antique interior items - here, independent restoration by an inexperienced craftsman can only do harm. You can restore old furniture or something that was bought in a regular furniture store with your own hands - below we will talk about some of the tricks of this process.
DIY furniture restoration
Self-adhesive film
This is one of the easiest ways to repurpose old furniture and doesn't require any special skills.
In construction and online stores you can choose any suitable canvas - with imitation wood texture, plain, with a pattern. A rich assortment will allow you to update your nursery, living room, bedroom or even kitchen. Its main advantage is moisture resistance, which makes cleaning easy. The film is easy to stick if you follow the instructions; it is resistant to temperature changes and even detergents. But this material lasts no more than 5 years, and fades in sunlight and in places of active friction.
Before purchasing film, it is important to take measurements and add a small margin. The surface requiring renewal must be leveled, cleaned, degreased and primed. Then apply the markings. When gluing facades or tabletops, you need to apply the film on top and gradually remove the paper layer. The canvas should be smoothed with a rubber spatula. If air bubbles form after gluing, make miniature cuts in these places and press the material to the base.
Time spent
It is impossible to accurately calculate the time spent. For example, you can spend one day on small items. Larger works may take several months to complete.
- Do-it-yourself computer desk: 150 photos of making corner tables and features of the choice of materials
DIY ottoman - step-by-step guide to the best homemade ottoman options (video + 125 photos)
Coffee table: simple and stylish design options and design ideas for coffee tables (115 photos)
Deadlines are calculated based on the working material. Each composition has a certain drying period.
It is necessary to carefully read the instructions and strictly follow the advice and instructions for restoring furniture. If the recommendations are not followed, the final result will decrease in quality.
Before each application of a layer of varnish, you need to be sure that the previous one has dried completely. To save time, buy mixtures that do not require long drying. It's a good idea to read reviews before purchasing.
Plan all your purchases clearly. This will help you avoid unnecessary trips to the store. The necessary materials should be purchased immediately and kept on hand.
Decorate with decorative elements
An old dining table whose top is swollen or cracked can be decorated with tiles or mosaics. To do this, you need to sand the base and apply wood impregnation, which will reduce the consumption of tile adhesive. The number of parts should be calculated in advance. To avoid cutting the tiles, the panels can be framed with wooden planks. Glue for ceramics must be applied at five points - in the corners and in the center. The tiles are laid one at a time and separated by crosses. After drying, the tile joints are smoothed with grout.
The photo shows a wooden table covered with tiles. This tabletop is not afraid of moisture and hot objects.
Old wooden furniture can be decorated with various fittings (rivets, original handles, belts) - this will give the product an unusual brutal look. Another way to turn a boring chest of drawers into a modern and stylish one is to stick mirrors on the fronts. It is better to entrust cutting of canvases and processing of edges to professionals, and you can do everything else yourself: paint the chest of drawers, fix the mirrors with special glue and attach suitable handles.
How to restore lacquered furniture
If you intend to restore small areas of lacquered furniture, you will need regular shoe polish. A universal colorless composition is suitable. You can also use wax if the polished item has dulled over the years and lost its appearance.
Of course, to start polishing and varnishing furniture, as well as restoring it, you will need patience and studying the life hacks presented above. But if you use the methods correctly, the result will be visible immediately.
Caring for matte furniture without polishing is much easier.
Remnants of wallpaper
This is one of the most budget-friendly options for remaking boring furnishings, but also the most short-lived. For decoration, we recommend using vinyl or non-woven fabrics, preferably moisture-resistant. After pasting the furniture with paper wallpaper, after drying it is necessary to apply varnish to it.
Before starting work, you need to prepare wallpaper, PVA glue, sandpaper, primer, roller, scissors and a ruler. If facades are decorated, they should be removed and sanded. If there are defects on the surface, they must be puttied and treated after drying. Wallpaper is glued to a pre-primed base and smoothed with a rubber spatula.
Removing the top layer of varnish
To remove paint and varnish material, use sandpaper, a hair dryer or varnish remover. A smooth surface should be achieved using any convenient method. Methods can be combined. The main thing is to come to a result.
Don’t forget about your health and use a respirator, gloves and goggles. Since the work is very dusty, particles of chemical compounds will fly in the air.
Using stencils
This is an ideal solution for those who want to decorate furniture with painting, but do not know how to draw. Templates for stencils can be made from thin plywood, cutting out patterns with a jigsaw, thick paper or film.
Before applying paint, the surface is sanded and degreased. The stencil is secured with masking tape (if the furniture is already painted, it is important to ensure that the adhesive trace does not damage the product). Aerosol or harmless acrylic paints are suitable for decoration. The finished work must be varnished for better preservation.
Disassembling items
The very first step will be to disassemble the furniture. The work process will be much simpler if you disassemble it as much as possible. Remove the doors, unscrew the handles, take out the shelves, preferably unscrew the frame parts.
But don’t get carried away; parts stuck to the glue should not be disturbed. There is a risk that during assembly it will not be possible to repeat the fastening of the elements. It is advisable to remove all fittings.
To simplify the assembly process, you should photograph the fastening points in advance. Label the accessories and put them into bags.
Repaint it a different color
When you paint furniture yourself, you can show your creativity and give the product any look. The most popular paint used in home decorating is acrylic. It dries quickly, is resistant to external influences, is economical and has almost no odor. In second place are aerosol paints in cans, which allow you to quickly update the product. It is recommended to apply them outdoors due to the small splashes that may be generated.
The photo shows old but strong furniture, repainted with a gradient effect.
Before you start remodeling, you need to repair the furniture and clean it of dirt. If necessary, remove the old coating using a spatula, washing or heating. Defective areas should be puttied. Then the surface must be sanded with fine-grained sandpaper and coated with a primer.
It is more convenient to paint hard-to-reach places (joints and corners) with a small brush, and everything else with a roller. If necessary, use masking tape to protect areas that do not require painting. To paint over dark items, at least three layers of paint are required, which should be reapplied only after complete drying. To give classic furniture nobility and sophistication, style it as antique using artificial aging or gilding.
When using chalk paint, which consists of water and chalk with mineral additives, there is no need to remove or prime the old coating.
Required materials
An individual list of materials should be selected for each piece of furniture. But there is a standard set of devices that will be universal for almost all ideas.
It is recommended to make a list in advance. You can use equipment rental because professional tools significantly save time, effort and give a higher assessment of the quality result.
- White table: 115 photos and videos describing the selection and construction of cool and easy-to-use tables
Do-it-yourself tabletop: video instructions for making a tabletop + 140 photos of the most modern ideas
Corner sofas - 130 photos and videos on how to choose and where to place modern original corner sofas
For DIY work you will definitely need: a sanding machine, a construction vacuum cleaner, an electric jigsaw, a screwdriver and a construction hair dryer.
Small details should include: sandpaper, brushes with rollers, several spatulas of different sizes.
To maintain health safety, buy good protective gloves and a respirator. Don't forget about removers, wax, paint, mixtures for sealing cracks.
Materials for work can be found in specialized stores, or use advertisements. Often the necessary compounds are sold at a reduced price, the remains from repairs do not match the color.
Artistic painting
With the help of drawings applied to the furniture by hand, it becomes exclusive. It is important that the resulting work fits into the interior, becoming part of the whole composition. It is easiest to paint wooden or natural veneer products, as well as MDF facades coated with acrylic.
The photo shows a refurbishment of an old but sturdy cabinet. Hand-painted furniture fits perfectly into the rustic style.
Artistic painting is a painstaking work, as it involves drawing small details. The basis for painting is a primer. It is important not to neglect surface preparation - even the most talented painting can be spoiled by a defect or crack in the base. Acrylic paints are best suited for work, and matte or glossy varnish applied in several layers to protect the finished drawing.
It is not necessary to paint a chest of drawers or a closet on all sides: individual accents on the facades look more aesthetically pleasing.
Disadvantages of restoration
It is preferable to leave it to specialists to give new shapes to old furniture or work on small details. A person without experience who does not know the nuances of work can completely ruin items.
Saving personal time. By handing furniture over to professionals for restoration work, you can forget about it and wait for the finished result.
DIY work requires an investment of energy in your free time; evenings and weekends will be devoted to the process. If you don’t treat your business as a hobby, then soon the activity will begin to burden you.
Eurobook sofa - 130 photo recommendations on how to make and assemble a comfortable and compact sofaAssembling furniture with your own hands - 105 photos and a detailed video of how various furniture elements are assembled
Do-it-yourself bookshelves - ideas for building shelves and shelves quickly and easily from scrap materials (155 photos and videos)
Allocation of special territory. Giving new life to old furniture is a dusty task. Chemical compounds, sawdust and dirt will fill the room.
It is necessary to allocate space for freedom of action. It is advisable to carry out work in non-residential areas: street, garage, workshop.
If restoration work is carried out in an apartment, then one room should be completely circled, and the floor should be covered with cellophane or paper.
Decoupage
This technique will be appreciated by those who do not own a brush. Depending on the thoughtfulness and accuracy of the procedure, the furniture can look professional and even luxurious.
The photo shows an antique chest of drawers, covered with paint and decorated with sheets of music.
You can decorate furniture with paper napkins, wallpaper, old photographs, geographical maps, and tram tickets. Before gluing the material, you should paint the surface with acrylic paints. After drying, the base is coated with PVA glue, onto which the picture is carefully glued. After this, another layer of glue is applied. The finished product is varnished.
Finish coating
If you want to preserve the original wood pattern, then use varnish, wax or oil as a finishing coat. When completely changing the color, choose paint or enamel for furniture.
When choosing bright and light shades, pre-paint the parts white. With this move, the paint will lay beautifully in the chosen tone.
Veneering
This method allows you to give shabby wood furniture an updated look. For home veneering, natural rotary-cut veneer is usually used. With its help you can restore door leaves, facades and countertops.
The base requiring rework must be smooth and sanded. Thin veneer, sold in rolls, should be straightened by wetting it with a damp sponge and placing it between two heavy slabs. Then the canvas needs to be trimmed along the edges to get rid of uneven edges. The veneer is glued with contact glue, which is evenly applied to the base in two layers. The sheets are fixed using an iron heated to 50º - ironed through the paper. After drying, the joints are sanded, and oil, varnish or stain is applied to the finished product.
The photo shows the process of finishing the table with veneer. The width of the canvas is usually 30 cm, so joints during use are inevitable.
Restoration of wooden surfaces
No matter how carefully you handle the furniture, abrasions, scratches, and stains still appear. They are easy to eliminate. The main thing is to know how and with what.
- If the wooden surface has simply lost its shine, find a wood care product that contains orange oil. Take a clean sponge, dampen it slightly and microwave for 20-30 seconds. Spray the product from a spray bottle, then wipe with a hot sponge (hands should be wearing rubber gloves with a coating on the inside).
A hot sponge and orange oil will restore the shine of wooden furniture - If there are scuffs or stains on the wood, you can try to get rid of them by rubbing it with a banana skin. It works well for minor injuries.
- More serious stains require serious measures. These are retouching markers (available in furniture stores), denatured alcohol and wax. First, clean the surface (dishwashing detergent diluted in water is the best solution). After cleaning, dry the wood with alcohol: use a moistened swab to rub the lightened areas well. In most cases, the color is restored. In deep scratches, alcohol does not restore the color; they are painted over with a marker of a suitable color. To add shine, the top surface is covered with wax and polished with a soft cloth.
Such transformations are possible using a marker, alcohol and wax. - If you need to smooth out small unevenness, you can use a nail file. For meticulous work, it is easier to use than sandpaper.
- If the wood is locally swollen from moisture: place a leaking vessel, you can quickly get rid of the defect and neutralize its consequences by mixing salt and olive oil. The paste is applied to the damage and rubbed in a circular motion. Leave for 20-30 minutes. The salt will draw out the water, and the olive oil will restore elasticity to the fibers.
- If there are chips, you cannot do without putty. Suitable for both wood and automotive applications. The best way is to buy a light one and add color to it as needed. The chip is covered, a little putty is spread on the adjacent surface. After drying, everything is smoothed out well with fine-grain sandpaper.
You might be interested in reading what types of wall shelves there are (with drawings).
Craquelure
This is a type of artificial aging, after which the item acquires the appearance of antiquity. Craquelure looks great on classic furniture, which fits perfectly into Provence and shabby chic styles.
One-step craquelure looks like a cracked layer of paint, through the cracks of which the base of the product is visible. This is the easiest way to give an item a touch of antiquity. The furniture is coated with a special craquelure varnish, which must be dried. A second, contrasting layer of acrylic paint is applied to it, which cracks picturesquely under the influence of the varnish. The thinner the paint, the larger the cracks.
Working on defects
Using specialized mixtures for grouting chips and scratches. The next step is to smooth out all the cracks and smooth out the uneven surface.
For scratches, grout is used, large cracks are filled with furniture wax, abrasions should be filled with putty.
Padding
This process is not complicated, but painstaking: you can reupholster an old chair, an armchair or a sofa. Dense natural fabrics are better suited for reupholstery. The first step is to disassemble the furniture and inspect it - this will help you understand how exactly the material is attached to the wooden frame.
If the upholstery is old, damaged or smells, it is recommended to remove it and strengthen the frame with metal plates. Sometimes the filler requires replacement. In the case of reupholstering Soviet armchairs that are popular today, we recommend adding foam rubber: the product will be softer, more comfortable and more solid.
Calculate the amount of fabric with a margin. It is important to fasten it tightly so as not to create folds. The material is fixed with a furniture stapler.
Sequencing
Each piece of furniture has its own step-by-step instructions. To figure out how to restore upholstered furniture with your own hands, you should add a little to the list.
But just like with a set of tools, there is a standard set of actions.
Photos before and after
We recommend starting remodeling furniture with small items - chairs, stools, bedside tables. A sanding machine will be an excellent assistant in restoration, as it will speed up the process of removing the old coating.
An excellent solution for a modern interior would be chalkboard paint: it applies easily, is safe, and has no odor. It can be used to paint old kitchen fronts, cabinets or sideboard doors.
A makeover can turn even the most boring dresser or nightstand into a work of art.
Updating furniture is an interesting process that allows you to get an exclusive piece of furniture and realize your creative abilities.
pros
Saving time and money. There is no need to use the services of cargo taxis, movers and restorers.
Confidence in the result. Cost control, selection of desired materials and the ability to follow all instructions personally.
Implementation of ideas. Furniture can be customized to your personal ideal. In the creative process, new thoughts may arise and a desire to correct what has been started.
For example, add intensity in color or add accessories. And the need to coordinate every change is eliminated. And after accepting the job, it is unlikely that changes will be made.
Veneer repair
Furniture that is decorated with veneer can also be repaired.
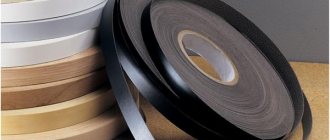
Small peelings are masked using putty. The repair area is degreased, cleaned, a layer of putty is applied, and polished.
Blisters can be repaired using PVA glue. It is injected under the top layer by piercing the surface with a syringe. The repair area is covered with material and pressed down with a weight. It is effective to use a bag of heated sand as a load.
If the swollen veneer is cracked, then after manipulating with PVA glue, the cracks are filled with putty and painted over.
The adhesive veneer can be secured with a hot iron. The alcohol glue will warm up and restore its properties.
Basic techniques
At the last stage of decoration at the time of restoration, they resort to not only painting compounds and varnishes. Currently, many professional designers and furniture makers like to use various technical techniques in this matter.
With their help, they sometimes manage to produce absolutely vintage and exclusive elements from completely nondescript items. The following methods are distinguished:
Patching
This method allows you to give old furniture nobility. The birthplace of this concept is Italy. It is based on the formation of a specific plaque, similar to formations after the oxidation process on bronze and copper objects.
Curtains for the kitchen - 120 real photos of new designs. Options for the ideal combination of modern curtains in the kitchen interiorHow to diversify your home interior: DIY decor and beautiful design ideas
- How to hang curtains - step-by-step instructions with photo examples and recommendations. Exclusive curtain design solutions from experienced craftswomen
Currently, the main colors used to give wood furniture a distressed look are gold, silver and copper.
