How to care for a wooden door
These doors require special attention:
- humidity in the room should not be more than 30%;
- water that gets on the surface must be wiped off, otherwise white marks may remain in this place;
- doors must be protected from impacts and scratches that leave marks that are difficult to remove;
- requires periodic cleaning from dust and dirt;
- Detergents should not contain chlorine, solvents or alkalis;
- Furniture wax is used to polish the surface.
From the instructions given, it is clear that a wooden door can be made with your own hands at home, without the use of special tools. If all the work on its manufacture is carried out correctly, then such a design will bring coziness and comfort to the inhabitants of the home.
DIY wooden doors Link to main publication
Products with panels - an affordable way
These are the most complex designs, but if you use ready-made insert panels made of laminated chipboard, the process will be simplified. It is easy to make such doors with your own hands step by step, following the recommendations. But first, drawings of individual elements are prepared indicating the exact dimensions. Using them, there will be no problems with assembling individual parts into a single whole.
Such models are most suitable as interior ones. They buy boards with a thickness of 25 mm or more, high-quality ones, but the species is not necessarily expensive. Budget pine will serve well indoors, because the climate here is constant.
- 1. Arm yourself with a grinder with a grinding wheel and carefully polish the material. Only a wide surface is processed; the sidewalls will subsequently be formed by a milling cutter. It is used to cut off the sharp edges of corners, but only slightly, giving a beautiful look.
- 2. Change the knife and select a groove along the entire length of the board on one side. Its width is equal to the thickness of the chipboard, usually 16 mm. Strictly adhere to the dimensions and center of the end. The optimal depth is 15–20 mm.
- 3. Using a hand-held circular saw, cut the ends at 45° on all four boards. You should be very careful about two things: strictly adhere to the dimensions and cutting angle
. The standard side posts of the frame have a height of 200 cm, and the upper and lower crossbars correspond to the width of the canvas. - 4. Cut out the laminated chipboard for the panel. Its dimensions are calculated based on the internal size of the opening, to which double the depth of the groove is added. If desired, intermediate partitions are installed, in which recesses along the entire length are also selected, and small spikes are made at the ends.
- 5. Assembly is very simple: boards are hammered onto the stove with a mallet, no glue is used. Make sure that everything is in place, there are no gaps, deviations from the parameters, or distortions. Holes are drilled and confirmations are installed - a special metal fastener, which is placed below and above.
The door with panels is ready, you can start finishing. But all the fittings are installed in front of it - locks, handles, hinges, so as not to damage the decorative coating later.
Tools
In production, special machines are used to make wooden doors.
- Thicknesser is necessary for processing the board. The most productive are double-sided planing machines, which clean the workpiece in one pass.
- without milling machine . It is used to make locking joints on boards, select chamfers, and process shaped workpieces.
- When gluing overlays to a wooden frame, a press .
- a circular saw to cut the board to the desired size.
To make wooden interior doors with your own hands at home, no one will buy expensive machines. circular saw is suitable for cutting the boards .
You can select grooves and process the surface of the workpieces using a hand router .
Additionally, you should have on hand:
- drill;
- screwdriver;
- wood hacksaw;
- grinder;
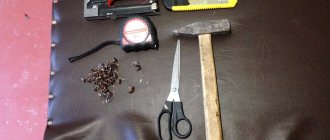
- chisels, mallet, corner, level, tape measure.
To paint the door leaf, it is advisable to use a compressor with an air gun.
Types of interior designs
Interior doors differ in the material they are made of:
- Solid wood. The material is traditional for elite-class structures, both double and single-panel. Especially Finnish ones, made from high quality wood.
- Laminated or veneered MDF or chipboard. These doors are distinguished by high performance properties and good appearance at a relatively low cost. Products from Finnish manufacturers are of high quality.
- Glass. The use of glass doors has no restrictions, either operational or installation location. But installation of glass structures requires extreme care and precision.
- Plastic. A good alternative where using wooden ones is not practical.
The following types of structures exist:
- According to the opening method - hinged and sliding. The latter are usually sliding, compartment and folding, which differ in “accordion” and “book”. Particularly popular are compartment doors, which save space. The most traditional installation is swing doors.
- According to the internal structure of the canvas - panel and panel. This applies more to hinged wooden ones, rather than glass and plastic ones.
- In terms of external design - solid and with inserts.
There are options for single- and double-leaf, right-handed and left-handed designs. The choice of double-leaf doors is determined by the width of the opening. Using double doors provides a certain convenience. In addition, the appearance of double structures is always more presentable.
Classification of insulation
The construction market offers the following types of insulation:
- Felt is processed animal wool. It has excellent properties to retain heat and is absolutely safe for human or animal health.
- Polystyrene foam - it is sold in sheets. Easily cut and fixed on the door leaf. Does not slip, does not absorb moisture. It is both insulation and soundproofing material. Can only be used for insulating metal doors. When installing foam plastic, the gaps are closed with mounting foam or using liquid nails.
- Foam rubber is a soft material. The main disadvantage of this material is that if it is used to insulate a wooden street door (private house), it will soon crumble due to temperature changes. Foam rubber is produced either in rolls or in sheets.
- Mineral wool is a soft insulation with positive characteristics. It has high thermal insulation properties and also creates sound insulation. The material has its drawbacks - moisture absorption. If you insulate the door from the street side, then you need to use polyethylene. When moisture is absorbed by the cotton wool, the door will become heavy, which will lead to deformation and improper operation of the door leaf.
- Isolon is sold in rolls. One of the most expensive materials. The base of the insulation is foamed polyethylene. The disadvantage of this material is the pricing policy. But, given his qualities, this can not be taken into account.
- Polyurethane foam is foam that can be pumped into the door cavity. The hardening time is less than a day. The only drawback of this material is that it is not possible to pump the foam yourself. You should call the experts who will do this carefully and quickly. The insulation retains heat, creates silence, and is not poisonous.
Selecting insulation thickness
The thickness of the material depends on the size of the door. Let’s say if the door is empty inside, then you should simply put insulation there and cover it with the top layer of the door leaf.
If the door does not have voids, then you need to stuff an additional frame on the inside of the door, which is filled with material and then sewn up with upholstery (leather substitute). The nuance here is the fact that the thickness of the insulation should not exceed the thickness of the door leaf.
Help with decoration
After making the door, the last stage is decoration. Such manipulations are carried out not only for aesthetic reasons, but also in order to enhance the strength and reliability of the canvas. When using natural wood, the surface is covered with stain or varnish. With the help of such impregnation, a film is created that protects the material. The varnish also protects the finished product from high humidity.
In addition to these types of processing, you can use a paint coating, for example, in some neutral or, on the contrary, extraordinary color (if the interior requires it). If this option is not suitable, then it is possible to finish it with veneer or, for example, decorative film.
Decorated look
The option of creating a contrast between the door and the panel is often used. That is, you can paint the vertical and transverse planks, and decorate the existing inserts with an unusual pattern or paint them in a different color scheme.
If you pay attention to the presence of glass, you can also decorate it yourself. For this purpose, special decorative materials are used.
You can create a unique design or an unusual stained glass window. If you wish, you can depict family photographs or other pictures you like that bring positive emotions every day.
Making beautiful doors yourself is easy and without the help of qualified specialists. They will have not only a functional character, but also a decorative one, as they will express the individuality of their owner. In addition, you will be able to show not only your true skills, but also please your entire family and friends.
And see how the manufacturing process takes place and all its details in our video. You can take more useful information from it.
Installing an interior door frame
Let's consider the features of installing a swing structure.
Preliminary preparation of materials
To begin with, you should make sure that you have the following components:
- box;
- canvas;
- loops;
- lock and handle;
- chisel;
- jigsaw and other tools.
Door frame assembly
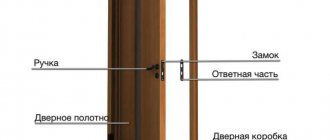
The box is a frame for installing the canvas in the opening. It is quite possible to install it yourself.
- Place all the parts on the floor the same way they will later be installed on the wall.
- Next, you need to adjust the box exactly to the size of the canvas, trim off the excess, leaving a couple of centimeters just in case. The cutting is done with a jigsaw or hacksaw.
The box is assembled using self-tapping screws, nails, or by cutting out a tongue-and-groove lock. For the latter type, the planks are connected strictly perpendicularly
For nails, the edges of the planks should be cut at an angle of 45 degrees, paying attention to ensure that the cut is even, so that the box does not warp later and there are no cracks or gaps left. Nails should be tapped from the sides and top
Installing the box in the opening
Step-by-step instructions for carrying out the work:
The pre-assembled U-shaped structure is inserted into the prepared opening. The beams are fastened using bolts. To do this, several holes are drilled in the wall and in the box. The gap between the wall and the box should be approximately 10-20 mm
It is important to check how level it is installed using a level, in relation to all planes. After this, fixation occurs as follows: wooden wedges are inserted into the gaps around the perimeter of the structure, and spacers are inserted inside the opening.
The remaining cracks are filled with polyurethane foam and left to dry for 2-5 hours, but complete hardening will occur only after 24 hours.
Types of panel doors
Reasonable price, classic design of the models attracts a large number of buyers. Paneled doors are divided into types according to their design features:
- blind, made with inserts from plywood or fiberboard sheets;
- wooden - the panels are made of solid wood;
- Glass is used as inserts. This product has a more elegant and interesting appearance.
Based on the type of base material, models are distinguished:
- made of oak, hornbeam or walnut. They are characterized by increased strength and durability. The elements are attached to each other using special grooves and protrusions;
- made from pine and other coniferous trees. Such models must be treated with special antiseptics and fire-fighting chemicals. They have a lower cost, but are inferior in quality;
- mixed models. Includes technologies from the two previous options. The design features are as follows: veneer made from expensive tree species is applied to MDF panels. The top of the door is treated with antiseptics, other special agents, or varnished. In this way, an appearance no worse than that of natural wood is achieved.
Panel door options
Selection of base material
To make a unique and reliable paneled door with your own hands, one of the most important issues at the preparation stage is the selection of materials. Despite the variety of choice of inserts, the base is still wood, so that’s where you should start.
The most common option is to make a frame and frame from pine; this type of wood is good because it makes the structure lighter and can be processed well; besides, pine does not cost that much. The downside is that even with good resistance to moisture and temperature changes, the wood will not last you too long. And when processing with stain and varnish, it is necessary to de-resin the material.
An alternative option is larch. This wood is quite affordable, but its strength and durability are much higher than those of the previous material. Of course, it will cost more, but it will also be more useful.
The following types of wood can also be used for doors:
- oak,
- beech,
- birch,
- teak,
- maple,
- etc.
You can combine several materials, including wood of different species. As for inserts, the best option is to use fiberboard or plywood. For kitchen doors or to decorate the entrance to the living room, it is better to add glass top inserts. For more sophisticated products, wood is selected, its sheets are left flat, chamfered or carved. It all depends on the skills and wishes of the master himself.
Types of doors by design
A solid wood box has the following advantages:
- low thermal conductivity;
- high strength and frost resistance;
- durability;
- environmental friendliness;
- opportunity to implement different design ideas.
At the same time, wooden canvas has the following features:
- unprocessed raw materials quickly absorb moisture;
- presence of cracks and knots;
- flammability.
To reduce absorption, the board is dried, treated with hot steam and impregnations.
Massive doors
Before making wooden doors, it is recommended to determine the features of the production process. The dacha can be protected from robbers by a massive canvas, for the manufacture of which thick tongue-and-groove or planed boards are used. The resulting structure is strengthened with horizontal or inclined jumpers.
To make a massive door, dense wood is used
To make a massive entrance door, cedar, larch or oak are used. This type of wood is characterized by a dense structure and textured pattern.
If the project of a summer cottage includes a bathhouse, then linden and pine are used to arrange the opening. The bathhouse must be used after treating the wood with an antiseptic.
Paneled doors
To make paneled fabric, boards and beams obtained by gluing lamellas are used. Then the workpiece is covered with veneer. Before constructing the canvas, a drawing is prepared. It indicates the configuration of the panels. It can be the same or different. Glass can be used instead of wooden elements.
Paneled doors are most often installed indoors
To equip the vertical and transverse elements, you will need to glue the timber. To make the canvas, a floorboard of appropriate thickness is used. To fix individual elements, spikes are used.
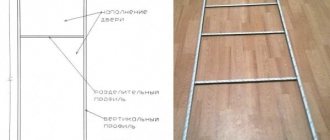
Door assembly diagram
If a panel is used to make the canvas, you need to consider:
- The reliability of the product is directly affected by the number of cross-sections;
- a homemade box is formed from timber, and a lath or plastic is used to make a panel;
- glazing bead is used to fix panels.
Since the paneled door is thin, it is considered the best option for creating an interior doorway.
Panel doors
The panel box is made of fiberboard, veneer or laminate. The frame is assembled from boards. Fiberboard, MDF or chipboard sheets are used as a shield.
Panel door design
The canvases under consideration are classified into the following types:
- solid - filled with beams fastened together;
- hollow - made from side and transverse beams. Lining is used for cladding;
- small-hollow - have different fillings.
To create a high-quality canvas yourself, the frame is first covered with plywood. The material is laid in 2 layers. Size of 1 layer – 24 mm. This technology prevents deformation of the coating.
How to seal cracks?
During operation, solid wood doors begin to dry out, which leads to the formation of cracks in the door leaf. To correct this situation, you need to attach metal corners to the joints of the bars or glue slats. They are placed in the cracks, and after the glue has completely dried, the surface is cleaned and sanded. If small cracks appear on the door, they can be easily repaired using a spatula and wood putty. Sometimes structures are sheathed on the front and back sides with veneer or fiberboard sheets.
Overlaid door trim allows you to hide visible flaws and is considered an original decoration. After the protective sheets are nailed to the canvas, they are painted with paint in several layers and the surface is well shaded.
Step-by-step instruction
First of all, measure the doorway. Build a box using a wooden beam. Currently, all blanks are sold on the construction market. This way you will save time and money.
Once the box is in place, fix it in the required position. To do this, the structure must be accurately measured.
Frame
What is this?
Properties
Such doors look incredible and beautiful and have become the most complex in terms of execution method. The presence of inserts in them creates a beautiful appearance. It looks extremely interesting if you use a non-traditional panel, for example, round/oval/with patterned slats that look like they were made in an antique style. According to the panel thickness method, they are:
- Embossed or voluminous along the edges, which are considered classic and are made using milling, or by pressing the material.
- Stacked, which look chic due to the connection of different slats through a tongue-and-groove connection.
- Flat, for decoration, craftsmen create carved or applied wooden ornaments.
Now let's talk about the design features.
Characteristics
Door designs with panels are simple and well thought out. Most often, the base is a frame made of spliced solid wood; a frame, most often made of wood, is attached to it, and the base is a panel. The fastening of the inserts and the base is done either with carpentry adhesive or with liquid nails (sometimes using a tongue-and-groove joint), which is fixed with glazing beads. At the assembly stage, serious manufacturing companies must tie the fabric together using screws, which gives the structure high strength. For high resistance to changes, a technological chamfer is made at the junction of transverse and longitudinal sections. Inserts in the form of panels can be not just decorative, but they also play a functional role. In the latter case, a structure is made of 2 plates, between which an insulating layer is laid. Such insulated door panels can be installed as entrance doors, or as a transition to an unheated room (veranda or balcony).
Varieties
Among all types there are wooden panel doors and more. They are the most popular because they have a rigid frame, and are complicated by panel inserts that add presence and beauty to the door. The classic type of such doors can be called hinged. They are installed on the box stand using 2-3 pairs of hinges, and when closed they fit tightly into the grooves and are convenient for use in those rooms that are quite spacious. The advantage of swing doors is reliability, simplicity and the ability to install latches with locks. Such doors can be decorated with various panels, from voluminous to lightweight, or even weighted with overhead ornaments. Sliding doors became another variety. They come with one or two doors, which are mounted on rollers and move along the lower/upper guide along the wall, and this door option is convenient in small rooms. This type includes cassette, cascade and radius doors. They are usually decorated with frosted/stained glass inserts, veneered MDF/bamboo inserts or flat panels.
At the same time, the main thing is not to make the structure heavier, which stands vertically only by being fixed in the guides. Wooden doors with panels are folding. These are special accordion doors that consist of several narrow leaves that are connected to each other using hinges. They are attached to the door frame with hinges, and when opened they move to one side. Locks are not provided in such a door, and they are often made openwork and light, with thin glass or wooden panels. Swinging panel doors have become an unusual and rare variety. They can have 1-2 leaves, which are attached to the door frame with canopies and can swing open in all directions. These options look very beautiful due to the opening method, and therefore they are usually not decorated with complex panels.
Manufacturing of paneled doors from solid pine: aspects and features
Currently, there are a couple of methods for producing panel doors from solid wood. Manufacturers offer a couple of main production methods:
- Production of paneled door panels using glued pine beams;
- Creation of doors from natural solid pine, which excludes the use of certain additional substances.
Each of these methods has its own advantages and disadvantages. As for the first method, in practice it is quite simple. Doors made from glued timber have undeniable strength and resistance to aggressive environmental influences, since during the gluing process the timbers are firmly attached to each other and it is almost impossible to tear them away from each other. After gluing the bars, they are thoroughly dried, after which they are coated with varnish, which not only helps to increase their strength, but also their aesthetic features. Due to their great strength, paneled doors made of glued timber are installed as external ones;
If you look at the second method, you may note that making a paneled door from natural pine presents certain difficulties, which is why such doors are usually made to order, and the cost of this activity is usually high.
Reviews
If you install a good wooden entrance door made of solid wood on ridges, and not a paneled one for 1200 rubles, and cover it 5 times with a good varnish, and not some crap “Pinotex”, then you won’t have to bother with any metal . Besides, what is the point of installing a metal door in a wooden house? If they don’t open the door, they’ll cut out a piece of the wall and climb in (as one of my friends did at her dacha).
Sources
- https://USA-dba.ru/sdelat-tpluyu-dver-svoimi-rukami/
- https://legkovmeste.ru/stroitelstvo-i-remont/dveri/dveri-vhodnyie-derevyannyie-uteplennyie.html
- https://odstroy.ru/dveri-vhodnye-derevannye-uteplennye-kak-sdelat-samostoatelno/
- https://roomester.ru/dekor/dveri/derevyannaya-dver-svoimi-rukami.html
- https://gorodverey.ru/derevyannaya-dver-svoimi-rukami-chertezhi.html
- https://BestDoor.guru/izgotovlenie/mezhkomnatnye-dveri-svoimi-rukami.html
- https://dveri365.house/po-materialam/derevyannye/derevyannaya-dver-svoimi-rukami.html
- https://dekoriko.ru/dveri/vhodnye/svoimi-rukami-kak-sdelat/
- https://vitdoors.ru/dveri/poshagovaya-instrukciya-izgotovleniya-derevyannoy-dveri-svoimi-rukami-kakie-instrumenty-potrebuyutsya-7.html
- https://ODveryah.ru/uluchshenie/uteplit-vhodnuyu-derevyannuyu-dver-svoimi-rukami-v-chastnom-dome
- https://stroy-podskazka.ru/dveri/mezhkomnatnye/izgotovlenie-derevyannoy/
- https://VseoDveri.ru/vhodnye-dveri/vhodnaya-dver-svoimi-rukami/
Peculiarities
Before you start designing a door, thoroughly understand its structure. Find out what features it has. The main difference between such doors is the presence of inserts that make the product sophisticated and elegant.
Installation and its varieties:
A blank sheet made of plywood. It consists of elements made from sheets of plywood, fixed inside with self-tapping screws;
Blind installation
With glass inserts. Glass inserts are used to fill the canvas. The canvas looks decorative and is light in weight.
Insert
Made of wood. This design is considered durable and reliable. The insert in this case is made from thin wooden sheets, but it should be noted that this way the production costs a large sum of money.
Natural wood
The technological manufacturing process is that the frame and insert are connected to each other. This is done using special fastenings with glazing beads. Manufacturing also involves other types of fastenings.
How to treat wood
Now we need to make the structure resistant to various external factors - atmosphere, moisture, cold. At this stage, it acquires not only reliability, but also its complete individual appearance.
Coloring
Preparation for painting begins with sanding. You need to sand in the direction along the grain. Then treat the surface with an antiseptic. Dents and chips should be filled with putty. As you apply the putty, you need to let it dry and then sand it again.
Before painting, you need to clean the surface from dust. To obtain a high-quality painted door, apply 2-3 layers of paint and avoid smudges.
Cladding with decorative panels
Decorative panels for cladding can be made of plastic, siding, veneer, laminate and other materials. They are solid massive canvases. They are mounted on a wooden surface using glue or self-tapping screws.
Light frame door with your own hands
Making simple frame products is easy and profitable, since few materials are consumed and defects in wooden structures are not visible, since they will be hidden by the outer cladding.
The main task in the manufacture of a panel door leaf is to accurately maintain the dimensions, right angles and make a strong frame.
This is an easy-to-use and inexpensive option for arranging entrances to outbuildings - a barn, basement or attic. External surfaces are sheathed with decorative MDF boards or plastic.
Step-by-step production looks like this:
- We cut 2 long pieces of timber and 3 short ones, equal to the dimensions of the door frame minus 5 mm.
- We make a light frame from beams, in which the third beam is a jumper between the long posts. The method of fastening the beams is arbitrary - with self-tapping screws, tongue-and-groove or in half a tree.
- We coat the joints with wood glue, assemble the structure and let it dry.
- We cover one side of the frame with the previously selected material - plywood, lining, fiberboard or laminate, securing it to the frame with screws or nails. When sheathing with individual elements such as lining, the frame must be made more rigid using bevels.
- Inside the frame we fill it with insulation, sound insulation, low-quality bars or boards from scrap materials. We reinforce the place where the lock is inserted with an additional block.
- We sew up the other side and fasten the fittings.
We carry out further decorative cladding in accordance with our desires and expediency. It is enough to cover the lining with several layers of varnish, and cover the plywood with plastic or laminate.
Installation of fittings and opening design
Ready-made doors are supplied with fittings already installed. It is better to purchase work by Finnish masters. Products from Finnish companies stand out for their better quality.
The operating rules are as follows:
The lock and handles should be placed at a height of one meter from the floor. Therefore, first the location of their location is marked with boundaries based on actual dimensions.
You can see the rules in the video:
- The door leaf cutouts are being prepared. First, a sample is made from the end part for the latch and the door lock fastening bar. Several holes are made with a drill, which are processed with a chisel to the required size. After this, the front and inner parts of the canvas are drilled. This is done with a crown of smaller diameter so as not to damage the coating. Then the holes for the handle and lock are expanded to the desired size.
- Now you can install the lock body and handles. Holes are made to mount the plate and it can be installed.
- The location of the answer on the frame is determined, and samples are also made under it and the tongue. The strike plate can be inserted and secured, after which decorative trims can be installed.
Next, you need to install extensions and platbands. Methods of attaching the latter may be different. They are nailed or placed on glue. Sometimes all options are used. Finished products are purchased in the store.
Platbands are not used for compartments. The guides and sliding mechanism are covered with special decorative strips. At the final stage, the threshold is set.
Installation of MDF doors
Every year, interior doors made of MDF become more popular. To satisfy customer requests, the production of MDF doors is carried out in accordance with fashion trends.
For decoration, different types of glass are used: frosted, transparent, darkened, smoky, textured. A rich palette of shades allows you to choose products to suit any interior.
Panel
Such products are very popular for furnishing rooms with a modern interior. They have a special design. In the production of doors, a single piece is used. Main components: frame, filler and finishing.
Pine timber is used to make the frame. MDF sheets are attached on top of it, empty cavities are filled with hardboard or cardboard. Lightness and good insulation of the door are achieved due to hollow filler cells. Often the panel fabric is decorated with glass inserts. Expensive and high-quality structures made of MDF have an internal filling made from the same material.
Paneled
The basis of the canvas is the frame. For its production, beams made of solid wood or laminated veneer lumber are used, which have undergone careful selection and drying. The frame consists of two vertical posts connected by horizontal crossbars - drawers. Grooves for the panel are cut on the inside. The frame itself, made of four elements, turns out to be shaky. For reinforcement, auxiliary jumpers are used to provide spatial rigidity. The design is resistant to distortions, bends and deformation. Glass and MDF panels are used for filling. MDF panel doors have both a modern and classic look.
This is interesting: Mechanism for interior sliding doors: let’s find out the question
What type of wood to choose
One of the most critical stages is the choice of source material. Each type of wood is endowed with special mechanical and physical qualities. It is necessary to know the features of different types in order to determine which one is ideal for solving a particular problem. All wood can be divided into two categories - deciduous and coniferous.
Hardwood
This series contains the most valuable species, endowed with extraordinary strength, high density, expressive texture and attractive natural shades.
Wood has the highest value:
- beech;
- nut;
- mahogany.
If there is no reason to spend money on expensive raw materials, you can get by with more affordable ones. Pay attention to the advantages:
- cherries;
- oak;
- ash
These rocks also have high strength, but will not require such significant costs as representatives of the first category.
Oak wood is very durable and resistant to rotting. Due to the content of tannins, which react with dyes during etching, it allows you to achieve intense color effects. Processing the material is not difficult - it lends itself well to simple tools. Making parts of unusual, curved shapes from it is not a problem.
Ash is as hard and durable as oak. However, this material requires regular treatment with antiseptic compounds. Otherwise, when the first wet season arrives, it will begin to rot.
Conifers
Coniferous wood never loses its popularity. This is explained by its availability and a wide range of positive qualities. The most popular materials are those made from pine, followed by spruce.
The strength characteristics of pine are slightly lower than those of deciduous trees. This disadvantage is more than offset by high resistance to biodegradation, mold and mildew, excellent thermal conductivity and extraordinary flexibility during processing. High air and moisture permeability guarantees decent quality of treatment with protective compounds.
Spruce is more susceptible to rotting compared to pine, but has less hygroscopicity and thermal conductivity. Products made from this material retain their original shape much longer.
If you choose between these two species, you should give preference to pine.
Deciduous tree wood is ideal for making interior doors. And for entrance structures, pine would be the best choice.
Successful examples and options
An unusual sliding door made from a single piece of solid wood looks very original and harmonizes well with the “aged” wooden floor, but it is unlikely that such an idea will be repeated often.
Dark brown doors in the same style – double-leaf and single-leaf – dilute the white color of the interior, “helped” by a table and floor vases.
The door, with its supposedly untreated surface and glass inserts, is specially selected to match the overall style of the room and therefore looks very organic.
To learn how to make a wooden door, see the following video.
Latest Market Trends
If we talk about the latest trends in the door industry, then the most obvious factor here will be consolidation on one specific type of product, for the production of which the maximum amount of both financial, production and human resources is allocated. Nowadays, most manufacturers do not try to cover the largest possible number of models, while simultaneously producing doors in artificial coverings, solid wood and natural veneer. Now everyone tries to become the most professional in one specific area, without scattering their efforts. It is much easier (and most likely more correct) for companies to make a quality offer in one specific segment.
New trends also include the decline in the popularity of models coated with veneer and especially Fine-line veneer; it was replaced by artificial films and painted doors with enamel coating, which can be called the fastest growing segment. The external characteristics of such models differ for the better, and the richness of colors allows you to choose the necessary solution.
Selection of materials
The cost of consumables is growing every year, which directly affects the cost of manufactured products, making them more and more expensive. But not every client involved in the wholesale purchase of doors agrees with the constant rise in prices and, for the most part, begins to look for alternative sources of supply at a lower cost. This fact pushes manufacturers to use lower quality components and look for other ways to reduce costs.
Stages of making a door with your own hands
The entire process of self-manufacturing paneled doors includes several stages:
- Preparatory – involves measuring openings, selecting material and preparing the necessary tools for the job.
- Manufacturing of frame and structural elements according to dimensions.
- Assembly and installation of the finished product.
- Check operation and adjust if necessary.
Start making doors with your own hands by measuring the openings. Only accuracy, painstakingness and attentiveness are faithful assistants in the upcoming work. Transfer the dimensions to paper and design the remaining elements.
When choosing a material, take into account its properties, attitude to high humidity and temperature changes. For panels, as a rule, thin sheets of plywood, chipboard or solid wood are used. The latter option is more durable and looks more solid. Glass inserts are suitable for interior use. You can achieve the effect of stained glass using glass with double-sided painting.
So, to complete the frame and elements of the product you will need:
- 2-3 beams or boards, 50 mm thick, for making vertical posts and an upper cross member;
- sheet of plywood, chipboard, glass or fiberboard for panel inserts;
- if there are glass inserts, be sure to use glazing beads;
- colorless wood glue and self-tapping screws for fastening and ensuring tightness;
- fittings (door locks, handles, hinges);
- To coat the finished product, you will need varnishes and special chemicals that guarantee fire safety and anti-corrosion resistance of the finished product.
The tools you will need to use are:
- roulette;
- pencil or marker;
- level and square;
- wood hacksaw;
- chisel;
- screwdriver or screwdriver, drill;
- sandpaper of different grits for sanding before varnishing.
The first stage is the implementation of the basic elements
First, start making the box for the opening. There should be no distortions or deviations in width. Adjust the dimensions to fit the door frame.
Check for parallelism and evenness of parts using a level. Only then proceed to making the paneled door itself.
For the frame of the model, use a smooth, knot-free timber. Saw off the excess parts yourself or do it first with the help of specialists in the store. Thus, you should get 2 crossbars (upper, lower) and 2 vertical posts. They are connected to each other using a tenon connection. Therefore, make tenons and grooves for fastening in advance.
Cut panels from the prepared material:
- Glass inserts are usually secured with glazing beads at the very end. Use already painted glass with dimensions corresponding to the drawing.
- Solid wood inserts require pre-fabricated tongues and grooves for mounting with risers and cross members. Then a chamfer is made with special cuts for a strong connection.
- Cut panels from chipboard or plywood according to size.
Assembly of elements and installation of the finished structure
Proceed to assembling the product. Attach cross members and prepared panels to one vertical post. Finally, install the second stand. The tenon connection must be strong and not loose. If necessary, adjust the mounting points.
If everything is normal, proceed to gluing the parts. To do this, disassemble the structure and reassemble it, but only with adding a small amount of glue inside the grooves.
Sand the finished product with first coarse-grained sandpaper, then fine-grained sandpaper. The smoothness and evenness of the surface depends on how well you sand.
Cover with varnish and special chemicals if necessary.
After final drying, proceed to installing the fittings and installing the glass insert (if any). Secure the glass with glazing beads.
Install the box into the opening. Attach the hinges using self-tapping screws and a drill (screwdriver or screwdriver). Hang the door and check its operation. If they sag, replace the canopies with stronger, more massive ones.
Let's summarize. Quiet opening and closing is evidence of the correct execution of the product. If you need to make several of them, it is recommended to use a draft prepared in advance. As it turns out, there is nothing complicated or special. Anyone can make a paneled door with their own hands, the main thing is desire and patience. Good luck in your endeavors!
Installation
Installing a door involves performing the following steps:
- leveling and plastering of door slopes;
- fixing wooden planks;
- screwing the aluminum guide into the upper door frame;
- placing the leading part of the leaf at a minimum distance to the door jamb with fastening to the floor (bottom) and to the guide (top);
- connecting the driven leaf to the leading leaf (using hinges);
- fixing the driven part in the guide (use a carriage equipped with rollers);
- installation of limiters (the sashes should not touch the surface of the walls);
- lubrication of mechanisms with an oil composition.
Installation of a book door with hanging elements is carried out as follows. After leveling the slopes, extensions are made from MDF panels, which are fixed in the opening using dowels. The space between the extensions and the wall is sealed with polyurethane foam.
Installation of hanging elements is carried out:
- an aluminum rail in a strictly horizontal position crashes into the upper part of the door frame;
- a carriage on rollers is inserted into the rail groove, which should move without interference;
- limiters are mounted in the extreme part of the rail;
- attaching the carriage to one leaf;
- lubrication of metal structural elements.
If a heavy door is being installed, then you should additionally consider installing a floor system with a roller mechanism. The aluminum rail is being installed into the floor. A carriage with a roller mechanism, which is connected to the bottom of the sash, is inserted into the rail.
The door moves along guides using sliders. Self-tapping screws are used to fasten the guides. The book is closed using handles and latches.
Parts processing
We cut the boards with an allowance of at least 10 cm to the required length of the board. This can be done manually, on a circular or miter saw. After this, they must be carefully planed along the sides and edges. You can perform this stage of work yourself with a hand plane or jointer, but it is better to use mechanical devices - an electric planer or a jointer. After processing, the edges of the parts must be strictly perpendicular to the faces and have a rectilinear shape without depressions or humps.
The ideal tool for preparing parts for subsequent gluing is a thickness planer. They come in one, two, and four sides. The best and most expensive are representatives of the last group of instruments. After thicknessing, the edges will be ideal in shape and strictly parallel to each other.
Parts processing
Shield gluing technology
In order to make a high-quality wooden shield with your own hands, you will need good wood glue. Binder production in our country is well developed; in addition, there is a large selection of imported analogues. Before use, you must check the quality of the available glue. To do this, they connect two unnecessary pieces of wood and check the strength of the connection under impact load. A good cool weld should take a beating. Possible destruction can only occur along the wood fibers.
To glue the shield together, you will need clamping devices called clamps or clamps, which you can purchase ready-made or make yourself. There are two types of them used - screw and wedge. In the first, the compression of the parts to be glued occurs due to the rotation of the threaded screw, in the second - due to the hammering of the wedge stop. Using any type you can obtain a high quality connection.
Apply glue to the edges of the prepared boards and distribute it evenly using a brush or flat spatula. We lay the boards close to each other so that the edge with glue of one part is in contact with the dry edge of the other. Next, we compress the shield until the glue is partially squeezed out of the seams and leave until the glue dries completely, usually for 12-24 hours.
After gluing, the finished fabric must be planed with your own hands. A wide-format thicknesser with a planing width of up to 600 mm will help ensure ideal flatness of the part. Instead, you can sand the blade with an electric planer or belt sander.
Assembly and gluing of all parts
