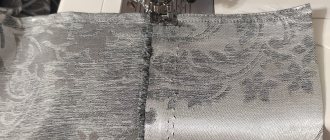
Car seat reupholstery - a great way to restore the aesthetic appearance of the interior, because old, worn covers in the car can ruin the entire design. This is especially necessary for a light-colored interior, the upholstery of which has lost its brightness, become stained and cannot be cleaned. Fortunately, now there are many materials and tools that allow you to do the reupholstery yourself. This is not as complicated a procedure as it might seem at first glance; you just need to have basic technical skills and the necessary tools.
Do-it-yourself car seat reupholstery
DIY car seat reupholstery technology
Reupholstering car seats with your own hands is within the capabilities of diligent and persistent people. Since the average car owner does not have the skills to do this kind of work, everything needs to be done slowly, following proven technology.
Preparing to reupholster the seats
Before you start updating your car seats, you first need to do some simple preparatory work:
- Removing seats. Usually fastening is carried out with 4 bolts, but you must first disconnect the negative terminal of the battery in order to de-energize the security system (airbags). Under the seat, you also need to disconnect the electrical wiring terminals, if any, for example, from the electric seat heating.
- Each part of the standard case is signed with a regular marker. You can also indicate the name of the material that will be used in this area of the cover.
- Removing the standard cover from the chair. To carefully remove the old seat trim, you need to press the metal clips on the back of the chair.
- The old cover is cut at the seams into separate parts that will be used as patterns.
- Material calculation. Now each piece of the old cover can be measured and its area can be calculated. The total area of the material must be increased by 20-40%!, which depends on the accuracy of measurements and cutting options.
Making new cases from leather or Alcantara
To make new seat covers you will need some tools and materials:
- gel pen,
- scissors,
- sewing machine,
- foam rubber 5 mm thick,
- glue in a can,
- hammer.
The sequence of actions is as follows.
- Each piece of the old cover is placed on new material and pressed with weights. Use a gel pen to mark with short dashed lines. The marked elements of the new cover are cut out with scissors. When cutting, it is important to take into account such a feature of Alcantara as the direction of the pile. When all elements are combined, the result should be a surface with the same direction of the pile.
- Alcantara and leather are reinforced using fabric-based foam rubber. The connection of the cut parts with the foam rubber is done using glue. You cannot apply the adhesive composition with a brush or roller to the surface of the foam rubber. Therefore, the glue is sprayed evenly from the can.
- The next important step is stitching the patches together. It is important to ensure that the edges of adjacent elements are accurately aligned. This will require some skill in using a sewing machine.
- The seam flaps, spread to the sides, must be glued on the wrong side. First, excess strips of foam rubber and material are cut off, and the lapels are cleaned and degreased. All that remains is to apply glue and press the lapels together.
- An important point in reupholstering the seats will be beating off the seams with a regular hammer.
- The lapels are sewn with a double finishing stitch, and the free edges behind the stitching are not trimmed.
Installing a car seat cover
Installation of a new car seat cover is carried out in the following sequence:
- Before installing the new seat cover, you need to thread the straps. The product is turned inside out and straightened out. The cover is first pulled over the back of the seat.
- Now it’s the “seat’s” turn. Usually this stage does not cause any problems. You need to use plastic clamps threaded through special holes to pull the cover to the base of the chair and secure it by the spoke. The edges of the new cover are stretched evenly along the contour of the seat.
- The leather covering should be completed by heating the material with a stream of hot air. An electric hair dryer is used for this; the main thing is not to overdo it and not burn the case. Gradually drying, the material will stretch like a drum. After this, each chair is steamed using an iron and a damp cloth. Thanks to these thermal operations, the chair cover becomes taut and absolutely smooth.
- The final operation of reupholstering the seats will be to clean the light leather or Alcantara from glue residues, abrasions and fingerprints.
We recommend: Is it possible to flush the cooling system with Coca-Cola or citric acid?
Carefully reupholstered car seats will please the car owner for a long time. During the update process, you can change the design of the car seats, as well as update the upholstery of the doors, ceiling and panels. The comprehensive tuning will change the shabby interior beyond recognition, add elegance to the car and increase its value.
The design of a sofa on snake springs and options for its restoration
Snake springs in expensive models are used as an additional means to increase elasticity. In budget models, a foam block can be placed on this base. They are attached to a wooden or metal frame across the seat - each spring separately. The installation step depends on the planned load. If your sofa begins to sag, or the springs have lost their elasticity or are broken, the solution is to replace them.
To increase elasticity and extend service life, when reupholstering a sofa, the number of “snakes” can be increased. Another option is transverse reinforcement with rigid corsage ribbons (which are used for straps on bags and backpacks).
For durability and greater elasticity, use grosgrain ribbon
The tape is nailed on one side to the frame. Professional furniture makers then tighten it using a special tool, but it can be replaced with a regular block wrapped around the middle with coarse-grain sandpaper. You wrap a couple of turns of tape around this beam, pull with both hands (make sure that the frame does not bend), secure the tape with staples or nails, release and cut off the excess. The same method is also suitable for increasing the service life of a mattress with slats.
Required tools and materials
If you have already decided on the material in which you will reupholster the interior, it’s time to calculate its approximate volume. In total you may need from 6 to 25 meters. But these figures are very approximate: it all depends on the specific car model. So, a crossover or SUV will require much more material than a coupe car. Therefore, do not be lazy and measure the length of the ceiling, the length of the cushions and backrests, the size of the front panel, as well as the width and height of the car doors. Add up all the resulting numbers and add at least a meter as an error. Believe me, you will need it.
In addition to the material itself, you will need other tools:
A set of screwdrivers with straight and Phillips slots for dismantling some elements;
- foam;
- sandpaper;
- degreaser;
- meter tape;
- masking tape;
- cling film;
- marker;
- chalk;
- stationery knife and sharp scissors;
- reinforced threads for stitching leather products;
- sewing machine with a needle and foot for working with leather;
- special high-temperature glue for leather;
- rollers and spatulas with rubber cloth;
- industrial dryer.
Separately, I would like to dwell on the choice of glue. Do not use Moment glue or other similar superglues. Universal glue 88 is often used for reupholstering, but it also has a number of disadvantages. Buy quality glue that can withstand high temperatures. MAH is well suited for these purposes. Its price is quite high, but if you don’t want to see the coating swell and come off after just a few months, spend money on it.
Use high temperature adhesive to bond leather to plastic parts.
Covering the panel with leather or fabric - how to do it yourself
So, we have in our hands a door of your car that has served faithfully with very shabby and dirty upholstery, which we want to reupholster. What do we need for this?
Materials and tools
1: Directly the door of your car.
2: A piece of leather, leatherette or fabric: everything here is purely individual, so we cannot say exactly how much material you need - measure, compare and decide for yourself.
3: spray adhesive
4: the blades are classic razor blades, not spare parts from Gillette machines.
6: sharp scissors
7: wire brush
8: Clean work area.
Operating procedure:
How to cover a car door panel - we cover it with available materials - leather, leatherette or fabric.
Covering the panel with leather or fabric - we continue to work
Now is the time to prepare the door panel for the new upholstery.
Covering the door with leather or fabric - directly covering the panel
Here we must have absolutely the same sequence of actions as in the previous paragraph.
Once again, we draw your attention to the fact that you need to work with glue very quickly.
Therefore, try to bend everything correctly in advance and make sure that you do so. that all your measurements are correct. All that remains is to simply fix the upholstery material with glue.
Preparing for reupholstery
Working on reupholstery requires perseverance, patience and following recommendations.
Before you start updating the seats, it is necessary to carry out preparatory work:
- dismantle the seats, which are secured with four bolts. Before doing this, disconnect the battery terminal and electrical wiring terminals.
- remove all fragments of old covers and sign them. In addition, it is better to write the name of the material that will be replaced in this place.
- remove the standard cover from the seat, first bend the metal clips from the back. cut the cover at the seams, it will be used to cut a new one.
- calculate the material. Take measurements of each part of the old cover. Make a pattern, leaving at least a few centimeters at the edges.
Stage VI – securing the new tissue
Finally, everything is ready, the beautiful new covers have already been sewn, and it’s time to attach them to the parts of the sofa. You must understand that the final result depends on this stage. Whether the surface of your sofa will be smooth and flawless, or whether folds and distortions will form on it, depends only on you. Therefore, you need to work slowly and carefully. It’s better to try on all the covers first, because for now you have time to make adjustments. You may have to sew something in by hand, cut something somewhere, there’s nothing wrong with that. Better to discover it now. It is better if the cover fits tightly than loosely. In the latter option, when secured with staples, folds may form. So, the sequence of your actions:
- Preliminary fitting of all elements and modification as necessary;
- After putting the cover on the part, straighten the fabric with ironing movements. You don't need to stretch the fabric too much, otherwise it will wrinkle. If the fabric has a bevel, make sure that the fabric lies evenly, without characteristic bends. It is better to start attaching the brackets from the most visible part, gradually moving to the end or corners, where the imperfections will be invisible.
- In the places where the mounting holes are located, it is necessary to cut small similar holes in the upholstery fabric. The edges of the fabric around the hole need to be secured with staples.
- The staples should be located at a distance of 35-40 mm from each other, no more, their optimal length is 14 mm.
- If the wood is too dense or the fabric is too thick and the staples don't go all the way in, tap them lightly with a hammer.
- After securing the upholstery, you need to cover the wrong side with lining fabric. You don't need a pattern here. Just attach it to the desired part and cut off the required piece in place with an allowance of 3-4 cm on the sides. It is necessary so that you can make a turn and it is convenient for you to work. This fabric should begin to be attached from the corners, while pulling it tightly.
This is the difficult and painstaking process of reupholstering a sofa with your own hands. But if you complete all the steps thoughtfully and measuredly, the result will exceed all your expectations. And your new “old” sofa will delight you for several more years.
Soft backing
A soft lining can be glued to the back of the upholstery. It is especially relevant for the skin. This is a foam material with fabric. The material helps to hold the thread, and it does not fall through the material when sewing. This soft material performs three functions. Firstly, it helps to eliminate wrinkles on the fairly thin upholstery material, and secondly, the soft lining gives better tactile sensations to the surface. Thirdly, this material provides a smooth, even appearance and fullness of the upholstery after installation.
The soft backing is glued with special glue from a can with the soft part to the upholstery, and the fabric outside. The principle of gluing and leveling is the same as when repairing ceiling trim. In addition to gluing, you can additionally stitch along the very edge of the upholstery part. This way the backing is guaranteed not to come off. After this, the excess along the edges of the upholstery part is cut off and the individual upholstery piece can be considered finished.
Errors
You don't gain experience right away. Therefore, for the first time, you can get air bubbles, uneven seams, and unnoticed defects in the original surface.
There may also be errors when choosing the material. You should especially remember about the persistent odor in the cabin if substances not intended for this purpose are used.
Note to you: How long does alcohol last in a driver’s blood?
Cheap, widely used glue can take years to wear out, so it is better to purchase all consumables from a specialized supplier as a single package.
The importance of carefully performing assembly and disassembly operations has already been mentioned. At the installation stage, you may encounter a changed panel geometry; you need to think about this when marking the patterns.
Advantages of reupholstering car seats in a studio
We recommend: DIY tips for replacing the Granta liftback fuel filter
If you need to update the seats in a short time and the money issue is not of decisive importance, then it is best to contact a specialized sewing studio.
Among the main advantages of reupholstering seats in a workshop are:
- work performed by qualified specialists with many years of experience,
- use of proven quality materials,
- choosing the preferred option,
- providing a guarantee for the service,
- Minimum turnaround time for reupholstery.
But all these advantages of reupholstering in a workshop can be reduced to zero due to the high cost of the service, which may not be affordable for a simple car enthusiast.
Replacing parts
After removing the old cover, you can find a lot of damage, which, of course, must be corrected to ensure the cleanliness of the entire work. Here are some of them:
- Frame beams. If this part of the sofa is cracked, it needs to be replaced. An important detail is that the new tree must be dry, without cracks or bark, with an even structure. Material with defects will quickly burst, while raw material will dry out and warp. It is better to repeat the locking cut, which is usually used to secure old beams, by ordering from a carpenter or doing it yourself. Impregnate the joints of new beams with PVA before joining.
- Fiberboard parts. Usually these are jumpers of the seat/back frame, which can break during operation. To replace, cut out new parts of the same dimensions as the old ones, or order them from a furniture workshop. A life hack for trouble-free future replacement of such parts: it is better to make the jumpers separate. Fastening is carried out with a pneumatic stapler/nails.
- Springs. It happens that over time you can find burst springs in sofas. The result of such deformation is poor shock absorption characteristics of the furniture and the risk of cuts/injuries. Replacing one or more damaged springs is an option, but does not rule out a repeat failure. In this case, it is much more rational to completely replace the spring blocks.
- Seat belts. Sometimes chairs use thick tapes as belts. Typically the backrests/seats use tightly woven straps with foam placed on top. And although they break infrequently, it is worth knowing that in the event of a defect, any strong belts with a dense weave at least 6-7 centimeters wide will do as a replacement.
- Foam rubber. A defect in foam rubber manifests itself in its compacted state. The fact that the filler in old sofas becomes obsolete is normal: any type of foam rubber can withstand a certain amount of compression, after which it is able to restore its shape. After this, the material becomes a viscous substance like sticky plasticine. In this case, the filler must be thrown away and replaced with a new one.
- Locks. A sign of deformation of the steel lock mechanism - the sitting/lying position does not work or works with difficulty. To correct the damage, you will have to change the screw or adapt a new latch spring. To completely replace the lock, you will need to purchase it in a store.
Selection of cladding material
Natural and artificial automobile leather are best suited for reupholstering car interiors. Both materials are characterized by high performance qualities, which sets them apart from the less popular carpet or velor. At the same time, leather covering is much easier to do with your own hands than, for example, flocking the interior. The reason for this is the high elasticity of the material, as well as the usual set of necessary tools. Recently, motorists are increasingly choosing Alcantara. However, the price for the original material is almost higher than the cost of genuine leather, while its cheaper substitutes cannot boast of high quality.
For these reasons, we will dwell in more detail on materials such as genuine leather and eco-leather.
Genuine Leather
Genuine automobile leather will become a real decoration of the interior. Is it possible to imagine a luxury car covered with a hard carpet or covered with multi-colored vinyl film?
However, a beautiful appearance is not the only advantage of genuine leather. It can withstand both frost and heat. Cracks will not appear on it due to temperature changes. Another positive property is resistance to ultraviolet radiation. Many materials fade in the sun, so after just a few years of use, the control panel and front seats, which are located directly under the windshield, become noticeably paler compared to the rest of the trim. But this will not affect natural leather. You can be sure that the interior will retain its color.
The interior of the car, covered in leather, looks expensive and solid.
Do not forget about the fire resistance of the material. Accidentally dropped cigarette ash will not harm the interior. Moreover, genuine leather does not absorb foreign odors, which is very important for those who like to smoke inside the car. The skin is also not afraid of other mechanical damage: it will take a lot of effort to scratch or tear such a coating.
On sale you can find material of various textures, including crocodile or ostrich leather. However, when choosing between smooth and perforated leather, it is better to give preference to the latter type. It is softer and more pleasant to the touch. In addition, its wear resistance is noticeably higher.
Perforated leather is softer and more pleasant to the touch
The only thing that can discourage you from upholstering the interior with genuine leather is its price. Its use becomes especially risky when you tighten it yourself. After all, if at some point something goes wrong, a large amount will be thrown away. If you are not ready to take such a risk, turn your attention to eco-leather.
Eco leather
Currently, artificial leather has practically received a second life. Outdated technologies have been replaced by newer ones. Low-quality leatherette is no longer used for upholstery of car interiors, giving way to eco-leather.
Eco leather is a synthetic material. During its manufacture, a thin layer of polyurethane is applied to a woven cotton or polyester base. At the same time, the characteristics of the material directly depend on the thickness of the layer: the thicker it is, the stronger the eco-leather is, but at the same time tougher. For car upholstery, the optimal thickness of polyurethane was experimentally determined.
The material received the name “eco leather” for two reasons. Firstly, during operation it does not emit toxic substances that adversely affect vehicle passengers. And secondly, after its invention, the number of animals killed for their skin decreased sharply, which pleased animal rights activists.
In terms of its external qualities, eco-leather is very close to its natural ancestor. Using special technologies, embossing is applied to the material, making it quite difficult to distinguish it from genuine leather. Moreover, the higher the price of the material, the more identical their appearance.
The appearance of eco-leather is very close to the appearance of natural material
Eco leather has a rich palette. You can use classic black or extreme red in the interior, or you can combine colors to your liking. But coloring natural material will cost you a pretty penny.
In terms of other characteristics, artificial leather is also not inferior to natural leather: wear resistance, moisture resistance and fire resistance are its strong qualities. Both of these materials remain clean for a long time, and if necessary, stains and dust can be easily removed with a wet sponge and soft cloth. It's no secret that many people are allergic to animal fur and skin, as well as the chemicals used in tanning. Eco-leather is perfect for them, as it is absolutely hypoallergenic.
We recommend: Penalty for installing LED lamps in headlights in 2019
At the same time, the cost of eco-leather is several times lower than natural leather, which makes it more accessible to the general public. You can safely take one or two meters in reserve if you are doing self-upholstery for the first time. The remaining material can be used to make a cover for the steering wheel, gear shift lever and other small elements of the car.
Regardless of whether you choose natural or eco-leather, purchase the material from specialized automotive stores. There are many reasons why leather used for making furniture, clothing and shoes is not suitable for upholstery. For example, its instability to temperature changes and reduced wear resistance.
Both natural and artificial materials have drawbacks that may seem insignificant to some. In cold weather, the coating quickly cools down, and in the sun it gets very hot. Accordingly, this slightly reduces the level of comfort. Whether it is worth paying attention to this feature of materials is up to you to decide. In any case, leather is one of the best solutions for interior decoration of a car.
Deciding on the design
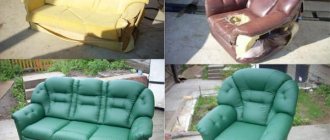
To change the appearance of an old sofa, you can sew a new cover, make pillows and throws of various models. The furniture will sparkle with new colors. If reupholstery is required, it can be done partially by replacing some upholstery elements. There are many varieties here - from typical to creative.
A cape made using the patchwork technique will look extraordinary. You can make an unusual applique and glue it to the upholstery. Denim or faux leather is suitable for upholstering a sofa. The most commonly used furniture tapestry, high-quality leatherette, leather, special synthetic velor, artificial fur with a strong base, and furniture jacquard. It is quite possible to sew removable covers from clothing fabrics.
Putting on new upholstery and assembling seats
- When all parts of the upholstery are sewn together, it can be put on the seat and back.
- When installing the upholstery, restore all fasteners that were cut off when disassembling the seat. As you assemble, refer to the photographs taken while disassembling the seats.
- The traditional method of fastening upholstery is the use of special rings. As an alternative method for fastening, you can use nylon zip ties of the required size (10 - 20 cm). They must be of good quality and not break.
Start tightening the seat back upholstery by turning it in the opposite direction and gradually unroll it.
- The upholstery on the back of the seat is a little more difficult to install than on the seat itself. It takes some effort to tighten it. The upholstery should be with the back side facing out. It is placed on the upper part of the backrest and unfolds in stages.
- When putting on leather upholstery, it must be treated with hot steam. This is necessary so that the skin “sits” well and tightly into place. Exposure to heat dries out the skin. When heated, the skin weakens and becomes much more pliable. After cooling, it contracts and tightens the seat. If you don't have a steam generator, you can use a hair dryer as an alternative. When using a hair dryer, adjust the temperature so as not to overheat your skin. If there are no adjustments on the hairdryer, then change the heating by changing the distance from the surface. When heating, you don't need to stay in one place for a long time. Faux leather is less sensitive to heat, but also requires caution when heating.
- A safer option would be to steam the inside of the upholstery before putting it on. This way the steam will not damage the front part. After drying, the leather will lie flat on the seat, without folds or wrinkles.
- If the seat has an airbag, the battery must be disconnected when connecting the seat plugs.
What the experts say
Professional auto shop craftsmen have accumulated extensive experience in reupholstering car panels inside and out. Here is a short list of tips from experts:
- Practice first. Take a small piece of material and drag some object.
- Prepare the surface carefully, because any bump or grain of sand will definitely appear on the fabric (defects are not visible on dense fabrics).
- Take your time, otherwise you will have to tear everything off and start again.
- Remove the backing carefully to avoid the adhesive surface sticking together.
- Do not bring a hot hair dryer close to the material and do not hold it at one point for a long time, otherwise you can easily burn the material.
A cracked or shabby torpedo is not a death sentence. It is easy to put in order, capable of bringing joy to the car owner and arousing the interest of passengers. It is enough to select the appropriate material and allocate some free time for the event.
