preparation and step-by-step instructions in compliance with safety precautions
Modern manufacturers offer more and more advanced gas and electric models of hobs.
As a result, there is a need to replace the failed panel with a new, more modernized one. To do this, it is necessary to dismantle the old surface. Having certain skills in the field of electrical engineering and gasification, the installation can be done with your own hands. Removing a panel from a kitchen countertop
Disabling the necessary communications of the hob for dismantling
In order to dismantle the gas panel equipment, it is necessary to carry out a number of manipulations with the gas supply shut-off valves. If gas is supplied from underground or external gas distribution networks, the ball valve at the entrance to the living space is closed.
If there is no access to the gas tap, an application is submitted to a specialized gas service to suspend the fuel supply.
When using a cylinder gas supply system (propane, butane, isobutane), you need to turn the valve to the “Closed” position. Then unscrew the gas hose from the panel to avoid the appearance of static voltage, install an equalizing jumper between the panel and the gas supply hose.
Dismantling a Bosch brand electric induction surface requires more careful adherence to safety regulations. Disconnect the panel from the power supply by removing the plug from the socket. Then use the “Network” indicator to make sure that the signal lamp is not lit, this means that the equipment is completely de-energized.
Mechanical dismantling: rules and technology
A set of necessary tools for dismantling:
- screwdriver “+”;
- pliers;
- side cutters;
- wrench 8*10;
- gas key.
Special tool for dismantling
First of all, use a screwdriver to loosen the fastening of the surface with the table top of the kitchen module. If the wire is laid permanently (for electrical panels), the terminal box is disassembled and the supply wires are disconnected. The grounding conductor from the device body is disconnected last.
Then the mounting screws are completely unscrewed and removed from the tabletop. Removal of the hob is considered complete.
Dismantling the gas cooking structure is carried out in the same way. In order to stop the supply of natural gas to the surface, it is necessary to close all fittings and visually ensure that the handles of taps and valves are in the “closed” position. Next, loosen the clamp and install the standard plug on the hose.
Packaging and transportation
If disassembly is impossible, all parts of the headset are securely fastened relative to each other and wrapped in air bubble film. The disassembled elements are packaged separately in boxes and labeled with what is in them.
In the back, kitchen furniture and equipment are placed in a certain order:
- The parts of the set are laid strictly horizontally on prepared pallets with uniform placement over the entire area of the body.
- To prevent mechanical damage, soft substrates are placed between them.
- Boxes and packages are stacked tightly to each other, without gaps.
- Household appliances (refrigerator, stove, etc.) are transported only vertically with the doors secured and packed in corrugated cardboard.
- Maximum fixation is achieved by using rigging straps attached to the sides of the vehicle.
- Heavy elements are located in the bottom row, fragile and light ones are located on top.
The car body must be closed to ensure that the appearance and functionality of furniture and equipment are preserved.
Removal from guide bars
10 mistakes when connecting a kitchen hood to electricity and ventilation
Guide strips are considered the most reliable for fixing kitchen cabinets, especially if the latter are filled with heavy objects: dishes, dry foods. It is necessary to remove such a headset element by observing the following list of actions:
- complete emptying of the interior, including removal of transverse shelves, dismantling doors from hinges;
- carefully lifting the cabinet by the body until the teeth of the fastening elements on the cabinet and the bar separate;
- The module is removed to the floor, then the guide strip is removed. To do this, unscrew the mounting screws one by one. It is advisable to start from the bottom.
The guide strip does not always have to be removed from the wall. This is advisable if the wall will be decorated with tiles or if furniture is planned to be changed.
Dismantling a wall cabinet in the kitchen begins with removing the doors and shelves Source remontnik.ru
Common repair mistakes
Nothing is done without mistakes. Repair is a vast field for making mistakes. Fortunately, the errors are always about the same, so most of them can be anticipated and avoided.
Main mistake
The main mistake is the lack of any action plan and a clear idea of the final look of the kitchen. Working on intuition or at random usually does not lead to anything good, but only creates additional problems and costs.
Incorrect calculation of sockets
Another mistake is incorrect calculation of the number of sockets and their location. Incorrectly placed outlets are a disaster. Who wants to run extension cords all over the place? And if there are fewer sockets than needed, then no tees will save you. Therefore, it is worth thinking about and calculating their number and location in advance.
Incorrect calculation of required materials
You need to calculate the amount of materials in advance and correctly. For wallpaper, tiles, wires and much more, it is customary to make a reserve in case of unforeseen situations. Well, a reserve of 10% bothers few people, but looking for the right material after everything has been purchased is much more difficult. It could be a different batch, a different shade and many other shortcomings.
Incorrect calculation of sockets
When installing plumbing and gas systems, some owners hide the valves or completely wall them up in the walls. This is a huge mistake. Valves must always be open and easily accessible. Who knows when and what kind of situation might arise?
Incorrectly selected materials
A terrible mistake is installing laminate flooring in the kitchen. Laminate is very afraid of moisture, and in the kitchen there is a lot of it.
Incorrectly selected materials are always a mistake. In addition to laminate, you can make a mistake in wallpaper, for example. Paper and fabric wallpaper cannot be used in the kitchen, because they absorb all the dirt, grease, etc., and it is impossible to clean them.
Late purchase of household appliances
One of the problems of our time is the purchase of household appliances after repair. This is fundamentally wrong. After all, repairs need to be carried out according to certain parameters, installation of sockets, layout - everything is taken into account. All furniture is customized to fit household appliances.
Thus, it turns out that repair is not a spontaneous decision, but a holistic and deliberate plan of action. In order not to get into trouble, not to get a lot of problems and costs due to a poorly thought-out idea or the wrong procedure, it is worth planning and calculating everything in advance. This is the only way to get the kitchen of your dreams in the shortest possible time and on your own.
Mandatory steps that must be included in dismantling
How to remove old varnish from furniture without the help of professionals?
Dismantling wall cabinets consists of several simple steps:
devastation
It is important to extract all contents completely. This will prevent any products from leaking or grains from spilling during transportation of the set; filming of sashes
It is better not to ignore this stage, as the cabinet may break. As a result, the doors will be damaged (the ends will be chipped, the glass will break), and, as a result, you will have to order new ones; removing the zip ties. Traditionally, all cabinets are connected to each other using special fasteners. This is done so that the set does not move around while being in a single set and does not sag. With the help of this part, during operation, a uniform level of the entire facade is maintained; dismantling shelves. The internal shelves must be removed, since when the headset is removed they tend to fall out. This is fraught not only with their deformation, but also with causing injury to those involved in dismantling; lifting the body. The cabinet frame must only be lifted by the bottom. If you grab the top bar, the cabinet may break.
Provided that a corner was used for hanging, then first unscrew the screw and only then remove the kitchen set from its seat.
Mounting corner for fastening the upper part of the kitchen facade, it is not difficult to dismantleSource onlinetrade.ru
Methods for removing the headset depending on the type of construction
Each modern design involves the use of different design options for kitchen units: pull-out, built-in, traditional wall-mounted. Each of them must be removed in the reverse installation sequence. If it was not you who did the hanging, then you need to be guided by the algorithms given below. Please note that we dealt with the demonstration of the mounted module above. Solving the question of how to remove a wall cabinet in the kitchen is done in slightly different ways. It all depends on the type of headset.
The furniture is first cleared; the fronts of all cabinets must be removed at once, and not one at a time Source Pinterest
Built-in
Such options usually have sliding doors, so the main problem arises at this point. Let's take a step-by-step look at how to make the process easier:
- After freeing the insides of the cabinet, they proceed to dismantling the doors. They are fixed by two guides (lower and upper). Therefore, each sash is first lifted individually so that it is pressed away from the lower part, and then carefully removed from the upper part.
- Then they begin to remove the shelves. If they are not screwed, it is enough to simply lift one edge to the top and, in a diagonal position, simply pull the crossbar out. If there are sides, then they are simply removed from the cabinet. The screwed parts will have to be unfastened using a screwdriver or a special hex key (usually this is included with the furniture modules for assembly).
- In case the structure is not very heavy, it can be removed from the niche without preliminary disassembly. If possible, you can wrap the edges of the frame with a soft cloth (possibly wool). This is done so that when removing the module, the case does not become deformed (chips, scratches and other damage). In case the part is quite heavy, then it is necessary to continue dismantling the parts.
- Next, the back strap is detached. It usually consists of plywood or a sheet of chipboard, fastened with small furniture nails or staples. Accordingly, to remove it, simply use a flat screwdriver or a chisel to pry the attachment points from the inside until the panel completely moves away from the frame. Next, they begin to disassemble the main parts (side, top and bottom components). There are two options for fastening the frame parts: using ties and corners. For both cases, you can get by with a screwdriver or a Phillips screwdriver. If fastening with a hex screw is provided, then the key must be appropriate.
- After complete disassembly, marks are made on each part of the module. This is done so that in the event of further assembly the location of the part is not confused. It is recommended to collect all accessories in a separate package, this will protect against loss of elements.
Please note that the built-in wardrobe is made strictly according to the dimensions of the niche in which it is installed and is mounted on casters. Therefore, it is often simply removed without prior dismantling.
Built-in cabinets in the kitchen are removed from their niches in disassembled form for convenience Source mfleko.ru
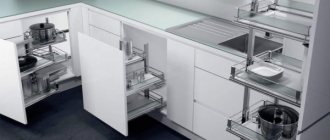
Retractable
This option can cause difficulties when removing it from the wall if you do not know the features of the working mechanism. This detail of all furniture is found quite often in modern kitchen interiors. To properly dismantle such a module, you must follow several steps:
- It all starts, as usual, with extracting the internal contents. Next, the drawer or vertical structural element is pulled out all the way; the working mechanism should appear.
- Next, use a screwdriver to press out the latches on the guide structures. If branded Blum parts were used to operate the cabinet, then they can be removed manually.
- Next, you need to remove the module from the guides, and then begin disassembling the fittings that provide movement. To do this, you need to unscrew the screws and then remove the rollers from the guides.
The principle of dismantling remains the same for all models of sliding cabinets; only the sequence of actions can change. This is influenced by the points at which the furniture structure was fastened.
The retractable kitchen modules are removed all the way, after which the “tongues” that support the movement are pressed out. Source ssm124.ru
Upper cabinet with closer
The closer is an element that does not allow the structure to move further. This is done for the safety and integrity of the door leaves. To make it easier to solve the question of how to remove a kitchen cabinet with a closer, you need to start dismantling from the door leaves, but it may vary depending on where the closer is attached.
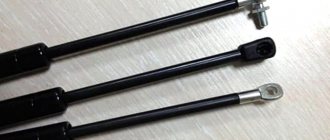
There are four types of finishing mechanisms: an element built into the loop (there are no problems with its removal, since it is often removed along with the canopy); gas elevator; oil lift; end closer-shock absorber.
These parts may differ in the method of fixation. For example, a built-in door closer is attached together with a hinge to the frame, so you just need to unscrew all the screws and remove the sash.
Other mechanisms are usually fixed either to the door or to the inside of the frame. They have nothing to do with furniture canopies. Therefore, you need to start unscrewing from the place where the closer is attached. During this process, you should hold the doors. If it falls after unscrewing, it will tear out the fastening mechanism on the opposite side. Repairing such damage to the headset case will be problematic.
If it is a drawer with telescopic guides
When dismantling a box that uses durable telescopic guides, you must carefully remove it completely from the compartment, and then unscrew the screw that secures the guide on the side walls of the box and the telescope with bearings.
It is necessary to work with telescopic guides carefully so as not to damage the thrust mechanism Source russian.alibaba.com
If such guides are supplied with closers or return springs, then the dismantling process begins with their removal. If the drawer opens by pressing the front, it means that a pressure-operating mechanism is installed in it. It must be removed first.
On a note! If the drawers have standard moving mechanisms on balls or wheels, then to remove them, you need to pull out the structure all the way, and then simply lift the drawer to the top. After this, it can be easily removed from the niche.
How to remove a wall cabinet door
Door repair in Moscow and Moscow region
It is also advisable to dismantle the wall cabinet door according to the instructions:
- If the kitchen facade is equipped with full glass or glass inserts, then when removing the doors it is better to remove the fragile material. Otherwise, under the influence of movements and vibrations, there is a risk that the glass will fall out and crack.
- Next you need to unfasten the canopies. To do this, first of all you should remove the door closers (if any). In case they are attached to the body, they are first unscrewed from it.
- After this, unscrew the screws that hold the hinges. All this must be done carefully, holding the sash by the bottom so that it does not fall off spontaneously when the connections are loosened.
Please note that the design and working mechanism of the façade parts may vary. The method of dismantling the structure will depend on this
To remove a kitchen cabinet door, you need to properly unfasten the hinge and determine whether it has a closer or not. Source remontnik.ru
Walls
The walls near the cooking area are designed to be protected by a kitchen apron.
It is usually made from tiles (the most reliable, durable and hygienic option, but is difficult to install), wall panels made of MDF or plastic (easy to install and maintain), and tempered glass.
Mirror surfaces will help to visually increase the space.
The most expensive materials include stone and mosaic. The apron is installed next to the work table, sink, and also near the hob or stove.
The remaining walls of the kitchen are usually finished with wallpaper (preferably washable or paintable), paint or decorative plaster, and wall panels.
disassemble the built-in kitchen and reassemble it in a new place, adjusting it to size in Khimki for 10,000 rubles
I am moving from one apartment to another; I need to dismantle the kitchen along with the appliances and assemble it in a new kitchen in another apartment, cutting and filing where necessary to the appropriate dimensions. Connect equipment. The task is 2-stage and divided by time: 1) disassemble 2) assemble after transportation
When: , 23:59
Address: Khimki, Moscow region, 8 March street, no.3
Reviews Rating: 5 — 1 1 review
Andrey F. 400 More than 400 completed tasks Reviews: 384 5 — Performer Feedback on the task “disassemble the built-in kitchen and assemble it in a new place, adjusting it to size” EVERYTHING IS PERFECT Politeness Punctuality Adequacy
Want to find the best repairman?
Latest added tasks
- Price is negotiable Construction supervisor
We need a supervisor for the site Engineers Education is required Construction OfficialRail A. Leningradsky Prospekt, 60A, Moscow
- RUB 2,500 Fill the screed with a slope
Pour screed from ceresit cn 173 with a slope towards the drains in two rooms of 5 m2 eachDmitry village Manushkino
- 20,000 rubles Make stainless steel hangers for the store. With…
Weld a lightweight stainless steel structure. To a clothing store. I’ll send you the project in a personal message on SappAlexander B. Chertanovskaya metro station, Moscow
- Price is negotiable Ventilation installation
It is necessary to extend a pipe to the installed ventilation, a line to the charcoal grill. Ready to discuss work optionsRustam R. Oktyabrskaya street, 26с1, Moscow
- RUR 1,000 Table repair
I bought a new computer desk, but it turned out to be defective. The bolt holes in the table top do not line up with the holes in the legs. They need to be drilled outAnton K. Khoroshevskoe highway, 34, Moscow, Russia
Ceiling
To put your ceiling in order with your own hands and complete an economical task, you can consider three simple options:
- Ceiling wallpaper
- Ceiling panels
- Painting the ceiling
Using contrasting paint on the ceiling can significantly transform the kitchen space.
Finishing the ceiling with panels can also save money because it does not require preliminary leveling of the ceiling.
It is easy to repair the ceiling using paintable wallpaper. It is both beautiful and inexpensive, and over time, wallpaper that has lost its original color can be changed by simply painting over it. Usually, white textured wallpaper is used, which after some time will be painted over with white paint.
Ceiling panels are used less and less - but this is also an economy class and an opportunity to make the space different.
An inexpensive kitchen renovation also involves simply painting the ceiling. Consult construction stores about paint; today the choice is so wide that the ceiling can be not just white, but with mother-of-pearl or metallic.
And an ordinary chandelier can brighten up the overall impression of an economical approach. More precisely, not ordinary, but originally decorated. For example, with a lampshade that matches the color of the kitchen curtains, or an interesting shape.
Exactly the opposite: installation of kitchen wall furniture
After purchasing a furniture set for the kitchen, you need to completely disassemble the entire set of parts. It must have standard canopies (especially if the furniture manufacturer is IKEA). The installation of the headset must be done reliably, and to achieve this, you need to work smartly
To do this, it is important to follow the instructions listed below
Deciding on the height
The first and most important thing in installation is knowing the exact height. Traditionally, it is not recommended to deviate from standards, however, there is such a need
It is necessary that the upper modules and the countertop be separated from each other at a distance corresponding to the generally accepted GOST, which is 45 cm. Modern kitchen furniture is hung above the countertop at a height of 60 cm. This is due to the fact that the installed household appliances acquire larger dimensions than before.
In addition, you should definitely take into account human height, especially those who will regularly use the headset. For example, if the height of the kitchen owner is 155-160 cm, then it is necessary to install a wall cabinet so that the height of the top shelf does not exceed 175 cm. A person must be able to reach its contents with an outstretched arm.
Preparing the walls for work
The first thing that needs to be done is to level the walls, otherwise there is a high risk that the design of the cabinet will begin to distort and the facade will look uneven, and the doors may even begin to sag. Therefore, first the walls are adjusted to the optimal level (if necessary, they are leveled using drywall). In this case, the angles must also strictly correspond to the 90 degree mark.
Alignment of walls for hanging furniture in the kitchen must be done Source krasnodar.mosplitka.ru
Choosing tools and accessories
Upon completion of the construction work, it remains to decide on the type of fittings with which the kitchen wall cabinet will be held. So, for this purpose it will be useful:
- tape measure, building level;
- drill, hammer drill;
- hand screwdriver and screwdriver;
- clamps;
- hammer, wrench.
Also, the choice of type of fasteners also depends on the type of surface. For example:
- tree. Then hardened screws with a rounded head will come in handy;
- concrete or brick. In this case, it is necessary to prepare a dowel, plug or anchor bolts;
- drywall. This is the only time when hanging cabinets in the kitchen that you will need Molly dowels.
When installing furniture on the chosen wall, you need to be sure that the surface is strong enough to withstand the long-term impact of the weight of the furniture on it.
Pendant options that can be used for fastening
There are two types of cabinet hangers: simple universal and complex, adjustable
It is important to know the details about each type in order to hang the headset correctly in the future.
Simple furniture hanging Source fastbox.su
Where to start renovating the kitchen: sequence, choice of materials
Required reading:
Old, boring interiors quickly become boring. To refresh the appearance of the kitchen, many owners of city apartments or country real estate are undertaking renovations. If you have free time and sufficient financial resources, you can immediately start working. But not every user knows where to start renovating the kitchen in order to complete the work in a short time with maximum efficiency and minimal labor costs.
How to choose an interior style
So that the kitchen space does not stand out from the rest of the rooms, it must be done in the same style. The most popular options are:
Attention!
A kitchen designer
has started working on our website . You can get acquainted with it and design the kitchen of your dreams completely free of charge! A wardrobe designer can also be useful.
- modern high-tech;
- baroque;
- minimalism;
- classic style;
- modern
Where to start renovating your kitchen? Of course, with the choice of style. In classic interiors, natural materials are used, the floors are covered with parquet. Art Nouveau and high-tech styles are more suitable for modern youth; glass and plastic products are used here. Baroque furniture is dominated by carved furniture, but such items are more suitable for a living room or bedroom.
We assemble a kitchen set with our own hands like a constructor
The assembly service costs about 6-10% of the cost of the set, so if you have time and some experience, then assembling the kitchen set yourself will not be particularly difficult, and you will not overpay extra money.
Before you start assembling the kitchen set yourself, you need to make sure that all work on leveling the walls, floors, finishing (including installing the apron), as well as work on electrical wiring, connecting sockets, and water supply have already been carried out and completed. After all, when the kitchen installation is completed, it will be difficult to carry out all these activities.
Transportation of the kitchen: disassembly, packaging and transportation
Packing and moving a kitchen is one of the most difficult stages of moving an apartment. Most people have no idea how to disassemble a kitchen set for transportation. Even greater difficulties are caused by the need to dismantle the electric stove and built-in appliances.
The optimal solution is to contact a transport company that has its own packaging materials store. Here you can order delivery of kitchen sets and other furniture at an affordable price.
And the packaging of kitchen stoves and hobs will be organized with the involvement of specialized specialists.
In case of austerity, you will have to disassemble the kitchen yourself, let’s figure out how to do it.
Mounting options
Before you begin to remove the headset, you must clearly understand what type of fastening was used. After all, each of them has its own nuances. These could be the following types of mechanisms:
- simple loop. This is the most primitive and long-familiar method. Particularly suitable if the walls in the kitchen have not been leveled beforehand. Removal from this type of mount is not difficult;
- hanging corner. By design, it is a plate made of durable metal. One part of it is attached to the wall, the other is fixed to the back of the wall-mounted set. This design does not provide for the possibility of adjusting the cabinet;
- professional IKEA canopies, this option is used for furniture from the company of the same name, since it has the appropriate grooves for fastening;
- guide strips (mounting rails). This type of fixation is considered one of the most reliable. The entire load created by the cabinets is distributed evenly along the guides. The planks themselves are attached to the wall in several places. This option is suitable for walls constructed from shell rock or foam block.
Each mounting option has its own characteristics, and accordingly, cabinets will need to be removed from them using an individual method.
Standard fastenings for wall kitchen cabinetsSource ecodacha-nn.ru
Fastening options for wall cabinets for the kitchenSource furniture.rf
You may not disassemble the kitchen yourself, but break it
When dismantling a built-in kitchen, it is difficult to cope with bulky equipment and cabinets on your own. Without the help of specialists, you run the risk of not disassembling the kitchen, but simply breaking it. Each item has its own weaknesses and requires special attention:
- The hood must be properly disconnected from the power supply and dismantled without damaging the fastening, which is firmly installed.
- It is quite easy to unplug the microwave, but it requires especially careful packaging.
- The same must be done with the oven.
- A gas stove requires the presence of a gas service representative when disconnecting and installing, not to mention the permission of the relevant authorities.
- The mortise sink that you once installed is “tightly” attached. You will not be able to disconnect it yourself with a regular home tool. In addition to this, you will need to properly plug the pipes by first shutting off the water. Otherwise, your flooded neighbors with their complaints will find you in your new apartment.
Useful tips
This section offers some useful tips for installing wall-mounted kitchen furniture:
- the mounting rail should be mounted slightly below the top edge of the headset (about 3-4 cm);
- Drilling holes should be carried out in places where there is no wiring. You need to check if there are any switches, sockets or distribution boxes nearby. In most cases, you need to know the layout of electrical cables. You can ask for it from professionals during electrical installation work;
- In order not to damage the kitchen cabinet panels or cause the formation of burrs and clamps, it is better to place a thin board between the hook and the fastening element. Maybe plywood. Even a thick sheet of cardboard will do;
- To prevent chips from forming and paint coming off the panels when making through holes, you need to start drilling with the smallest drill size and gradually increase its diameter by reloading another one.
We fix the baseboards
For the kitchen it will be plastic or metal. Wooden plinth is not very practical, since without additional coating it does not like moisture and does not wash so well. In contrast, plastic plinth does not mind wet cleaning, and in addition, it fits perfectly with linoleum. Metal plinths (aluminum or stainless steel) also performed well in the kitchen.
The standard length of any plinth is two and a half meters. To calculate how many pieces you need, add a couple of meters to the perimeter of the kitchen and divide by two and a half. We purchase corner elements based on the number of corners. It is best to cut plastic baseboards with a miter saw. Mount it starting from the door or from the corner. Holes are drilled in the walls for this purpose.
A very convenient element is a plinth, which is fixed between the table top and the wall. That’s what it’s called – kitchen plinth. Having installed it, you don’t have to worry that something will fall into the gap near the tabletop or water will spill. There is another type of plinth - ceiling, called baguette. It is placed to highlight the design. It is installed after finishing the ceiling and walls.
Preparing for assembly
Before assembling the kitchen set, you need to prepare the necessary set of tools:
- Hammer, drill with a diameter of 6 and 8 mm, drill (adapter for drill) and corresponding drills;
- Screwdriver (MUST!);
- A jigsaw or hacksaw for sawing off the tabletop;
- Hex key (included with the kit);
- Tools: square and level, tape measure, hammer, pliers and cutter knife.
Advice! The missing power tool can be borrowed, or better yet, purchased. A screwdriver and a hammer drill are necessary things in every home.
You will also need different types of fasteners:
- Furniture nails;
- Euroscrew;
- Fastening strip (rail) for hanging;
- Silicone based sealant;
- Ties that fasten the sections together;
- Self-tapping screws: 15-16 mm for fittings and 70 mm for hanging kitchen cabinets;
- Corners, dowels, anchor bolts (included in the set);
- Conductor for dowels (preferably).
Features of removing a shelf from a cabinet
In kitchen cabinets, shelves are arranged in different ways. Therefore, the fastening features are first determined, from which they are subsequently based when dismantling:
- standard shelf holder. These can be small studs on which the panel is laid on top. In this case, it is enough to simply lift the empty shelf and remove it from the frame without much effort;
- furniture corners. In such cases, the shelf is securely held using self-tapping screws, so in order to pull it out, you need to unscrew them. It is most convenient to unscrew the screws that are located on the shelf, and not on the side of the frame;
- eccentrics. To dismantle them you will need a screwdriver. It is necessary to slightly unscrew the fastener so that the shelf and sidewall disengage. This is done in all places where such fasteners are installed (usually there are only four);
- plastic holders. These are intended exclusively for glass shelves. First, you need to carefully unclench them and then remove the glass. These manipulations should be done carefully so as not to damage the shelf;
- dowels. The shelf can only be freed from such structures by completely disassembling the fasteners. If you try to remove shelves with such clamps from the frame, you can damage the integrity of the set.
Often, to dismantle a shelf from a kitchen unit, it is enough to simply lift the bar and remove it from the internal space. Source drive2.ru
We disassemble the swing wardrobe
For modern storage systems, the rules are essentially the same as for coupes. How to quickly disassemble a cabinet: start by dismantling the fronts, then remove the shelves. The fronts are easy to remove: on each hinge located on the side panel, just loosen 2 screws. Ready: the doors can be removed and packed away. Then proceed in the same way as in the case of sliding models.
You'll have to tinker with old-style cabinets. They were assembled a little differently: wooden dowels and even eccentric ties were used. To deal with shelves, handles and drawers you will need a set of screwdrivers, a screwdriver, a chisel and a rubber mallet.
First, remove the shelves that are not fixed in the cabinet, but simply rest on the holders. Then remove all the fastener plugs, corners and screws holding the other shelves and put them away. Using a screwdriver, unscrew the screws in the crossbar supports and remove them from the wardrobe. Now it’s the screwdriver’s turn: it is needed to remove the screws holding the body and mezzanines from the hinges. The removed doors can be laid on the floor and the handles unscrewed from them.
We remove the mezzanine
They can be attached:
metal arc and screw.
Installation of ventilation systemsHow to choose a window sill?
Pipes for internal sewerage
An eccentric coupler is easier to disassemble. Insert a suitable screwdriver into the cross slot of the eccentric and carefully turn it counterclockwise. Then pry the cylinder with a flat-head screwdriver and pull it out. Done: all that remains is to separate the panels.
If the fastening is made in the form of a metal arc with a screw, which is also hidden in a cylindrical recess, you will have to tinker. You may need an awl or thick wire that will not bend under pressure. Insert the tip of an awl or the end of a wire into the screw hole, unscrew the pin, and then remove the bracket and separate the body parts.
Does not work? You can gently tap one of the plates with a rubber hammer so that the dowels come out of their sockets. Be patient and do not try to separate the elements using brute force: if the dowel breaks off, you will have to remove it from its socket, and this is inconvenient.
Wooden dowels can be removed with pliers, screws with a screwdriver. It remains to deal with the bottom of the mezzanine. Pry it with a chisel and move it a little to the side, and then remove it. You need to do this together!
We continue to disassemble the body on the floor:
Use a chisel to pry up the back. In old cabinets, it is made of plywood and is attached to nails - they need to be removed using pliers.
Remove the plywood itself and the connecting strip.
Remove the remaining fasteners and remove the body panels.
An important nuance: if you have to dismantle a wall with glass doors, do this at the first stage, carefully releasing them from the hinge clamps.
