Home / Interior furniture / Decor and creativity
3
Reading time: 5 minutes
A
A
Scraps and remnants of various fabrics are not garbage, but a real treasure in the hands of a needlewoman, which can be turned into amazingly beautiful and useful things, for example, rugs for a nursery, hallway or bathroom. There are so many ways to make rugs and rugs that you don’t even need to know how to sew and knit, you just need to choose the most convenient option for yourself.
DIY rugs made from scraps of fabric
After getting acquainted with the methods of making chair covers and sewing rugs, think about whether it is worth throwing away old T-shirts, jeans, towels, woolen sweaters and scarves. After all, all these things, even if they are shabby, with holes, faded in the sun, can be given a second life.
Patchwork fantasies
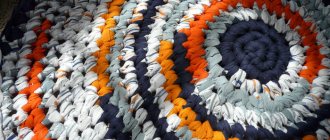
Bright rainbow rug
- Preparation of flaps Cutting continuous tape
- Connection without node
- Video - Crocheting a round rug from cut fabric strips
- Braid rug
- Video - Denim rugs
Step-by-step instructions for various techniques
In order to create a beautiful rug that you won’t be ashamed to show to guests, you need to accurately follow the instructions corresponding to each of the implementation methods.
Soft volumetric rug
To make a product that is perfect for a children's room, you must first prepare the following materials and tools:
- Small scraps cut from outdated clothing.
- Scissors.
- Special rubber mat with ordered holes.
- A hook or small tweezers.
Step-by-step production:
- The prepared fabric is cut into strips of equal width and short length.
- Using a hook (tweezers), the strips must be inserted into the holes.
- Tie them in a simple single knot.
- Using the same scheme, close all existing holes with fabric strips.
Everything is very simple and fast!
"Granny's rug"
This option is more popular than others. It can be found in many village houses. But many people want to give city apartments a little zest and real comfort. This product can be made without the help of your grandmother. To do this you will need:
- Crochet hook in volume from 7 to 10 mm.
- Scissors.
- Waste fabric in various colors.
Manufacturing:
- The fabric is cut into thin strips. In this case, efforts are not necessary, since evenness does not play a special role. Thanks to some unevenness in the cuts, the rug will acquire a peculiar volume.
- The strips are tied alternately into one continuous rope. The sequence of colors depends on the idea of the future product. Tying is done using a regular double knot, which is pulled as tight as possible to make it easier to hide.
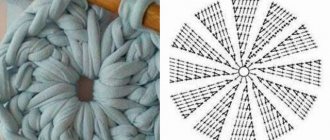
- At the end point of the finished rope, a small loop is made, and from it five loops are knitted in the form of a chain. The very last loop must be connected to the very first. This is how the initial row is formed.
- The second row is done a little differently. From the first row, a convex loop remains, into which the working tool is inserted and then also grabs the one closest to it in a counterclockwise direction.
- So there are two loops on the hook, to which the free thread is also captured using the hook. The thread must be pulled through these loops. This creates the next loop.
- The entire row is knitted according to the same pattern until the very end.
- This pattern should be repeated from the very beginning until the entire rug is completed.
- A circular connection is made as needed to introduce a specific color. The result should be a product with multi-colored even circles.
- Sequential is performed by preliminary fastening of a homogeneous knitting thread. Each type of fabric is attached in the sequence intended by the manufacturer. The result is a rug with a constantly repeating pattern.
- A chaotic connection occurs with the introduction of various tissues at random. The result is a bright product with absolutely illegible rows of knitting.
Rug made of braids
If it is impossible to use a knitting tool such as a crochet hook, you can use a simpler method of making a product from scraps. To do this you will need:
- Fabric in three colors.
- Needle and thread or glue.
Work progress:
- The fabric is carefully cut into strips of the same size.
- Stripes of three colors are woven into a standard braid.
- The braids must be glued or sewn together.
- A solid long braid is curled in a circular direction. Here the braid should also be secured with a needle and thread. You can also use glue for these purposes.
Braided rug
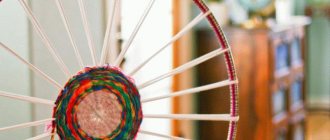
A rather original way of weaving is to make products using a hula hoop. This technique is quite simple. You must first prepare some elements that will be needed during the work process:
- Hula Hup.
- Many multi-colored thin strips of fabric.
- Scissors.
The weaving technology is incredibly simple:
- First of all, with the help of stripes, a kind of web is created on the hoop.
- Next, the strips are threaded into this web in the center of the circle with a snake.
- When one of the stripes goes through a full circle, you need to tie it with a neat knot.
- All other rows are performed according to the same pattern, gradually rising to the edges of the hoop.
You can create a beautiful rug using various methods and many different materials at hand.
What else to read on the topic?
Products made from braids
Curling braids using a needle and pins is the simplest way to weave rugs from strips of fabric; it is useful for beginners to try it out. Three cuts of different colors are connected at the ends and begin to braid. The product is made up of one continuous braid, but it is inconvenient to weave strips that are too long.
Therefore, you will have to attach another tape each time as you work. The approximate suitable length is about half a meter, but the texture of the fabric, for example, matters (it’s easier to work with hard ones), in the process it will become clear which size is more convenient.
The next stage of weaving a rug from fabric strips, rolling the braid, can be started before it is completely ready. The tip of the tape is tucked in, secured on a flat surface and they begin to wind turn by turn in a spiral, forming a circle.
Each added turn is sewn to the previous one so that the product does not fall apart. This can be done as you fold, or pinned together first and stitched afterwards. If braids of equal length are laid out in a row, you will get a rectangular braided rug, in which case you will have to work hard to secure the free ends. The top side where the seams run will be the bottom and will be hidden under the lining needed for strength and shape retention.
Recommendation. If the weaving material is too thin to create the desired volume, the cuts can be made wide and folded in half.
Note!
How to make a craft with your own hands: what you can do with your own hands at home
DIY foam crafts: snowman, Christmas tree, sculptures, original figures with instructions (photo + video)
Papier mache from egg trays, boxes, cassettes: the best ideas on what can be made from egg packaging
How they are made
How to choose a carpet for your interior: tips from decorators and 80 win-win combinations
Sewing is done using various techniques. This allows you to realize any fantasies and creative ideas. You can learn how to create any rugs. Old clothes and yarn are used as a raw material base. The very strips that will become the basis for the rug are made from them.
As for the execution technique, it is worth highlighting:
- Knitting. Knitting rugs is carried out using yarn or scraps, which are knitted in the process using the classical method.
- Patchwork. In this case, a single piece of fabric is created from different pieces of fabric by stitching them together.
- Weaving. Reminds me of the first technique. The difference is whether shreds or thick threads are applied to the base.
- Stitching. The optimal way to create voluminous rugs. Instead of shreds, padding polyester balls are used. You can sew in different ways.
Before choosing equipment, the design style of the room and some other nuances are taken into account. This is the only way to create a product that optimally fits into the interior design.
A fun and useful hobby
There are many ways to make them; accordingly, these items are infinitely varied and can take their rightful place in any part of the apartment, in the hallway or in the kitchen, in the nursery, bedroom, living room. Beginners should not be embarrassed by the lack of skills; many of the techniques are quite simple, the work is fascinating, and step-by-step instructions and many ideas suggested by the masters will help overcome difficulties.
The peculiarity of homemade rugs is that, as a rule, “waste” material is used to create them, thus, savings and recycling of unnecessary things become by-products of creativity.
Basic manufacturing technologies
Electric floor heating mat
On the Internet you can see a huge number of products, which ultimately makes the choice very difficult. In order to simplify the search, it is worth dividing all products according to the main manufacturing methods:
- Sewing. The simplest method, but when using it, there is a need for additional tools, such as a sewing machine. With the help of such a very ordinary home device, you can produce a very beautiful and high-quality rug in a short period of time.
- Weaving. It will require perseverance, time and patience. But the result is amazing. To bring it to reality you will need the simplest loom.
- Crocheted. Knitting needles are generally not used for weaving such products, since they cannot bear such a load. But the hook is ideal because the structure is solid and durable.
- Knitting on a special basis. Rugs knitted using this technique will look perfect in any interior, as the result is soft and has an aesthetic appearance. This option will require the purchase of a special base, but it is worth noting that it is inexpensive.
You can clearly see the work process in the following video:
Weaving without a hook
You need to take a regular photo frame made of wood. You need to drive nails into it on opposite sides. The distance between them should be 2.5 cm.
Afterwards the threads are pulled, resulting in a base. Pieces of knitted fabric are used for weaving.
Rug made of patches on a mesh backing
Large baby crawling mat
A hook can be useful to you not only for knitting, but also for securing scraps of fabric or yarn on a porous base. A mesh fabric will be useful for this. In principle, scraps of fabric can be fixed to it by simply tying the ends. But you can use a more interesting and at the same time neat method.
To do this, you need a specialized hook, equipped with perforation at the opposite end of the working part of the product. A thread will be passed through this hole, with which you will have to fix the shreds to the base.
Pass the tool through several cells (five or six are enough), and then wrap several turns of patchwork tape or yarn around it.
Carefully remove the hook and a wonderful spiral arc will appear on your work surface. Repeat all of the above manipulations so that all mesh cells are filled
Repeat all of the above manipulations so that all mesh cells are filled.
Of course, you can alternate the yarn as you wish, combining shades and textures according to your own idea. Be sure to try to secure the spiral pieces tightly to your mesh base. In this case, it is necessary to move from the edges to the core.
Some useful tips for beginning needlewomen
To make a truly high-quality and beautiful product, it is extremely important to be careful in every action. We strongly recommend that you use rough drafts before starting the actual work.
This will save you from common mistakes when you start doing everything “clean”.
If you have already dealt with samples and think that you are completely ready to make the final version, do not sit down with it until you have outlined a specific plan of action
Pay special attention to the concept of fringe, if it is intended in your product. Keep an eye on the texture and quality of the fabric - if they leave much to be desired, it is better to avoid releasing the ends altogether, otherwise you risk getting a sloppy option - the fringe will quickly become unsightly, and the rug will become sloppy and “disheveled”
When making rugs using a base, use two-layer fabrics for it. This trick will help your finished product retain its “presentation” for a long time and keep its shape. And remember that using similar textures of raw materials will greatly facilitate all your work.
Let your fantasy come true in the best possible way!
Patchwork - what is it?
The name of this technique (Patchwork) comes from the English language. If we translate this concept literally, we get “sewing from scraps.” As a matter of fact, the name fully explains the feature and method of production of this product.
According to historical information, the origin of this technique occurred many centuries ago. Evidence of this is the exhibits of Cairo museums. There you can see patchwork quilts once made by Egyptian women. Another valuable exhibit is a patchwork kimono kept in the Tokyo Museum. Archaeologists believe that the approximate time of manufacture of this find is the 9th century BC. e.
The revival of patchwork occurred many centuries later in European countries. Since then, the popularity of handmade bedspreads and carpets has not decreased.
Required tools and materials
Each technique requires specific tools. These can be knitting needles, a crochet hook, very thick cardboard, and so on. Scissors are a tool that should always be present
It is important that they are of high quality and sharp, as this will make the work much easier.
When choosing a material, you should follow several rules:
- The width of the fabric strips used to weave one carpet can be different, it all depends on the desired result.
- It is desirable that the mass of the fabric be approximately the same. If there are significant differences, you can compensate for this by the size of the stripes.
- You should not combine cotton and wool in one carpet, as this will not lead to a decent result. Too different structure.
- It is most convenient to weave rugs from knitted products.
The good old way - knitting
The classic option is a small round rug for the hallway, kitchen, balcony, crocheted from scrap materials in a large size. Made in a circle, from the middle, such a thing looks good with almost any choice of fabric and creates a feeling of home comfort.
Begin knitting with a chain connected into a ring. Most often, narrow stripes of color are alternated, choosing them by contrast or keeping them in the same range. The rectangular version can be made around the middle square or with a smooth cloth from one edge; such a rug can also be knitted on knitting needles, although this is less convenient.
Those who have at least a little knowledge of crochet will not have a question about how to knit rugs from rags turned into ribbons; this is done with ordinary double crochets or single crochets, in a circle, with additions in each row. Moreover, this can be a good training for beginners, since it is easier to master the techniques on large material than when practicing with thin yarn.
Recommendation: to ensure an even edge of the rectangle, it is not advisable to combine material of different thicknesses.
Note!
Wood burning for beginners: tips and secrets for burning pictures
Plasticineography - interesting options for creating pictures from plasticine on cardboard for children
DIY scrapbooking for beginners: what it is and how to do it. What you need to create a beautiful album or notebook (photo + video)
What interior elements can be made using the patchwork technique?
Almost anything: these are blankets, bedspreads, pillows, curtains, upholstery for upholstered furniture, wall panels, wallpaper, rugs and even tiles in the bathroom, which may also not be quite ordinary.
Decorative pillows in patchwork style in the interior
Patchwork style day bed
Bathroom tiles in patchwork style
Bathroom tiles in patchwork style
Patchwork products in the bedroom interior
It should be noted here that this style is characterized by an abundance of bright colors and colorful patterns, so such furniture itself immediately becomes the center of attention in the room. This leads to one small rule: there should not be too much decor made in the patchwork style in the interior, otherwise the result will be complete bad taste, colorful and intrusive, looking like a dressed-up gypsy. Let it be just a few elements, for example, a sofa and a rug in patches, and nothing more.
Furniture and other interior items in patchwork style
Patchwork style chair
There are times when people are embarrassed to decorate the living room with shreds, expecting ridicule or disapproval from loved ones and household members. But if this style is close to your spirit, then start small, make it yourself or order from the craftsmen a pot holder, curtains for the kitchen, a tablecloth, a pillow for the kitchen seating area, cover the walls with wallpaper in the patchwork style or simply lay tiles on the working kitchen apron in the same style.
Patchwork in the interior photo
Patchwork in the interior photo
Patchwork in the interior photo
Wallpaper in patchwork style
Let the cheerful patchwork please the eye and lift the mood of the residents of the house. And if you like the execution of this wonderful style, then you can move to other rooms, for example, to the bedroom.
There is generally a place for both experienced and novice designers to roam. A bedroom in a patchwork style looks great and, most importantly, cozy. Judge for yourself: there is a patchwork rug on the floor, a blanket or blanket made of scraps on the sofa, as well as carelessly scattered pillows made of scraps. If this is not enough, then you can hang a patchwork panel on the wall or make a partition from fabric made in patchwork style. The main thing is to maintain a single color direction, but otherwise there are no restrictions.
Patchwork style blanket in the bedroom interior
Patchwork style bed linen in the bedroom interior
Patchwork style bedroom
Patchwork and grass rugs
Nowadays carpets with long pile, called “grass”, are fashionable. They are very soft and warm. True, it’s difficult to clean them without a powerful vacuum cleaner, but they look beautiful and cozy with them. Making such rugs with your own hands is not at all difficult, however, it can take a lot of time. This is if you decide to use threads. But it's very beautiful.
These are the results that can be obtained using this technique. But to make the carpet so beautiful, you need ribbon yarn or thick threads
The idea is outrageously simple: threads and strips of fabric are tied to a mesh base. There are two tying techniques - just using a knot, and making a loop. They give slightly different results, but both techniques are good. You can try and choose.
How to make rugs with your own hands from scraps
The same painting mesh is suitable as a base, but a rubber anti-slip backing for carpets is better. She's practically perfect. We tie threads or scraps of the same length to the cells of the grid - in each or through one.
Row by row we tie the scraps
If you do not have such perseverance, but you have a sewing machine, the process can be speeded up significantly. But the base must be woven. We fold “blade of grass to blade of grass” and stitch it on a typewriter. So row after row. Making patchwork rugs with your own hands is much faster with a machine.
You can also use a rubber mat with holes as a basis.
Patchwork floor in the interior
A colorful patchwork rug or bedside rug will enliven even the most drab and featureless interior. To create a patchwork style carpet, it is better to use thick fabric or sew light patches onto a fabric base. You can use old clothes - coats, jeans and woolen items. By the way, if you collect old rugs and carpets from friends and acquaintances, you can use the cut-up scraps to sew a new carpet using the patchwork technique!
Manufacturers of ceramic floor tiles also often use the patchwork theme in their collections. You can even create a patchwork-like pattern yourself from assorted tiles or pieces of multi-colored linoleum.
Bathroom decoration
You can make a comfortable and practical bathroom rug yourself. For this you will need:
- Old towels;
- Ruler and tailor's chalk;
- Sewing machine;
- Tailor's scissors.
The process of making such a rug differs little from that described above. To begin, cut the towels into long strips 4-5 cm wide.
Connect the first three pieces using a sewing machine. You also need to increase the “working thread” using this sewing tool.
When braiding a braid, the raw edges need to be folded inward.
During the assembly process, you need to stitch the rows on the machine.
The bath mat is ready! It is very soft and pleasant to the touch, absorbs moisture well and can be washed.
Rug made of pompoms
It's time to remember such cute, soft and original pom-pom rugs. They are made as before. case: pompoms are tied to a construction mesh or sewn to a fabric base. But how to make the most pom-poms? Are there many of the same or given sizes, beautiful, neat?
There is no need to look for drawings and descriptions of certain devices or machines for making pom-poms, as some sources advise. Excellent pom-poms are obtained as shown in Fig. “Technological equipment” made from a couple of reusable cardboard scraps; In any case, it’s enough for a whole carpet of pom-poms.
Making a pompom for a rug and other purposes
Pompoms can also be multi-colored if they are wound from threads of different colors, but of the same thickness. There is no need to connect the ends of the threads somehow; the twist will be cut anyway.
What if you want the pompoms to be smooth? Also no problem: take a piece of padding polyester or fleece, crumple it into a ball, cover it with a suitable fabric and tie the tail with a thread. The fabric, by the way, can also be silk: padding polyester and fleece have antistatic properties and will remove electrical charges.
Where and how is plastic good?
Hobbyists sometimes make rugs from plastic film that are amazing in appearance and fine workmanship. But we still cannot recommend them for residential premises. In dry rooms, plastic is easily electrified, and, say, in a bathroom, water stagnates in its folds. What kind of living community will soon form there is best not to look under a microscope. Especially those familiar with the principles of microbiology.
Plastic film mats can find other uses, e.g. as door and/or street at the dacha. A properly made plastic bag mat will remove dirt from shoes, although not as well as special cleaning mats. Cleaning it comes down to drying and shaking it out, the material costs pennies, and you can make a new rug like this in 10-30 minutes as follows:
- The package is rolled into a flat roll and tied with tape; You can also use a rope made of film, pos. 1 per rice;
- The tourniquet is pulled tightly, the edges of the bag are cut off, pos. 2;
- The workpiece is fluffed by hand, pos. 3;
- Several blanks are tied into something like a pompom, pos. 4;
- If the diameter of the pompom (20-35 cm depending on the size of the bags) is too small, several of them are tied together or tied to a construction net.
Preparation of flaps
Depending on the chosen technique for making the rug, scraps of fabric of different sizes and shapes may be required. It is better to select and cut the required amount in advance so as not to be distracted while working.
Preparing long strips of fabric for knitting or weaving a product can cause some difficulties: sewing them together is a long and tedious job. And if you tie them in knots, the rug will turn out rough and sloppy. But there are ways to avoid this.
Cutting continuous tape
This method is used when preparing fabric strips from old clothes: T-shirts, turtlenecks, T-shirts and even tights.
Step 1.
We cut off the rough bottom seam, the cuff of the sleeve or the toe part of the tights. For a T-shirt or turtleneck, cut off the top part right below the armholes.
Trimming seams
Step 2.
Place the product on a flat surface with the side seam facing you and cut it into strips of the required width, without cutting a couple of centimeters to the opposite seam.
Cutting strips
Step 3.
Thus, we cut the entire workpiece into fringe.
Workpiece cutting
Step 4.
We straighten the workpiece so that we can see the entire uncut part, and cut it not in a straight line, but at an angle, directing the scissors from one slot to the adjacent one on the other side of the product.
Cutting fabric
As a result, we get a closed ring, which to obtain a tape you just need to cut across one of the seams.
Blank for making a rug
Blanks can be wound into balls
Connection without node
If the length of the tape is not enough or you need to connect many short pieces with each other, the simple technique shown below will help you do this.
| Image | Description |
Step 1 | We cut small holes at the ends of adjacent strips that need to be connected. |
Step 2 | Place the strips on top of each other, aligning the slots. |
Step 3 | Pass the second end of the top strip through the slot from below and pull the entire strip through it. |
Step 4 | Tighten the connection. If necessary, repeat these steps to further lengthen the tape. |
Advice. If scraps of fabrics of different thicknesses and densities are used, then thinner ones should be cut into strips of greater width to even out the thickness of the weaving.
RUG FOR HOME
Patchwork - sewing from scraps. A favorite sewing technique for many that does not require any special sewing skills. It is enough to have a sense of taste and the ability to select and combine different colors and patterns of fabrics.
This type of home rug has many uses: for your favorite cat or dog, a rug for kitchen stools or chairs, on a sofa or chair, on the floor of a toilet, bathroom, hallway or near the bed. Everything is your choice! For example, I sewed a round rug for a kitchen stool. In general, they can be made into oval and rectangular shapes according to your taste and desire. Those who don’t really like to read can immediately go to watch the video and see the whole sewing process with their own eyes:
To make it you will need small scraps, remnants of any types and colors of fabrics, which are often left over after sewing. I don't recommend throwing them away, because they can always be used in patchwork. You can cut old, worn things into pieces. I recommend choosing the brightest colors. This rug can be sewn either plain or colored. “Lay out” the drawing according to your taste.
Before starting, I advise you to prepare small squares of different colors. I use different types of fabrics: calico, chintz, polycotton, melange, crepe-satin, knitwear, linen, raincoat fabric, etc. You can take any types of fabrics of different thicknesses, but I advise you not to use fabrics that are too thick and too dense. The rug will turn out to be quite thick due to the folding of the scraps, and a household sewing machine may not be able to sew a layer that is too thick.
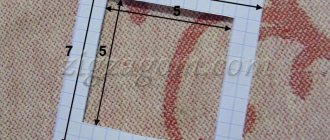
For the center of the rug, I cut calico measuring 5x5 cm. In the center you need to lay it very thickly, so you need to take a thin fabric. Also cut out a small circle with a diameter of about 15 cm. This will serve as a basis to start with. In the middle of it you need to start tweaking. We fold the shreds diagonally. In the photo, the white squares and examples of their folding are best used to make the center of the rug. Sew starting from the center and in a spiral, expanding the mat. Make the stitch in such a way that the cut edges of the squares are to the right. Subsequently, they will be closed by the next row.
When the circle is filled, you can cut the squares a little larger - 6 x 6 cm. To make the back of the rug look more beautiful, you can make rectangles - 6 x 7 cm. You can see an example of how to fold rectangles in the photo made from blue fabric. The larger the size of the mat, the larger the pieces can be customized. I recommend finishing the rug with the thinnest fabrics. So that the edge of the rug is thinner and easier to handle with a roller.
I think that no one will have any difficulties with cutting the squares, since for this rug it is not necessary to make them perfect and even. When sewing, you should try to make rows as close as possible so that all the cut edges are sewn up with the next row, to the desired size of the rug.
If you are satisfied with the back side of the rug, then you can leave it that way. The stitches are made densely and even when washed, the threads will not spill out of the rug. And I also suggest making the reverse side beautiful. To do this, you need to take any fabric (preferably not thick and not very dense) that fits in size. Place the rug on it and sew it along the last stitching line. If the rug is large, you can make several circular stitches.
Trim off excess edges and finish with a roller. For the roll, in this case, I recommend taking stretchy fabrics, for example: fleece or knitted fabric. This is so that the steering wheel fits better. For those who don’t know how to sew a rulik, read my article on processing the edge with a rulik (braid stitch). The fabric (if it stretches well) for the roll can be cut along the transverse thread of the fabric 5 cm wide.
You can experiment and sew such a rug in different ways. For example, cut into larger squares. Inserting a strip of fabric between the rows of squares can make stitching easier or faster. In the bottom photo I stitched a sample stitch with an insert. An additional strip of fabric can be made of different widths. In this case, the rug will be square or rectangular in shape. This is especially good for those whose sewing machine does not sew thick layers well or you are planning a large rug. In this case, squares and stripes must be placed directly onto the base fabric for the rug. And to make it more convenient to sew a large size, also add the base fabric as you sew in wide strips of 30 - 50 cm.
That's all! Good luck!
Rug for a children's room
Circles of the same size are cut out from bright scraps.
Synthetic winterizer is used as a filler. The resulting parts must be sewn and then turned out. Note!
How to properly make a birdhouse with your own hands from scrap materials: we create an original birdhouse according to sketches
How to make candles with your own hands: instructions for making wax, gel, scented, homemade decorative candles with a wick
What you can make from foamiran with your own hands: we create flowers, Christmas tree decorations, snowflakes, three-dimensional paintings (photo + video)
A square is drawn on the round element. All parts of the product will be sewn along these lines, only the upward-curved “tabs” will remain. At the final stage they are sewn to the rug.
Unusual carpets. Photo
A carpet in the shape of a fried egg, created by Italian designer Valentina Audrito, was presented at a Milan interior decoration exhibition. Visitors to the exhibition took great pleasure in lying on the squirrels, resting their heads on the yolk.
And the German creatives from the Flachbild studio came up with carpets in the form of a piece (a piece with a diameter of 1 to 5 meters) of different types of sausage: from amateur to salami. The carpets are made from pure wool.
Designers use a variety of materials to realize their ideas.
Felt and felt are especially valued for their practicality.
Norwegian designer Ksenia Mavafagh imagined a carpet in the shape of stonework. These pebbles are made from felted felt.
You can make bright, multi-colored rugs from functional felt by connecting the parts with a zipper. And it’s convenient to wash this one in parts.
You can also make a carpet in the shape of a pack of colored pencils.
There are even leather carpets. Here, for example, is a design idea from an Italian company. All leather elements of this carpet are hand-joined into a single whole.
Rachel Denny from the USA decided to use ordinary women's gloves for an unusual carpet.
And this is the fantasy of ordinary people: a carpet made of socks. I hope it's new.
Unusual carpets and rugs can be made from old jeans. In the photo shown, the carpet is made of only jeans labels. They are machine sewn onto denim or sewn together by hand.
Twine has become a particularly popular material for carpets and rugs. And not just rugs. I crocheted a box from twine. It turned out interesting.
There is no need to knit a carpet from twine. The cord is twisted in parts into large and small rings or other shapes and glued to a solid base in a certain order.
But that is not all! Even tree cuttings can serve as material for carpets.
And the Dutch designer Yvette Laduc came up with a carpet that imitates the cut of a tree tree. This unusual carpet is made of soft fleecy material and fits perfectly into a modern interior.
Here are more ideas for wool carpets:
- in the shape of the moon, created by designer Martin Mostbeck for the 40th anniversary of the astronaut landing on the moon,
- and a rectangular carpet with a perforated effect.
By the way, I came up with the idea of making such an interesting, unusual rug with my own hands: crocheting it! One part is made with single crochets, and the second part is made of openwork motifs. We have a selection of square motif patterns.
If you remember, I recently talked about how to make an original wall panel by cross-stitching on a perforated panel with large stitches. Using the same embroidery technique you can make a beautiful carpet for the floor.
Rugs of unusual shape
In addition to the usual round and rectangular ones, you can make rugs of unusual shapes, absolutely any, like these blots.
Crochet in short rows is used here. For example, we knit several rounds, then some in reverse rows, again in the round, and so on. The shape of the rug can be completely unexpected.
You can also crochet unusual rugs in the shape of a butterfly or an Irish paisley cucumber, or anything at all, using patterns and thick yarn.
Owl or foot shaped rugs are a great idea for unusual bath rugs.
I am attaching the diagrams.
Patchwork - a classic of patchwork creativity
Making a patchwork rug requires a more careful selection of materials, and if a complex item is conceived, then considerable skill. This is the same technique used to make the famous “granny” quilts.
Since the product is intended for the floor, the fabric chosen is dense: denim, gabardine, drape or tweed from an old coat. You will need a lining made of solid fabric, also strong. If you have worn-out carpet, it will make an excellent base.
The design of the item needs to be thought out in advance, a combination of colors should be carefully selected, preferably bright ones, and one of the many designs developed in this area should be taken as a model. It is useful to familiarize yourself with what has been created by experienced craftsmen.
Many of the author's mosaic items are complex, exquisite, practically a master class. You will have to sew both by hand and by machine, because the amount of work is large.
To assemble a kind of mosaic, which is a rug made from scraps of fabric using the patchwork technique, first take into account all types of elements that make up the selected ornament. A paper template is made for each of them. To make and work with them, use:
- scissors;
- paper or cardboard;
- pencils;
- fabric chalk;
- pins.
Using templates, cut out the required number of parts, leaving seam allowances. Referring to the image of the finished product or your own conceived pattern, the ornament is laid out, sewn by hand, then by machine, ironing each seam.
Patchwork
Although the name of this method appeared relatively recently, blankets sewn using this technology can be seen in any village house.
To get a beautiful carpet, you must follow the instructions exactly:
- Fabric preparation. It is advisable to take bright and beautiful pieces.
- If the fabric is old, then it needs to be ironed thoroughly.
- To ensure that the finished product does not deteriorate ahead of time, you should prepare the base and padding (batting or construction foam).
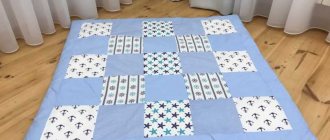
- Cut the prepared fabric into pieces of the same size, taking into account allowances.
- The flaps are laid out according to a pre-selected pattern. For the first time, it is better to choose a simple pattern.
- To give the finished product softness and volume, a spacer is placed between the base and the top fabric.
Patchwork
Round foot mat made with a hoop
Old knitted T-shirts are actively used by craftswomen for a variety of crafts; in particular, the idea of making rugs out of them is very popular.
Necessary materials:
- 3-4 T-shirts (other things, ribbons or ropes)
- children's gymnastic hoop or hula hoop for adults scissors
It is recommended to take items made of fabric with a minimal admixture of elastane, tape or just rope.
The size of the mat depends on the size of the chosen hoop; you can take either your daughter’s gymnastics hoop or a large weight loss hoop. The weaving technology is very simple; even a child can do it by making a round rug on a hoop for their room.
Cut T-shirts or other old outerwear into strips of equal width, from one side seam to the other, to form rings. Place each strip on the hoop: first a vertical line, then a horizontal one, and then divide each sector into equal parts with a strip of a T-shirt.
Important! The strips of fabric should not be very stretched, otherwise the finished rug will wrinkle and will not hold its shape. Ideally, the T-shirt strip should fit almost loosely over the hoop, with minimal stretching of the fabric.
It's likely that if the diameter of your hoop is larger than the t-shirt strip, it's too tight or you're using ropes at all. In this case, simply wrap the hoop in fabric or rope and tie a knot.
Try to have all the base lines intersect at the center point. We start weaving the rug from the center. Take a strip of T-shirt, fasten it with a loop to one of the warp lines and pass it under and over the longitudinal lines.
When the strip ends, tie another T-shirt ring to it, hiding the knot under the previous row. Continue weaving in the same way, alternating between pulling the strip under and over the longitudinal lines. Try to keep each circle pressed tightly against the previous one, avoiding large spaces or holes between them. Once you have finished weaving, cut off the ends of the loops with scissors and tie them with a knot.
