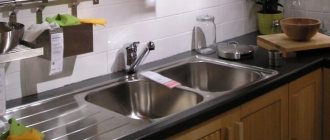
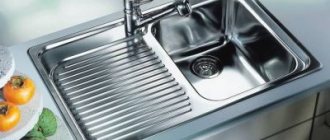
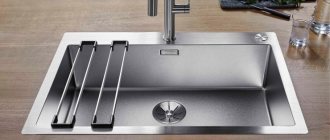
Kitchen sinks differ in material, size, shape, design and installation method. Overlay models are considered outdated against the background of a variety of fashionable mortise products. However, they have a number of advantages for self-installation and are still used in summer cottages and temporary apartments.
In this article, we will look at how to install an overhead sink with your own hands, what needs to be prepared for this, and what installation methods are best to use. To make it easier for you to understand the main stages of installation, we have selected visual photos and useful video recommendations for installation.
Distinctive features of overhead models
If we do not take into account sinks that are a thing of the past, which are attached directly to the wall on special brackets and do not require a cabinet or countertop as a support, all products for washing kitchen utensils can be divided into 2 categories: overhead and mortise.
The main difference between the two types is the installation method. The first ones, chosen exactly to size, are “put on” the top of the cabinet, and to install the second ones, you need to cut a hole in the tabletop.
From here follow the distinctive features expressed in design, material, and shape.
Products that do not require additional processing of the base are preferable for self-installation, and they are on average cheaper.
However, design features rarely allow the use of “overlays” in modern kitchen sets with a single countertop and built-in appliances. Overhead models are also quite often chosen for installation in the bathroom, but these plumbing fixtures have a more attractive design, material and size than kitchen fixtures.
But there are similarities between the two types of sinks. For example, installation of a tap and siphon, as well as connection to water supply and sewerage, is carried out using the same technology.
Methods for attaching kitchen sinks
There are several ways to install a kitchen sink:
Reinforce the sink on top of the cabinet by replacing the countertop (overlay installation). This is the easiest thing to do, so if you plan to install a purchased bowl yourself, it is best to prefer this option. It is often chosen for stainless steel products due to their low weight. But there are also disadvantages. The main one is the gaps between the sink and the lids of other fittings. This is unhygienic: dirt will clog in the cracks and water will leak. Cut the bowl directly into the countertop
For flush mounting, it is important to correctly cut the hole in the cover. This is not very difficult to do thanks to mounting templates, but the cost of error is high
Yes, and changing the sink will be more difficult, since you will have to either select the same shape or cut a new hole. But this type of fastening is more hygienic. Outwardly it looks more natural and beautiful. Combine the design with the work surface. Artificial stone looks most advantageous with this installation option. The disadvantage is that it is difficult to install. Correctly assembling such a structure can only be done if you have the appropriate knowledge, so professional installers are usually invited. And not every model is suitable for such an installation. Mount the bowl under the countertop. This installation option looks very decorative and modern. But it is only suitable for stone or hardwood countertops.
Having decided on the mounting method, you can move on.
Detailed installation instructions
Let’s look at how you can independently install an overhead sink from “A” to “Z” without resorting to the services of hired installers and furniture manufacturing companies.
The instructions will be useful to anyone who is used to doing all the simple housework with their own hands, and the sink itself will find a place in a country house or in an apartment kitchen as a temporary replacement.
Step #1 - selection of materials and tools
To assemble more quickly, the cabinet can be purchased ready-made, but only if it is sized to fit the sink.
The second solution is to order from a furniture company, but this option is only advisable if the cost of the order is low.
To put together a cabinet and attach a sink to it, you will need the following materials:
- thin boards, sheets of chipboard or MDF plywood;
- steel sink;
- kitchen faucet with hoses;
- fastenings for washing (screws, corners);
- sealant or polyurethane foam;
- hinges and handle for the door;
- siphon with sewer fittings;
- antiseptic impregnation;
- legs or rollers.
To attach the sink to the cabinet, you only need a screwdriver or a screwdriver to tighten the screws, but to cut out the walls, base and door you will need a hacksaw, circular saw or jigsaw.
To clean the ends, you will need sandpaper, and to drill holes for self-tapping screws, a drill with a thin drill bit. We do not recommend using nails: they are more difficult to hammer into particle board panels, and besides, the structure fastened with nails becomes inseparable.
It is better to purchase all materials in advance so as not to waste time searching for the necessary parts during the assembly process. The listed tools are usually found in the home workshops of amateur craftsmen, especially if they are in charge of a dacha farm.
Step #2 - making a kitchen cabinet
The sink cabinet has a design that differs from conventional kitchen cabinets. It does not have two elements: a back wall - for free connection to communications, as well as a countertop, since it is completely replaced by an overlay sink.
Sheets of chipboard, thick plywood or moisture-resistant plasterboard - sometimes it’s easier to take some materials left over after repairs - we take in such a volume that there is enough material for two full walls, a bottom and parts for the connecting “belt”.
- first we cut out the large elements - two identical side walls and the base, then - the horizontal connecting parts;
- We carefully cut and, if necessary, clean and process the edges;
- if we use planed boards or plywood, before assembly we cover all elements with antiseptic impregnation, varnish or paint;
- we connect the elements according to the drawing using self-tapping screws and metal corners;
- Attach legs or rollers to the bottom side of the base.
If possible, we adjust the legs. If desired, the space under the cabinet can be covered with a plank. Lastly, we hang the door. This is best done after installing the sink.
Making a kitchen sink cabinet
There are 2 options for this method of installing a stainless steel sink:
- When buying a cabinet or a complete set of kitchen furniture. In this case, the section that will be fixed in the place of the room where the sink needs to be installed must be open at the top. That is, it is a cabinet with a frame, side walls, front doors and a bottom.
- The second option is to make your own cabinet.
Naturally, for the second option to resolve the issue you will need to acquire:
- Lumber - this will be timber, the cross-section of which should be about 10x20 mm.
- MDF, chipboard, fiberboard for creating sides, bottom and doors.
- Metal corners.
- Screws for connecting elements.
- Additionally, glue may be needed.
To make your own cabinet you will need chipboard and other materials and tools.
After this, a drawing is selected in accordance with the dimensions of the stainless steel sink that is planned for purchase.
At this point, it is important to consider the following parameters:
- The sink can be simple, that is, it can consist solely of the bowl itself. Most often, the dimensions in this case along the upper plane of the cabinet will be 600x500 mm. And the height is standard 850 mm. Although there are other options for the height of the working surface.
- The second option is a sink that has either a double compartment or a drainer that is located either to the right or left of the main sink. In this case, the dimensions on the upper plane are 600x800 mm.
- The depth of the sink most often occupies 150 mm.
The drawing must take into account certain parameters.
When making a cabinet yourself, first:
- Select a suitable drawing.
- Then the amount of materials needed is calculated. They buy them.
- The cut is made in accordance with the dimensions in the drawing.
- The frame is made of timber.
- Then, using screws, the sides and bottom, as well as the back wall, are attached to the frame.
- Using metal corners, individual elements are fixed relative to each other. This eliminates distortion of parts during operation and exposure of furniture to loads.
- After this, the doors are sawed and trimmed at the end with a special edge in order to fix the open edge.
- Then they are hung on hinges that are attached to the sides.
- It is important to take into account that along the upper plane, in the place where the stainless steel sink will be installed, there should be strips around the entire perimeter. It is on them that the shell is hung, as it were. They serve as a support for her.
Conclusions and useful video on the topic
Video instructions for installation on a kitchen sink:
An overhead sink is not the best solution for improving the kitchen. But when a suitable cabinet is idle at the dacha and you need to quickly create comfortable living conditions, it is considered one of the most successful options. What is also attractive is that installation work does not require special skills, time and effort - everything can be done with your own hands.
Would you like to supplement the step-by-step instructions outlined above with useful tips or point out nuances that we did not mention? Please write your comments and recommendations under this article.
Or maybe you want to share your personal experience of installing a sink in your dacha? Tell us how difficult this work was for you and how much time it took you to assemble the structure.
Having purchased kitchen furniture and plumbing fixtures, many turn to professionals for help. But it often happens that there is no one to expect help from and you have to do everything yourself.
You need to learn in advance how to install an overhead sink on a cabinet in the kitchen in order to be prepared for possible difficulties and nuances.
Two popular installation types of kitchen sinks
A wide range of kitchen equipment users are most familiar with two types of washing bowls - overhead and mortise.
Many overhead sinks can be classified as a universal and inexpensive segment, however, today they are becoming less and less common. They are distinguished by simple designs, mainly made of thin stainless steel. Their installation usually does not cause difficulties even for home craftsmen. Often installation is carried out on top of a separate cabinet, thus replacing the tabletop with it. The popularity of overhead bowls is also supported by the fact that they:
- have a limited number of models;
- when installed, they rise above the level of the working surface to the height of the flange, which does not look entirely aesthetically pleasing;
- have a design for which it is difficult to achieve a tight seal of the gap under the edging flange, where moisture then penetrates and dirt collects.
In the segment of overhead sinks, special models have begun to be found, for example, made of stone. However, they cost a lot, so they are not widespread.
Built-in sink - its name speaks for itself. Under it, an opening is cut out in the common tabletop (working surface), where the sanitary bowl is mounted. The edges of the opening are waterproofed, and the mating gap is carefully sealed. Due to the tight fit, as well as the slight elevation of the sink above the countertop, moisture and dirt do not accumulate. Such modern products have a significant selection of models that are precisely matched to the overall style of the kitchen set. For example, a mortise sink, in addition to the standard rectangular one, may have a round, oval, angular or special complex shape, manufactured to special order.
Installation rules: all the nuances of installation
So, we purchased convenient plumbing fixtures that fully meet the owners’ needs in practicality and appearance. By the way, stainless steel sinks are popular for kitchens today. Firstly, they are affordable, light weight, and durable to use.
The universal color “metallic” can be combined with a variety of color schemes in the room.
Installation is quite simple, there are only two stages:
- Assembling the sink cabinet;
- Installation of an overhead stainless steel sink on a cabinet.
The sink is an indispensable attribute of the kitchen. You can easily install it yourself - you do not need to have special knowledge and skills.
Types of overhead sinks
The advantage of this material is that it can be successfully combined with almost any kitchen design. Overhead sinks are one of the most popular sink options. Their advantages are obvious:
- low cost;
- ease of installation of the sink.
The disadvantages include:
- relatively small thickness;
- gap between the cabinet.
Overhead models are placed on the cabinet and secured. This is extremely easy to do, especially if the height of the structures is standard.
Important. Such sinks are best suited to sets of separate modules, where the sink is not part of a single work area covered by a common countertop. Installing an overhead sink is preferable in corner kitchens
where the headset is located in an L-shape, and the height of the modules is standard
Installing an overhead sink is preferable in corner kitchens. where the headset is located in an L-shape, and the height of the modules is standard.
The kitchen is a place where the family spends a lot of time together, where neighbors, relatives, and friends drop in for a cup of tea. Therefore, every detail of the interior is so important, creating coziness and comfort. How to install a countertop sink in the kitchen? What type of equipment to choose and install so that it lasts for a long time.
Both elements (cabinet and sink) are important. Place and location in the kitchen depends on:. Place and location in the kitchen depends on:
Place and location in the kitchen depends on:
- planning;
- preferences of the apartment owners;
- location of other types of furniture (in the same row with them, in a straight, corner version, or separately).
The design of the countertop is the basis for the sink. Its internal area is used to maximum benefit. It is not designed for a large number of shelves; its main purpose is to accommodate sink communications (corrugated hose, siphon) and trash cans. You can place a small shelf for detergents in it.
The surface-mounted sink is less popular today than the mortise sink.
There are certain rules during installation:
- To prevent excess moisture and deformation of the material, open areas are treated with: special mastic; silicone sealant.
- To prevent the structure from deteriorating due to leakage, it is necessary to securely tighten all the nuts using silicone sealant during installation: a corrugated pipe for water drainage; siphon; mixer
- Installed near the wall, since there are pipes in it: for drainage; cold and hot water supply; from the washing machine. water from other equipment (filter that purifies water).
The cabinet has 3 walls, so it is not rigid enough. To do this, create stiffening ribs (“kerchiefs”, wooden or metal corners, fixed in the four corners of the cabinet from the inside). This issue can be resolved by bolting the walls to other furniture or screwing them to the wall.
The cabinets are made in a variety of colors, which allows you to choose them to suit any interior style.
Kitchen overhead models are available in a wide range of types, sizes and shapes. Which model to choose for the kitchen? To select it you need to rely on:
- dimensions;
- layout;
- material of manufacture;
- prices;
- own preferences.
One of the popular types is a stainless steel sink. It is different:
- popularity;
- simplicity and elegance;
- ease of installation;
- durability;
- strength.
Stainless steel kitchen sink
Ceramic
Ceramic is popular and in demand
The product has the following advantages:
- durable;
- stainless;
- durable.
A stone sink will be appropriate in any interior style.
Furniture assembly
The first stage requires preparing the furniture itself so that the plumbing can be installed. Usually delivered to the customer in disassembled form. If you don’t know how to assemble a sink cabinet, the instructions included with the furniture will help.
Looks like a diagram.
The standard set is:
- 2 side walls;
- 2 doors (or one);
- Bottom;
- 3 frames for rigidity;
- Fittings, corners, screws.
You need to have a screwdriver on hand to carry out assembly, or a standard furniture hexagon.
- The side walls and front frames are connected with screws and corners. One of the frames is attached from above, and the second from below.
A sink cabinet is the most popular solution for a small kitchen.
If you plan to have a countertop sink, you won’t need a countertop – you just need to choose a sink of the appropriate size.
You can also install simple internal shelves in your homemade cabinet.
How to install a sink
This stage of the work is relatively easy. The metal sink is inserted into the body from above, but it must be secured, otherwise the required rigidity will not be achieved. If this is not done, the cabinet will sooner or later fall apart (see video).
There are two methods for attaching a metal sink to the body.
The same silicone is used, and two problems are immediately solved - sealing the upper part of the body at the junction with the sink, giving rigidity to the entire structure. To do this, silicone is applied along the entire perimeter to the upper end of the case. Then a sink is put on top. The housing assembled in this way can be immediately installed, connected to the drain and used. Self-tapping screws are used to attach the sink - this option is more reliable
Please note: in either of both methods, silicone is applied to the upper end of the cabinet - primarily for sealing, and not just to secure it. Below are the dimensions of the sink for which the body was built
It will install into the structure without any problems. There are options for the location of the sink both on the right and on the left, when viewed from the facade
Below are the dimensions of the sink for which the body was built. It will install into the structure without any problems. There are options for the location of the sink both on the right and on the left, when viewed from the facade.
As a result, the finished piece of furniture will look something like this:
Installing a sink: what is needed for this?
How to attach a stainless steel sink to a cabinet so that it holds well and the installation itself does not take too long? To do this, you need to have accessories and tools, thanks to which installing the sink on the cabinet will not be much of a problem.
You can attach a sink with sealant without additional equipment if it is light. If the overhead sink is heavy, then installing it on the sealant will lead to the collapse of the structure. In this case, it must be fastened with self-tapping screws.
The classic tools and accessories used for such purposes are:
- Drill, screwdriver;
- Screwdrivers;
- Ruler;
- Pliers;
- Drills (for wood);
- Self-tapping screws;
- Sealant (we will pay special attention to it later);
- Masking tape;
- L-shaped corner.
The above items are also suitable for installing a sink on a countertop.
But experienced craftsmen only need a sealant and corners.
How to attach it correctly with your own hands
In order for the sink installation process to go quickly and efficiently, you need to choose the right sealant. This will allow you to reliably and permanently protect your sink from prolonged exposure to moisture. In addition, to successfully install an overhead sink, you will need the following tools:
- electric drill;
- Screwdriver Set;
- pliers;
- silicone sealant;
- ruler;
- wood drills;
- self-tapping screws;
- masking tape;
- L-shaped fastener.
The video shows how to install a stainless steel sink on a cabinet:
Secure to the tabletop
For these purposes, it is important to adhere to the following action plan
- It is necessary to draw the contours of the future sink on the countertop. For this spruce, a regular pencil will do. Be sure to take care of the indentations from the front and rear edges of at least 5 cm. After this, you can take measurements where the bowl will be concentrated. Using these measurements, it is worth drawing the outline of the hole for the sink.
- the line along which the cut will take place should extend 1 cm outward from the sides of the bowl. Make a hole at one point of the contour. If the shape of the bowl is in the form of a rectangle, then the hole should be made in the corners of the designated contour.
- Attach masking tape to the outside of the outlines. Thanks to it, it is possible to protect the tabletop from damage that a jigsaw can cause to it. In the process of cutting the opening, it is necessary to screw self-tapping screws into the cut to a small depth. Thus, it is possible to protect the inside from falling. The element to be removed should also be secured from below with support.
- Treat the ends of the table top along the saw cut using silicone sealant. This way you will protect your products from moisture. Application of sealant is also possible along the drawn perimeter.
- Insert the sink and installed mixer and siphon into the prepared opening. Secure it to the tabletop using clamps. These fasteners are included in the plumbing fixture complex. All that remains for you is to connect the mixer to the water supply and drain the product through the sewer siphon.
Here's a video of attaching the sink to the countertop from below:
Mounting on a kitchen cabinet
In this case, the DIY installation process is carried out as follows:
- Prepare the place where the bowl will be installed. It is worth turning it upside down and tracing the outline with a pencil. You can cut the hole using a jigsaw.
- To prevent the embedded part from falling prematurely, it must be secured with 2-3 self-tapping screws.
- After this, try on the sink to the resulting hole. If it is placed normally, you can attach it to a set, equip it with a siphon or mixer.
- Attach the faucet to the bottom using nuts and washers. Screw flexible hoses into it.
- The siphon is assembled using union nuts. When the sink is equipped with an overflow, it is also worth connecting it to the siphon. Although it is not uncommon to find ready-made siphons for sinks with overflow. The finished sink is installed in a prepared place, and then connected to the water supply and sewerage system. Seal all existing spaces with sealant.
The video shows how to attach a countertop sink to a cabinet:
Installation
We lay out the tools and accessories in advance so that they are at hand. It is also advisable to decide on the mixer and siphon so that everything is installed at once, otherwise it will be difficult to install later. How to attach a stainless steel sink to a cabinet? This is not difficult if you have already completed the assembly of the frame itself.
- L-shaped fasteners are installed, either included in the kit or purchased separately.
For fastenings, it is better to purchase L-shaped plates with oblique slots at a fastening store. You will need 4-5 plates.
During the assembly process, make sure that all holes are at the same level.
Before installing the overhead sink itself on the base or cabinet and securing it, you need to assemble it completely - secure the siphon and mixer in their places, install gaskets.
This product provides additional fastening of the sink to the cabinet in the kitchen.
The fasteners are placed on self-tapping screws and moved along the slot. This presses the sink against the cabinet.
Take care of the accuracy of the work and reliability.
If water leaks out, the system is assembled incorrectly.
The sink is secured to the cabinet with fasteners and a sealant. This is the most reliable method, quite durable.
So the question of how to install a stainless steel sink on a cabinet has been resolved. If the work is done correctly, it can stand for a long time.
Many people attach the sink to the countertop. There are options when, when ordering kitchen furniture, the need for a hole in the countertop for installing plumbing is specified. Then there will be little work involved in installing the sink.
If there is no specially allocated space on the countertop, then you will have to do everything yourself.
- Mark the contours on the surface with a pencil. Take into account the margins from the edges (5 cm). Take measurements for the bowl.
Remember that the gap from the edge of the countertop to the side of the sink must exceed 50 mm. If this distance is less than 50 cm, then the sink needs to be deepened.
To make a hole in the tabletop you will need an electric jigsaw.
To avoid chipping on the front surface, choose the opposite direction of the tooth.
Stepping back a couple of millimeters from the edge of the hole, we apply the silicone in a thickness just above the side of the sink.
The sink needs to be inserted into the hole and the edges should be pressed firmly so that the silicone strands take the shape of the sink and left for a few minutes.
So, having looked at how to attach a stainless steel sink to a cabinet with fasteners and to a countertop, you will notice that doing this is not as difficult as it seems.
The most difficult thing is to make the hole correctly. If it turns out to be larger than expected, the paws will not be able to hold the sink.
Fasteners for mortise sinks
Sink fasteners: purpose, features, installation
Fasteners for a mortise sink are a necessary part for fixing the sink bowl to the countertop when installing it. This type of fastening fittings greatly simplifies the process of installation and subsequent dismantling of kitchen sinks, and we would like to consider it in more detail.
Kitchen sink mount.
Mounts for sinks Purpose and features
Fasteners for surface-mounted sinks with screw clamps.
Mortise and surface-mounted sinks have practically driven out all other models of kitchen sinks from the market due to their beauty, practicality and ease of use. It is this type of plumbing fixtures that is best suited for installation in a modern countertop, which involves maximum integration of all fixtures into the overall interior ensemble of the room.
One of the features of such an installation is that there should not even be traces of fastening fittings, gaps, cracks and other technological details on the surface and in visible areas. To realize this requirement, you need a hidden and reliable fastener that can not only imperceptibly, but also with sufficient force, pull the sink bowl to the surface of the countertop.
The photo shows a common type of sink fastener.
Of course, plumbing manufacturers took care of such a device, because the “do it yourself” and “finish with a file” options have long been out of date, and modern products should be equipped to the maximum.
Let's consider the design of the fastening element:
- The product consists of two parts and a clamping screw;
- The lower part is attached to the sink apron in special grooves or holes;
- The upper part rests against the tabletop, cutting into it with special teeth;
- The parts are connected to each other using a screw, by tightening which we can adjust the distance between them. If the lower part is fixed on the sink, and the upper part rests on the tabletop, then by reducing the distance we will press the sink against the table;
- The parts have a hinge joint, and the upper part can bend relative to the lower one. During installation work, this feature allows you to first bend the teeth inward, insert the sink into the hole in the countertop, and then bend them again and rest them against the board.
Sink fastening unit.
The product may consist entirely of metal (tin, stainless steel, galvanized) or have plastic inclusions. All-metal clamps are considered more reliable.
The teeth can be bent in both directions.
Important! Even in the case of an all-metal clamp body, the screw should only be tightened by hand, since the threads on the washer are weak and can easily be torn off with a screwdriver.
Installation without clamp
You can use glue or sealant as a fixative.
There are situations when fasteners are lost or do not match the thickness of the tabletop. In this case, you can do without them, although this is extremely undesirable.
There may be options here:
- Use glue or sealant for fastening ;
- Make the fastening yourself from parts for installing gypsum boards .
- On the body of the sink we find special grooves or ears for attaching clamps;
- We insert the corresponding parts of the clamps into the grooves;
- We bend the upper part of the mount closer to the bowl, insert the sink into the countertop;
- Using a screwdriver, tighten all the screws sequentially. We try to press the bowl evenly and gradually.
- Pencil, tape measure, ruler, construction angle, Phillips screwdriver, sharp knife.
- Jigsaw with Bosch T101B or T101BR file.
- Electric drill with a drill (for metal) with a diameter of 10 mm.
- Several 4×30 self-tapping screws.
- Silicone colorless sealant (universal or plumbing).
- How to attach an overhead sink How to attach an overhead sink You can attach an overhead sink without a cabinet directly to the wall. For…
- Inexpensive kitchen sinks: how to choose the right one Today the market offers customers a wide range of inexpensive and high-quality kitchen sinks. This allows many...
- How to install an overhead sink How to choose and install an overhead sink A sink is a very important attribute in the kitchen. Exists…
- Overhead sinks for the kitchen: specifics, installation and dimensions Overhead sinks are the most popular design of kitchen sinks. Affordability of price and ease of installation form a high…
Sealant or glue is applied to the contact area between the edge and the board.
Since the sinks are placed over the hole and rest on the countertop from above, all operational loads and forces that arise tend to press the bowl even more tightly. The only issue is the gap between the sides and the board.
If we place the sink on glue (silicone sealant, epoxy resin, etc.) and press the bowl with a weight while it hardens, the resulting gap will be minimal and the fixation will be reliable.
Important! The main problem with glue is the impossibility of quickly and easily dismantling the sink if necessary when repairing or replacing the faucet or other structural parts.
Remote mount or suspension for gypsum boards.
You can take the remote fasteners for gypsum plasterboard profiles and cut it into two parts. We insert the antennae into the mount on the sink, and insert a self-tapping screw through one of the holes and tighten it to the countertop at an angle. This creates an attractive force, and the fastening is reliable and durable.
Important! A screw can only be screwed into a wooden tabletop. Composite, polymer and stone products are not suitable for this method; here it is possible to mount them with a dowel.
Scheme of under-table fixation of a stainless steel mortise sink to a granite countertop.
The price of fasteners is very low, so there is no point in reinventing the wheel in this case. It is much easier to buy suitable fasteners and save time and effort.
An enlarged product made of metal and plastic.
It is very easy to install the fastener on the sink body and use it to secure the bowl with your own hands.
The instructions will be short and clear:
We find mounting ears or grooves.
Insert the fastener into the groove.
We bend the part with the teeth inward.
Tighten the screws with a screwdriver.
Important! An indicator of sufficient clamping force will be the silicone squeezed out from under the side. Residues should be removed with a rubber spatula or rag.
The easiest way to securely fasten a kitchen sink is to use a special clamp. These clips are usually included with a drop-in sink. The video in this article will help you better understand this topic.
Fasteners for mortise sinks Cash payment
in any of our stores;
Cashless payments
after issuing an invoice (for legal entities); To pay for goods by bank transfer, legal entities must receive an invoice from the operator of the online store for payment in the name of this legal entity. The issued invoice reserves the goods in the warehouse for a period of no more than 5 days; after this period, if the money has not been received to the seller’s bank account, the availability of the goods in the warehouse is not guaranteed, and the invoice is subject to reissue. Delivery of goods is carried out only after receipt of money in the seller’s bank account. After receiving the prepayment, you will be notified by SMS message or call from the operator.
By bank card
in any of our stores; after delivery of the goods upon receipt;
in any of our 21 stores in St. Petersburg
Courier delivery
Delivery cost: from 450 Delivery by force within St. Petersburg and the Leningrad region is carried out within 3 working days from the moment the order is placed, unless another period is agreed upon and is carried out on a certain day at the following hours: 11:00-14:00, 14:00-18:00. The delivery day must be agreed upon with the operator when placing an order. Standard delivery is carried out to the customer's doorstep. The goods are lifted to the floor after the buyer has accepted the goods.
Delivery by transport company
Delivery cost: from 450 Delivery of goods to other regions is carried out in agreement with the managers of the online store at the rates of the partner transport company. You can find out information about delivery to a specific region by phone.
Accessories for sinks from Aqualink
(98 visitor(s) voted)
Today there is a wide variety of all kinds of mortise (built into the countertop) kitchen sinks, made of different materials, having different shapes and colors. The most popular, budget-friendly and durable type of kitchen sink can be considered stainless steel sinks. Let's look at how to install a stainless steel kitchen sink with your own hands, using simple household power tools. Absolutely any mortise sinks are installed using the same principle.
We will install the sink in a countertop made of chipboard, covered with plastic on top - the most common type of kitchen countertop. If it is necessary to embed a sink into a countertop made of another material (for example, artificial stone), you must follow the recommendations of the countertop manufacturers. There are also overhead sinks that are simply placed on top of the cabinet; such sinks are considered obsolete and are used extremely rarely; we will not consider them in this article.
To install a kitchen sink, we need:
Files Bosch T101B (top) and Bosch T101BR (bottom). They differ in the direction of the teeth: forward and reverse (reversible), respectively.
Accurate marking is the key to successful installation. To begin with, you need to decide on the axis of symmetry, that is, symmetrically to what the sink will be installed. Usually, the line of the center of the sink bowl (for a round one - the diameter) goes along the center of the cabinet above which the sink is installed. Other installation options are possible, depending on the specific case (kitchen set configuration). The distance from the front edge of the tabletop, as a rule, should not be less than 50 mm, from the rear - less than 25 mm. However, these figures cannot be considered universal and absolute; depending on the size of the sink and the features of the insert, the figures may be different. With a pencil we draw two perpendicular axes on the front surface of the tabletop, indicating the center of the bowl and mark the boundaries of the sink (left, right, top, bottom).
Indentations from the edges of the tabletop.
Place the sink on the front surface of the countertop with the bowl facing up and align the sink relative to the markings made. Carefully, without moving the sink from its place, outline the outer contour of the sink with a pencil. We remove the sink from the countertop.
Depending on the manufacturer, the sink kit may include metal or plastic fasteners. If possible, preference should be given to metal (all-metal) fasteners, as they are more reliable. Before installing the fasteners on the sink, they must be disassembled (by separating the parts mounted directly on the sink and on the countertop from each other). By snapping, parts of the fasteners are installed on the sink into the corresponding metal eyes so (that side) that the fasteners minimally protrude outwards (“look” into the sink).
Plastic (not all-metal) mounting of the sink in assembled form.
Part of the fastening installed on the sink.
We accurately measure the width of the sink side (the distance from the outer edge of the sink to the installed fasteners) taking into account the protrusions of the fasteners. As a rule, the width of the rim of a stainless steel sink ranges from 10 to 15 mm.
Sink side. Shown is a sink with a gray seal already attached. The sink is ready for outlining its contours on the countertop (marking).
Parallel to the outer contour of the sink previously drawn on the countertop, draw by hand (using a ruler to control accuracy) another contour - the cutting line - inside (closer to the center of the sink), indented by the width of the side of the sink minus 1-2 mm. The sink should fit freely into the future hole, allowing up to 2 mm of play on each side.
Marking the cutting line.
Cutting a mounting hole in the countertop.
In one (for a round sink) or several places (in the corners of the markings, for a rectangular sink) of the countertop, we make a through hole with a 10 mm drill so that the future hole is close to the cutting line, but does not touch it (it is closer to the center of the sink). It is necessary to drill from the front surface of the tabletop! We get a hole(s) for the file to enter.
Using a jigsaw, exactly along the cutting line, we make a closed cut. To keep the inside of the tabletop in place (not fall down), you need to screw screws into the gap from time to time, which will act as temporary fasteners. We insert the sink into the cutout, check that the cutout is made correctly: the sink should fit freely with a slight play; if necessary, additionally perform trimming with a jigsaw.
The cutout for the sink is made, the inside of the countertop is held on with self-tapping screws. Below you can see the hole from the drill.
Close-up of the hole.
The cutout for the sink is made, the inside of the countertop is removed. A slight curvilinearity of the cut line does not matter.
Small chips of plastic are acceptable. To avoid chipping at all, you must use a T101BR file with reverse teeth.
After sawing is completed and the unnecessary (inner) part of the tabletop is removed, it is necessary to clean the cut from dust and carefully cover it with silicone sealant (using a small rubber spatula or just your finger), this will prevent the tabletop from swelling when water gets in. You also need to lubricate the plastic chips that formed during sawing. There is no need to get too carried away - there is no point in covering the cut with a thick layer of sealant.
Applying sealant to the cut.
We glue the foamed polyethylene seal (included with the sink) to the side of the sink around the entire perimeter. If, after gluing the seal, it protrudes beyond the outer contour of the side (rises more than 1 mm above it), then the seal must be trimmed with the sharp tip of a knife, otherwise there is a possibility that the fasteners will not be able to fully press the seal and press the sink to the plane of the countertop.
Using a clean cloth soaked in gasoline or acetone, degrease the surface of the seal and the line where the seal meets the countertop. We apply the sealant to the sealant in a continuous strip, not being carried away by the thickness of this strip (it is assumed that the sealant is glued flush with the protrusion of the side). In practice, you can find a way to install a sink without using a sealant at all; in this case, the entire space (calculated for inserting the sealant) is filled with sealant. However, the sink should not be installed this way for several reasons: high consumption of sealant (as a result, long drying time), difficult control of the filling of the seam (the line where the sink meets the countertop), and the labor-intensive process of dismantling the sink in case of unsuccessful installation.
Applying sealant to the seal.
Sink fastening.
We insert the sink into the hole in the countertop and align it with the markings (the markings must be applied so that they are partially preserved after cutting out the countertop). We take two or four fasteners and, equidistant from each other, pre-fasten the sink (without fully tightening the fastenings), constantly monitoring its position relative to the markings. Attention! Tightening the sink fasteners must be done manually, without using a screwdriver, as the threads in plastic parts are easily torn off! We turn the tabletop upside down (if necessary), install all the fasteners, and finally tighten them, trying to do this evenly and consistently. To ensure that the sharp spikes of the fasteners penetrate the tabletop in the best possible way, you can sharpen them with a file and/or lightly tap them with a hammer while tightening them.
Mounting on the sink in assembled form. By tightening the self-tapping screw, the sink is attracted to the countertop. The sharp ends of the metal part of the fastening must be securely fixed in the tabletop.
Tighten the fasteners with a screwdriver.
The fastening is tight. It is recommended to lightly tap the fastener with a hammer so that the sharp ends cut deeper into the tabletop.
All fastenings are tight.
Let's look at the result of the work: the sink should be pressed along the entire perimeter to the surface of the countertop, installed along the marking lines. Indirect confirmation of the complete fit of the sink can be the squeezed out sealant. Use a cloth to wipe off excess sealant and markings from the front surface of the countertop. Allow the sealant to harden overnight (see instructions on the sealant package).
The sink is well pressed to the countertop. The sealant squeezed out slightly.
Installing a built-in kitchen sink is a responsible undertaking. Poor installation of the sink can not only spoil the appearance of the kitchen, but also lead to rapid failure of the countertop due to water penetrating under the sink onto the cut of the countertop. Primary importance should be given to sealing the sink-countertop joint; do not rely on well-executed processing of the cutout end.
Selecting a sealant
The sealing material plays a major role in installation work. The following types of products are available on the market:
- Silicone acrylic;
- Elastic silicone;
- Polyurethane silicone.
When purchasing, you need to pay attention to the features and characteristics of the sealant: shrinkage, adhesion, purpose.
Apply the product to a dry, clean surface to ensure maximum adhesion. If the surfaces are not fully prepared for sealing, then moisture may penetrate into the cracks, which can lead to the growth of fungus and mold.
Typically, elastic silicone sealing material is used. It is easy to use and quite reliable.
Summing up
Advantages of installing a sink yourself:
- There are tools in almost every home; attaching an overhead sink to a cabinet can be done using almost improvised means;
- You can save on the cost of a professional plumber by doing the steps yourself;
- If the plumbing product did not come with any fasteners, then purchasing them is not a problem.
If you cannot install the plumbing yourself, it would be better to turn to professionals.
Types of sinks by installation method
Nowadays there are many models of sinks for kitchens and bathrooms on the market. They differ not only in appearance and dimensions, but also in installation methods. To make it easier for you to understand, we have presented the main characteristics of the most popular varieties in the form of a table:
| Kitchen sink type | Highlights of design and installation |
| Tabletop | Tabletop-type products are now virtually not used. In most cases, such a product is a bowl that is installed on top of the countertop and is in contact with it only at the location of the drain hole. A small number of tabletop sinks are represented by premium models, so their price will be appropriate. |
| Invoice | Overhead units are mounted on a cabinet without a top: flat areas near the bowl replace the missing tabletop. In most cases, such models are made of stainless steel, and therefore they are characterized by a relatively low price. |
| Mortise | Unlike the overhead, the mortise design is “recessed” into the countertop, which significantly complicates installation. The mount for the mortise sink is installed from the reverse side and reliably presses the sides of the bowl to the kitchen furniture. |
| Podstolnaya | The bowl, as the name suggests, is placed below the level of the tabletop. In most cases, models for tables made of non-natural stone have this design. To fix the product, special brackets are used; in addition, the joint of the bowl with the lower plane of the table top is sealed with a special glue. |
| Integrated | The most expensive variety. The bowl is installed in the countertop so that the gap between them is minimal. In most cases, products made of synthetic stone have this design, but it is also possible to find experienced varieties made of stainless steel. |
It must be emphasized that attaching a sink to a countertop made of artificial stone or installing an integrated structure is a rather labor-intensive task that should be entrusted to specialists. But attaching an overhead sink to a cabinet or installing a mortise product can be done by any craftsman with sufficient dexterity.
What you need to install a sink
Before you begin installing the sink, you need to assemble the furniture.
To attach the sink correctly, you need to assemble a minimum set of tools. To seal the seams, you will need silicone sealant, which will protect the surface of the furniture from moisture.
Installation accessories:
- electric drill or screwdriver;
- a set of drills with a diameter for fastening;
- screws and other fastening products;
- screwdrivers in a set with different sections;
- masking tape to protect furniture;
- ruler and device for level measurement;
- sealant for sealing joints.
Before installation, it is recommended to clean the space and remove excess. For convenience, all communications should be secured to the stand in advance. After fixing the sink, this stage will be problematic. The installation location will depend on the location of the water pipes and sewerage. If space permits, it is not recommended to place the cabinet next to the refrigerator and heating appliances.
Installation technology
Overlay design
The instructions for installing an overhead sink will be the simplest, so let's start our review with that.
It should function according to this scheme:
- To begin with, we set the cabinet-underframe according to the level . The more stable this design is, the easier it will be for us in the future.
Note! In many cases, it is possible to install the sink on a movable cabinet, but it will still need to be secured and leveled before connecting the mixer.
Advice! The fastening for the overhead sink should be tightened manually, and not with a drill or screwdriver - this way we minimize the risk of deformation of the rather narrow metal.
- Instead of brackets, it is possible to take wooden blocks with attached iron corners . The sequence of actions in this case will be the same as when using standard fasteners: we install the sink on the screwed bars, which we then press with the corners.
Mortise design
In addition, it is possible to install a mortise structure with your own hands, but here you need to be more careful:
- We attach the template that comes with the bowl to the tabletop.
Note! If necessary, you can make your own template from thick cardboard.
- We draw marking lines according to the template, and then cut out a piece of wood or MDF along these lines using a jigsaw. To make the cuts more correct, it is possible to first make a couple of holes with a wood drill.
- We apply silicone sealant to the edges of the hole, and lay butyl tape around the perimeter.
- We install the part, carefully smooth it and press it to the lower plane of the tabletop, using iron brackets.
- In addition, if necessary, we drill an additional hole and fix the mount for the mixer to the sink, if its presence is provided for by the design. In most cases, the valve is located at the bottom with a clamping nut.
Wall mounting
In many cases, it becomes necessary to install the sink directly on the wall.
In this case, we proceed like this:
- To begin with, we apply markings on the wall, choosing the optimal height for mounting the bowl.
- After this, we take the brackets (their dimensions must correspond to the dimensions of the product) and apply them to the selected section of the wall. We mark the points where the fasteners will be installed.
- Using a hammer drill, we make holes in the wall. Installation of sink mounts is carried out using anchor bolts with an iron sleeve.
Note! The heavier the bowl, the thicker the anchors should be and the deeper they need to be embedded in the wall.
- We install the sink on the brackets, if necessary, fixing it from below with special fasteners. We seal the joint between the wall and the sink.
- Then we attach the siphon, which we disguise using a decorative console: it will also serve as an additional support.
Installation of a free-standing sink
If the sink and its cabinet are not part of the set, but are installed separately, then connecting the structure is usually even easier. All necessary brackets are most often included in the kit, and the absence of interference from other items makes the headset easier to access.
If the sink is built-in or embedded in a cabinet, the operating procedure is exactly the same as described in the previous sections of the article. If the sink does not have a cabinet, it is placed on brackets screwed to the wall. The supplied communications can be hidden in the decorative “leg” of the sink or hidden in a decorative box.
Features of installation in the corner
Some subtleties must be taken into account if the location of the sink in a corner kitchen involves installing it in a corner. This is the least convenient position in terms of freedom of access. Therefore, it is worth screwing the faucet, drainage glass and flexible hose to the sink in advance.
In addition, the space in the lid of the corner cabinet is very limited; an accurate calculation of the location of the bowl is required:
- a rectangular or oval bowl is placed diagonally, placing the mixer in a corner. With this position, it is usually necessary to take longer supply hoses than for conventional installation;
- A corner sink is the best option. You just need to make sure that there is enough space in the lid to accommodate it. The only drawback is the higher price of such products.
If you follow all the requirements and act carefully, it is quite possible to install the sink in a corner. This arrangement allows you to effectively use the entire space of the kitchen and create an original interior.
