Share on social media networks:
Nowadays, bedding items are quite expensive. Therefore, many take up the task of making them themselves, because in this case you can not only save money, but also decorate the interior at your own discretion, making it individual using inexpensive and simple means. Looking at photos of homemade pillows, for example, you might think that sewing them requires a lot of experience or innate skills. In reality, everything is much simpler. This article will help you with this, you will overcome all your fears, and as a result you will get a gorgeous pillow. You will need a minimum of time, effort, and available tools to understand how to sew a foam pillow and implement this idea.
DIY decorative sofa pillows: 25+ options
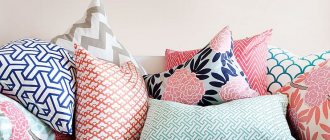
Pillows are perhaps one of the easiest ways to make the interior of your apartment bright, stylish and unusual. As a rule, designer products cost a lot of money, and it can be difficult to choose something to suit your taste... If you have a free evening, we suggest sewing exclusive decorative pillows yourself - it’s quick, simple and very inexpensive! Easy-to-make sofa cushions with your own hands, patterns, photos and diagrams of which are given in today’s lesson, will completely save you and everyone in your household from the autumn blues! Bright and stylish, they will create a good mood for the whole day and make your home even a little more comfortable;)
How to sew a round decorative pillow
Round sofa cushions are a great way to decorate any room. It harmonizes well with both the sofa and the bed, and would also be good as a floor seat. There are several dozen options for sewing round decorative pillows, but today we will look at just one - from scraps of multi-colored fabric.
We sew a round pillow with our own hands: master class
Stage one
For sewing, we will need multi-colored pieces of fabric of the same density and one large button.
First, a pattern is made. On a small Whatman paper we draw a circle, the diameter of which will be equal to the diameter of the finished pillow. We divide this circle into twelve equal sectors and cut out one of them - the pattern is ready! We apply it to the flaps of fabric, trace it twice: first, clearly along the contour with a straight line, then again, taking into account seam allowances of one centimeter on all sides. We will get twelve of these multi-colored parts:
Stage two
Let's proceed directly to sewing. To do this, take two parts, fold them face to face and attach them to each other along one of the long sides. We sew the line, retreating three millimeters from the edge. Standard length stitches.
Turn the fabric over and iron the seam with a hot iron. Sew the remaining slices together in pairs in the same way:
Next, we sew together three pairs of double parts, in the end we get two semicircles:
We connect two semicircles face to face and sew them together from the wrong side. Carefully smooth out all seams with a hot iron.
Stage three
Now let's work on the back of the pillow. It can be the same as the front one, or one-piece. You already know how to sew the side with sectors, so now let’s look at the second option.
So, we take a piece of plain fabric, attach the finished one-piece front part to it, trace it with a pencil and cut it out taking into account the seam allowances.
Then we take another piece of fabric and cut out a strip from it, the length of which is equal to the circumference of the front part, and the width is equal to the desired volume of the pad. Sew the strip to the front piece, like this:
After this, we sew the strip to the back piece, leaving a little space for padding.
We turn the pillow right side out, stuff it more tightly with holofiber and carefully sew up the hole.
Sew a button into the center of the pad using a long needle and strong nylon threads.
That's it, the round sofa pillow is ready!
What materials and tools are needed to sew pillows?
It is not difficult to find interesting models of interior pillows that can decorate any home decorated in any style. Below you will be offered a selection of the most successful options for how to sew a foam pillow. But first you should take care of preparing everything that you may need in the process of completing the work. Now more details.
Textile
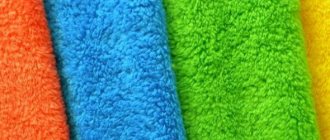
Of course, what could be more important than fabric. In the case of homemade pillows, there are no special restrictions on the choice of fabric; the main thing is that you feel comfortable working with it and that the finished product looks impressive. Therefore, you should use your imagination to the maximum.
Materials used for upholstery are suitable for this, for example:
- cotton and linen;
- felt;
- canvas or denim fabric.
You can also use short or long pile fur.
Important! It is recommended to be more careful with knitwear. Decorative pillows are even sewn from old clothes.
Padding
It is not recommended to fill pillows with cotton wool because it quickly clumps. Sintepon is excellent, but over time it decreases in volume, in particular when the products are used for other purposes than their intended purpose.
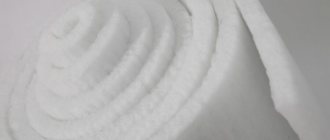
The best option is synthetic down or fibertech. These materials are unique because:
- don't get lost;
- do not cake;
- do not cause allergies;
- even after washing they restore their usual plumpness and volume.
You can buy them at any fabric store. Naturally, you will also need foam rubber, which is sold in construction stores and can have different thicknesses.
Decor
The choice of decor depends on the flight of your imagination. There are a lot of ready-made examples of decorating homemade pillows, so feel free to choose:
- Most often today, ribbons, ribbons, buttons, laces, buckles, sequins, lace, and zippers are used as accessories.
- You can make some decorative details yourself, for example, make bows, appliqués, and even voluminous flowers from fabric.
- Special acrylic paints for fabrics are also used for decoration.
Threads
Be sure to prepare threads for sewing that are clearly selected according to the thickness and color of the main material. Additionally, you may need more knitting threads or floss to make decorative details or seams by hand.
Tools
Where would we be without them? Prepare:
- needles;
- scissors;
- marker;
- pencil;
- handle;
- paper for making a pattern.
Important! If you knit any elements, you will need knitting needles or a crochet hook. If embroidery is used, special tools will also be required. It is advisable to find a sewing machine.
How to sew a cushion cushion
The bolster pillow is so easy to sew that even a child can handle it! A minimum of time, tools, fabric - the work will take you no more than half an hour.
Sew a decorative pillow-cushion: master class
Stage one
First, let's prepare all the necessary tools and materials, namely:
- piece of fabric;
- ribbon with pom-poms in the color of the fabric;
- lightning;
- holofiber or any other filler;
- sharpened scissors;
- sewing threads;
- ruler;
- measuring tape.
Stage two
As part of this master class, we will sew a pillow with a diameter of 20 centimeters and a length of 61 centimeters, but if you wish, you can easily change the parameters.
So, we cut out two round parts for the ends and sides of the pillow. Taking into account seam allowances, the diameter of the circle should be 22 centimeters.
We measure the circumference at the sides and cut the main roller blank according to dimensions: width = circumference + one centimeter, length = 63 centimeters, taking into account seam allowances. We sew a zipper along the length.
We sew decorative braid with pom-poms along the short sides of the main part of the bolster pillow.
We turn the pillow inside out and connect it to the sides.
Turn the pillow right side out again and stuff it tightly with holofiber or any other filler.
That's it, the bolster pillow is ready!
To make the pillow easier to wash, we recommend sewing an inner pillowcase for it from a plain natural fabric. In this case, you should skip the step of sewing in the zipper and ribbon. Instead of a fastener, we leave a small hole, with which we stuff the pillowcase and sew it up with hidden stitches. Now we can safely put the cover we made earlier on the pillow and rejoice at the new thing.
Starting a workflow
Having collected together the entire arsenal of sewing accessories, you can safely get to work. If you are a beginner and have little experience in sewing, you should start with the simplest and most uncomplicated options. More experienced needlewomen can try to repeat more complex and sophisticated examples. The main thing in this matter is desire and perseverance.
First of all, you need to imagine the approximate shape and appearance of the pillow you want to make. If you are afraid of spoiling the materials, resort to examples in specialized literature or the Internet. This will help you break down your work into specific sequential processes.
If the pillow is square-shaped, cut two pieces of fabric of the same shape. This applies if the product has a different geometric, but simple shape. This will be the so-called face and back of your product.
Sewing a cushion for a sofa with your own hands doesn’t end there. It is necessary to fold both pieces with the front parts facing each other and attach pins along the perimeter. This process should not be avoided. It is the pins that allow the fabric to be fixed well, not to bulge, and to be stitched well in the future.
Then the finished product is stitched or stitched on all three sides. We use the fourth side for stuffing. You can sew directly on the pins, they will not break. Next comes ironing all the edges and filling the inside with any filler.
Sometimes it is placed in a separate bedspread to prevent it from spilling. The fourth section of your pad is hand sewn with a blind stitch. Now the product is ready for final decoration.
How to sew a sofa cat pillow
Such a pillow, in addition to its purely decorative and practical qualities, automatically becomes one of the favorite toys in the family! Sewing such a charming sleeping cat is not as difficult as you might think, but the work will require care and painstakingness. Are you ready to try it? :)
How to sew sofa cushions with your own hands: patterns, photos and diagrams
Stage one
First, let's prepare all the necessary tools and materials, namely:
- cotton fabric in three different colors;
- a piece of fleece;
- interlining;
- sharp scissors;
- holofiber;
- pencil or piece of chalk;
- floss threads;
- two buttons;
- tailor's pins;
- pattern.
Stage two
We start by printing out the pattern. If desired, you can draw it by hand in any form. We carefully cut out all the elements of the pattern.
Next, we place the paper blanks of the body on the selected fabric, trace them with a pencil and cut them out, not forgetting to add one centimeter of seam allowance.
We place the workpiece inside out on the adhesive side of the interlining, secure it with tailor's pins and cut it out. We do the same with the second body blank, cut from fleece.
Cut out the paws, ears and tail of the cat.
We take out the pins and iron the two-layer body blanks with a hot iron so that the fabric sticks to the non-woven fabric.
Stage three
We fold the blanks for the ears, paws and tail in pairs with their faces inward and sew them on a sewing machine, leaving small holes for turning the parts inside out. We cut the stitched parts with curly scissors or make small notches with ordinary tailor's scissors.
We turn the blanks inside out and iron them, stuffing them with holofiber. Now machine stitch the holes using a zigzag stitch. Using pins, we attach the resulting blanks to the front side of the kitten’s front. We sew them to the body using a zigzag seam.
Draw the kitten’s face like this:
We put a piece of fleece on top (back part) and secure it with pins. We sew the parts together, leaving a little space at the bottom to turn the product inside out. We trim the seam allowances with curly scissors or make small notches with regular ones.
Turn the pillow over your face and iron it. We stuff it with holofiber and sew up the hole with hidden stitches.
We sew the upper legs and buttons to the body for decoration.
We embroider the nose and closed eyes with floss threads.
Results
Decorating pillows can be a fun and creative activity for the whole family. When making such wonderful products for the family hearth, you can involve even the little ones - entrusting them with the easiest stages of work.
The finished product will be a joy not only for you, but also for your loved ones, who will feel their contribution to creating a homely atmosphere.
Creative ideas can be drawn from completely different sources and resources, the main thing is to competently implement them and do not hesitate to ask advice from more experienced craftsmen on forums or in real life in order to avoid minor mistakes that can cost you all your planned work.
Create with joy and be happy!
How to sew a pillow for a sofa from scraps
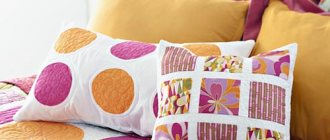
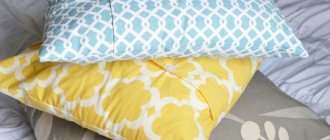
Pillows sewn using the patchwork technique always attract special attention. They are bright and stylish, so they will fit perfectly into any boring interior, refreshing it greatly.
Sewing a decorative pillow using the patchwork technique: master class
Stage one
As usual, we start by selecting the necessary tools and materials, namely we take:
- four pieces of colorful fabric;
- matching sewing threads;
- scissors;
- tailor's pins;
- ruler;
- pencil;
- linen cord.
Below we provide a diagram of the layout of the fabric scraps.
Stage two
To begin, we cut out pieces of fabric, focusing on the layout diagram above. We place the parts on the table in a given sequence, like this:
We place adjacent flaps face to face and fasten them with a pin.
We sew the parts together. We always start work with small elements!
Shape and fillers in different rooms
podushki-5 podushki-6 podushki-7 podushki-8
The attractiveness of decorative pillows largely depends on their shape. Different rooms require the inclusion of models of different appearance.
- Living rooms. Classic products are appropriate here - square, rectangular and round. The cushion cushions in the halls are interesting; they seem to take us back to the era of the eastern emirs or royal France. The sizes of models can vary from tiny - 20x20 cm, to quite large - 70x70 cm. According to experts, for a room not exceeding an area of 40 m2, it is acceptable to include from 3 to 7 items in an ensemble. They must be combined with other interior items and always with each other in color, texture or finish. Both synthetic and natural material can be used as a filler.
- Bedrooms. Typically, square and rectangular models are chosen for bedrooms. French fashion suggests the inclusion of rollers in the interior. They are great to place under your main pillows for pre-bedtime reading.
- Kitchens and dining rooms. In these rooms, flat pillows placed on the seats or attached to the backs of chairs can make the interior stylish and rich. The main requirement for the filler is easy care, machine washable and resistance to odors.
- Offices. Strict flat pillows of square or rectangular shape are also welcome here. They can be filled with foam rubber or non-woven synthetic material.
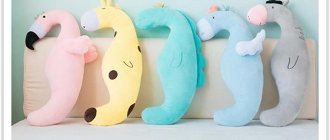
- Children's. In children's rooms, pillows turn into soft toys. They take on intricate shapes and often depict cartoon or fairy tale characters.
A duvet with artificial swan down inside will pleasantly surprise you with its warmth, and its filling, unlike its natural counterpart, will not create any problems for people prone to allergies.
If you want to create an elegant, romantic interior, then don’t forget about curtains. Elegant drapery, complemented by a cascade and lambrequins, fits perfectly into such a setting.
How to decorate a finished pillow in an original way
When you want to update decorative pillows with your own hands, but don’t want to bother with sewing a product from scratch, our quick tips for transforming already finished products beyond recognition will come to the rescue!
Method one: airy heart made of roses
For work we need a pillow, fabric that does not require cutting, scissors and a needle.
We cut out circles from the selected fabric (not necessarily even, even if they are slightly different in shape) with a diameter of about eight centimeters. Next, we take one piece by the middle, gather it together, forming folds as in the photo, fix it with a couple of stitches and sew another circle at the bottom, forming a lush bud.
We continue to sew circles to the rose until we get a flower of the desired size.
Prepare the rest of the roses in the same way.
Sew the flowers to the front side of the pillow, starting with the outline of the heart.
We arrange the parts more closely, without leaving large gaps between them. We gradually move towards the center in a spiral. We fix the thread and hide the tail. The decoration for the sofa pillow is ready!
Method two: application
It would seem primitive! But look how an ordinary pillow was transformed in just half an hour! The pillow can be decorated with colorful flowers, animals, hearts, butterflies - it is not at all necessary to achieve natural colors. This pillow will make even the grayest and rainiest autumn a little warmer and more comfortable.
Method three: tapes
Ribbon, whether satin or fabric, can quickly transform any boring, plain-colored pillow! Experiment with the width and types of bows - it's easy and fun!
Method four: buttons
Bright and pastel shades, large and small – buttons will always decorate a finished pillow, especially if you collect interesting pictures from them.
Method five: pompoms and tassels
The same rule applies to pom-poms as to buttons. Experiment and use your imagination! :)
For knitters
Decorative pillows do not have to be made only from textiles. Knitted covers deserve special attention. Of course, this option will require much more time, but the result is worth it.
Even if you are just learning to knit, feel free to take on making a cover. After all, there is absolutely no need to knit complex details with tricky decreases and increases. It is enough to knit 2 squares or rectangles according to the size of your pillow. In addition, decorative pillows 70 by 70 are very rare; usually their dimensions are much more modest.
Beginner knitters should choose simpler patterns, without a lot of yarn overs and crossed stitches. But experienced craftswomen can choose options with complex arans or weightless openwork.
