<
>
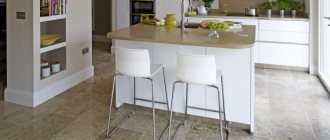
A beautiful and at the same time comfortable kitchen is the dream of any housewife. To arrange the space stylishly and rationally, you must first decide on the furniture that will be located in the kitchen. Particularly popular are islands - free-standing furniture structures, one of the varieties of which is an island with a bar counter.
Kitchen bar counter - countertop
Before we dive into the world of wonderful kitchen dining bars, let's take a look at their more practical versions. It can really be an alternative to an island in a kitchen where you would normally install a sink. Some of these designs have additional features such as drawers, built-in ovens or shelves if you wish.
It makes more sense to combine a breakfast bar with one or two practical features if you don't want to buy a separate dining table and have cooking space. Some counter kitchen peninsulas are designed specifically to accommodate both countertops and kitchen areas. The difference in height can be one of several solutions for separation from the main kitchen
Design functionality
There are several ways to use an island combined with a bar counter:
- Kitchen work area. There are two design options: with or without technology.
Option with a work area without equipment
- Part of the work triangle. A sink or stove is installed on the island.
- The storage system is located at the bottom of the island. Both open and closed shelves are used. An open island looks visually lighter; it is used more often in kitchens with medium dimensions.
Island with storage system
The stand itself is additionally equipped with rotating shelves and hanging holders for glasses.
Option with glass holder
- Module for built-in equipment. Household appliances can be installed in the island, for example, a coffee maker, freezer, oven.
With built-in oven
Dining peninsula for the kitchen
A bar counter in the form of a dining peninsula can be simple and practical. With these, you really don't have to buy a dining table. These dining areas may look more modern, but that doesn't mean they can't be stylish and elegant.
Some kitchens include retractable breakfast bars, while others have full, full-size dining space. There are many creative solutions for the kitchen table. It can be in old metal or attached to the main kitchen at a sharp angle. The possibilities are endless.
Advantages and disadvantages of the design
A bar counter combined with an island has a number of advantages:
- Advanced functionality. It is used not only for drinking drinks, but also as a dining table, work area, and a place to store kitchen utensils.
Island unit with storage shelves
- Stylish appearance. The stand is used in various modifications. Suitable for any style.
- The design is one of the most convenient for zoning. When used in a kitchen-living room, it marks the boundary between functional areas and at the same time serves as a unifying element.
The disadvantages include:
- Cumbersome design. It cannot be placed in a small kitchen; an area of at least 14 square meters is required.
- This design, as part of a kitchen set, significantly increases its cost.
Kitchen breakfast bar
If the dining room seems unnecessary and uncomfortable to you, install a small bar table for breakfast. Just don't forget to pay attention to the chairs.
A breakfast bar not only allows you to grab a quick bite before heading to work, but can also welcome guests with the utmost hospitality. If you plan to use it to entertain friends and family, perhaps a longer, more spacious peninsula will suit you. Otherwise, this is the perfect place to bond with your child or spouse.
Kitchen layout options with island
Option 1
Let's start with the classic layout:
Instagram @cubiqstudio
The spacious room is divided into several zones. In this case, the island part is a good way to zone a large area without disturbing the integrity of the space.
For this project, we chose a spacious model that combined three functions:
- Working surface.
- Plate.
- Bar table.
- Spacious storage system.
An accent round hood was installed above the hob, which further zones the room.
Instagram @cubiqstudio
Instagram @cubiqstudio
Instagram @cubiqstudio
Option 2
A U-shaped kitchen with an island is suitable for a large family or simply for those who cook a lot and enjoy cooking.
Instagram @hollstudio
The cooking area was placed along three walls, the sink was installed near the window so that you could wash dishes and admire the view from the window. Since the set itself is spacious, the island design is used more as an accent element and replaces the dining table.
With this arrangement, there is definitely enough space for storing all the necessary utensils and for comfortable cooking.
Instagram @hollstudio
Instagram @hollstudio
- Kitchen
How to decorate a kitchen island: 9 fashionable and functional ideas
Option 3
If the apartment is of a non-standard shape, the rooms should be brought as close as possible to the appearance of a rectangle or square.
Instagram @std__design
Here we see a fairly spacious kitchen-living room with an area of 18 square meters. The apartment is for a family with children, so the cooking area needed to be quite spacious. For the set, we chose an L-shaped arrangement, which echoes the corner sofa opposite.
There is no classic dining table here - this function is performed by the island, so it was made large enough for both a family dinner and a feast with guests. The surface was not occupied by anything - all the necessary equipment and storage systems are located in the main headset.
Instagram @std__design
Instagram @std__design
Instagram @std__design
Option 4
Here is an example of a kitchen design with an island for a small area.
Instagram @hollstudio
For an open space of 16.5 sq. m chose a light palette, minimalist design and a compact island model. Its wooden surface stands out against the white background, softly marking the transition between the cooking area and the living room.
A small island design can replace a bar counter or a dining table for 1-2 people. The main thing is not to overload the space. To do this, use furniture that is simple in shape and basic colors.
Instagram @hollstudio
Instagram @hollstudio
- Kitchen
6 of the most beautiful kitchens with islands (you'll want to make one!)
Small kitchen bar counters
Although small kitchens look better without upper cabinets or other visual obstructions, such as a peninsula or island, the design can be very pleasing. Even internal columns may not be a problem.
A tiny peninsula may seem gimmicky, but in a small home it can make a beautiful transition space between the kitchen and dining room. You can also use it as a work area if you are dedicated to finding a chair that won't ruin your back. Very useful for small apartments.
Bar top
The countertop is already important, but when a bar counter is also made from it and its share in the kitchen design increases, the right choice is critical.
The difference is huge:
- Appearance
- Tactile sensations
- Resistance to aggressive environments in the kitchen
- Price
If you're too lazy to delve into it:
In terms of price, quality, speed (the same people who did the whole kitchen will do it), stability, design, tactility - the best is chipboard with imitation wood.
An article with a selection of photos of white kitchens with wooden countertops.
For more details, read on.
Bar counter made of chipboard (postforming)
Laminated chipboard imitating wood, stone, marble, etc. Options with imitation wood look cool and in fact are a standard solution for countertops in general.
Postforming with imitation of any material other than wood must be chosen very carefully. Ideally, look for examples of kitchens with such countertops displayed somewhere in real life, because little is clear from the sample. This is important because Most chipboards with imitation stone or marble look terrible in real life , photos don’t convey this either.
Plus, when a stone is imitated, but when touched and knocked it makes the sound of wood, this causes dissonance.
A natural stone
A bar counter made of stone looks stylish and expensive, and is also expensive. The material is durable, resistant to moisture and high temperatures, and easy to care for. For my taste, it loses in important parameters to artificial stone. You can choose if money allows. The main advantage is tactile sensations. The material is perceived as monumental and solid, which is nice. In real life, no one will confuse natural stone and imitation laminated chipboard.
Limited number of shapes and sizes, difficult to process, but not afraid of temperature.
Artificial stone (acrylic)
Artificial stone comes in different types and can be called a brand or type. Known as acrylic, agglomerate or corian. Created on the basis of acrylic resins. Acrylic is not inferior to natural stone both in appearance and in terms of wear resistance. There are a huge number of colors and it’s almost impossible to go wrong with them - a bar counter made of acrylic looks at least good.
A special feature of acrylic is the ability to use broken geometry without seams. Great for an L-shaped open bar. You can also embed lighting directly inside acrylic, but this is not for everyone. Can be cast in one piece with a sink, etc.
Disadvantage of acrylic: it gets scratched over time, but can be sanded. Afraid of extremely high temperatures.
Made from concrete
A concrete bar counter can become a central part of your kitchen design, especially if you are designing a loft-style kitchen. It’s a one-off object, but it’s things like this that are worth the time and money spent because... take the kitchen interior to a new level.
Solid natural wood
A kitchen with a bar counter made of solid oak and other wood looks very cool and is suitable for both classic and modern styles. But the tree is delicate (it is afraid of mechanical damage).
You will have to worry about searching and making it - this is not something that you can simply order from kitchen specialists. But natural wood is always a unique piece. In the photo below, people tried their best and bought a whole cut of oak, which was also enough for the table.
From tiles
The base is made monolithic or from plasterboard, and the sides and top of the rack are lined with tiles or mosaics.
I don't recommend using it. It will look like a collective farm in 99.99% of cases. In addition, dirt will constantly get stuck in the seams between the tiles - it is inconvenient to wipe a countertop that is not smooth.
Tempered glass
A controversial option that can turn out either successful or unsuccessful. If you are confident and ready to take risks, why not. But there are more proven materials for bar counters.
There are also unusual options for bar counters: stainless steel, porcelain stoneware, timber, round, etc., but these exclusive options are already beyond the scope.
If you are tired of racking your brains and want a ready-made solution - a monolithic base made of gas silicate, covered with decorative plaster, and a table top made of post-forming wood.
If you really wanted a bar counter, but weren't sure, go for it. Now you have all the information to implement your idea without risk. I advise you to read about choosing a kitchen, there is really useful information there.
Save and share - it will come in handy!
Convenient storage kitchen peninsulas
Some kitchen peninsulas are more convenient for storage than others. Most come with cabinets, but you can choose drawers, cubes or shelves instead. This is especially useful in open layouts. For example, a dining peninsula can look more impressive with glass fronted kitchen drawers.
Open shelving is another great way to display your best accessories or store books for your morning reading. Drawers are designed for more organized storage, so if you are planning to store cutlery on your peninsula, then this is the best choice.
Dimensions and dimensions
There are no strict rules in this regard. There are some recommendations that are violated in about half of the cases. The recommendations relate only to the height and width of the tabletop:
- The height of the bar counter is usually 1.1-1.2 meters. Then special high chairs are placed next to her.
- The width is at least 30 cm, optimally 50-60 cm. You shouldn’t go less than 30 cm: even a small plate on such a tabletop will be in danger. And it’s just inconvenient: you can’t put your elbows down, you can’t really lean on your elbows.
The length, shape, number and shape of the legs are all at your discretion. Speaking of legs. The traditional counters that were in drinking establishments are a table top on a cabinet. But for a kitchen, for some reason, a tabletop with one pipe from floor to ceiling is considered a “classic”.
Something like this counter is considered a classic in kitchen sets
By the way, in this form it is practically not used anymore. More functional analogues with cabinets and cabinets predominate.
Kitchen peninsula projects with decorative countertops
The current trend for bar counters doesn't stop at dining tables. Even kitchen countertops are getting natural, organic materials. Apart from natural wood, you will find that marble and marble effect materials are in high demand. Metal and glass are also widely used for kitchen peninsulas and bar counters.
Corian, melamine and other more affordable materials can also look quite engineered. It all depends on what the manufacturer can do with any of them, but also what kind of design you're going to work with.
Features and rules for the location of a kitchen island with a bar counter in the interior
It is important not only to choose the island itself, but also to think in advance about the location of its installation. It largely depends on the area and layout of the kitchen.
If it is open or part of a studio apartment, then there will be no problems. A closed kitchen should be spacious and meet the following parameters:
- area – from 14 sq.m.;
- width – from 3.6 m;
- length – from 3.6 m.
If the kitchen is cramped, it is best to purchase a peninsula with a bar counter - it will not seem so bulky and will not “eat up” the space.
When planning the placement of furniture, keep in mind that the island should not prevent the owners of the house and guests from moving freely around it. To comply with this condition, the distance between the island and other furniture and walls is made at least 120 cm.
You need to select the shape of the island based on the layout of the main set:
| Headset shape | Island shape |
| P or U | straight |
| G | T-shaped |
| I | any shape |
Kitchen peninsula designs with sectional countertops
Like an island, a peninsula can also have a cantilevered, stacked, or sectional top. This can be done to combine the kitchen and breakfast bar, add some length to a dining peninsula, or divide the space between work and eating surfaces.
Modern kitchen peninsulas and breakfast bars are as functional as an island and can be a stylish addition to any kitchen. When planning your kitchen, keep this in mind because a peninsula might just help you save precious square footage.
Which form to choose
There are several options:
- The rectangular island part of the set with a bar counter is convenient to use for storage; the design does not take up much space. It is also easier to install appliances and a sink on the lower-level rectangular countertop.
Rectangular shape
- For zoning and as an interesting, unusual interior detail, a square island with a bar counter is used. In this case, the stand can not only be standardly positioned and run along one side of the square, but also run along both sides.
Standard square shape
- In medium-sized kitchens, where there is not much space for people to pass through, round islands with bar counters are installed. They do not have sharp corners, look cozy, and you can create a lot of seating.
Round shape
- Non-standard shapes are used for corresponding styles in the interior. Such designs are created to order; they can have a triangular shape and consist of several related elements. They are used only in spacious kitchens, possibly combined with a living room, since non-standard shapes are not very convenient in everyday life and take up a lot of space.
Custom shape
Mini island idea for small urban kitchen
This mini island idea for small urban kitchens comes from La Cornue.
They offer a mini island that will allow you to simply shift some of your usual kitchen areas.
Just because you're in a compact living space doesn't mean you have to give up the chef's kitchen.
What about that yellow color spot? Isn't this great?
You don't have to give up design or functionality in a small space.
Kitchen island
Many modern designers adhere to the principle of centralization. It is no longer fashionable to place kitchen units exclusively along the walls. An additional work surface is installed in the center of the room.
Reference. The kitchen island is a free-standing part of the set. It serves many functions: additional work area, bar counter and storage space.
Initially, this arrangement of furniture was used by restaurateurs. A table in the center of the room allowed more cooks to cook at the same time without anyone interfering with each other. In the 60s, the idea migrated to residential apartments.
The kitchen island is loved by many housewives for its practicality and ease of use. Its advantages:
- Functionality. Furniture can become anything depending on your preferences. The island has a cooking area, a bar, and a mini-fridge.
- Practicality. This solution will fit perfectly into any style from classic to loft. The large surface of the table will allow several people to cook at the same time, and will also replace a full-fledged dining group.
- Convenience. An important rule for arranging a kitchen is maintaining the work triangle. The island will create an ergonomic space with three work areas one step apart from each other.
- Design. The solution looks stylish and modern. It seems that everything in the kitchen has been thought out to the smallest detail. An island will be a great idea for a studio - it will separate the work area and the living room, preserving free space and comfort of movement.
The size of the room does not always allow installing this type of furniture. For such cases, there are peninsular options that will fit into a small kitchen.
Sculptural kitchen island by Pininfarina
It's not often that we find a design that surprises us - but this is one of them. To celebrate 25 years of collaboration, Edi Snaidero and Paolo Pininfarina have created this limited edition kitchen worktop with 84 components to help you choose the style and configuration that best suits your lifestyle.
The material is carbon fiber with a glossy black lacquer finish. The cabinet doors are in a soft champagne lacquered finish and the work surface is clear black glass.
And the sum of the details adds up to something impressive. The thoroughly modern style is also classic.
This high design island and countertop can be found anywhere from a modern glass loft to a traditional fine home.
Combining design with function isn't always easy, but Sanidero and Pininfarina get it done. This is, of course, the work of true masters.
What functions can a kitchen island perform?
In fact, an island with a counter can include a variety of functions. Let's list the main options.
- Work zone. Typically, an additional tabletop with a lower height parameter (approximately 70–85 cm) is used for this. Used for cooking.
- Equipped place for cooking. It can be equipped with a hob panel or an overhead sink. Less often these two options are used at once. In rare cases, an oven is additionally installed in the housing.
- Module with niches for placing built-in equipment. These are options for specific equipment or for any one at the request of the owner. Options with a coffee machine are quite popular.
- Various storage systems. Drawers, cabinets, and shelves are often placed under the countertop. Sometimes they are supplemented with railings with hooks. They are often placed on the opposite side of the chairs, but this is optional.
The stand can also be equipped with a variety of accessories, for example, special bottles, hooks for utensils, and napkin holders.
Bar counter for the kitchen: stages, manufacturing methods, photo reports
The simplest option to implement is the classic one: a tabletop attached with one edge to a wall or furniture, and the other resting on a pipe. There are options with the tabletop:
- Make it from a wide board, preferably not coniferous - their wood is too soft.
- Order from the same company that made the kitchen set. If you bought a ready-made one, you will have to look for similar material from a photo or carry a small spare part with you to workshops to demonstrate what you need.
- Make it out of thick plywood, then decorate it with something - stick on plastic, tiles, mosaics.
Everything else is better to choose in a store that sells furniture fittings. The choice is very wide, and the range of prices is absolutely amazing. For example, a pipe of the same diameter can cost three times more. But this difference is not without reason. With cheap Chinese pipes/grids/baskets, the chrome plating begins to flake off after some time. German fittings have a very high price tag, but have a lifetime guarantee; Poles are in the middle in both price and quality. The choice is yours.
Homemade bar counter for the kitchen from a board
The photo above shows a homemade bar counter made from a thick board. It rests on one side on a shelf attached to the wall (also made of inch boards). The second support is a traditional pipe. A hole of suitable diameter is drilled in the body of the tabletop for the pipe. A “fastening ring” stop attachment is installed on the pipe under the table top, and the hole is closed on top with a decorative ring. There is also a “thrust bearing” or universal fastening of the pipe to the floor and ceiling, as well as various holders and shelves for it.
If the tabletop is attached directly to the wall, corners are usually used for these purposes. You can take reinforced ones, and choose the color based on the finish. But this type of fastener is installed so that it is not visible - stepping back a few centimeters from the edge. You can put several small corners, or one solid one.
Shelf holders can be placed under the tabletop
If you decide to make a bar counter in the kitchen along the wall, you can use decorative brackets for shelves. Their load-bearing capacity should be enough for a tabletop, especially since you can put several of them. An example of assembling a bar counter of a simple design with a pipe in the photo below.
Photo report No. 1: homemade stand made from tabletop and pipe
The tabletop was cut out from a window sill (solid wood), the edge was rounded, sanded, tinted and varnished. Spare parts - bar leg, brackets and a fixation to the floor - were purchased in the furniture fittings department.
This is the original data
We screw the stop to the tabletop and the corners to the edge. Everything sits on self-tapping screws with a flat head. The work takes about 7 minutes.
The main part is assembled
Having placed the assembled stand against the wall, mark on the wall the places where dowels need to be installed. We trace the pipe on the floor with a marker: we will set the thrust bearing according to this mark. Using the marks, we mount the support for the rack and install dowels in the wall.
Preparatory part
We put the stand in place and secure it with screws. All. Ready.
A simple bar counter assembled with your own hands
Bar counters with shelves
If you don’t like the design with the pipe, you can do without it, but you will have to remove the upper part, which is located under the ceiling. Instead of a leg, for example, you can make the same shelf as near the wall. The look will immediately become more dynamic and modern.
Sketches of easy-to-make bar counters
And in general, the entire structure can be assembled from wide boards, joining them at right angles. Looking at the photo below, you will understand what we are talking about.
Bar counter for a kitchen in a modern style (for minimalism and high-tech too)
Broken lines generally fit better into modern interiors. If the kitchen is in the style of minimalism or high-tech, then it is difficult to fit the classics there, but something consisting of broken lines will look very good (several sketches in the picture below).
Bar counters for kitchens in modern style
A slightly more traditional version is shown in the photo. This didn't make him any less interesting. A non-standard approach, even in small doses, significantly changes perception.
Bar drain-table option
Bar counter on base
We considered all these options without reason. But the tabletop can be attached to some kind of cabinet. If the tabletop is located exactly above the table surface, we take a pipe and standard fasteners to horizontal surfaces. If, as in this case, the surface of the bar counter is offset, there is a special inclined fastener.
Attaching the tabletop to the cabinet is easy and simple
You can make a cabinet yourself. Actually, the main thing is to assemble the frame. It can be covered with furniture plywood or some other finishing material - it depends on the style of your kitchen. The frame can be made from wooden (dry) slats, or you can weld a metal corner.
You can dance on this stand
An alternative is to assemble it from plasterboard profiles and sheathe it with it or with gypsum plasterboard. Another option is to build a brick base. But this is if the load-bearing capacity of the floor allows.
Loft style
With a plasterboard base: photo report No. 2
Often a plasterboard base is chosen. The material is inexpensive, the technology has been tested, the mechanics are familiar, and the result is at least good. There is no news regarding the order of work: we are assembling the frame. In this case, wooden blocks were used, but the same can be done using profiles.
Assembled frame
The main thing is to maintain vertical and horizontal planes, place the racks exactly at 90°. Everything is checked with a good building level; it is better to monitor verticality with a plumb line: it has no error. When the frame is assembled, it is sheathed on both sides with plasterboard or gypsum board.
Plasterboard sheets mounted
We fill the marks from the screws, corners and joints with putty. Then it depends on the chosen type of finish: some require putty (painting with water-based emulsion), others do not. In our case, textured paint was chosen; it is applied in a thick layer, and can be applied directly to drywall.
Covered with textured paint
All that remains is to install the tabletop on the bar counter. Choose which one matches the rest of the furniture in your kitchen.
Photo report No. 3: Bar counter with sink
This was the first experience in creating furniture (and anything worthwhile in general) with my own hands; as a result, some design flaws were made. The design was not the most successful, although there is no arguing about tastes.
Source materials:
- inexpensive countertops bought on sale;
- remnants of a laminated chipboard cabinet;
- bars;
- a couple of additional doors purchased;
- plumbing filling: sink, siphon, mixer and the required pipes, hoses, fittings.
The countertops are folded in an “L” shape, connected by steel plates, and the sides are attached.
Installing and replacing a faucet in the kitchen is described here.
Tabletops are laid out face down on the floor. They are connected in the shape of the letter “L” using glue, which coats the ends and a steel strip with perforations into which the screws are screwed. The strip, of course, is fixed at the bottom.
The sides were supposed to be refined (presumably with laminate), so the remains available on the farm were used - an old door and a piece of a cabinet. They are screwed using corners, aligned along the edge of the tabletops. And this is the first mistake. And visually such a cabinet looks heavy, and it’s uncomfortable to sit on. The sides must be moved from the edge by at least 10 cm.
After the sides were installed, the cabinet was turned over and placed in its permanent place. All other work was carried out on site. A hole for the sink was cut, the plumbing was installed and connected.
Front and back view
Slats are nailed along the floor - along the walls and slightly retreating from the outer edge (an indentation of 5 cm is made, 10 cm is more convenient), shelves are made. The cabinet on the sink side is closed with a door, the shelves on the left remain open. The space is partially finished with wooden slats.
At first they thought of putting several different “bells and whistles” on the pipe, but semicircular edges remained from the tabletops. It was decided to use them on the pipe. Panels for decorating balconies (purchased in Leroy) were used as the exterior decoration of the cabinet. They almost fit, and the remaining gaps were closed with a twisted cord. See the photo below for what a homemade bar counter with a sink cabinet looks like as a result.
Bar counter for the kitchen with a DIY sink
There are also some comments on finishing. First, the cord will soon be saturated with various liquids, will have a pale appearance and a strong “aroma”. To delay the appearance of the smell, you can cover it with something, even the same PVA glue. Secondly, the tabletops are simply joined together. Water will get into the gap and various small debris will accumulate. Even at the “joining” stage, the edges must be coated with sealant (transparent, silicone, not acrylic). You can and should also process the edges of the cutout for the sink. Then the tabletop will not swell. The joints of the countertops can be finished with furniture pads, and the same or similar ones can be used instead of a cord. Another budget option is plastic corners and the same T-shaped strips.
Bar counter for the kitchen on the remains of the wall
If the kitchen is combined with a balcony, a piece of the wall remains. The place where the window used to be. If you don’t want to destroy it, you can make a bar counter.
The rest of the wall when combining a kitchen and a balcony can be turned into a bar counter
There are two options:
- Place the tabletop at the existing height. This will be another work surface or shelf. Above it, on the pipes at a height of about 1.1-1.2 m, secure another plane, which will actually be the bar counter.
- Add/raise the wall to the required height and install a countertop.
How you can decorate a counter on the rest of the wall
Both options are not bad, but the one in the photo on the right is more practical: two surfaces in the kitchen are always better than one. Please note that the dimensions of the tabletop are larger than the width of the “leg”. This is no coincidence: this way you can sit more or less comfortably without turning sideways.
And if you’re not too lazy to remove this wall, you can make something more convenient - so that you can put your feet up. An example is in the photo.
It will be more comfortable to sit this way
List of materials
To make a bar counter with your own hands you will need the following materials:
The timber and board must be dried, treated with an antiseptic and fire retardant.

