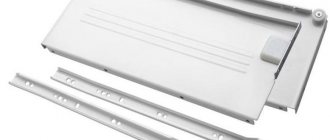
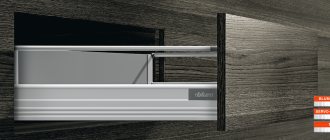
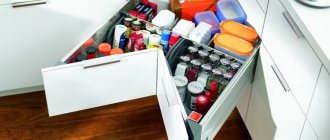
To achieve maximum functionality and ergonomics, modern drawers are installed using "Tandembox". Tandembox is a special system that allows you to fully extend the drawer and view all its corners, which is especially important when storing small items or things. How to choose a tandembox yourself, calculate it and install it, read on.
Drawer guide kit
Installation TANDEMBOX – pull-out system from BLUM.
A variety of customer design wishes can be fulfilled by one drawer system – the TANDEMBOX system.
The systems – TANDEMBOX intivo and TANDEMBOX plus – provide many options for furniture design. Each of the systems allows the use of various designs: from standard to special (like a drawer for a sink, etc.). TANDEMBOX plus is a box that allows you to diversify your interior. It impresses with its wide range of options, including the use of round railings or solid sidewalls.
The TANDEM guide system and the various opening systems TANDEMBOX intivo and TANDEMBOX plus can be used simultaneously in one project.
The mobility of the TANDEMBOX intivo system makes it possible to use inserts made of almost any material: artificial leather and glass or an extension made of BOXCAP drawer material.
List of main advantages of the TANDEMBOX system:
What you need to know about additional options:
Assortment, technical characteristics:
•Full range in length range from 270 to 650 mm, width up to 1200 mm. •Heights of standard drawers N (68 mm), M (83 mm) and K (115 mm) •Heights of TANDEMBOX drawers with high front B (140 mm), C (172 mm) and D (204 mm) •Optimal dynamic load of TANDEMBOX 30 and 50 kg • Drawers (side sides) are made of steel, aluminum or stainless steel • The back wall of the drawer can be made of steel or laminated chipboard, MDF, etc. • The system has a full extension function • The system is equipped with BLUMOTION closers, providing soft and silent closing
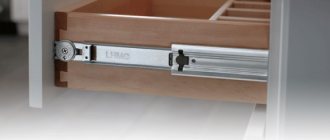
Smooth gliding of TANDEM is ensured by wear-resistant plastic rollers, which are the basis for smooth gliding. Optimized slide sag values ensure minimal sag when fully extended.
TANDEMBOX boxes
Installation instructions for SERVO-DRIVE for AVENTOS, TANDEMBOX and TANDEM (MA-502; language pack F) This instruction manual contains all the necessary information for installing the SERVO-DRIVE for AVENTOS, TANDEMBOX or TANDEM. This language pack includes the following languages: Bulgarian, Estonian, Latvian, Lithuanian, Romanian, Russian.
Example of a standard TANDEMBOX BLUM kit:
Source
Blum tandems. Calculation and installation. TANDEM BLUMOTION.
Article number in the Blum
: 550Н5000В.
The dimensions for fastening the guides on the side of the cabinet will be given taking into account the possible interchangeability of the drawers. The calculation and example are given on the basis of a three-drawer kitchen cabinet section (Fig. 2.). At the end, a fully parametric model of such a cabinet with all the fittings will be given for more detailed acquaintance. Model PRO100 in “*.sto” format.
! All calculations are made on chipboard with a thickness of 16 mm.
Width 400 mm. Height 720 mm. (without legs), Facades - 3 pcs. Guides - 500 mm.
140x396 mm. - top. 284x396 mm. - lower ones.
Drawer length.
Fig.3
where, NL is the nominal length of the guide. SKL - box length. SKL = NL - 10 mm.
Drawer width.
Fig.4
where, LW is the internal size of the cabinet (between the sidewalls). SKW is the length of the front or back part of the drawer (provided that this part is placed between its sides).
Drawer height.
Fig.5
Diagram for calculating the height of the box.
Practical part. Calculation and installation.
In practical application, we will move a little away from catalog diagrams and make a diagram for ourselves. See Figure 6. Black numbers
- dimensions of the body, drawer sides, fronts and gaps.
Red
- dimensions for attaching guides.
Blue
- the size of the front and back panels of the drawers.
Green
- gaps in the drawer body between other parts.
Fig.6
With this scheme, the lower and middle drawers turned out to be interchangeable.
Tandem box diagram.
Fig.7
The Blum catalog suggests making boxes with a groove for fiberboard in all four parts, and then making cutouts in the front and back parts for the clamps. For what? It is enough to make only grooves in the sides of the box, and reduce the height of the front and back walls accordingly.
Fig.8
We take the length of the side of the box as according to the catalogue. Those. 500 mm - 10 mm = 490
mm.
Then, the dimensions of the drawer parts
:
- The sides of large drawers are 490 x 210 mm.
- Front and back parts of large drawers - 326 x 194 mm.
- The sides of the top drawer are 490 x 100 mm.
- The front and back parts of the top drawer are 326 x 84 mm.
When mounted to the side of the cabinet, the guides are fastened by 4 mm. from the front edge of the sidewall. Hence, the minimum
the depth size (the width of the side of the cabinet) should be = Length of the guide + 4 mm. For convenience, the depth of the cabinet should be considered as follows: Length of the guide + 10 mm. In our version, with a guide length of 500 mm. the depth of the cabinet will be = 510 mm.
1. Fastening the guides.
| TANDEM BLUMOTION partial extension slides from Blum | Marking. |
2. Assembling boxes.
| Groove for fiberboard in the sides of the drawers. Such a groove can be made using a hand-held plunge-cut saw. Cutting depth 9 mm. |
| Box details. | Croaking box. |
| Installing the bottom of a fiberboard box. |
| Tandem front locks. | The clamps are attached to the front panel of the drawer. |
| Fastening the clamp. | The clamp is in operation. |
| In the back panel of the box, on the left and right, blind holes with a diameter of 8 mm are drilled. to a depth of 12-13 mm. The hole is drilled at a distance of 8 mm. below and to the side of the corner of the part. | |
| The box is installed on the guides and pushed in until the latch clicks. In order to remove the drawer from the guide, just lightly press the orange locking flag. | |
Cabinet with drawers on Tandems assembled.
Bottom line. General formulas.
In order to calculate the detailing of a product for using Tandem guides, we present the general procedure for universal calculations.
- Sidewall of the cabinet =
Tandem guide length
+
10 mm. - Drawer side =
Tandem guide length
-
10 mm. - The length of the front and back panels of the drawer =
the width of the cabinet
-
32 mm.
(thickness of the sides of the cabinet) -
42 mm. (catalog size). - The height of the side of the drawer (for facades with a height of 200 mm.) =
The height of the facade
is
40-41 mm.
(gap at top) -
17 mm. (gap from the lower edge of the facade or from the bottom, connection). - The height of the front and back panels of the drawer =
the height of the drawer side
-
16 mm. - Height of the drawer side (for facades less than 200 mm high) =
Front height
-
23 mm (gap from the top of the facade)
-
17 mm. (gap from the bottom of the facade). - The bottom of the box is made of fiberboard. Width =
Length of the front and back panels of the drawer
+
14 - 16 mm.
(for placement in the grooves of the drawer sides). Length =
drawer side. - Dimension for marking the fastening of the guides to the side of the cabinet. 40 mm
. from the lower edge of the facade or from the connection, bottom.
Inner drawer, height M, Tandembox plus: installation, dismantling, adjustment.
Tall cabinet for supplies with 5 internal drawers Tandembox PLUS or ANTARO.
Sink drawers Antaro, Legrabox, Tandembox Plus.
Electric drawer opening system. TIP-ON + Blumotion.
Trays, dividers and accessories Orga-line.
Tandembox plus tall drawer dividers.
Containers for separate waste collection Inoxa Divisione Plast.
Baskets with facade fastening Internal pull-out baskets.
+375 (29) 620 55 13 Minsk (Velcom) +375 (29) 702 13 46 Minsk (MTS) E-mail Seller: IP Sholokhov A.D. UNP 192238803
Source
Kitchen box with tandembox drawers
Today we will look at making a kitchen box with a lower base with drawers. Boxes in the calculations will use tandem boxes from the Austrian company Blum. But in the article I will post my simple calculator for calculating other popular retractable systems.
I have already posted the PRO100 project of this box earlier, but I did not check the dimensions in detail in this file (it is more for designers).
So, my box has a width of 900, depth (with facade) 532 mm, height (with supports) - 830 mm. - not quite a standard size, but you can count it yourself, the main thing is to get the essence. It uses Antaro tandem boxes.
Notice
To calculate
tandemboxes, as well as other retractable systems, namely, budget metalboxes and Chinese-Polish analogues of tandemboxes - modernboxes , I use the following calculator:
Download Exel drawer calculator
Just in case, I’ll post the source code of this PRO100 box , maybe someone will need it...
Let's analyze this element in detail (the lines to the right of the number are a schematic designation of the edge - on one side or on both sides)
| Furniture box | |||||
| body strip | 868 | — | 100 | 2 pcs. | |
| rack | 714 | — | 516 | 2 pcs. | |
| lower horizon | 900 | — | 516 | = | 1 PC. |
| fiberboard back wall | 720 | 899 | 1 PC. | ||
| Drawers | |||||
| tandembox back wall | 781 | — | 199 | 2 pcs. | |
| tandembox back wall | 781 | — | 81 | 1 PC. | |
| tanembox bottom | 793 | — | 476 | 3 pcs. | |
| facade top | 150 | 897 | 1 PC. | ||
| facade bottom | 284 | 897 | 2 pcs. | ||
We will need the following accessories:
- Confirmations - 8 pcs.
- Adjustable supports H=100 mm - 4 pcs.
- Self-tapping screws 14-15 mm long - 46 pcs.
- Self-tapping screws 25-30 mm long - 25 pcs.
- Tandembox Antaro set, height N - 81 mm, depth 500 mm - 1 pc.
- Tandembox Antaro set, height C - 196 mm, depth 500 mm - 2 pcs.
- Furniture handles - 3 pcs.
Well, we bought everything we needed, ordered it and picked it up from the workshop for cutting and edging. Now you can start assembling.
Warning!
Let me make a reservation right away that the markings have already been applied to the parts. I will discuss how this was done separately, so as not to repeat it with each new box.
You should start by marking and installing the guides on the racks. On the front edge of each rack, first set aside the height of the facades (along with the spaces between them). Considering that the bottom of our box is overhead, we must subtract 16 mm (bottom thickness) from the first size. It turns out
268 - 3 - 284 - 3 - 150 - 5 mm.
Then we move on to the actual marking of the guides. 33 mm is set aside from the bottom edge and bottom border of each façade. We draw a perpendicular to this point, after which we mark 37 mm on it. We prick the point with an awl.
This is the center of the third hole in the guide. That is, we lay the guide on the line so that it can be seen through the holes. We screw the self-tapping screw into the third hole (at the marked point, of course). Then we align the guide again so that the marking line passes through the centers of all the holes and screw a couple more screws into it.
As a result, we should get a picture like this, only in pairs. (in mirror image, of course).
Let's start assembling the box. Using four confirmats, we screw the racks to the bottom (it's better to do this by placing the box on its back). This way we can see the ratio of parts and, if necessary, correct it).
Again we fasten the body strips with confirmations (the edge is directed forward).
Now we lay the box on the front side, put the back wall on it, align the walls with the edges of the fiberboard and temporarily fix it with three nails (or self-tapping screws) so that it does not move. Then, using a thin drill, we drill holes for the screws and fasten the wall to the box.
We turn the already almost assembled rigid box “on its head” and screw the legs. It is advisable to mark and mark the attachment points for self-tapping screws in advance.
In general, the finished box looks like this.
Let's move on to assembling the drawers themselves. First, we screw a pair of side clamps to the back wall. The top edge of the chipboard part (where there is an edge) should be flush with the metal part. If it doesn’t work right away, the mounting holes have an oblong shape and allow you to make adjustments within a couple of millimeters.
We attach the side walls to the rear wall; to do this, we snap them onto the latches of the rear wall (put them into the grooves and press them into place.
Having snapped both side walls into their proper places, we insert the bottom into the grooves on the underside of the walls.
We turn the box over, and pressing the side to the bottom with one hand, screw the screws into the mounting holes (23 pieces per side).
We collect the remaining boxes in the same way. (we are not installing roof rails yet - they are installed together with the facades).
We install the drawers on the guides. To do this, we simply pull out the last ones, place the drawers on top and push them all the way. At a certain moment, a metallic clang will be heard and the box will clearly fall into place.
The next step will be the installation of facades. First, we mark them out. In the photo I show the markings of the lower and other facades; they differ from each other, because the lower one also covers the bottom of the box. The two lower holes are for fastening the facade itself, while the upper one is for the railing.
Use a 10 mm drill to drill blind holes 12 mm deep. It is better to do this on a machine or use any drilling depth limiter, otherwise it can be very sad.
After this, we take the holders in our hands (at rest they are bent to the side), insert them into the lower pair of holes and straighten them (thus, they are fixed at random). I must say that it is quite tough.
We put the façade in place. To do this, simply click the holders into the side walls of the tandembox.
Now for deep drawers you need to install rails. They are attached to the facade in the same way as holders, that is, they are placed in the holes and straightened.
The railing is attached to the rear wall with a snap. It is placed on the “notched” corner and snaps downwards.
By rotating the orange part of the railing you can adjust the tilt of the facade. All these adjustment devices are locked by sliding the plastic coupling forward, again until it clicks.
We install all the other facades in the same way.
All that remains is to make the adjustment. For this purpose, there are adjusting screws and slots (for a Phillips screwdriver) on the side walls of the tandembox.
As a result, the box takes on this form. All that remains is to screw on the handles, which haven’t even been chosen yet)))
Easy installation without tools
The various TANDEMBOX plus designs are easy and convenient to install. Adjustment in three planes allows you to create the perfect façade pattern. And all this without a tool.
Installation, adjustment and dismantling
Once the façade fastening is installed, the façade simply clicks into place.
All components can be installed quickly and easily without tools.
Adjustment in height and width is conveniently carried out through a window in the drawer. The tilt adjustment is carried out directly on the railing.
Installation instructions
PDF | 391 KB | 11-26-2020
PDF | 384 KB | 11-26-2020
PDF | 188 KB | 11-26-2020
PDF | 151 KB | 11-26-2020
PDF | 184 KB | 11-26-2020
Machines and devices
To ensure easy and precise installation of Blum products, we provide a variety of drilling machines, jigs and assembly jigs. After all, perfect movement is only possible with precise installation of the fittings.
You might be interested.
Product Configurator
Quickly find the necessary accessories
EASY ASSEMBLY app
Electronic assistant for assemblers
Services overview
A variety of services for Blum clients and partners
Source
How to install blum tandem boxes correctly
Hello dear friends.
Today we will talk about what retractable systems with a “self-driver” are and how they are installed.
In our example, it will be a tandem on a box, 440 mm deep.
To begin with, I will say that for this fittings, there are special catalogs that indicate all their sizes and installation diagrams.
So, for tandems, the drawer is designed differently than for conventional guides (for example, for the same “telescopes”).
The height of its side parts should be 12mm greater than the height of the transverse parts.
Special mechanisms are attached to the resulting protrusion (from the front end of the box) (in the photo, they are red).
Its total width in this case is also greater than the standard width, since it does not depend on the gaps on the guides, the size of which is usually, as you know, 13 mm.
In this case, this gap will be 5 mm.
So, special mechanisms (latches) are mounted on the front edge of the box, and holes are made on the back edge, thanks to which it is fixed in a special mechanism.
Next, at a distance of 37mm from the front edge of the side, guides are attached to the side itself. In this case, the box contains one telescopic guide (upper) and two “tandems” at the bottom.
After assembling the box, the box is very easily inserted into the system and works great.
In addition to the fact that the Blum tandembox is a system with a self-winding mechanism, it (according to the instructions) can withstand quite a decent weight.
