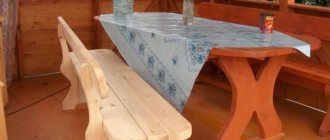
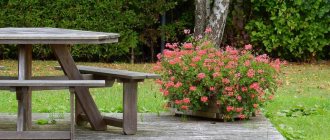
For example, what do you associate with the word “dacha”? Some with hard work in the garden, and some with a hammock under a shady tree. And I immediately imagine a country table on the open veranda, with an abundance of fresh herbs and kebabs. At the dacha, it can be said to be a cult place, where food mystically becomes much tastier.
Naturally, if you make a table for your dacha with your own hands, it is also a source of pride . You can always say to guests: “Well, how do you like the table? I did it myself” and tell an interesting story of his labor feat. This article provides several examples of how to make a country table; you can choose the appropriate option.
Note . Most of the diagrams in the photo are taken from English-language sites, and they have everything there, as you know, in inches; to convert to centimeters, simply multiply the indicated dimensions (excluding degrees) by 2.54.
Preparatory work
I propose to consider one option for self-assembling a round wooden table.
It is simple enough that even a beginner can assemble such a structure. After re-reading the assembly features and the progress of work, you will decide for yourself whether it is worth making a similar table, or whether you will somehow modernize the proposed design.
You will need a set of tools consisting of:
[adv2]
- roulette;
- pencil or marker;
- jigsaw;
- screwdriver;
- drills;
- set with drills;
- construction compass;
- clamps;
- grinding machine;
- sandpaper, etc.
Prepare everything in advance so that at the most crucial moment it doesn’t turn out that something is missing or missing.
Materials required:
- pine boards for making a lid (table top);
- wooden blocks for the legs;
- self-tapping screws;
- wood glue;
- corners (metal);
- varnish;
- wood processing products;
- paint if you are going to paint the table.
Only when everything is collected and prepared can you begin to implement your planned project.
Don’t be afraid, but also be prepared to devote a lot of time to the round table. Especially if you are doing this for the first time.
Drawing with dimensions
To make a table with your own hands, you will need to draw up a drawing. This way you will prevent errors during the work process and make furniture much faster. This drawing should contain the following designations :
- length of the product;
- width;
- depth;
- height.
Also in the drawing it should be noted the materials of their manufacture. For furniture designed for 8-10 people, the optimal tabletop size will be 80 by 120 cm .
Important : the dimensions of the table for the dacha are calculated based on the needs of the users and the availability of free space in the dacha area.
If there is a lot of free space, you can assemble a spacious country table with benches . The advantages of this design include:
- capacity;
- sustainability;
- ease of use.
Some people prefer tables with an ice chest . Such designs are convenient. In the summer heat, you can cool drinks in them. This model is practically no different from the product with benches. Only in the middle of the tabletop is an ice box made. Instead of an ice chest, you can build a table with flowers. You will have a beautiful flower bed in the middle of the tabletop.
If there is not much free space on your garden plot, you should opt for a folding furniture model. It is different:
- compact size and ergonomics;
- light weight;
- different transformation options.
Important: to make a tabletop, you should choose a board 3-5 cm thick.
Sleek, durable metal
Metal is often used in the production of outdoor furniture because products made from it can last for decades (but only if high-quality metal is used and not recycled materials). Modern forging technologies give wide scope for imagination. A forged table will look especially impressive in a courtyard with ornate metal gates, wickets, fences, and gazebos. Such products seem exquisite, weightless, elegant.
But you can make a simpler design with your own hands using standard sheets of metal and a profile. Aesthetically, such furniture is inferior to forged furniture, but it has the main advantages of outdoor metal products, namely durability and stability. Metal furniture is not afraid of cold, heat, wind, it can be used outdoors all year round.
Metal also has certain disadvantages. In particular, it is susceptible to corrosion and therefore requires special treatment to prevent rust. It can get very hot in hot weather and cool in cold weather, which creates some discomfort when using it. Metal has significant weight and is one of the most expensive materials for furniture production. Aluminum has the most affordable price, but it is inferior to steel and cast iron in strength.
Required Tools
To make a table with benches for your garden with your own hands, you need to prepare the following tools:
- wood hacksaw;
- electric jigsaw or circular saw;
- drill with various drill bits;
- screwdriver;
- hammer (if it was decided to use nails instead of screws).
This is a minimal list of tools that are simply impossible to do without when assembling wooden furniture. To make the work go faster and at the same time make the furniture look more aesthetically pleasing, you will also need:
- milling cutter;
- sander;
- rotating miter box (allows you to make precise cuts at the desired angle).
How to paint garden furniture
Since the garden table will be located in the open air, it will be exposed to increased moisture and sudden temperature changes.
The tree will also be susceptible to attack by pests. You can extend the life of your country table using various impregnations, paints, and varnish .
It is recommended to paint the table not only to add aesthetics, but also to extend its service life.
To do this, you should use special paint for exterior use .
Advice . Life in the country can be made even more comfortable by making a gazebo table or folding table.
Wooden table for a summer house with benches
Outdoor table for a summer residence with benches
This design (as in the photo) is made of boards measuring 38x89 mm, although in fact, any boards of sufficient length will do.
Some parts of the structure are connected using studs with M6 threads and a length of 16 mm, while wide washers and nuts are used.
We connect the table parts together with studs, washers and nuts.
To use studs, just connect all the parts together and drill through holes. First, a washer with a nut is installed on one side of the stud, after which the stud is inserted into the hole and the washer is put on it again and the nut is screwed on. Finally, the structure is securely fastened together using a wrench. This approach allows you to disassemble the structure and hide it for the winter so that the structure is not exposed to precipitation.
Seat manufacturing process
Drawing of a bench with dimensions
The image above shows the dimensions of the bench, although they may differ depending on wishes, but the general principle of construction should remain. First of all, you should make the blanks by cutting boards of the appropriate size. Since there will be two benches, there should be 2 times more blanks. Naturally, the workpieces are polished - this will make it more convenient and pleasant to work with them, although the final grinding is carried out after attaching all the workpieces.
Short sections of boards, which are intended for attaching the boards of the seat itself, are cut at an angle of 45 degrees, although this is not necessary. First of all, you should connect into one unit the elements that are attached to the seat boards from below. The photo shows how this unit is attached using pins. It may turn out that one pin is not enough, so you can put another pin diagonally, which will make the structure more reliable.
Bottom seat support assembly
After all the elements are securely fastened together, as indicated in the image below, proceed to attaching the boards of the seats themselves. The boards do not have to be fastened tightly end-to-end, but you can leave gaps between them, up to 5 mm thick. The boards can be secured to the base using regular nails, using 4 for each board.
Fastening the seats together
The seats are fastened together using two boards located on both sides of the legs and connected to each other using pins, as shown in the picture below.
We connect the legs to the boards using pins
Table installation
The image below shows the dimensions of the table, although the dimensions should match the dimensions of the frame with the seats attached, so they may differ from those shown. The transverse boards, with which the tabletop boards are attached, are cut at such an angle that it coincides with the angle of divergence of the legs.
How to make an outdoor table out of wood
The legs of the tabletop are made in the shape of the letter “X”; for this, in the center of the fastening, the boards are selected to be half their thickness. The legs are connected using nails or self-tapping screws.
This will have to be cut out
Using this principle, two legs are prepared; all that remains is to connect all the elements together.
How to make X-shaped legs for a garden table
Table mount
First of all, it is necessary to secure the legs to the frame with seats. They are also fastened with pins, at the same distance from the benches.
Table leg fastening unit
Lastly, the tabletop is attached, also using pins. All that remains is to open the table with benches with a paint and varnish material for every taste.
Creative ideas
To make housing more original and attractive, non-standard approaches to furniture manufacturing are used. You can use one of the following ideas:
- The bottoms are made of boards from giant decommissioned barrels. The available inscriptions only emphasize the interesting history of the product. The lower edges of the tables can be equipped with thresholds made of iron brackets or chopped firewood.
- Large diameter trunk cuts. Their edges may be rounded or remain with bark. Wild wood looks very good in gazebos, verandas and hallways of country houses.
- Coils from the power cable. The products are comfortable, large, stable. They only need finishing. Service inscriptions add originality.
- Solid wood with carvings. The depressions made are filled with epoxy glue. It looks very unusual.
A round table helps create an atmosphere of intimacy in the home. And if it is made with your own hands, it will definitely become loved by all family members. Exclusive design will help give the room individuality and unique style.
