Required materials and tools
Before you start learning the assembly process yourself, it is first important to prepare the necessary tools:
- Screwdriver. You will need it to tighten various parts: bolts, confirmations, screws. With their help, prepared parts of the fittings are necessarily attached. There is an alternative method of assembly - using ordinary screwdrivers, but in this case the whole process can take a long time, and not every person has such an opportunity.
- It is advisable to immediately purchase drills of various diameters. In many construction stores they are sold as a set (from 4.5 to 10mm). This will also save time on searching for all the necessary materials, especially since such a tool may be useful in the future;
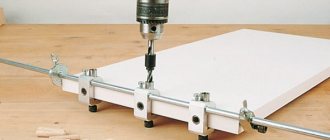
- A drill for confirmation is purchased separately. In this case, you can drill a 5 mm hole in a very short time. For steps without special costs, the hole expands to 7mm;
- In order to tighten the confirmat efficiently and tightly, it is recommended to purchase a hexagon. As an alternative, some home craftsmen use a screwdriver equipped with special bits, but with this design it is impossible to get into hard-to-reach places;
- Anyone who wants to assemble cabinet furniture should have a Forsnel drill, since it is used to tighten hinges and other fittings;
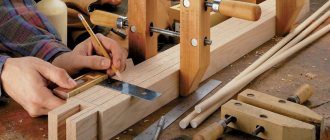
- Marking supplies: ruler, pencil or bright felt-tip pen, metal square, tape measure, stationery knife;
- Circular saw;
- Electric jigsaw;
- A hammer, preferably with a nail puller (will be needed if you need to dismantle individual elements);
- Construction hair dryer.
If the furniture does not have any special features, when assembling it is recommended to use universal diagrams that are designed for a drilling angle of 90 degrees. Unfortunately, such a device cannot be called a budget option, so such a purchase is only advisable when the assembly becomes a professional craft.
Product selection
So, let's start discussing the process itself in more detail. If making furniture yourself is not new to you, then you can start making quite complex structures. Otherwise, it is best to start by assembling simpler models. The simplest model for making modern upholstered furniture is a square ottoman.
Important! The softness and springiness of the product depends entirely on the purchased foam rubber and its quality.
Manufacturing technologies
Answering the question of how to make cabinet furniture at home, we divide the whole process into several stages.
Cutting out the parts that make up the overall structure
When you plan to work with chipboard, it is impossible to do without cutting. Using a machine, we cut chipboard, on which we distribute all the workpieces in advance. This will help reduce material consumption. It is recommended to use a high-performance machine, due to which the optimal sawing frequency is achieved, since a scoring saw is installed here.
It is easier to work with ready-made laminated chipboards. In stores you can buy options covered with a decorative layer to suit every taste. All that remains is to cut out the necessary parts from them. If the furniture is made from unprocessed raw materials, then you need to paste over the already cut parts. The cladding can be done with self-adhesive film or special plastic.
We take measurements
We make cuts with a machine
Processing slices
Before assembling the cut parts, you need to process the cuts. For this purpose, adhesive-based edge tape is used. Before work, it is important to pay attention to the conditions in the room:
- The humidity percentage should be as low as possible;
- It must be warm to avoid deformation of the material.
To paste parts with edge tape, prepare a breadboard or construction knife and an ordinary iron. Most often, the edge is sold with an already sticky layer, and no additional surface treatment is required.
You can use a professional iron. During operation, it is important to keep it at a certain distance from the surface in order to avoid displacement and secure all parts tightly in place.
It is important to remember that the iron must be held on the edge for a short amount of time, otherwise it will overheat and bubble. As soon as the edge is fixed and takes a certain position, take a knife, trim the edge and smooth out all the irregularities with sandpaper.
Trim off unnecessary parts
Glue the edge
Marking points for fittings
The finished parts must be laid out on a flat surface. Next, mark the places where the fittings are attached, in accordance with the plan of the finished product. Check all dimensions; an error of just 1 mm can cause the entire structure to become distorted. The cabinets will stop opening, the doors will not fit together correctly. Next, you need to drill all the holes of the required diameter to secure the fittings.
Lay out the parts on the floor
Creating markup
Drilling holes
We fasten the fittings
Installation
After the work with the fittings is completed, we proceed to assembling all the elements. Many newcomers to this business first turn to video instructions, which not only show the order of assembling a certain model, but also give practical advice on how not to confuse the entire process. We collect the nodes. This is the final stage when it is necessary to assemble all the prepared parts into a single structure. It is important to perform all operations sequentially.
Sofa design example
Sofa frame drawing
Staying organized is a necessity when you work from home or have to study, so finding the right desk and modular system or cabinet for your storage needs can make all the difference to the success of your home business or study time. To easily coordinate your office space, you have all the pieces you need in one package, so everything fits for a professional look.
An example of designing an oval sofa
This is part of the department. Yul studied architecture at the Academy of Fine Arts in Copenhagen. He made his debut as a furniture designer at the Copenhagen Guild Exhibition at the Museum of Decorative Arts in the 45th Chair, as it became known, which featured a one-piece curved seat and back that were separated from a sculpted teak wood frame, conveying a feeling of incomparable weightlessness. All furniture was made to order in limited quantities.
Choice of upholstery fabric
Mid-century furniture plans from major designers refer to items currently earmarked for purchase.
This property has been purchased. Our curators emphasized that they are connected to this. We are pleased to be the exclusive New York representative for this prestigious line of furniture and accessories. Each piece is handcrafted, designed and painted with vibrant images and themes raised. Sticks have received national recognition for their distinctive line of furniture, accessories and sculptural art. The building's studio is large and modern with many doors that open to natural light and fresh air. After dyeing, the piece goes to the finishing studio where a protective finish is applied to the piece. These treatments include surface modifications that include fabrics, metals, carvings and intensive artistic processes.
Before the introduction of 3D modeling into furniture production, many things had to be done by eye, through real trial and error, with double and triple waste of materials and time, and ultimately obtaining inaccurate results. The production, use, and storage of patterns and templates obtained by handicraft methods entail problems associated with wear, damage, and loss. The number of such patterns during intensive production simply goes off scale, making any classification and systematization difficult. As a result, searching and assembling templates for a specific product turns into a nervous puzzle, when it is easier and more correct to do everything again.
Pieces that include special treatments will cost more than basic pieces of furniture for pieces and pieces. Leather applications are most often made on chairs, benches, chests and headboards. There are many leather options.
Upholstery leather upholstery leather lives in sticks of different colors. Talented sewers stitch the surface of the leather with images to match the design of the product. Hand stamped leather that adds dimension and texture to the leather. It is then hand-painted to match the part's color palette. Building from the piece's color palette, a combination of leather and texture are chosen to create additional structure and dimension for the piece, as shown in the detail on the right. Leather Collage By recycling the assemblage of its materials and techniques, this procedure truly offers unique leather applications that include stamping, dyeing, dyeing and stitching.
I have been producing furniture for more than a quarter of a century, I have experienced several forced moves and each of them added gray hairs to my head, destroying at least half of what I had acquired through back-breaking labor. All factory documentation in electronic form solves this problem once and for all.
All the documentation and patterns of the furniture factory accumulated over the entire period of work are on one flash drive with a password. Your entire business is in your pocket. Life presents dizzying surprises, but no matter what side fortune turns to you, your experience and the entire accumulated database of documents, furniture models, drawings, specifications, patterns, suppliers, clients are always with you, allowing you to easily replicate your business, restore it from scratch, be confident in the future. Show x-th changeable fate!
Sewn and Dyed Bark Soft leather that is soft enough to be sewn. It fits on sticks without a pigment finish, so it can be painted on to go with a palette on the piece. This process entails a second application that shades the surface design. There are many levels to the process outlined below.
Anxiety. The restless treatment begins with abstract and textured wood burning, followed by a bruising technique. The anxiety treatment is completed by applying color tones. Mixed environment. The treatment uses leather and metal applied directly to the surface of the wood. The treatment may simply be skin, it may simply be metal, or it may be a combination of both. These materials can work as accents or completely cover a surface.
Documentation standard for upholstered furniture projects
At the moment, there are no GOSTs or standards for documentation for upholstered furniture in electronic form. In my opinion, documents for the production of upholstered furniture must meet the following criteria:
- Drawings, illustrations and specifications must be professional and at the same time understandable to “poorly skilled” workers.
- They should actually be used to produce real furniture, excluding even minor annoying mistakes that are inevitable when designing upholstered furniture “from the head.”
- Patterns of curved parts must be made on a scale of 1:1 for printing on a plotter or printer.
- Visual illustrations must be created so that workers can clearly understand the assembly of the product.
- It is advisable to provide for scalability (for example, two, three, one), if the furniture model allows it.
- Possibility of any additions at your request.
Step-by-step instruction
First you need to determine what cabinet furniture is made of. The most common and affordable materials are chipboard, fiberboard or chipboard. Solid wood is more reliable and stronger, but it costs more and is more difficult to work with.
Design
All instructions for creating cabinet furniture can be divided into two stages. The first is the design of cabinet furniture. This stage involves an artistic or graphic representation of all elements (drawings of cabinet furniture). This is a complex undertaking, since a project diagram must be correctly developed to help visualize the necessary functionality of the furniture.
Just a few years ago, such a project could only be developed by a qualified designer, but with the help of modern applications and programs, you can work on the task yourself. To draw up a clear plan for designing cabinet furniture with your own hands, it is worth determining what information should be contained in it:
- On a separate plan, you need to draw the general design of the room in order to visualize the position and appearance of cabinet furniture;
- All dimensions are included in the project - section dimensions, height, depth;
- All the details that will serve as the basis of cabinet furniture are worked out, drawings of facades with the required dimensions are included;
- The texture and color scheme are selected.
On the Internet you can find special 3D programs with which you can recreate absolutely any furniture project. In the functions you can set special parameters and even select the material from which you plan to create the desired interior items. The main advantage of such services is that there is no need to study information on how to calculate dimensions or draw “the old fashioned way,” especially since not every person has such skills. The finished version is printed on a printer as a photo project, and then it’s a matter of technique and practical skills.
The graphical drawing of the overall project determines the success of the planned business, but the creation of details is an equally important undertaking. First of all, everyone should think about what functions the furniture should perform and only after that start drawing. Correct sizing is a determining factor in the success of all further assembly. Otherwise, the part may not fit into place, which means that its shape will need to be adjusted, which means additional financial expenses. Even if the plans include making an ordinary storage cabinet, each detail should appear from a separate perspective in the drawing:
- Back wall;
- Front Panel;
- Side walls;
- Each shelf;
- Door.
As for the parts that will be retractable, they are also drawn separately from the rest.
We create the overall design
We take measurements
We create color design
Creating parts
The production of parts is carried out according to the general instructions:
- Selecting the material from which the parts will be formed;
- Creating a project on a computer using a 3D program or drawing by hand on whatman paper;
- Making patterns by printing on a printer or making patterns by hand;
- Transferring blanks to the material by tracing patterns with a pencil or bright marker;
- Sawing using a high-performance machine;
- Edge processing, grinding if necessary;
- Drilling holes for fasteners.
Choosing manufacturing materials
Let's make a project
Creating patterns and cutting materials
We cut chipboard
Sanding the coating
Making holes
Astra Constructor Furniture
One of the most understandable systems for 3D modeling is Astra Constructor Furniture. This program is aimed at medium and small furniture manufacturing businesses. It has a certain set of tools sufficient for comfortable work. A simple and clear interface attracts users. In Astra Constructor you can create a product from scratch using elements of the standard library. You can completely select the fittings and fastenings yourself, as well as create free-form parts.
Also in this system you can edit any detail and this is a huge plus. Despite the fact that Astra Constructor performs almost all actions automatically, you can correct everything: the drawing, the shape of the door handle, the thickness of the shelf, corners and more. Not every program allows you to do this.
Assembly
When transitioning from constructing furniture with your own hands to assembly, the entire process can be described in the following steps:
- All present fittings (hinges, locks, ties, runners) are attached to the main parts;
- Assemble the frame and back wall, mount the mirrors;
- They check the fittings, attach handles, plugs, and install retractable elements in their places.
Depending on what piece of furniture you plan to assemble, the process may differ slightly, but the basic procedure remains the same. So that every person planning to create furniture with his own hands understands how he needs to act, we can analyze the whole process using the example of creating an ordinary cabinet.
We fasten the fittings
Assembling the frame
We mount the handles
We attach the plugs
Stage 1. Frame
The cut parts are connected according to the plan. To perform the screed, it is first recommended to prepare a screwdriver with special bits. Twisting will happen much faster than with a screwdriver. In addition, much less effort will be spent on such work. It is important to ensure maximum structural strength, so it is not recommended to use nails to strengthen the bottom of the cabinet. The best choice would be 4 by 16 self-tapping screws. The side surfaces, as well as the top and bottom, are connected at right angles using furniture corners. You can nail the back wall of the cabinet to the finished frame.
Assembling the base
Making holes
Installing the bottom frame
Fastening the shelves
Stage 2. Sliding system
To ensure the correct movement of sliding doors, the guides are first attached. They are mounted parallel to the top and bottom planes of the cabinet. One of the best options would be to use a specially developed system called “Commander”. Without much effort, you can not only move the doors to the desired position, but also easily make adjustments. As a rule, adjustment is needed if gaps are observed during the assembly process, which not only spoils the appearance, but also complicates operation. In most cases, during the first time after assembly, cabinet furniture shrinks, which can also result in cracks appearing. This is considered normal due to the specific characteristics of the material.
Special rollers are screwed to the doors. The finished structure is installed in the guides and the progress is checked.
Installing the stopper
Installing the rubber pad
Installation of guides
Adjusting the system
Stage 3. Installation of fittings
At this stage, all shelves, drawers are inserted into place, coat hooks and other small elements are attached. The cabinet is ready. Even a person who does not have experience in creating cabinet furniture with his own hands will not spend a lot of time creating something of excellent quality. The average assembly time is no more than three hours, excluding preparatory work. In addition, the cost of a handmade product is much lower than the price of ready-made furniture in a store.
Assembling cabinet furniture with your own hands is a combination of the optimal design solution, the choice of quality materials, as well as the acquisition of new skills, with the help of which you can create entire furniture sets in the future.
How to do?
But how to make all these sofas? Where to screw, where and how to drill and saw? Well, let's get started. Just don’t forget that what is being covered must be covered before general assembly. We’ll discuss how to cover something after the carpentry, after all, the basis is in it, and the making of the sofa begins with it.
Frame and drawer
In a professional, artisanal manner, so to speak, the supporting frame is assembled on blind tenons with wedging and gluing. They provide a completely hidden connection and furniture on these lasts for centuries, but to make them you need a hand-held wood router, skills in working with it, or mastery of a hammer, chisel and brace.
It will be easier for an amateur to assemble a frame with inserted legs, pos. 1 in Fig. This is no less reliable for 30-40 years, and the seam is almost invisible. Beam cross-section from 50-30 mm; legs - from 70x70 mm. In any case, the “stump” of the leg must be at least 40x40 mm. The beams are fastened with pairs of diagonally located self-tapping screws from 4.2x60 using glue.
Connections in sofa modules
The box is best assembled on triangular section bosses from 50x50, pos. 2. They are fastened to the box boards (oak/beech from 30 mm; pine from 40 mm) with self-tapping screws (4.2-6.0)x45, 2-3 pieces each. into each board, i.e. 4-6 pcs. on the boss; connections also with sizing.
Note: the box will be much stronger and more durable if you take the time to assemble the box on dowels, a pair per joint, before installing the bosses.
The bottom can simply be nailed with small nails in increments of 70-100 mm; it will lie on the frame and therefore will not come off. The choice of material is more important here. OSB is the strongest, but the staples of the stapler do not fit into it well, many bend and tear the casing; wallpaper nails too. Chipboard and fiberboard are fragile and delaminate. Suddenly the bottom gets wet and may simply fall through, leaving a nailed strip between the frame and the box.
Note: if you need to reupholster the sofa, the chipboard/fibreboard bottom will show itself in all its glory - when you tear out the old staples, the layered material is torn apart so that you can no longer attach the new upholstery.
The best bottom material is plywood 4-8 mm thick, impregnated with a water-polymer emulsion. But, if you need a box without bulkheads, a problem arises: sheets of plywood as wide as the length of the sofa are not produced. The pieces need to be connected so that the joint is supported by the weight of the contents. The same question arises if there are scraps that are enough for the bottom.
In the industrial production of high-quality furniture, plywood sheets are connected with a shaped strip made of hard wood, at the top at pos. 3. You can make the “shape” yourself if you have a router. Its length is 2 board thicknesses less than the width of the box (equal to its internal width). The gusset is fastened from the inside to the frames (boards) with steel corners. If there is no router, the gusset is replaced with a prefabricated T-shaped beam made of 50-70 mm strips with a thickness of 15 mm and a 20 mm liner no less thick than plywood. It will give rigidity to the beam, and without it, the sheets assembled end-to-end will begin to mutually delaminate each other under work loads. Everything is assembled on small nails and secured in a box like a gusset.
Connect the box to the frame (remember, after the lining, if provided) with dowels in increments of 200-300 mm, this is enough to prevent it from sliding to the side. An option, perhaps in addition to the dowels, is flat metal lining from the inside and self-tapping screws, 1 in the middle on the short sides and 2-3 evenly along the length on the long sides.
Note: if the drawer is without bulkheads, the back height should not exceed 350 mm, otherwise the back drawer drawer will not withstand the loads.
Back
The basis of the supporting frame of the backrest (item 1 in the figure) is spar A made of hard board (120-150)x40 mm. Most often, to simplify the work, it is made of sections, but a solid one will be stronger. This one is cut flush into the vertical posts and placed first on the dowels. It is also advisable to assemble the entire frame first on dowels, and then fasten it at the corners inside with corners or bosses, like a box. The bosses in this case can simply be scraps of timber, because The internal volume of the backrest is not used.
Sofa back design
The height H1 is equal to the height of the support frame, without legs, together with the height of the drawer; H2 – the thickness of the sofa, but not less than the height of the spar indicated above. Thickness of the bottom slab made of oak, etc. – from 40 mm. It, together with the spar and rectangular parts of the racks, makes up the lower backrest belt. This is a very responsible node, because The normal operating load of people reclining tends to tear it away from the lower support.
The normal number of stands for a sofa up to 2 m long is 4 pieces. evenly along the length. If the back is wider than the sofa, i.e. also covers the armrests, then 2 more are added. The penultimate ones, counting from the middle, fall on the corners of the supporting structure, the outermost ones - on the outer planes of the armrests, see below.
The upper belt of the backrest is made of solid timber with a thickness of 50 mm. His “responsibility” is necessary when people stand on the back to reach something above or when the sofa is dragged by the back when moving furniture. Also here the upholstery is most likely to creep and wrinkle, so the top beam is planed into one plane with the supporting surface of the back and its edges are rounded (shown in the inset). As for the racks, they can also be made of pine.
The production of the backrest is completed by upholstering its supporting surface with plywood, chipboard, fiberboard from 4 mm, as shown in pos. 2. This is necessary to give the entire module the necessary rigidity for a strong connection with the support, but there is no need to sew up the rear yet!
Now compare poses. 2 and 3. The last one is a gross mistake that simplifies the work and allows you to quickly get paid for it, but seriously worsens the quality and durability of the sofa. How to attach this backrest to the support? Self-tapping screws into the ends of the boards? How long will a sofa like this last before the back comes off?
Connection to support
Assembling a backrest with a support is exactly the case when metal fasteners in furniture are necessary. Together they are connected with corners from 60x60x4, and to the back parts with self-tapping screws from 6 mm, and to the drawer/frame - through bolts from 6 mm (heads into the drawer/frame), 3 of each per corner. Washers from 40 mm under the heads and nuts are required! There are still springs under the nuts; it won’t be possible to tighten them later!
You need 2 corners for each vertical joint in the back (12 with 2 intermediate posts), at the top and bottom, 3 horizontal ones in each section at the top, in the area of greatest load (towards the spar), evenly along the length, and 1- 2 horizontally at the bottom. It’s better to have 2, in case the sofa is dragged by the back. For fastening to the spar, it is better to use unequal angles 60x40 with holes in a narrow flange, located in a row.
And only now the back can be sewn up with the same plywood, chipboard, fiberboard from the rear, covered with technical fabric, glued with foam rubber (40-70 mm), and completely covered. It is impossible to leave the decor for later, so as not to accidentally damage it during further work: it is unacceptable to insert the folds of the upholstery into the joint of the backrest and the support, and it will not be possible to cover it after installing the armrests.
Armrests
Armrests can be solid wood or framed like a backrest. They are also fully completed before installation. The load on them is less, so they are attached from the inside with self-tapping screws from 6 mm with an envelope or a snake to the box, and 4-6 pieces to the support. in a row.
Design of curly armrests and back of the sofa
Armrests of complex shapes are most often made of frames. In fact, technologically they are not that complicated, pos. And in Fig. The decor on the inside reaches the bottom edge of the sofa. The backrest should also match the elegant armrests. Then it needs additional. sheathing made of slats approximately 30x40 and liners made of boards from 30 mm, pos. B. The sheathing is cut into the backrest posts, and the inserts are fastened with self-tapping screws into the edge.
Sofa sofa arrangement
Sofa
The bottom of the sofa (plywood or chipboard from 8 mm) is assembled on a frame made of 70x50 timber with at least 1 crossbar for every full or incomplete 70 cm of length; distribute them evenly. The frame parts are connected by a half-timber insert and reinforced with self-tapping screws using glue. The bottom plate is attached to the frame with small self-tapping screws or notched nails. The frame bars should be at the bottom, i.e. outside (see figure), and not inside, as is sometimes advised. True, in this case 50 mm of foam rubber disappears, but there is a significant advantage when covering it: staples/nails do not scratch the top of the drawer, and thanks to the extra bending, the covering of the sofa (the most loaded) lies more evenly and holds tighter.
Upholstery
Covered with fabric with corners turned up
Upholstery of different sofas and even different modules of the same sofa is done in different ways, but they all have a common sore spot - the corners. Form them with a fold, as in Fig. on the right is a common method, but therefore no better quality. According to GOST USSR, turned upholstery corners are generally a manufacturing defect. Only sewn corners are reliable and durable.
Cutting and sewing the corners of furniture fabrics is done in two ways: without a tongue and with a tongue, see fig. below. The first is preferable for very dense and durable fabrics (jacquard, tapestry); the second for those more susceptible to abrasion - velor, courtesan, chinchilla - and leather. But keep in mind that the numbers in Fig. approximate, fitting with sketch is required!
Methods for cutting furniture upholstery corners
The covers are sewn, as usual, from the inside out and put on inside out. When putting on the finished cover, the wings (bends) of the scars are straightened with a special tool like a small shoehorn. It is called a bobbin, although it does not look like a braided bobbin. The tongue is not sewn into the seam; when sewing, it is folded back and left free.
Next comes tightening. If the corners have tongues, then the sheathing is leveled with them, and the tongues are secured. Then they pull the cover with a strong thread from the bottom along and across, 2-3 ties per 1 m of length and, tightening the threads, achieve an even, but not tight, tension; it is controlled by drawing. A cover with corners without tongues is straightened with threads. When the upholstery is stretched as expected, fasten the edges with a distance of at least 5 cm from the edge of the fabric. If the type of product allows, fasten with a hem.
Schemes for covering the frame and drawer of the sofa
Features for different modules
The supporting frame of the sofa and the drawer are upholstered as shown in Fig. The drawer is on 3 sides, the back remains open. This is necessary to ensure the strength of the connection between the backrest and the support, see above.
Tragus to make it easier to cover the sofa
A pair of small trestles with a height of approx. 1 m, see fig. on the left, less than the width of the sofa, so as not to press down the fabric. As a last resort, the sofa blank is placed on a couple of stools. It’s not possible to simply cover the back, because... it is already attached to the support. Here, first, the fabric is attached along the line of interface with the box, from under the bottom it is pulled on the trestles, like a sofa, and to tighten it from the sides, you will have to temporarily drive small nails into the support. Well, the armrests can be moved as you like, there are no problems here.
Pillows
Individual cushions for a sofa are sewn in the same way as blocks of a frameless chair:
- The foam mat is covered with technical fabric;
- Sew the decorative cover inside out, leaving the final (lower back) seam unsewn;
- 2 zippers are sewn into the final seam, fastened towards each other;
- Insert the foam block into the decor and fasten the zippers.
Drawstrings
Sewing several pillows is boring, and dust collects in the seams between them. But a flat sofa does not harmonize with every design. Therefore, sometimes the pillows on it are imitated with drawstrings, see fig. There are also 2 options available here, for lighter and denser fabrics. In the first case, loops are sewn onto the edges of the cover under the drawstrings, and the drawstrings themselves are made when the cover is already secured. According to the 2nd option, the front scenes (tunnel sleeves) are sewn onto the workpiece under the cords and an even tension is achieved by alternately pulling the cords and the tension threads of the cover.
Sofa upholstery with drawstrings
Beautiful scars
Decorative scars on sofa cushions
Another common way to decorate a sofa is with decorative scars, see fig. You also need to sew wings under them, but it is better to fill them with flexible multi-core electrical wire in PVC insulation with an outer diameter of 2-4 mm. Wire frames are formed on a template of nails driven into any (possibly vertical) wooden surface of a suitable size, even into the wall of a barn or doghouse.
British way of twisting wires
The ends are stripped of 25-35 mm of insulation, twisted with British twist (British, shaved, see the figure on the left), the joint is soldered and, so that the inadvertently exposed wire core does not dig into a sensitive place, it is wrapped with electrical tape. In the pillow, the joint, of course, should be at the back.
About one-piece cases
A one-piece sofa cover is already the highest aerobatics in the wallpaper business. However, what if a shabby but strong sofa made of mahogany or Karelian birch appears in your grandmother’s attic? Furniture restorers know their worth, but they love their work and respect smart connoisseurs. If you talk to them knowledgeably, they will charge a moderate fee and will put their soul into the work.
In such a case, as they say in “1001 Nights”, know that the basis for tightening a one-piece cover is the lines where the sofa connects with the armrests and backrest. They are fixed with cords, as shown in Fig. The cords are routed along the bisectors of flat angles (external) and the trisectors of triple (internal) angles along grooves in the wooden frame and, for triple angles, through holes in it. The cords are moderately stretched, their ends are secured and then the cover is straightened and pulled.
Stretching a one-piece sofa cover with cords
The drawstrings for the cords can be, depending on the design, front or back. The last case is the most difficult; the drawstring seam must be double and very even. To carry it out flawlessly, you need a professional 2-needle sewing machine.
Note: in general, the machine is the main problem when upholstering a sofa. Before work, look at your specification and check whether it sews jacquard weave fabrics with reinforced thread no thinner than No. 20. If not, you will have to rent or order upholstery at home. Or sew by hand.
