- Common Problems
- Hull repair
- Failure of fittings for internal filling
- How to update wardrobe doors
- Updating the appearance of the wardrobe
Restoring a wardrobe with your own hands will give you the opportunity to save on the purchase of this useful interior detail. An old or broken cabinet can be repaired and updated without much difficulty. The most common cause of breakdowns is considered to be door malfunctions, and restorations are the loss of the surface's appearance. Now we will look at several options on how to update an old wardrobe with your own hands and fix existing problems.
Common Problems
Before you repair your wardrobe and update its appearance, you should understand the type of damage. Among the most common we highlight the following:
- damage to the cabinet body or internal partitions;
- failure of fittings for internal filling;
- failure of the roller system and door closers;
- loss of aesthetic and commercial appearance of both the entire product and its individual elements;
In all these cases, it is quite possible to repair the wardrobe yourself, for which you will need components and tools.
Fastening the shelves
The installation of the main internal elements is done even before installing the door to make sure that everything fits and matches everywhere. First, mark the interior of the cabinet directly along the walls and do not forget about the thickness of the material. Self-tapping screws, brackets and furniture corners are suitable for fastening.
For cross-shaped shelves and sectional blocks you will need special dowels and glue. Wide shelves from 80 cm must be additionally fixed in the middle so that they do not sag or sag. Vertical corner racks are good in corner cabinets - this is the most efficient use of space.
Hull repair
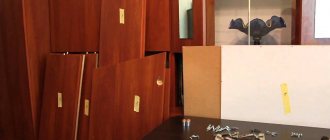
First of all, remove the cabinet doors, then, if necessary, remove the lower and upper guides. Next, you may need either complete or partial disassembly of the housing - to fix it, they often use either an eccentric tie or so-called Euroscrews, which must be unscrewed. If necessary, you need to order additional sets of fasteners.
If the case has mechanical damage, the panel will have to be replaced. By the way, it is recommended to buy components for sliding wardrobes in advance in those sets that will be needed.
Accessories for wardrobes
Accessories for wardrobes
Laminated chipboard panels are most often used to repair the body. You can replace the entire panel, or you can replace only a part, if the design allows it. In any case, you should carefully adjust the dimensions to the existing furniture format.
Knowing how to fix a wardrobe, you will not encounter serious problems. You should pay attention to the correct installation of the doors - first install the body using a level, then install the doors and achieve the correct location by adjusting the screws on the rollers.
Article about furniture
We are often asked various questions about old wardrobes and we notice that we begin to repeat ourselves in the answers. It’s probably time to write an article on this topic to help you.
Is it possible to move the built-in wardrobe?
It is possible if the dimensions of the new place match the dimensions of your closet. If the ceiling is smaller, it is better to abandon the idea of moving the cabinet. You will have to reduce the compartment doors, and this is very troublesome than reducing the vertical racks of the closet.
Is the ceiling height the same? Then remember one important thing. Treat every detail, every screw, every self-tapping screw very carefully. If the cabinet will have to go to another house or lie there for some time until the renovation is completed, pack each part in stretch film and sign the name of the part with a marker. It is very important.
If you are careless and approach the move of a wardrobe from the position - it’s not new anyway... The wardrobe in the new place will look as if it has survived 10 moves. Any lost screw or hardware plug will give the cabinet a sloppy look.
Is it possible to replace the floor under the built-in wardrobe?
For example, you are making repairs, changing laminate or parquet boards. Why would you need to change the flooring inside the closet? If your closet is new, good, and you are not going to change it in the next 10 years, why do you need to change the floors inside the closet?
Make it simpler. Remove the compartment doors and the lower track; if there is a substrate under the track in the form of chipboard, this also needs to be removed. Using a grinder, cut through the laminate exactly in the middle of the bottom track and change the covering in the room. Then reinstall the lower track and compartment doors. All. It turns out that you have a new floor on the façade, but the old one remains inside the cabinet.
It will not be possible to partially disassemble the cabinet to change the laminate inside the cabinet. You will have to remove all the vertical posts and the shelves are attached to them. You need to completely disassemble the entire cabinet, then you doom yourself to a bunch of problems that we described above.
Perhaps the cabinet is built-in, but has one side panel made of chipboard. Then you will need to dismantle it, make a cut inside the cabinet so that it is invisible from the outside, and decorate the joint with an aluminum threshold.
Can I wallpaper the inside of the closet or paint the wall?
You can, but it will cost you a lot of effort, and in the case of wallpaper, also nerves. It's easier to paint it, of course. Stock up on masking tape, glue the edges of the chipboard that are adjacent to the walls and paint. When the paint dries, tear off the tape, it will look neat, and the cabinet will not be dirty.
Is it possible to make a ceiling inside a wardrobe?
It depends on how you imagine it. For example, you can use 16mm chipboard. or HDF 3mm, but cutting and inserting rectangles inside the cabinet is extremely problematic. Be prepared for gaps and visible mounting brackets around the perimeter of the inserts. We recommend simply painting the ceiling with water-based paint.
Is it possible to add lighting inside the wardrobe?
The main problem is the presence of an electrical wire inside the structure.
If you have a junction box inside the cabinet (which is rare these days) or an outlet, you can connect to it. Think about where you can mount the transformer. Usually it is located in the upper part so that it does not catch the eye when opening the door.
Light sources are now mainly LED strips or recessed spots. Calculate which sections and shelves you will highlight and how you will route the wires.
Remember that if you run an LED strip inside the cabinet, along the entire top, then all the light will be blocked by the upper shelves. You will not get the desired result; the closet will still be dark.
It is better to highlight the sections with hanging clothes on hangers. Light up the drawers.
Don't forget to think about the way you turn on the lights. The easiest way is a push-button switch. You can install a touch or door open sensor.
There is a battery-powered backlight, with a motion sensor or with a vibration sensor. They provide little light, but are a great help in the dark. We have already written about this method of lighting, you can read it in the article - “Why is lighting needed in cabinet furniture?” And also, perhaps you will find the story about Ikea lighting in a wardrobe useful, read it.
Can I install mesh shelves or drawers inside the wardrobe?
Of course you can, but do not forget about one important point. The drawer or basket should not rest against the compartment door when being pulled out. People often forget about this, they buy baskets and already during installation they understand that they won’t be able to pull them out, the door will get in the way.
Is it possible to change the Schlegel (brush seal) at the compartment doors yourself?
Changing the Schlegel is easy, you just need to know a few secrets. Often an old brush dries out so much that when you tear it off the profile, it breaks into pieces. Particles of synthetic base and glue clumps remain.
Take a hair dryer and warm up the old schlegel with hot air. Be careful! If your profile is covered with film (the profile is wrapped), you can overheat the coating and it will come off along with the schlegel. Proceed with caution.
It is advisable to completely remove the old glue and degrease the surface. We usually use medical alcohol, it is more gentle, unlike solvent No. 646, but when alcohol does not help, we use a solvent. Again, the profile wrap may suffer, it may soften and swell. Be careful!
Anaditing does not face such problems. The only thing is, if the coating is rough, try not to smear the glue on the surface of the profile; stains may remain.
The ends of the Schlegel often come off during use, so we advise you to immediately glue them with super glue.
Why does the compartment door pop out?
There may be several reasons for this.
To begin with, try lifting one side of the door and using your finger to press the wheel up (we are talking about the bottom wheel), it should resist the pressure and be pushed out. If this does not happen, it means that the spring inside the wheel support has weakened or broken. The wheel needs to be changed.
If you do not know the brand of wheels, we advise you to carefully unscrew one roller (you will have to pull out one door) and take it to a specialized store (for example, in Degon, Moscow), and select it from the samples offered. Often wheels of different brands are interchangeable, because they are structurally copied from RAUM+.
If the spring is pushing the wheel out, bend down and examine the wheel cover. Perhaps it has simply been worn down by time and does not have rectangular edges. It's time to change the wheels.
Did you feel that the wheel seemed to be loose and wobbly inside the aluminum profile? Outwardly it is unerased. Perhaps the adjusting screw has come loose, or its head has slipped through the hole in the profile. It is necessary to pull out the door, lay it on its side and carefully examine the fastening points.
Often a regular washer under the head of the adjusting screw extends the service life of the door.
Is it possible to convert a hinged wardrobe into a wardrobe?
Theoretically, it is possible, but we, for example, do not undertake this, since we work with the Absolute door system, the doors of which occupy 10 cm. inside the closet. You will need to disassemble the entire cabinet to reduce the internal racks and shelves by about 10cm. Otherwise, the compartment doors cannot be installed.
New side walls with greater depth, a roof and a cabinet floor can be made. But then the structure will increase by 10cm. and it will be possible to install compartment doors.
Remember about drawers in the closet. The main thing is that they do not rest against the compartment doors when sliding.
Now find out how much you will pay for new doors, for remodeling the body. Think - do you need this?
Perhaps make the wardrobe smaller?
This is real, but remember about the compartment doors. If we are talking about the depth of the cabinet, then there is no problem.
If the width of the cabinet is reduced, the width of the doorway will also decrease, because the doors will remain the same. It is unlikely that you will want to pay money to reduce the width of coupe doors.
The same applies to the height of the structure. Are you willing to pay to reduce the height of your coupe doors?
Is it possible to make a dressing room from a wardrobe?
We've had a few occasions where we've used old closet doors as an entrance to a walk-in closet.
We recorded one result on video, look what came out of it. Pay attention to the height of the compartment doors, they are less than the height of the room. All articles
How to update wardrobe doors
In principle, mechanical problems (loose closure, play, difficulties in moving) are a reason to completely update the part. You can even completely replace them by choosing suitable sliding doors for your wardrobe. You should focus on the dimensions of the models, since the doors only fit the size of the cabinet itself. If the furniture is made to order, you will have to order parts and call a measurer.
Before you repair the wardrobe doors, you should eliminate the other furniture problems described above. Next, we remove the doors and install new ones. We begin the installation by attaching the guides, first of all the top track is attached. It is necessary to fasten the track with self-tapping screws, making holes in the case every 50-60 mm.
Installation of the upper profile
Next we work on the bottom track, but do not fix it, but only mark the places for the screws. Repairing a wardrobe door with your own hands involves a precisely calibrated level - we do the fastening after installation.
We attach rollers to the door leaf and insert the door into the guides, checking how the door moves along the tracks. There should not be too much play or difficulty in moving. Using a mounting level, we achieve a perfectly vertical position of the part. Once this is achieved, we fasten the lower track in its existing position, taking into account the vertical.
Sliding systems for sliding wardrobes are quite heavy, so before final fastening you should check the vertical level of the entire cabinet.
What does the general dismantling scheme look like?
To understand the problem and then correctly complete the assembly, no special knowledge or skills are required. To begin such work, it is worth remembering one important feature. When making sliding wardrobes, different manufacturers use different modifications of parts such as fasteners and accessories, each of which has its own characteristics. Therefore, when disassembling furniture, the main thing is not to rush. Everything else is easy to understand without spending a lot of time troubleshooting the problem.
So, how to disassemble a wardrobe. The general scheme consists of several stages and is presented as follows.
Updating the appearance of the wardrobe
Other repair options include general painting of furniture. It is advisable to use acrylic paints for these purposes. This allows you to significantly update the entire appearance of the cabinet - for painting it is simply disassembled according to the above algorithms. Before painting, it is necessary to sand the surface and apply a primer to it. You can use various design coloring options - it depends on your personal preferences. Or you can order a ready-made case in a new design. At the door, if you are not satisfied with the filling, you can replace it by first calculating all the dimensions of the inserts.
Now you know how to update your wardrobe without calling a specialist. This is not the most difficult job if you follow the rules and follow all the rules. Such furniture requires regular maintenance - this will allow you to save on purchasing new options.
Door system
The sliding system mechanism is a rather complex device. To make the design easy to use, you need to design doors with an optimal height to width ratio.
The calculation is quite simple: one part width to four or less parts height. So, if the product reaches a height of 240 cm, then each door should be at least 60 cm wide. The wider the door, the more stable it is and the softer its movement. But a door that is too wide can be too heavy. Therefore, the width should not exceed 100-120 cm.
How to paint?
A cabinet that has gone out of fashion, but is still quite strong and will last for many years, can simply be repainted. In this simple way, a new design of cabinets, chests of drawers and any other old furniture is created. In this case, we are talking not only about giving freshness to dull surfaces, but also about completely replacing the color scheme, which will add originality to the product. Painting is the most common option for updating an old item. Despite its simplicity, it is necessary to approach this process correctly. For a long-lasting result, you must first prepare the furniture walls.
Below is a step-by-step master class.
It will help you to carry out high-quality and competent painting at home:
- it is important to first clean the surfaces of paint residues: one layer will easily remove the sanding disc; special brushes can handle several layers as an attachment;
- all walls, doors and other parts must be sanded manually or using a tool;
- leveling occurs by applying a primer or putty to hide defects that have arisen during many years of use;
- you need to wait until the leveling layer has completely dried, and after that you can start painting;
- To apply a layer of paint on all sides, take a brush, roller or sponge; however, it is faster to use a spray gun or spray gun. With this method, the paint is applied under pressure, so the doors, shelves and walls inside the cabinet are well painted;
- As a rule, several layers of paint are applied. This ensures rich color and good surface preservation. It is better to paint the cabinet with acrylic, alkyd enamel or other high-quality paint;
- the paint must be allowed to dry completely, after which a layer of varnish can be applied. It makes the cabinet look glossy and shiny. If you prefer a matte surface, you can skip varnishing. However, the use of this coating has a protective function, prevents abrasion and gives the tone greater depth. You can use not only glossy, but also matte and silky finishes.
Installation of a swing facade on furniture hinges
Today there are the following types of door hinges:
- hinged;
- four-hinged (overhead, semi-overhead or inset);
- products for glass structures;
- corner;
- inverse.
How to mount a door leaf on hinges
Before installing hinges on the door and cabinet wall, you need to take into account the material the furniture is made of, and also determine how many door hinges will be needed. The number of products used depends on the size of the door and its weight. For example, with a facade height of about 1500-2000 cm, which weighs up to 13 kg, you will need 3 hinges.
Get ready for work
You should select the following tools with which you can hang swing doors in a closet with your own hands. Prepare:
- electric drill and drill corresponding to the diameter of the mounting screw;
- milling machine, nozzle of equal diameter;
- tape measure, pencil for marking;
- building level;
- We screwed it with a regular screwdriver that fits the size of the fasteners.
Procedure
- Mark the location on the door to install the hinges. The distance between the loops depends on the height of the fabric, and 8-15 cm should be measured from the edge.
- Place the hinge on the door and use a pencil to mark the location for the cup of the fixture.
- Drill out niches for the cup using a router with an attachment. Use the sharpest possible tool, drilling to a depth of 13mm.
- Insert the loop inside the finished recess, align the device horizontally. Mark the locations for preparing holes for fastenings.
- Drill holes for fasteners.
- Attach the hinge to the door surface.
- Place the door against the cabinet body with your own hands, align the position of the panel, and mark the cabinets where the strike plate should be installed.
- Drill through the cabinet at the marked points.
- Install the strike plate onto the screws.
- Connect both parts of the loops.
- Use a screwdriver to adjust the hinge to the correct position.
How to restore?
Any antique cabinet requires a little restoration, which will significantly improve its appearance.
You can restore the wardrobe yourself if you use the advice of experts:
- A metal brush is used to treat decayed wood, after which the dead tissue is removed.
- The fine dust formed in this case is washed off under running water.
- Sometimes there are holes from nails, some unevenness and cracks in the wooden elements of the cabinet. All this must be cleaned with a spatula. It is necessary to apply several thin layers of putty to match the wood. Each layer must dry before applying the next.
- Then dry all layers in fresh air for 1-2 days. Do not dry wood in the sun.
- Sometimes there are metal parts in furniture that have become covered with rust over time; such places should be treated with a special solution.
- The restored surface can then be painted or decorated at your discretion.
- A self-adhesive film that imitates wood, stone, or metal is perfect.


