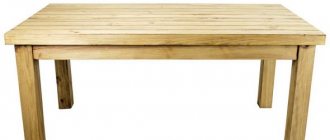
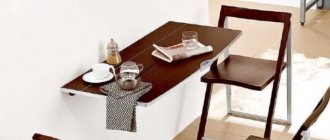
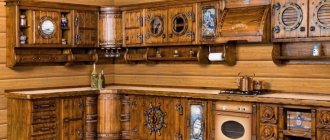
The tabletop is the upper part of the table, which is its main component, which determines the possibility of using this type of furniture.
In the manufacture of countertops, various types of natural and artificial materials can be used, such as: wood, stone, various types of plastics. When using wood and materials made from wood waste (chipboard, plywood, OSB), the easiest to process , the countertop can be made with your own hands at home.
Pros of wooden countertops
Wooden countertop
The undoubted advantage of using wood is that it is an environmentally friendly material, which in addition has a number of undeniable advantages, these are:
- Easy to process, allowing you to make a wooden tabletop with your own hands, of various geometric shapes and sizes.
- The variety of wood species used in manufacturing makes it possible to combine such products with various types of other finishing materials: glass, tile, metal, etc.
- The beauty and warmth of natural material allow it to be used in the design of tables of various types (kitchen, dining, work, etc.).
- Easy to maintain and maintain, and with proper care, long service life.
- Possibility of performing local, local repairs and reconstruction.
- The cost is lower than that of analogues made from natural stone.
Having said about the advantages, we cannot forget about the disadvantages, which are:
- Low resistance to external influences, such as: high temperature, humidity, mechanical damage (cuts, scratches).
- When caring, special products are required that do not damage the outer surface.
- If damaged, special treatment and repair are required (grinding, varnishing, waxing, etc.).
Breed options
As mentioned above, regardless of the type of structure being installed, to create it you must initially select the right wood. In order for the table you create to be as durable as possible and resistant to external influences, preference should be given to hardwood - the best option in this regard would be:
cherry;- teak;
- nut;
- oak.
It is these tree species that have the most optimal strength characteristics and are able to effectively withstand the changes in humidity and temperature that are common in kitchen spaces.
Tree selection
Oak boards
When choosing a material, the purpose of the table on which the tabletop is mounted and its location are important.
The selection criteria are:
- Durability.
This indicator determines the ability of the material to withstand mechanical and thermal loads, as well as prevent moisture.
- Hygiene.
It is characterized by the ability to be treated with detergents and other sanitary and hygienic products.
- Practicality.
It is characterized by the durability and hygiene of the material, as well as its ability to be restored and repaired.
To make a tabletop, a board with a thickness of at least 25.0 mm and a high degree of drying can be used. Its humidity should be no more than 12.0%.
The raw materials for the production of boards can be oak, cherry, walnut, teak, iroko, Siberian larch, linden, birch, spruce or pine.
In addition, solid wood, straight plank or furniture board, which are made from the above listed wood species, can be used for production.
Straight planken is a wooden board with edges trimmed with sharp edges. Plankens come in straight, beveled and straight with grooves.
Furniture board is a natural material made from wooden blocks connected to each other by gluing.
Updating the tree workspace
The need to update the countertop depends on the operating conditions. There are several ways to protect the workplane:
- Oil and wax protect wood well: they prevent fibers from swelling when exposed to moisture, and also protect against mechanical and chemical influences.
- Varnishing a wooden surface. To give a darker color, a special pigment is sometimes added to the varnish.
Wooden surfaces impregnated with oil and wax are considered the best option, given their environmental friendliness.
Table size
The size of the table and tabletop, in particular, depend on its purpose and type of use.
It should be comfortable to sit or stand at the table, as well as to use cabinets and other furniture hung (installed) above the table surface.
When determining the size of the countertop used in the kitchen, the following are considered optimal:
- height – 850 – 900 mm;
- depth – 600 – 800 mm.
- length - depending on the size of the table.
The installation height and depth of the tabletop must correspond to the height of the user, which can easily be varied when independently manufacturing furniture for various purposes.
Installation
Installation of the kitchen countertop is carried out as follows:
- The finished tabletop is laid on the kitchen cabinets and secured using fasteners or with the help of special tires located on the bottom of the canvas, which must be installed in the holes in the upper ends of the cabinets.
- When installing the tabletop, you must ensure that the distance between the canvas and the wall is maintained, as well as between the side edges of the table and the adjacent furniture.
- Special pads are put on the ends of the canvas , which are secured with self-tapping screws.
- Next, the sink is installed . The places where it connects to the canvas must be treated with sealant. This will protect the tree from swelling.
- The siphon are being .
Materials and tools
Planer
Hard wood is used to make countertops, especially for products used in the kitchen and in rooms with high humidity (bathroom, laundry room, and the like).
As already written above, it can be oak, cherry, walnut, teak, iroko, Siberian larch, less often - linden, birch, spruce or pine.
To make this piece of furniture yourself, you will need the following tool:
- planer (jointer) manual or electric;
- wood saw or electric jigsaw;
- drill or screwdriver;
- wood cutters;
- thicknesser;
- angle grinder (“grinder”) with a set of grinding wheels;
- files, sandpaper;
- tape measure, square;
- pencil, scriber, chalk.
To assemble and finish the countertop you will need:
- stain of the required color shade;
- antiseptic substances and materials;
- varnish or paint;
- wood glue.
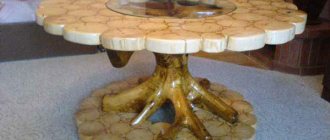
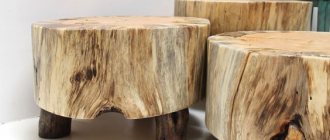
Sawn coffee table
This reclaimed wood coffee table is not only easy to DIY, but it's also made entirely from recycled materials. You can make this table in one day and with some careful planning it will be almost free! Find a tree trunk with a depth of 76 - 106 cm and a diameter of 20 - 25 cm. If you are cutting the cut yourself, draw two parallel lines around the trunk and cut around the perimeter with a chainsaw. The smoother you make this cut, the less work there will be later. Leave the cut to dry for several weeks in a warm, dry place. Be sure to place it on a stand of some kind to allow air flow and prevent mold from forming.
The longer it dries, the fewer cracks will form on the surface. Use a sharp chisel to remove the bark from the tree. Start by deleting a small section. Then try to scrape away the remaining bark in large chunks using a chisel and pry bar. Use a level to identify any unevenness on the surface. Then slowly sand both sides in small steps on the planer. Sand the top side using an orbital sander. Move back and forth across the surface consistently to prevent indentations from forming. Decide what legs your table will have. In this case, old metal racks were used.
If you want to make V-shaped legs, weld metal pipes, rods, or whatever you choose for your table at a 45-degree angle. But you can set your legs straight and skip this step. Then drill 5 cm deep holes using a spatula or nozzle attachment, the size of which corresponds to the diameter of the legs. Mix two parts epoxy and apply about a teaspoon into each hole just before inserting the legs. Wait until the resin has completely cured before turning the table over. Finish by applying two coats of sealant of your choice to the top and sides.
Sand lightly between coats with sandpaper.
Photo source: www.diynetwork.com/how-to/skills-and-know-how/carpentry-and-woodworking/how-to-build-a-stump-coffee-table
DIY coffee table made from sawn wood
There's nothing fancy about a sawmill table, but things start to get exciting when you see the bark and count the rings to determine the age of the tree! These days, wood decor is everywhere - from chandeliers and hangers to coasters and candlesticks. The only problem is the exorbitant price. But if you want to make a coffee table from sawn timber with your own hands, then it is not so difficult. The first thing you need to do is find a suitable log. The next step is to cut the cut for the table top. This is best done with a chain saw, which is great for cutting logs but leaves the wood rough and uneven. To smooth the surface, use a belt sander, gradually increasing the grit to give the surface a nice, smooth look. Finally, after removing any dust (using a rag and an air compressor), apply three coats of polyacrylic to the top to protect against scratches and liquids, and for the sides To cover the bark, spray clear varnish. Then attach a section of wood to the legs of the stool, which can be painted black. Of course, this is one of the options, the legs can be made from anything, for example, using metal hairpin legs, it also looks very stylish.
Photo source: seakettle.com/?p=1285
How to make a wooden tabletop with your own hands
Cutting boards
Manufacturing technology depends on the material used in the work: boards, straight planks, solid wood or furniture panels.
Manufacturing from boards and straight planks
When using a board and straight plank, the manufacture of a tabletop is carried out in the following sequence:
- boards (planken) are cut to the required length and in the required quantity;
- the outer surface of the boards is processed with a plane and jointer;
- grooves are cut in the side ends of the boards; for this, an electric jigsaw or a special machine is used;
- The slats are cut from a material similar to that used to make the tabletop. The thickness of the slats should correspond to the width of the sawn groove.
- the manufactured slats are inserted into the groove on one of the sides of the prepared boards. When installing the slats in the groove, wood glue is placed there.
- when the slats are inserted, the boards are connected to each other in such a way that the slats fit into the free groove of the adjacent board. This also uses wood glue.
- after all the boards are connected to each other, they are compressed by installing clamps or other devices that provide compression to the assembled sheet.
- When the glue dries, the outer surface is sanded and tinted.
- antiseptic treatment of the assembled structure is carried out.
Manufacturing from furniture board
When a furniture panel is used in the manufacture of a tabletop, the work is performed as follows:
- the furniture panel is cut in accordance with the dimensions required for the table being constructed.
- On the inside of the furniture panel, it is reinforced, for which a wooden block or lath is used. The installation of these elements ensures the strength of the structure under loads in the vertical plane (deflection strength).
- if it is necessary to install the legs, the fastening elements are mounted and installed; when installing the tabletop on the table frame, the necessary fasteners (tenons, corners, etc.) are installed.
- The outer surface is ground and polished.
- treated with water-repellent substances and painted, if necessary.
Plastic coated
Regardless of what technology and what material the tabletop is made of, it can be covered with plastic, which will improve the performance of this piece of furniture.
Plastic is used if the working surface is damaged during the operation of the table or initially during its manufacture.
There are a large number of different types of plastic on the market for such products, differing in technical characteristics (density, thickness), geometric dimensions and color options.
To finish the tabletop, plastic is cut in accordance with the required dimensions, and then glued to the outer surface. The edges of the tabletop can also be lined with plastic.
For gluing, special glues, adhesive mastics or liquid nails are used.
Preparation
Removing the old countertop from the kitchen island was very easy; it was held in place by a few screws. We needed to increase the working area so that we could not only prepare food in this part of the kitchen, but also serve breakfast for the whole family. Therefore, the process has become slightly more complicated.
As a base, we laid several sheets of plywood, attaching them with self-tapping screws to the furniture base. So we increased the width of the tabletop by 10 cm. The protruding part was supported by massive brackets mounted on the back side of the plywood and turned figured balusters that act as furniture legs.
Finishing
After the product is assembled, it must be processed. Treatment is necessary so that the product is resistant to the external environment and lasts many times longer than without treatment.
Processing a product means sanding it and then opening it with varnish . Most often, sanding and varnishing are done several times for greater reliability.
How to clean a surface from dried glue?
It makes sense to remove excess glue from the surface of the wood either while it is completely fresh or when it has completely hardened. If you rush to sand a damp area of wood, you will most likely end up with an even greater aesthetic defect when the fibers deformed by sanding dry. The hardened glue is cleaned by hand sanding (along the fibers) or cut with a chisel.
Before applying decorative finishing, check to see if there are any stained areas on the product. Otherwise, traces of dried glue will appear under the finishing compound. To more effectively detect defects, wipe the surface of the wood with a cloth soaked in white spirit.
Manufacturing of carpentry panels
We select dry boards of the same thickness
Making a carpentry panel is the arrangement of pre-prepared elements. The main parts of the carpentry panel are wooden boards. But first they need to be specially processed.
Cut the boards to the required size
We process the surfaces of all boards using a plane and jointer
Use a plane to level the surface of the board material. Using sandpaper, carefully sand the surface. After grinding, the prepared material must be treated with an antiseptic.
Sand with sandpaper or a sander
Construction stores have a huge selection of them, but please note that you need a solution for interior work. The antiseptic will protect the wood from excess moisture, which is available in abundance in the kitchen, and will prevent the appearance of mold and insects.

