In any business, the sequence of actions is important. The final result depends on how clearly and clearly the whole process is presented. Understanding this, awareness of all the upcoming difficulties allows you not to abandon the assembly in the middle due to the lack of some components, spare parts, tools and fittings. Instructions on how to make a cabinet with your own hands step by step will allow you not to miss a single detail.
dimensions
Initially, you need to decide where the cabinet will be located. This will allow you to decide what dimensions it will be.
- Height. Technically, only built-in structures can be implemented under the ceiling. If the cabinet is a cabinet, with side walls and a roof, the distance from the ceiling should be at least 15-20 cm. Otherwise, you simply will not lift it due to the diagonal of the sidewalls - after all, any cabinet is assembled “lying down”. The removable mezzanine greatly facilitates assembly and allows you to reduce the gap between the cabinet roof and the ceiling to 10 cm.
- Depth. For a wardrobe with hinged doors, the optimal depth is 50-55 cm, with a longitudinal rod for hangers. In a compartment, sliding doors “eat up” about 10 cm, so the depth increases to 60-65 cm. For bookcases and pencil cases with shelves, a depth of 35-40 cm is usually set. Narrower cabinets, 20-30 cm, must be attached to the wall, since they will unstable.
- Width . An arbitrary parameter, limited only by the length of the wall. For cabinets with hinged fronts, two-door, three-door and four-door options will be easier to assemble.
The first step - measurements - is especially important at the design stage of built-in and partially built-in wardrobes.
Sliding wardrobes , as a rule, are installed from wall to wall, the entire length of the room or in a niche. Here it is important to take into account the curvature of the walls and blockages horizontally and vertically. The smaller size is used as a basis.
A wardrobe for a balcony also requires extreme thoughtfulness and accuracy when taking measurements. In conditions of limited space, any design flaws are fraught with complete rework due to the impossibility of installation.
Balcony cabinets are always prefabricated! The sides are divided by height in at least two places - for the mezzanine or lower cabinet. Otherwise, you simply won’t be able to assemble a wardrobe on a narrow balcony.
Preparatory work
Before making such a wardrobe, you need to choose a material. Not only the cost, but also the durability of the product depends on this. Solid wood is considered the best material in furniture production. The main disadvantage is its high cost and difficulty in finding boards of large width. If you are planning a built-in model, you should take into account that there is often high humidity in niches, and the wood may warp because of this.
Plywood is also used. These are sheets of special veneer, glued under pressure, with a number of layers that is a multiple of 3. It is 4 times stronger than solid wood and is also susceptible to moisture. When using natural materials, the sheets must be treated with drying oil.
Chipboard panels are compressed wood chips using phenol-formaldehyde resins. They use chemical compounds, so it is better to purchase laminated sheets. Their disadvantage is that they do not hold fasteners well.
The fine fraction (MDF) has the properties of natural wood and is made using modern technologies. The shavings from the processing of the array are processed into dust, compressed at high temperatures, and natural lignin is released, which is a binder. This creates a very durable material that can hold fittings well.
Design and content
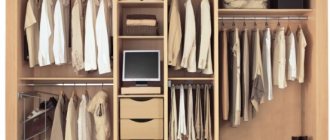
After accurate measurements of the placement location, the internal filling of the cabinet is considered. It must comply with the functional purpose and basic rules of storage ergonomics.
When planning, it is important not to lose attention to the ratio of sections to the façade.
- Wardrobe doors are always the same width. Behind each of them there should be a full-fledged storage space, without overlaps or “dead” zones. The moving mechanisms used (pantographs, baskets, drawers, trousers, etc.) must move freely.
- Hinged fronts can be of different widths and heights, combined with pull-out chest of drawers and open niches with shelves. But in terms of design, symmetrical compositions and alternation of identical elements look better.
Next, a general and assembly drawing is drawn to scale with the dimensions of each section and the distances between the shelves.
general view of the wardrobe
wardrobe drawing with dimensions
Based on the drawing, the details of chipboard blanks (detailing) are calculated, cutting maps and a list of accessories are drawn up. Based on these data, you can already judge the upcoming costs of making a cabinet with your own hands.
calculation of wardrobe detailing
laminated chipboard cutting cards for wardrobes
calculation of costs for a wardrobe
DIY wardrobe: 101 photos of ideal designs of different types of stylish wardrobes
The closet plays an important role in any interior. It is not surprising that strict requirements are imposed on it: not to take up too much space, to be spacious, to have a sufficient number of shelves and drawers. The models on the market do not always fully satisfy individual wishes.
But the online store https://www.salon-shkafov.ru/ has both ready-made cabinet options and custom-made ones. So experienced craftsmen will assemble the future owner’s closet to suit any of his whims and desires.
Owners of apartments with non-standard layouts find it even more difficult to choose an option that fits into the room. In this case, you can order a cabinet from specialists who will take into account all your wishes regarding the design and internal contents.
Unfortunately, this option is not affordable for everyone. Then the best solution to the problem will be to use your own hands and ingenuity, because assembling a cabinet yourself is not at all difficult!
What hand tools will you need?
It all depends on what you decide to do yourself and what to delegate.
- Cutting parts. To cut chipboard and align the ends for gluing the edges, you will need a jigsaw with a wood file, a sander or router, sandpaper, a tape measure, a metal ruler and a pencil.
- Edging. The melamine edge is glued on with an iron, the excess is cut off with a stationery knife and sanded off with sandpaper. It is difficult to glue PVC edges at home; you will need special glue and a router.
- Drilling parts . Before assembly, the workpieces are drilled for fasteners using a drill or hammer drill. You will need drills with a diameter of 5.7 mm, a confirmation drill. And also drills 10, 15, 20 mm, if eccentrics (minifixes) are used, 26/35 mm for installing hinges on swing doors. Thin awl for marking.
- Assembly. A screwdriver with Phillips and hex bits, a screwdriver or a ratchet for tightening fasteners in tight spaces.
- Auxiliary tool . The most common one, available to any craftsman: a set of screwdrivers and wrenches, a vice, pliers, wire cutters, a chisel, a hacksaw, a shoe knife, a square, a marker, a sharpener.
How to do it?
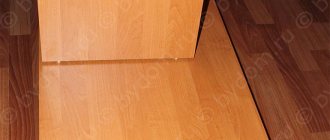
Work begins with assembling the frame of the product. Assemble the frame under the bottom. No legs are needed for a wardrobe . In other cases, plastic devices are used for adjustment. Assembly is carried out in a certain order:
- Using a drill, prepare holes for the connecting joints, maintaining their accuracy and symmetry. Holes for shelves, partitions, and hangers are also taken into account.
- Connect the bottom, sides and top of the product using screws and a screwdriver. First, lay the bottom of the cabinet and attach the side walls in order. The upper partition is placed on the U-shaped structure.
- Installation of supports for shelves, hooks, furniture drawers and other elements is carried out at the base of the cabinet. To check the correct installation, use a level. The opposite fasteners must be horizontal.
At the final stage, the door mechanism is fixed. For sliding model cabinets, guides are fixed at the bottom and top. For swing systems, door hinges are screwed into the sides. Upon completion of the work, the installation of fittings is carried out: hooks, crossbars, handles.
Cutting the body parts and rolling the ends
At home, cutting sheet material to the size of blanks professionally and accurately is unlikely to be possible. How to process the ends: gluing the melamine edge with an iron is a better option for country, budget furniture.
Usually, cutting and gluing of PVC edges is ordered from the relevant companies. Typically, these services are offered in the same place where chipboard, fiberboard, and edge materials are sold.
The price for cutting can be calculated in different ways:
- Along the length of all cuts, per m.p. The more small parts in the cabinet design in the form of shelves, strips and drawers, the more expensive the cutting will be.
- For cutting the sheet. It doesn’t matter how many details there are, it’s important to fit it into the sheet. Therefore, it is more profitable to cut large items (for example, wardrobes) according to moldings, and small ones (chests of drawers, bedside tables, etc.) according to sheets.
The rolling of visible ends is calculated per linear meter. PVC with a thickness of 0.4-1 mm is cheaper, and PVC with a thickness of 2 mm is more expensive. Therefore, it is more profitable to roll the internal parts of the cabinet with thinner PVC.
Portal about construction
A mandatory piece of furniture that should definitely be in every home is a closet designed for storing things. Sliding wardrobes are especially popular - they are not only fashionable, but also an incredibly functional interior detail. Unfortunately, family budget problems do not always allow them to purchase such a valuable item, so many have to look for another way out. An alternative option is to create a wardrobe with your own hands - drawings and descriptions that will be useful during the work process will be presented below. This way you can not only build a piece of furniture that will meet your wishes, but also save a lot of money and also acquire useful skills.
Facade part
The design of the furniture determines the design of the façade. In addition to the doors and the method of attaching them to the body, the following can be designed:
- Visor . Baguette (cornice), built-in lamps, arched structures.
- Base . Interesting base, decorative legs, adjustable thrust bearings.
- Sidewalls. Overlays in the form of carved columns, as well as open corner shelves of various designs.
Hinged doors
In budget options, cabinet fronts are sawn together with the body, made from laminated chipboard and rolled with PVC 2 mm thick. Sometimes furniture design involves a contrasting combination, for example, a dark body and a light facade. Then a separate sheet of chipboard of the desired color is purchased for the facades.
Also, cabinet doors can be made of MDF, lined with PVC film, plastic, veneer, and painted with enamel. Or order from an array.
The hinged façade can be overhead or internal, depending on which furniture hinges are selected. Glass and corner facades also have their own hinges.
Coupe doors
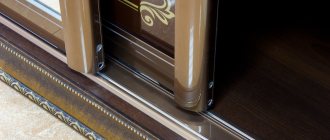
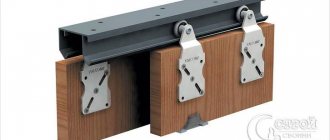
Sliding systems for compartment doors can be supported or suspended. But, as a rule, they consist of:
- Track, top and bottom guide.
- Set of rollers.
- Door leaves.
You can read how to calculate compartment doors yourself here. You can also order already assembled sliding doors to the size of the niche for installation in a closet, complete with upper and lower guides of the required length.
Materials
The material can be natural wood, plywood, MDF or chipboard - all of them are used by furniture manufacturers.
Wood is environmentally friendly, does not require additional decorations, and is convenient to work with. A wooden cabinet will last for many years and will look solid and impressive. An ideal choice for an interior in a classic style.
Plywood consists of glued veneer sheets (birch or coniferous trees are used). This cheap, practical material is suitable for making almost any furniture. It is best to choose laminated plywood (FOF brand).
Chipboard (chipboard) is the cheapest and most common option. When assembling your own closet, this is usually what you use. Short-lived.
Source: mebelindesign.ru
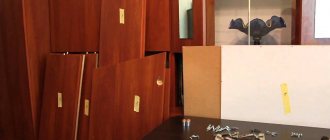
Preparing parts for assembly, drilling
Using special furniture programs, you can create specifications for drilling parts for subsequent assembly.
This greatly simplifies the process, making it more accurate and accurate. You can also make markings for fasteners manually. The main thing is to have a spatial understanding.
The process of drilling parts is also called “additive”.
For confirmation you need a hole “into the mouth” with a diameter of 8 mm from the front part of the part and a hole “into the end” with a diameter of 5 mm. Under the dowel, as a hidden fastener, the drilling “into the mouth” is done from the inside and with a diameter of 5 mm. The eccentric coupler also has its own nuances in the markings.
The attachment points for hinges, drawer guides and other mechanisms are also marked, and holes for the shelf supports are drilled.
Finding a location, optimal dimensions
The built-in wardrobe is convenient, spacious, but at the same time it takes up little space. You can find a place for it:
- In a niche. This is the most convenient option for using such an empty recess.
- In the corner. This placement makes it possible to expand the space inside the closet and use a not very functional area of the room. The advantage of this solution is the possible cladding of mirrors, which gives a chance to visually increase the area of a small room.
- Between walls - wide or narrow, at the dead end of the corridor. There are very original options: for example, rational use of empty space near the window.
Cabinet assembly
If the addition of parts was done correctly, the cabinet will be assembled simply and quickly, like a construction set.
- The process begins with preparing parts for assembly. The thrust bearings are screwed in, the shelf supports are driven in, and the guides are attached. The boxes are assembled separately.
- The cabinet assembly itself begins with attaching the bottom and roof of the cabinet to the sides.
- Next, the base, bearings to the base or legs are screwed.
- Stiffening ribs and non-removable shelves are installed.
- The back wall is attached.
- The cabinet rises and moves to the desired location.
- Drawers, clothes rails and other internal elements are installed.
- The final stage is installing the doors and adjusting them.
The larger the cabinet, the harder it is to assemble it alone. Therefore, it is better to involve a partner - he will support the parts and components so that you can screw them on smoothly.
left section, assembly
center, assembly
right section, assembly
Here, in general terms, is the entire description of the process of making a cabinet with your own hands, step by step. We recommend that you familiarize yourself with other materials on our website - they will help you in developing a furniture design project, calculating parts and final assembly with on-site installation.
Advantages of MDF over laminated chipboard
Why MDF is better than laminated chipboard:
- The high density of the material increases the service life of the furniture and its strength;
- The fastening hardware is fixed much more reliably, it is possible to unscrew and screw in the screw again without much damage to the MDF (disassembling and reassembling the cabinet when moving);
- Ease of processing - cutting occurs practically without chips;
- Minimum deformation of massive parts when exposed to moisture and temperature changes;
- Low content of phenols harmful to the body, etc.
