The functionality of the kitchen is one of the main conditions for comfortable cooking and caring for various utensils. Not only household appliances can increase the level of convenience, but also devices such as a dish dryer, roof rails, pull-out shelves, and so on. Read on to learn how to assemble a kitchen dish drainer and install additional equipment yourself.
Kitchen accessories for drying dishes
Kitchen cabinet dryer
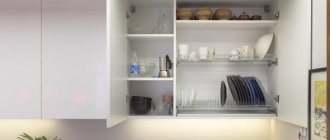
One of the most common types of kitchen accessories is the dish drainer. Basically, such designs are built into upper cabinets. The dryer is a functional and, at the same time, simple item that does not have a complex or intricate design. Such models are designed not only for storing dishes. Kitchen drying racks allow you to properly organize space in your closets.
Varieties
If we talk about the design features of built-in products, then we can distinguish 2 main types.
Let's start with the classic or standard solution.
Built into base cabinets
. These are ordinary straight designs, which are presented in the form of a box. It is built into the base cabinet using guides. Such dryers are equipped with several compartments for various dishes. At the very bottom there is a tray for collecting excess water, which must be removed and washed periodically. Such designs are convenient to use for children and small people. You can install a Tip On pull-out system with a closer so that the dryer rolls out after lightly pressing the façade. That is, it is not necessary to use pens here.
If you have a dishwasher installed, such a dryer will be the optimal solution when placed next door. It is enough to open the dishwasher, pull out the drying compartment, and then, without changing your body position, move the dishes from one container to another.
Really very convenient and practical.
I can say that lower placement has more advantages than disadvantages. Much depends on the overall organization of the kitchen.
There is another type.
Roll-out bottom dryers
. Mainly used on corner cabinets. Due to the difficult access to them, it is quite correct to use a withdrawable system. It optimizes interior space. Basically, these are dryers with a mesh structure, which are attached to the counters or to the facades of the kitchen unit. There are usually no divisions into sectors for different dishes. Basically, it is recommended to use such dryers specifically for storage, and not for placing wet dishes there. This is due to the lack of pallets in most models.
So it is the first option that can rightly be considered a full-fledged and most practical dryer installed in the lower cabinet.
Main types
Modern manufacturers of kitchen accessories have provided customers with many types of dish dryers. It is worth noting that all designs, regardless of type, have several compartments. Each of them has an individual purpose: for storing plates, saucers or cups. High-quality and durable materials are used to manufacture the elements.
The surfaces of the structures are covered with special enamel, which greatly simplifies the process of cleaning this fittings. Some models are decorated with paint. One of the modern options is drying, the design of which uses special rubber coatings. This element allows you to put the dishes in place without noise.
There are two main groups of products: separate dryers and structures that are built inside a furniture set.
Manufacturers also produce wall-mounted models. Basically, such dryers are installed above or next to the sink, which is very convenient. The fact is: drops of water remaining on the surface of the dishes flow straight into the sink. Often a special tray is installed along with the dryer. This part needs to be cleaned of water regularly.
Built-in dryers are the most common today, and they can be safely classified as traditional types. The advantage of the models is that they are located inside the cabinet and do not take up space on the free surface. Installing such a system does not require much time and effort. For fixation, special plastic fasteners are used. You can place the dryer in both the lower and upper tier.
Thanks to the use of these systems, the kitchen interior looks more harmonious, and the presence of unnecessary details does not catch the eye.
Wall systems are not inferior in popularity to the previous type. This group of models is based on two subtypes: stand-alone and built-in options. It is worth noting that when using the second type, you need to take care of the presence of normal ventilation of the furniture. This is due to the fact that the moisture that accumulates inside can deform the cabinet material. Basically, such options are presented in the form of a grid.
The latest functional innovations include retractable systems. Their advantage is their ease of use. The systems are mounted inside the cabinet, which saves space.
On sale you can find another interesting type of dryer called troflex. The peculiarity of these models is their unusual design. They are made in original and non-standard forms.
Source: dekoriko.ru
Connecting the dryer to communications
Installing a dryer in a column also involves further connection to communications. The type of connection will depend on the type of dryer. Below we will look at all the options for connecting it.
Connection to ventilation
Everything is quite simple here. On one side of the case you will find a vent to which you need to connect the air duct. Fastening can be done using a special clamp. Usually this element is included in the kit. You need to know that you cannot bend the corrugation 90 degrees. Try to route the air duct with minimal kinks.
If the dryer will be connected in a room with a high temperature, then the flexible air duct cannot be routed through the top. In this case, you need to come up with another withdrawal option.
Connection to sewerage
If you purchased a condenser type dryer, then after each drying you need to remove the water tray. To make the work easier, you can connect it to the sewer. The connection in this case is no different from connecting a washing machine. You just need to lead the hose to the sewer.
Electrical connection
The last communication is considered to be the electrical network. To connect the dryer to the network with your own hands, you can remove a separate line from the distribution box. If necessary, if the dryer has low power, it can be connected to an outlet. To protect your equipment from overvoltage, you can connect an RCD.
As you can see, installing a dryer is a fairly simple process. Thanks to these instructions, you can save your money on calling a specialist.
Types of drying racks
There are two main types of dish drainers that are built into dish cabinets:
Polymer-coated dryers, usually white
These are inexpensive dryers, which is called an economy option. This dryer is equipped with one tray for water draining from the dishes.
Dryers larger than 600 mm sag, and they are not durable; over time, rust begins to appear, and the tray breaks easily. Installation of the white dryer is simple; 8 holes with a diameter of 8 mm are drilled into which plastic bushings are installed.
| Rice. 1. White polymer-coated dryers |
Dryers with galvanic coating, usually chrome color
More expensive, the difference in price is 5-10 times, but also a more durable option for drying dishes.
| Rice. 2. Dryers with galvanic coating in chrome color |
Dish rack width
Drying widths are available in 400, 450, 500, 600, 800, 900 mm. The size is given for the size of the cabinet into which the dryer will be built. That is, a 400mm dryer means that it will be installed in a 400mm wide cabinet.
There is such a nuance here, there are dryers that are installed either in a case made of chipboard with a thickness of 16 mm or 18 mm, and there are universal ones that are suitable for both 16 and 18 mm chipboards due to the use of special gaskets, pay attention to this when purchasing a dryer .
The optimal size is 600 mm, 400-500 mm is small, and 800-900 mm begin to sag under the weight of the dishes, and the dish drying cabinet itself turns out to be heavy when loaded with such a width.
| Rice. 3. Dimensions of dish drainers using the example of Rejs products |
Types of drying racks for dishes:
- installed in a cabinet with drawers
- dryer that hangs on the railing
- tabletop drying drying in a corner closet.
| Rice. 4. Drying dishes in a cabinet |
| Rice. 5. Hanging drying on a reel |
| Rice. 6. Tabletop dish dryer |
| Rice. 7. Drying dishes in a corner cabinet |
Myth 9. Drying spoils items made from delicate fabrics.
In the new Candy models, drying is implemented using a heat pump, that is, a lower temperature is used than in condensing machines. This in turn does not wear things out, as already stated. Also, let's not forget about special drying modes, for example, the mode for wool - they are designed specifically for delicate fabrics.
In addition, modern washer-dryers are equipped with a steam mode, which not only saves electricity, but also helps to carefully wash delicate fabrics: steam treatment resembles boiling in its effect, but colored fibers retain their color. By the way, steam also disinfects clothes quite well, which is very important for children's clothes or things for people with allergies.
Installing a dish dryer in a closet
The first thing to do when installing a dryer is to study the included instructions, because there are slight differences when installing dryers from different manufacturers.
We had at our disposal a two-level 600 mm chrome dryer produced by Rejs, perhaps one of the best dryers on the Russian market.
| Rice. 21. Drying chrome for 600 mm produced by Rejs |
Drying chrome is universal, both for chipboards with a thickness of 16 mm and 18 mm, due to the gaskets in the photo below. The kit includes euroscrews for fastening the plastic fasteners of the dryer, thin screws for fixing the telescopic parts in the lower part of the dryer, small screws for connecting the square rods with the plastic fasteners of the lower part of the dryer.
| Rice. 22. Gaskets for drying installations for different chipboard thicknesses |
The dish dryer was assembled according to the assembly diagram.
| Rice. 23. Rejs dish dryer assembly diagram |
Initially, we drill holes with a diameter of 5 mm for plastic drying fasteners, the first hole from the edge is 69 mm, the height distance and the second point can be marked by attaching the fastening to the side wall or by taking measurements.
| Rice. 24. Drilling holes for drying fastening |
We insert square aluminum rods into the plastic fasteners, fix them with small screws to the plastic drying fasteners, and use Euroscrews to fasten the fastenings themselves to the side walls along the drilled holes.
Having pulled out the sliding parts of the fastening to the required depth from the back and front, we fix them with thin self-tapping screws from the kit.
At the front, a sign of sufficient extension is when the square rod is aligned with the leading edge.
At the rear, a square rod with a groove extends back to the depth of the fiberboard if the bottom of the cabinet consists of chipboard slats, or until it aligns with the groove in the side walls if the cabinet is designed without a bottom.
| Rice. 25. The dryer is not installed in a completely “correct cabinet”, which goes around the ledge on the wall |
To determine the height of the cup dryer, take the largest plate you are going to place and place it in the dryer. The cup dryer should not touch the plate, the first point is also drilled with a diameter of 5 mm at a distance of 69 mm from the front edge, determine the second point by measuring the distance between two holes on the plastic mount.
Source: shkafkupeprosto.ru
How to install a dish drainer in a closet
Hello friends! Today, while installing a dryer in a cabinet, I remembered how 5 years ago I could not remember the distance to the upper level of the dish dryer. Understanding that this is one of the important factors of a comfortable kitchen, I tried to install the fittings as accurately as possible.
To free you from this “headache”, I decided to describe this topic in detail in this article. And without any distracting reviews, I’ll go straight to the instructions. The result of reading the article will be confident actions of your hands and grateful eyes of the owner of the headset.
Dish dryer in a cupboard and other design options - features of different solutions
Don't know which dish dryer to choose so that it suits the room and your needs? Then read the review carefully; it covers all the main modifications with their pros and cons, so that you can choose the best option.
The dryer provides easy storage and easy access to used utensils
Pros of built-in dish dryers
Options that are built into kitchen furniture have a number of advantages:
| Illustration | Description |
| Aesthetics . Most often, the structure is covered with a facade and is not visible indoors. This makes the kitchen tidier. And if your dryer is located in an open compartment, then choose options that are made from high-quality materials and have an attractive appearance so that they look like a harmonious element of decor. | |
| Hygiene . There is no need to wipe the dishes - immediately after washing they are placed in the compartment, and all the moisture drains into the tray. The surface dries out and mold does not form on it. And you don’t need to make any additional efforts - the main thing is to arrange everything neatly and steadily so that nothing falls out or breaks. | |
Ease of use. This is expressed in the following aspects:
| |
| Variety of options . You can find dryers of various sizes and configurations, which are installed in standard wall cabinets, corner structures, pull-out sections of cabinets, or can simply be placed on the table. All main varieties are described in detail below. |
This option also has disadvantages, they are also worth mentioning:
- It is necessary to monitor the pallet . More precisely, the amount of water that drains from the dishes and can overfill the container and spill out. From time to time, most often once every few days, the element is emptied of water and rinsed;
- The cupboard must be of high quality . This concerns two aspects: material of manufacture and ventilation. To prevent furniture from becoming unusable due to high humidity, it must have a moisture-resistant top layer, or even better, a special impregnation (chipboard of this type is green when cut). As for ventilation, most often several holes are drilled in the upper part of the structure.
Recommendations and videos
More details:
- You should not install devices one on top of another just like that. This is a gross violation of operating rules and regulations and is therefore strictly prohibited.
- While the dryer is running, the washing machine should be turned off and vice versa.
- Do not forget that vibrating devices should not be placed close to the wall. There should be at least 3 cm between them.
- Two devices of the same brand are more convenient to use, and this option should be preferred.
- If it is impossible to purchase devices from the same company, they must still fit in size.
Installing washing machines and dryers in a column is a rational and simple way. It's not difficult to do this yourself. Before you start work, you need to study all the nuances. You should take care of the accessibility of communications, prepare a mount if necessary, and also carefully read the operating instructions for the device.
An indispensable thing in the kitchen: a dish drainer and its modifications
Reading time: 7 minutes No time?
A dish dryer is an absolutely necessary item. Even if you have a super-modern dishwasher and a fashionable kitchen set, you can’t do without this utilitarian little thing. The range of such designs is quite large, and in this material the HouseChief editors have collected for you a lot of useful information on selecting a suitable model.
Read in the article
Topiary
You can decorate your kitchen by making a topiary - a kind of imitation of the tree of happiness. Today, such crafts have become very popular, because it is believed that topiary brings good luck to homes. Making such souvenirs yourself is extremely simple and does not require any special skills. The master class can be viewed on the Internet.
Completely different and sometimes unexpected accessories can be used as details of the tree - its leaves and flowers - ribbons, bows, artificial flowers, artificial and live fruits, candies.
In order to make topiary, you need to make a base. It will form the shape of the tree and any interesting components will be inserted into it. The base is made from:
- old ball;
- polystyrene foam;
- ready-made polystyrene balls, which are sold in hobby stores;
- papier-mâché in the shape of a ball.
Coffee beans are most often used to make the “tree of happiness”
Topiary in the form of a fruit still life will perfectly decorate the kitchen or dining room
To make a stylish topiary in the kitchen, you need to think about the trunk. The trunk of the tree can be made from a real tree branch, wire, or a stick wrapped in twine. If the topiary is tiny, then a pencil is used as a trunk.
A base is placed on the trunk. Wires are stuck into the base, on which are attached those trinkets that represent the crown - bows, shells, candies. The main thing is to plant the entire surface of the base tightly so that there are no gaps, trying to follow the rules of symmetry. The tree is planted in a pot, in which you can place synthetic polyester as a filler. On top it is masked with expanded clay or decorative stones. The topiary is ready.
Today topiary is a very popular decorative element that decorates almost every home.
Dish dryer: principles of separation by type
There are so many of these accessories presented in specialized stores that it makes your eyes wide open. You can choose cheaper or more expensive models. Complex or extremely simple design. How to decide among this diversity?
First, let's look at the types of this device, and they are divided according to several criteria.
By design
This is one of the main criteria for choosing a dryer. What options are possible?
Wardrobe dryers . There are usually a pair of racks for placing cups and plates, as well as a tray made of aluminum or plastic.
Tabletop dryers are another simple option for an open-air installation. Such devices are usually placed directly on the countertop next to the sink.
Wall-mounted dryers . Such structures are mounted on rails either directly above the sink or next to it. You can hang this drying rack under a cabinet or, if desired, secure it inside the cabinet.
Such items can be removed during general cleaning.
Corner dryers . They are convenient for their economical approach to using free space, but usually hold few dishes.
Retractable structures . A very convenient solution for modern furniture. Suitable for use in base cabinets. Such dryers are preferred by older people who find it inconvenient to reach into the upper cabinet.
Comfortable, soft-running slides make it easy to open, remove and place dishes
Built-in dryers . These models are equipped with a fastening system and are made to order to fit the size of the furniture.
By material
In addition to design, material is a significant factor in choosing a dryer. What can you find on sale today?
Steel products . These models are painted or galvanized. The paint usually peels off after a year of heavy use, and the rods become rusty from constant contact with water. Galvanized models are more resistant, but after two to three years they turn yellow.
The most durable are chrome grilles, which, if treated with care, will look attractive for ten years
Stainless steel dryers . These structures are considered the most durable, so they are not afraid of water and do not require touch-up or cleaning.
They're not cheap, but it's a fair price for no hassle.
Plastic models . Cheap and bright plastic products look attractive on a tabletop. They are not afraid of water and do not absorb it, they are easy to wash.
Due to their fragility, the models are not very durable and, after a couple of years, lose their original color
Wooden dryers . This is the most impractical option, which makes sense to purchase only if your interior requires it.
Wood absorbs water, can become moldy, darken and become deformed.
By functional purpose
Based on this feature, dryers are divided into only two types:
- For plates - has a trapezoidal shape or a triangle rack for convenient installation of dishes.
- For cups - usually a straight shelf with sides, on which mugs are placed upside down.
Rarely does anyone prefer to use only one form. Typically dryers have both types of shelves
By the number of tiers and method of fastening
Depending on the number of shelves for dishes, dryers can be single-tiered or two-tiered.
Single-tier models can only accommodate plates or cups; they are usually made retractable
Two or more tiers are suitable for installation in cabinets and for desktop placement. Such dryers are more popular.
The mounting method can be removable or fixed. Fixed structures are firmly attached to the walls of cabinets and shelves; they securely hold the dishes. But such models are difficult to wash. You will have to remove the entire shelf and unscrew the fasteners. Removable dryers are more convenient in this regard.
Installing a dryer in a column with a washing machine
You can only connect a dryer on top of a washing machine using a special fastener. Many manufacturers of drying machines also include mounting brackets with their models. But sometimes, you have to purchase it yourself.
These connecting parts are also needed to prevent the machine from tipping over during operation, and in addition, they protect the washing machine from damage due to vibration. However, you should take into account that errors or illiteracy during installation will certainly create complications during operation. In view of this, if you are unsure of your own abilities, it is best to entrust the installation of devices to professionals.
Tips for installing and using machines:
- Do not stack machines directly on top of each other without perfect mounting. It is forbidden.
- Under no circumstances should you turn on two machines at the same time, even if you are sure that the wiring will withstand the load;
- It must be remembered that for vibrating machines it is necessary to leave a free space of 2-3 cm from the wall.
- Try to ensure that both machines are from the same manufacturer;
- If it is not possible to choose cars of the same brand, buy the same size.
When planning to install machines one on top of the other, be sure to check and clarify the availability of communications that will provide electricity, water and its drainage for both machines.
Alternative: dish mat
If you usually don't have many dishes, or if you need to dry dishes after a party and they don't fit in the dryer, a dish drying mat will come in handy.
Such products are made of material that absorbs moisture well or has a ribbed surface that will collect flowing water, leaving plates and cups dry
Criteria for choosing a dryer for dishes
We have given you possible options. How to choose the right one? For the optimal solution, you need to decide on several points:
- what is the volume of dishes that you need to place on the dryer;
- where do you plan to place this device: in a closet, on a table, hanging or retractable;
- how much money are you willing to allocate to solve this problem?
Almost all designs that you will find on sale in a ready-made version have standard sizes. Their width varies from 40 to 80 cm, and their depth is approximately 20-30 cm
When purchasing, you need to pay attention to the distance between the levels; it should be such that you can easily place the plate. If you use large cookware, this is especially important.
And the second significant point is the ease of removing the pallet. It will have to be drained and washed more often.
