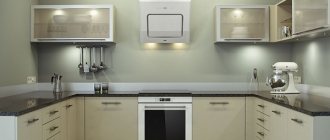
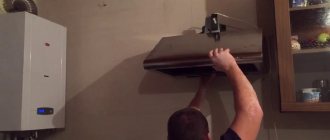
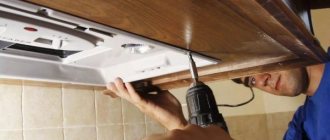
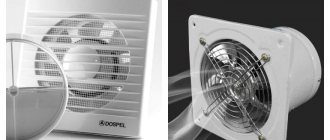
As you know, kitchen hoods come in classic and recirculating types.
The first discharges air into the ventilation shaft or directly to the street. The recirculation system simply pushes it through itself, trapping fat. It is designed with filters to remove odors from the air.
The main questions and problems arise when installing and connecting the classic version. We will consider it in as much detail as possible.
To begin with, we will briefly list the main mistakes that await you along this path. Below we present ways to solve them and the most popular installation methods.
Mistakes when installing a kitchen hood
1 Blind connection of the air duct to natural ventilation is the most common mistake.
Some people, of course, leave a grille for natural air movement, but still manage to block it with the air duct itself.
2 Connecting an air duct of too small a diameter through an adapter to a powerful hood with a large outlet flange.
Recommended dimensions for round air ducts are d=125mm. For rectangular ones - 204*60mm.
3 Exit the air duct to the street through a homemade hole in the wall.
In most cases, this is prohibited by the rules. Specific points will be given below in the text.
You can, of course, lay a separate box along the facade straight to the roof. But is it worth it? Although in restaurants and cafes located on the ground floors of high-rise buildings, this solution is widely used.
By the way, the ban on venting air to the street through a wall does not apply to private houses, but only to high-rise buildings.
4 Complex route geometry with a large number of transitions and curvatures.
First of all, this will affect the noise. Although, of course, the turns themselves are not the greatest evil. And sometimes you can’t do without them.
It is the turns that follow one after another, without acceleration sections, that are dangerous.
5 Connecting an overly powerful hood (for example, 1000 m3/h) to a standard ventilation duct, which is capable of passing about 300 m3/h.
Remember that a productivity of 200-300 m3/h is quite enough to effectively remove all odors, with minimal load on the ventilation of the house.
6 Installing the hood at the wrong height.
The installation height directly depends on what kind of stove you have - gas or induction hob.
7 Assembling a plastic ventilation duct without a good seal, or joining parts with superglue.
Believe me, sometimes this structure has to be disassembled.
8 Upper, rather than lower, location of the slots in the decorative grille in the same frame as the air duct.
Why this is a mistake, and when it is still possible to do this, is discussed below.
9 Lack of a separate outlet in the upper part of the wall for the hood.
As a result, connecting it haphazardly, through carriers and extension cords. Do not forget that in the end this is not a portable device, such as a fan, heater or mobile air conditioner.
This means that the wiring for it needs to be done stationary and wisely.
10 Incorrect installation of check valve.
It must be embedded and installed in compliance with the appropriate angles and inclinations. Otherwise it will work every other time.
In general, installation of a hood can be divided into two main stages. The first is its connection to electricity. The second is the air duct structure and everything connected with it.
Let's look at each of them separately.
Where to start installing a hood
A very important question, you need to pay close attention to it, otherwise instead of a positive effect you will get a negative one.
| Action | Short description |
Checking the technical condition of the existing ventilation duct | Remove the decorative grille and carefully inspect the channel surfaces. To make inspection easier, use a flashlight. The channel must be clean, the smoke from the burning paper must be completely drawn into it. If there are cobwebs, black soot and other foreign deposits, then this indicates poor natural ventilation; representatives of the management company must be called to correct the problems. Further re-equipment is done independently, we will tell you exactly how below. |
Determining the type of hood | It can be flow-through or circulating. The first is connected to the channel and exhausts the exhaust air outside. As we mentioned above, it has several important installation restrictions; the requirements must be met. The second type of hoods is not connected to ducts; the unit purifies the air and returns it back to the room. This is a completely autonomous and safe system, but it has one significant drawback - it requires frequent filter changes. |
Technical parameters of the hood | The main thing is to select devices taking into account the volume of the room and the minimum air exchange rate. The fan performance should be at least 20% higher than the required volume of air exchange; operating the electric motor at its maximum capabilities significantly reduces its operating time. If the main factor is determined, then you can select ventilation according to size, noise level, availability of additional functions, design, type of control, etc. These indicators do not affect the cleanliness of the air in the kitchen, they only increase the comfort of using the device. |
How to choose a kitchen hood
TOP 7 best hoods.
| Model | Advantages | Capacity (m³/h) | Installation width, cm |
Hansa OSC 6111 WH | Budget hanging model Hansa OSC 6111 WH with comfortable slider control. Housing - stainless steel steel. Noise level is low. | 335 | 60 |
Indesit H 151.2WH | The hanging hood Indesit H 151.2 WH has a flat design that is installed on the wall above the stove. The Indesit H 151.2 WH hood operates quietly, producing a maximum noise of 60 dB. Cleaning is done with a grease filter. An additional carbon purifier can also be installed. The kitchen work surface will be illuminated by two light bulbs built into the hood. | 230 | 50 |
Akpo WK-4 Vario eco | An elegant fireplace hood with a powerful motor will not take up much space in your kitchen. Three operating speeds will allow you to adjust the device to any level of air pollution, and thanks to its high performance, the device will perfectly cope with a combined kitchen-dining room or kitchen-living room. | 650 | 50, 60 and 90 |
Hansa OKC 653 SWH | The hood is made in white and has an inclined position. The intensive mode allows you to instantly purify the air, and control is carried out thanks to the touch display. | 620 | 60 |
Elica MEMPHIS WH/A/90 T.GREZZO | Two operating modes can draw polluted air into the ventilation or purify it and release it back into the room. The aluminum filter is easy to clean from grease in the dishwasher. | 650 | 90 |
Once all the above points have been agreed upon, you can proceed with the actual installation of the hood.
Connecting the hood to electricity
This stage is the simplest. It’s very good when initially planning your kitchen, you carefully planned the location of all sockets and electrical points.
You can find out how to avoid making a bunch of basic mistakes and maintain all distances in a separate article.
If you do not have a free socket for the hood, you will have to install it. To do this you will need the following materials:
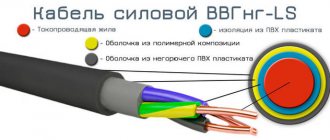
- three-core cable VVGngLs 3*2.5mm2
For home wiring, use a cable of this particular brand (with the index Ls).
- regular 16A socket with grounding contacts
The hood itself, unlike other kitchen appliances, is a low-power device. Accordingly, it is not at all necessary to pull separate wiring under it directly from the switchboard.
The same cannot be said about the hob or dishwasher.
It turns out that this unit can be connected from a common socket group from the nearest distribution box.
Pull a groove or cable channel from the distribution box to the location of the future outlet and mount the socket box.
This outlet is located on top, almost under the ceiling, slightly above or to the side of the hood itself. The choice of a specific location will depend on the length of the cord and the requirement for the minimum installation height of the exhaust unit above the stove.
Often you have to cut a hole in the nearest kitchen cabinet for this purpose.
Next, remove the insulation from the cable, mark the cores and connect them together in the junction box.
All that remains is to connect the outlet correctly.
The wiring for the kitchen unit is ready. Let's move on to the air duct.
Why do you need a hood in the kitchen: main functions
The design of kitchen hoods is quite complex, but its use, as it turns out, is elementary. By installing such a device in your kitchen, you become a happy owner of cleanliness and freshness not only in the place where you prepare food, but throughout the whole house.
If you run the hood after cooking, it is advisable to open the doors to the living rooms to eliminate harmful odors from there too.
Kitchen cleaners help to instantly get rid of carbon deposits, odors and smoke accumulated under the ceiling after intensive use of a gas stove. You probably know that all the grease and soot accumulates in the air and on the furniture. If the house has a hood, then it will save you from unnecessary worries regarding washing grease from the facades of the kitchen unit.
Incorrect connection of the exhaust duct to the ventilation
The main problem during installation is to correctly connect the air duct without disturbing the natural ventilation in the apartment.
Some of the craftsmen generally advise taking the whole thing out into the street, through the nearest wall. However, according to SNiP it is prohibited to do this.
It clearly states that such a hole cannot be placed closer than 8m from the adjacent window. Since this window is considered a device for supplying outside air.
Here, read the paragraphs of the set of rules SP54 and SP60.
That is, drill a healthy hole in the wall, spend a lot of nerves and money, and the neighbor will complain about you, and you will be obligated to repair it all.
How do most consumers connect? An ordinary corrugation is taken, placed on the outlet, stretched and attached to a flange, which is screwed to the ventilation hole.
That's all. Simple, cheap and wrong. What are the disadvantages of this method? First of all, the noise.
When air passes through such a ribbed corrugation, it makes extremely unpleasant sounds.
But most importantly, when your device is turned off and not working, natural ventilation is forced to draw air from the apartment through the hood. Not only can your box be clogged, but in the summer there is sometimes no traction at all (due to the same temperature at home and outside).
Moreover, you are actually putting an oily mesh, motor, turbine, etc. in the path of the air. Also, air suction will not occur at the ceiling level, but at the level of the middle of the kitchen.
Although the collection of all odors of waste products should be carried out from the maximum height.
It is quite clear that in this case there will be no traction. That is, with your own hands you are depriving yourself of natural ventilation.
This threatens the occurrence of fungus and increased humidity. In the off-season, your doors will simply begin to swell and close poorly.
There will also be a lack of oxygen and constant poor health. At the same time, someone falls into mysticism and begins to think that they have been damaged or the apartment has bad energy, but in fact, there it is - improper ventilation!
Initially, in Soviet times, when designing our multi-story buildings, engineers expected that air would flow into the apartment due to leaks in wooden windows.
However, with the installation of plastic windows and sealed doors, we thereby blocked this channel of fresh air in the house. You will also close the ventilation and you will live like in a submarine.
To correct the situation in such cases, it is recommended to install a supply valve on a plastic window.
Instead of clogging, you can do everything more intelligently. What alternative options are used for this?
Exhaust equipment
This type of hood is often chosen for kitchens with a small area, as it is compact in size. Of course, the purpose of the device is not limited to interior decoration problems. First of all, it is necessary to clean the air from unwanted impurities that arise during the cooking process.
The presence of a hood allows you to quickly remove foreign odors from cooking food, steam, dirt, etc. from the room. The built-in version fulfills all these requirements, and is also distinguished by its compact size and low noise emitted during operation.
The disadvantages of such devices include the high price, which is fully compensated by solid advantages. Despite its small size, the device has the necessary level of performance.
There are horizontal and vertical hoods. The first ones are considered the most common, since they are much easier to install.
One of the advantages of a built-in hood is its compact size and minimalist design, which will fit well into the interior of any kitchen.
The device can be mounted in a wall cabinet or a special box. With the vertical option, everything is a little more complicated; it needs to be installed directly in the wall, in a niche made for this purpose. The manufacture of this niche significantly complicates installation. When choosing a hood, you need to focus not only on its type, but also on the size of the hob surface of the stove.
The width of the retractable part of the built-in hood must match the width of the cabinet in which this device will be installed
The width of the device can vary over a fairly wide range: from 45 to 90 cm. It should be remembered that the working width of the hood must correspond as closely as possible to the dimensions of the hob surface of the stove.
Only by following this rule can you achieve sufficient efficiency of the device. The most popular model is the size 60 cm.
An important element of the built-in hood model is a filter for catching grease. Before turning on, the horizontal hood must be pulled out so that it is located above the entire area of the hob. The grease filter is located in this moving part. Some models are equipped with an additional air recirculation function.
Flow hoods completely remove waste air from the kitchen, and circulation devices clean it and leave it in the room
Such devices must be equipped with a carbon filter; they are more expensive. They can operate in two modes: diversion or recirculation. You should decide on the type of hood before making furniture for the kitchen, since the cabinet in which the device will be installed must have suitable dimensions.
The now popular recirculating hoods are good because they return not only purified air to the room, but also warm air. Thus, a significant part of the thermal energy spent on cooking and heating the air will remain within the house. However, flow-type hoods purify the air better.
Another important parameter when installing such a hood is the vertical distance from the hob to the edge of the hood, i.e. to the bottom of the cabinet in which it is built. This parameter is strictly standardized; for electric stoves it should be 70 cm, and for gas stoves - 80 cm.
The distance from the hob to the hood must be at least 65 cm and no more than 85 cm
Failure to comply with this requirement will lead to a noticeable decrease in the efficiency of its operation, and it is possible that the device will break down. In some kitchens it is not possible to install a hood at a distance of at least 85 cm from the hob. In this case, it is necessary to purchase a design with a higher performance than the calculated one.
There are plastic air ducts with square and round sections. Round structures are used less frequently than rectangular counterparts, since the latter take up significantly less space than a cylindrical channel.
It is preferable to use a plastic version with smooth walls, since they better resist the accumulation of dirt.
The air duct of a built-in kitchen hood should not be too long; it is recommended to make no more than three turns so as not to impair the operation of the appliance
A corrugated air duct in this regard will create more problems; in addition, when hot air passes through such a duct, additional noise is generated. The maximum permissible level of sound interference that a hood can produce is 70 decibels. This is slightly louder than normal conversation.
Despite these disadvantages, corrugated air ducts are widely used with hoods because they also have advantages. It is easier to install such a structure because it can be tilted and bent in a suitable manner. Therefore, for successful installation you will not need adapters or additional elements.
A special corrugated hose can be used as an air duct for a built-in hood. It is easier to install, but may make more noise than plastic counterparts
But to rotate the plastic air duct you need to create a special elbow. This design promotes the formation of hot air vortices inside the channel, which is not very useful. To reduce the amount of contamination on the walls of the corrugated air duct, when installing the built-in hood, you should stretch it a little.
If desired, the circular cross-section of this design can be made square so that the air duct takes up less space. This is another advantage of this type of construction. Good quality is demonstrated by such models of built-in hoods as Bosch DHL 545 S, Shindo MAYA 60 SS/BG, Elica KREA GFA WH/F/60, Miele DA 2270, Sub-Zero Wolf and others.
Hood duct and grille with non-return valve
The first is that instead of corrugation, a plastic pipe is taken (for example, d-125mm), and through one or several bends it is led into the hole in the ventilation duct. In this case, a certain division is made in the hole itself under the ceiling.
An entrance to the pipe is mounted on top, and a small rectangle is left below through a grate with a valve for natural inflow.
Moreover, the grille should be at the bottom, and not at the top. Otherwise, the air flow from the hood will blow upward and lift the so-called non-return valve.
Although, of course, if you have a more advanced valve design - a circle or rectangle with an offset axis, and not simple strips of polyethylene, or there is a solid partition, then you can safely install it as you want - on top, side, bottom.
However, in fact, this whole structure often does not work as intended. When you turn on the exhaust unit and create pressure, a small part of the dust still seeps through the cracks and micro-holes, after which it safely ends up in your kitchen on the dining table.
No check valves are 100% effective. The bulk of the air, of course, goes outside, but the gradual formation of dust inside the apartment is a fact.
And even when the hood is turned off due to the reduction in the diameter of the original hole, natural ventilation through narrow grilles will be much worse.
Everything can be done much better.
Correct entrance to the ventilation duct
In the case of a chimney laid directly behind the wall where the cap is to be installed, there is no need to install an elbow directly through its outlet. In this situation, it is recommended to lay at least 30 cm of pipes up and only then install the elbow. Thanks to this operation, the force of the air expelled from the room by the hood motor will not immediately collide with the wall. This will protect you from dirty air returning to our kitchen. When the air immediately bounces off the elbow, it returns to the engine and prevents it from working properly. The hood will be louder.
Outboard engine
If you want your hood to operate more quietly, choose a model that can operate with an external motor. A turbine installed in another room (garage, attic) will not be heard in the kitchen.
Correct connection of the air duct to the ventilation system
For this you will need:
- plastic air duct
- offset check valve
- tee splitter
In the end, you should end up with something like this.
How does it all work? When the hood is turned off, the valve will be open and warm air from the kitchen will quietly flow by gravity into the ventilation duct. As soon as you turn on the exhaust hood, the valve immediately closes automatically, blocking the air flow into the room.
In this case, all odors from the stove will easily go outside. When switched off, the pressure in the box drops and the valve automatically opens, connecting the ventilation shaft to the apartment.
At what height from the gas stove should the hood be installed?
Knowing which fasteners to install a kitchen hood on is not enough. It is important to correctly measure the distance for hanging equipment above the gas stove. There are special standards that must be followed if the kitchen is standard.
Also, the installation height of the hood can be changed if provided by the manufacturer.
Traditionally, the system is installed at a height of 65-90 cm above the hob. If you try to place the device a little lower, this may affect performance, because high temperatures may cause some parts to become deformed.
It is advisable to install a hood higher only when a tall person in the family prepares food, and the device has sufficient power and is capable of extracting smoked air even from the bottom of the room.
Assembly instructions - all numbers and performance
How does this all come together in practice? For capacities up to 300 m3/h (low speeds of most hoods), a d-125mm pipe is sufficient. On the device itself, the outlet hole may be larger.
For example, for 650 m3/h you will need a d-150mm pipe. However, you are unlikely to find such plastic pipes, and if you use the next standard size d-160mm, it will turn out to be a huge and awkward structure that spoils the entire interior and design of the kitchen.
Moreover, you will have to drill a factory hole for the ventilation duct in the wall, expanding it.
Therefore, in most cases, the optimal diameter of 125 mm is chosen. And you don’t need more.
The forced throughput capacity of standard channels and shafts with dimensions of 100*150mm is 400 m3/h.
An air flow of more than 450 m3/h simply will not fit there (it was tested in practice), even if it says 1200 m3/h on your hood!
Remember also that you cannot underestimate the diameter of the air duct too much compared to the outlet pipe on the hood. Otherwise, the vibration and noise will be so strong that the structure will have to be re-glued every month.
The connection of different diameters is made using special adapters.
Let's start assembling. First, install the adapter on the hood and connect the vertical section to it.
To improve its sound insulation, it makes sense to go crazy and stick a 5mm thick heat-sound-insulating material on top.
It wouldn’t hurt for them to cover the inside of the decorative casing and the noisiest part - the adapter. This is where the greatest turbulence occurs.
Next, add 90-degree elbows and other straight sections of duct as necessary to ultimately exit toward the hole in the wall.
All this is glued together with silicone, no superglues. There should be no gaps anywhere.
We reach the tee. A valve is installed in it from the side of the room.
Keep in mind that this is a gravity valve! It opens not due to air flow, but due to its weight.
One half of it is heavier than the other and at the same time it is installed at a slight angle of 2 degrees.
How to install a dome hood
In the modern market of household appliances, hoods with dome shapes are especially popular. They fit harmoniously into the kitchen space and cope with their functions perfectly. These products, in turn, are divided into several subtypes:
- fireplace (wall-mounted). These devices are fastened to the wall surface. The design of products of this type is similar to ventilation systems for fireplaces;
- corner. Hoods with this configuration are rare in kitchens. They are installed only in cases where the stove is in a corner;
- island. These options are installed only in large rooms, for example, in dining rooms. They are suitable when the gas stove is installed in the center of the room. The devices are fastened to the ceiling surface.
Types of hoods
In order to correctly install a dome hood, you need to know the main features of this process. It is advisable to entrust this work to professionals; they will be able to do everything correctly and efficiently.
Dome hood installation option
If you decide to install the hood yourself, be sure to remember a few important recommendations:
- To perform the installation, you need to connect the hood to the ventilation system and connect the device to the electrical network;
- It is advisable to furnish the kitchen area with furniture in advance, and only after that mark the location of the hood. In this case, it is necessary to take into account the height of this device;
- Next you need to drill holes for the dowels. Using bolts, we mount supports onto which the base of the exhaust device is placed;
- after this, a special outlet of the exhaust device is connected to the corrugated air duct, and the tightness must be maintained;
- At the end, the operation of the hood is checked and the upper casing of the device is put on.
Connection requirements
The hood must be installed correctly, taking into account all important requirements. A prerequisite for installing this device is to ensure that the existing electrical outlet is grounded. If you do not know how this process is performed, then it is better to seek professional help.
Preparing the ventilation shaft hole
Before all installation work, it is advisable to plaster the entry into the ventilation shaft itself and remove all sharp corners. This will give the entrance maximum aerodynamic qualities.
You should end up with approximately the same surface as a standard 90 degree round elbow.
It is recommended to add ceresit liquid (ceresit CT99) to the plaster solution.
This hole will be exposed to fat and moisture. And ceresite contains components that prevent the formation of mold.
However, do not use gypsum plaster under any circumstances. Its use in ventilation shafts is a direct path to the appearance of mold and fungi.
Attach sections of a standard air duct to the tee on both sides. From the side of the wall, 5-7 cm, wall it up in the ventilation duct. The exit itself is decorated with a square frame.
Grounding and grounding
Before telling you how to make a hood in the kitchen, it’s worth mentioning electrical safety. Since a lot of grease splashes get inside the housing and moisture accumulates, the risk of electric shock increases if the hood is incorrectly connected to the electrical network.
Therefore, a kitchen hood installed by yourself must be connected to the network with three wires: phase, ground and zero. The standard ground wire is yellow with a green stripe. Before installation, ensure proper grounding to ensure safe use of the electrical appliance.
If the house has a grounding loop and Euro-type sockets are installed, there will be no problems: when connecting, the wire is connected to the grounding terminal, which is indicated by strips of different lengths or the word Ground (GND). If your equipment does not have a grounding connector, you can make one yourself by screwing the wire to a metal part of the case.
A Euro socket with connected grounding in Russia is found only in new apartments
But many may not find Euro-sockets, and will wonder: how to connect a hood in the kitchen if there is no grounding? In this case, you can do the grounding yourself, but under no circumstances connect the neutral wire to pipes and batteries. You need to connect it to a dead neutral.
To do this, open the electrical panel with the meters and find a bricked-up pipe in the wall where the wires come from (be careful, the wires are 220V!), or a special bus, as shown in the photo. Most likely, you will find a ready-made pin on it and neutral wires already attached. This is a solid neutral, the pipe is perfectly grounded. You need to run a stranded wire with a cross-section of at least 2.5 mm2 from it to the kitchen, and connect the hood through a 6.3A automatic separator.
Zero tire on the panel at the entrance
Note! If there are already wires connected to grounding, then under no circumstances disconnect them! This may result in an electric shock. Throw your wire over someone else's and tighten the nut. If there are no wires and the pipe is smooth, strip it and secure the wire contact to the clamp. If you do not understand this matter, it is best to contact a professional electrician.
Why does the check valve sometimes not work and close?
On the kitchen side, a check valve is mounted on the tee. In the factory version it will be quite long. In this case, it is better to shorten it so that this “gun” does not stick out too much.
The valve is inserted inside a section of a standard air duct d-125mm, and this air duct is put on and siliconized onto the tee.
If this whole structure seems too cumbersome to you, and the protruding pipe with the valve is not very aesthetically pleasing, you can do it a little differently. You make the air duct not with a round pipe, but with rectangular channels.
In this case, you install the above check valve on a straight section, as close as possible to the turn.
You can't achieve a factory connection here, so you'll have to farm collectively. Buy a rectangular tee with a round outlet on one side. Next, this round timber is cut off and a check valve is glued in its place.
The valve is placed strictly at an angle (2 degrees). Otherwise, it will open every once in a while or not open at all.
Many people have encountered this problem and easily solved it this way.
The damper itself is also mounted with a vertical deviation. The upper turning point, based on the hour dial, is at 13.00 (1 o'clock), and the lower one is at 17.00 (5 o'clock). This is if your flow direction is from right to left.
Otherwise, the circle is placed at the 11 o'clock - 7 o'clock position.
For more reliable operation and stable opening of the damper, you can stick some kind of weighting material (no more than 2 grams) on one side. Glue it close to the edge.
By the way, do not throw away the previously cut round pipe. It is tightly inserted onto the valve from above, after which a decorative grille diffuser is mounted on it.
What nuances might there be with this method? If your hood stands exactly above the entrance to the ventilation shaft, and the duct pipe goes straight, without any turns in the horizontal plane, then the valve installed on such a straight section does not work normally, at least at 1st speed.
You will simply have nowhere to get the increased pressure to close it. The air will fly through this “turn” in a straight line. You definitely need an angle.
The valve cover and its rotating mechanisms are easy to clean and do not be afraid of them becoming overgrown with grease. For this to happen, you will have to fry huge wild boars on the stove and stew them in your oven for several hours a day, no less.
If you don’t want to see a protruding “hollow” under the ceiling at all, then, as an option, you can install a tee so that the middle elbow rests against the wall, otherwise, where the valve is located, it would look to the side. In this case, also close the hole with a decorative cover.
Everything will look much nicer. However, due to the additional rotation, the performance of natural ventilation will deteriorate slightly. And the grill will reduce it by another twenty percent.
In addition, it will no longer be possible to clean the channel by hand or with a vacuum cleaner. But many do this deliberately and even hide the entire structure in a wooden or plastic box.
As they say, beauty requires sacrifice.
Calculation of hood performance
According to established standards, the power of the hood should allow the air in the kitchen to be renewed at least 12 times in 1 hour. The device passport indicates the productivity in cubic meters per hour.
- Why windows sweat: main reasons, possible consequences and methods of elimination (80 photos)
Supply valve to the wall: installation tips, device overview and types of the best models (95 photos)
Air dehumidifier - rules of use, layout diagrams and recommendations on how to choose the right air dehumidifier (85 photos)
All that remains is to calculate the volume of the kitchen. For example, if you multiply 3 meters of width by 4.5 meters of length and 2.9 meters of ceiling height, we get 39 cubic meters. multiplying by 12, we get the required minimum exhaust capacity - 470 cubic meters per hour.
It is usually advised to purchase a hood whose performance is 30% higher than calculated.
Why does the air from the kitchen get to the neighbors - is the hood to blame?
Despite all the advantages, such a hood connection system has many critics. They believe that in this way you are rudely interfering with the overall ventilation system of the entire house.
For example, everything will be fine with you, but have you thought about your neighbors? Allegedly, due to this connection of the hood to the ventilation, all odors from your kitchen will automatically penetrate into the apartments through the riser above.
They started frying pies, and all the neighbors already knew about it. However, all critics are mistaken based on misconceptions about the ventilation system in apartment buildings.
They think that from bottom to top there is one common channel 110*150mm with “holes” for each apartment.
In fact, in 5 floors, all the channels are individual and you are unlikely to be able to blow out extraneous odors from your neighbors. In houses of 6 floors and above, there is already a ventilation system with air removal through satellite channels, connecting to a common collection channel through one floor.
This common channel has a cross-sectional area 6-8 times larger than individual shafts in apartments with dimensions of 110 * 150 mm.
Schematically, such a ventilation system for a multi-story building can be represented like this.
Yes, in such buildings, if several hoods are turned on at the same time to the maximum, reverse draft may occur. But this is an extremely rare case.
Look - the natural draft from apartments, at best, ranges from 100 to 150 m3/h. You have a nine-story house. The first seven floors are embedded in a common channel measuring 510*270mm, or even more. The total natural flow in it is about 1000 m3/h.
And then, instead of the usual draft of 150, you turn on your hood at 300 m3/h. Do you think it is capable of creating reverse draft in this case and starting to expel air to the neighbors?
To do this, it is necessary that all 6 floors do the same thing, and at maximum speed.
Then one apartment will be unlucky and its inhabitants will have to smell all the aromas of their neighbors’ cooking. But this option is unlikely.
Despite all this, sometimes the air from your kitchen actually gets into other apartments in the house. Or, on the contrary, you have a great feeling that your neighbors are grilling you for lunch today. Why does this happen and where to look for the reason?
This happens for several reasons. For which ones, read in more detail under the spoiler.
Why does the smell from your apartment penetrate to your neighbors?
What modern technologies in hoods should I choose?
Modern technologies offer a number of improvements that affect the performance of devices and our health. Modern hoods can absorb not only water vapor and odors, but also grease, dust, bacteria, fungi and allergens.
You will get this effective level of cleaning by choosing hoods with plasma filters that work on the principle of electrostatic micro-discharges. Hoods with a plasma filter operate in a closed circuit - they cannot be connected to an air duct, so as not to get rid of perfectly purified air.
Some hoods have the ability to ionize the air. Thanks to this technology, not only unwanted substances and microorganisms are removed from the air, but also the ionic balance (both in the kitchen and in other rooms). The resulting negative ions are very important for human health. Some hoods also have the function of releasing air enriched with aromas. During cooking, the air is not only purified, but also enriched with pleasant aromas. Odor filters are, of course, harmless to health.
Fans with lamps that emit infrared light that keeps food warm are also available to fans of unique technology. Most modern hoods also have touch or remote controls. Modern technologies in hoods also minimize noise levels. Special sound-absorbing structures allow you to mute the sound to levels below 50 dB. This feature is useful if your kitchen is connected to a living room, where the noise from the device would be too annoying.
A very important improvement offered in modern hoods is the reduction in energy consumption without compromising the performance of the device. The choice of such solutions allows you to save up to 70% of the current consumed when operating the hood.
Modern hoods can operate normally even for 15 years. But for this you must ensure that it is installed correctly. Then you can be sure that the device will serve us well all the time and you can enjoy efficient and reliable operation. Using the above 9 tips will definitely help us.
Popular models
A ceiling or wall hood should be in harmony with the design of the kitchen furniture. For a classic kitchen or a country-style interior, hoods in light shades (white or beige) and large shapes are more suitable. If there are wooden inserts, this technique will become a continuation of the headset.
Hoods in high-tech and modern style are more laconic and strict. Their design is dominated by black and metallic shades, and, in addition to steel and aluminum, glass, plastic and other materials are used.
The calling card of new models of hoods is a touch display: such equipment will always look appropriate in a kitchen oriented towards modern trends.
The best hanging hoods from well-known manufacturers will not be cheap, but you can find quality models from other brands for less:
- Jet Air flat hoods will cost about 3.5 thousand rubles;
- Elica suspended equipment costs from 4.8 thousand;
- the minimum cost of a Krona hanging hood will be 5.2 thousand rubles;
- price for Whirlpool suspended hoods – from 5.9 thousand;
- the cost of Electrolux hoods starts from 2.8 thousand rubles;
- Bosch suspended hoods cost from 5 thousand rubles.
How to choose a suspended air purification system
Currently, many manufacturers produce wall-mounted hoods. Models differ in size, functionality and characteristics. To choose a device that will fully meet your expectations and delight you with its performance, you should take into account a number of criteria:
- Size;
- Performance;
- Functional;
- Filtration system.
Each criterion has a number of nuances and features that will be useful to learn about.
Size
The choice of size depends on the area prepared for the hood. However, it is worth considering the dimensions of the hob. If its surface is larger than the hood, then some of the fumes will rise to the ceiling, bypassing the air purification device. In this case, the cleaning efficiency decreases.
The most compact devices have a width of 45 cm. If a built-in hood is mounted above the stove, then a device with these dimensions is only suitable for 2 or 3 burners. For a full-fledged hob, you should choose kitchen hoods with a width of 50 cm. For a stove with 5 or more burners, hanging models are relevant, the length of which is 80-90 cm. The height of the hoods reaches 15 cm.
Performance
This is one of the main parameters of a suspended hood. It displays the maximum volume of air mass that the device can clean in 60 minutes of continuous operation. Productivity is measured in cubic meters. If the hood is attached to a wall, ceiling or cabinet, then when choosing a model you should take into account the size of the room in which it will be installed. The larger it is, the higher the indicator should be. The minimum productivity of air purification equipment is 150 m3/hour.
It is interesting to note that there are special sanitary standards, according to which the air in the kitchen must be changed more than 12 times within 60 minutes. Taking into account these recommendations and the height of the ceilings, you can use the following formula to calculate productivity: total kitchen area x ceiling height x 12. The result obtained can additionally be multiplied by 1.3 - the minimum reserve coefficient. In the case of models equipped with a carbon filter, another 25% for resistance should be added to the result obtained.
Functional
Hanging-type models do not have extensive functionality. Modern devices are equipped with:
- 3 speed modes;
- Backlight (LED or halogen bulbs);
- Timer.
There are devices equipped with a touch control panel. Other models have buttons and switching sliders.
Filtration system
The filter is one of the main elements of a kitchen hood. It comes in two types: coal and fat. The latter is used for deep cleaning of the air flow. It is able to trap particles of fat, fumes and rotting products. Carbon filters are installed in all kitchen hoods operating in circulation mode. Their main task is to finely purify the air mass and eliminate unpleasant odors.
A kitchen hood is a useful device that makes the air clean and safe for health. Hanging models are suitable for small spaces. When connected correctly, they will effectively remove excess moisture, grease, and unpleasant odors from the air mass. Thanks to this, comfortable conditions will be created in the kitchen, which also meet sanitary standards. Knowing how the device is installed, you can save your budget on the services of a specialist. To further simplify the installation process, choose hoods with body mounting.
What determines the location of the hood
The correct choice of height for installing a ventilation system is an indispensable condition for its effective operation. When determining this parameter, the following are taken into account:
- manufacturer's recommendations;
- dimensions and power of the device;
- architectural features of the premises;
- distance from the hood to the ventilation hole;
- type of hob;
- regulated standards for the placement of hoods.
Deviation from generally accepted norms is fraught with undesirable consequences. At an excessively large distance, the hood will not be able to actively capture air and fat particles, which will settle everywhere. The device will run idle and it will take much longer to clean the air.
It is also undesirable to place the hood too close to the hob. It is necessary to leave a gap of at least the minimum recommended by the standards. Failure to comply with this condition may result in:
- inconvenience in work - if the hood hangs too low, it is difficult for the cook to inspect the contents of the pans and control the cooking process. There is a high probability of frequently hitting the device with your head and causing injury;
- reduction of service life - lack of distance between the exhaust equipment and the stove causes overheating of the device and its rapid failure;
- fire - there is a danger of ignition of fat accumulated on the filter elements;
- decrease in efficiency - the rate of filter clogging increases, due to which derivatives of combustion and cooking will settle on all surfaces.
Wall mount
As mentioned above, models such as dome and wall-mounted ones are attached to the wall, although they differ significantly in appearance. Fastening is carried out through the holes provided by the manufacturer, located on the rear wall of the case. Some manufacturers complete such products with special templates. Having attached the template to the wall, the fastening points are marked, after which holes are drilled in the wall, dowels are hammered in and finally the product is secured with screws. Often the kit also includes fastening elements, which are represented by dowels and screws. If there is no template, you will have to work hard, carefully measuring the distance between the holes, after which these dimensions should be transferred to the wall.
The hood must be attached to the wall through the standard holes in the housing.
Of course, it’s quite difficult to do everything yourself, so it’s better to have an assistant. At this stage, it is very important to ensure that the hood is fixed strictly level.
It will be worse if there are pipes in the place where the hood should hang and it will not be possible to attach the hood directly to the wall. In this case, you will first have to attach wooden blocks to the wall, and then you will have to attach the hood to them. Unfortunately, this is not the best option, since the hood will be far from the wall and will not be located directly above the stove, and the space behind the hood is a comfortable place for cockroaches to live, for example.
How to install a hood on a wall if a gas pipe is in the way or the wall is uneven
Instead of wooden blocks, it is permissible to use special long pins, but again, this is not a very good option, since reliable fastening will not work. It is better to make sure that nothing interferes with the hood, although this is not always possible.
How to install a hood on an uneven wall
About fastening the exhaust system
If the system operates according to a flow-through design, then an air duct with a diameter of at least 120 mm must be brought into the ventilation shaft. It cannot be narrowed, bent or attempted to be lengthened, otherwise power loss is guaranteed. You can use either a round or square duct.
Nikonorov Vladimir
Our expert. Specialist in the field of air conditioning and ventilation with 10 years of experience.
Ask a Question
Please note: it is better to purchase an air duct not with a corrugated surface, but with a smooth one. This will significantly reduce the noise level of the device in operating condition.
If the hood is circulation, then there is no need to connect it to the ventilation shaft. The main element, the filter, will have to be purchased separately.
Installation process
Installing a hood in the kitchen involves several technological steps. These include:
- The moment of fixing the hood in the designated place.
- Connecting this device to electricity using a cable and an electrical plug. If there is no outlet nearby, you will have to make sure that the outlet is located next to the hood.
- Connection of the exhaust duct with a ventilation duct or with an individual ventilation system.
To carry out all the necessary stages of installing and connecting the hood, you need to go through the preparatory stage, which can take much longer.
What is needed for installation?
To secure and install the exhaust system you need:
- corrugation - for venting air into the ventilation duct.
Advice: it is better to choose plastic corrugation rather than aluminum. It looks more beautiful and works silently
- clamps (2 pcs.) - to install the corrugation on the hood;
- grill for ventilation shaft;
- screwdriver (for a wooden wall);
- hammer drill or impact drill (for a concrete wall);
- hacksaw and sandpaper (for cutting and processing pipes);
- jigsaw - for making a hole in a cabinet or shelf (if the system is built-in);
- level, tape measure, marker - for marking;
- knife;
- screwdriver;
- sealant (silicone) – for sealing cracks and joints between structural elements.
Be sure to: carry out all work wearing gloves and goggles!
