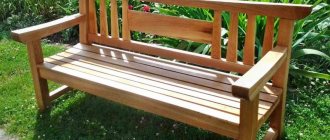
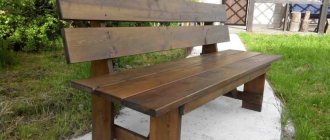
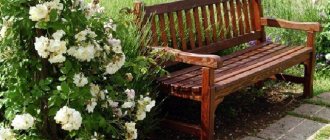
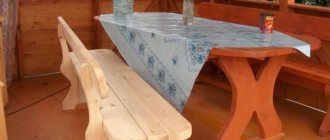
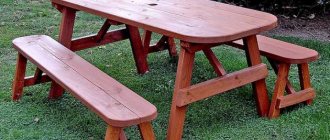
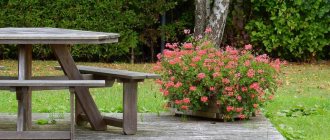
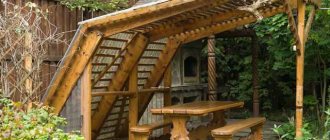
Benches are a mandatory element of the design of a yard or personal plot. You can have a good time there after a hard day at work. In addition, the original and neat bench is a stylish decoration for the site. A do-it-yourself log bench is a great way to decorate your garden plot, as well as make comfortable garden furniture for a pleasant pastime. This bench combines practicality, functionality, durability and presentable appearance. In addition, if you follow the rules and recommendations, its production will not take much time.
A log bench is a great way to decorate your garden plot
Model selection
The choice of the master is determined by the availability of available material, the purpose of the bench and the level of working skills.
For the most inept and unpretentious, an option with a large-section log or beam laid directly on the ground is suitable. The only thing that needs to be done is to level the surface and treat it with a protective compound.
Beginners should try their hand at extremely simple models made of calibrated timber and boards without a back or decorative elements.
Those who have a chainsaw and at the same time have the opportunity to get a large-diameter barrel can be advised to “just remove all that is unnecessary”, obtaining a product of the required shape.
For those for whom the ability to work with wood, a good set of tools and materials removes all restrictions, you can choose any model - from purely wooden to combined, for example, with cast or forged elements.
Inverted bench made from scrap materials
Used furniture can be given a second life if you approach the matter creatively. Often the household has a chair on a durable metal frame, which is very easy to convert into an inverted bench.
How to assemble:
- Free metal parts from all other parts. Clean the surface from rust and old paint.
- Cut 27x30cm stands from plywood or chipboard. Prepare a 20x50 cm rectangle for the seat. Dimensions can be arbitrary.
- Tie the parts together using a wooden block or board.
- Secure the metal frame of the chair to the sides.
- Cover with waterproof film or fabric, padding with foam rubber for softness.
This inverted bench is convenient to use when planting or weeding beds in the garden as a knee rest. To do this, you just need to turn the seat towards the ground.
How to choose material for a bench?
A do-it-yourself log bench, which is indispensable for a summer house, garden or private home, must be beautiful, original and practical.
It must be made from environmentally friendly material - wood, because it has a pleasant texture and combines elegance and convenience.
You will also need planed boards prepared in advance. Ordinary oak, cherry, and hazel logs do not need to be processed, except for coniferous tree logs, which should be cleaned of resin with acetone.
Photo:
Waste material and substandard wood are also suitable. All this can be put to good use.
You can protect the bench and table from the influences of the external environment by covering them with varnish.
To make furniture with your own hands you will need the following materials and tools:
- chainsaw;
- main logs about 120 cm long;
- small logs for legs;
- columns as high as a bench;
- polished boards for making the backrest;
- drill with screws;
- sandpaper;
- rasp;
- jigsaw (for creating decorative elements).
Frequently asked questions
During the manufacturing process, home craftsmen have a lot of similar questions. You can answer them immediately:
How to finish board seats so that they blend more harmoniously with the log frame?
You can artificially age wood by brushing it with a wire brush (or using a drill attachment to remove rust). This treatment makes the material more natural and gives it a vintage look.
Do I need to sand the logs?
There is no fundamental requirement, since the trunks of some species of deciduous trees look very attractive in their natural form. It is necessary to inspect the material and determine its general condition - if it is clear that the bark will soon fall off, it is better to remove it immediately.
Is it possible to paint such furniture?
Paint reduces the naturalness of the material and hides its texture. However, there are no serious contraindications in this matter; the user decides it independently.
If there is a mixture of softwood and hardwood, can they be used together?
It is possible, but it is recommended to sand the logs immediately for a more uniform natural color.
Is it possible to finish furniture by firing it with a torch?
This is a good way, fast and gives an attractive result. You just need to remember to apply a finishing layer of clear (or tinted) varnish so that the furniture does not leave stains on clothes.
Log bench
If eco-style or modern style was chosen to decorate your summer cottage, then an excellent option would be to use a single piece of wood to make a bench. But it’s worth noting right away that those who don’t have a large log will have to fork out more. Wood is not cheap, plus not every option is suitable for the job. It is necessary that the wood be durable, able to withstand difficult weather conditions, but easily yield to the hands of a craftsman.
Experts recommend using logs and stumps of oak, larch or pine for such purposes. From these species you can make not only original, but also durable garden furniture. Of course, the bark will come off quickly enough, but the wood itself will definitely last a long time. For greater safety, it is still worth carrying out additional processing. This will protect the tree from premature rotting and fungal development.
From high-quality logs you can make a reliable and very durable structure, which will not only decorate the local area or garden, but also make the landscape design original.
A huge advantage of benches made from a single piece of wood is that there will be a minimum of work. It is enough to place the log in the right place, and then cut exactly a quarter out of it. This creates both a seating area and a backrest. If desired, you can remove only the central part and leave the sides. This will create armrests.
If the master has wood carving skills, then this option opens up unlimited scope for the flight of imagination.
It is very important to carry out the highest quality treatment of the surfaces for the seat and backrest. If the bench leaves splinters, then there will be no comfort from such a rest
Finally, it is worth treating the wood with a special solution, which will preserve the bench for many years.
Using wood in a summer cottage
Currently, hardware stores offer a choice of a huge number of different ready-made sculptures and other elements for the garden, made from various materials.
But it’s better not to be lazy and make country crafts with your own hands - making them from wood, unlike stone or metal, is not so difficult, and the resulting result will exceed your wildest expectations.
Craft ideas
Let's focus on interesting and easy-to-implement designs:
- The most common option is wood sculptures. This can be a figure made from a single log or made up of several parts connected to each other in one way or another.
- Crafts made from branches and stumps that resemble animals, birds or fairy-tale characters look good. In this case, you practically do not need to make changes to their natural shape; just clean the material from the bark and varnish it.
- Plywood is good for creativity. Draw a stork, a windmill or a frog princess on a sheet of paper, cut off the excess parts and paint the product.
- You can also make excellent containers for plants and birdhouses from plywood. Another beautiful and useful thing is a feeder.
Logs as a material for creativity
Very often, when designing a summer cottage, it is necessary to cut down one or more trees. Of course, they are perfect as firewood, but it’s better to show your imagination and use them for crafts made from logs for your dacha: you can easily make a flowerbed, bench or decorative well with your own hands.
Let's look at these options in more detail.
- Flower bed. For most summer residents, it is not a novelty made from various available materials: plaster, empty glass bottles, old car tires, and so on. But it is the old log that is suitable for this purpose like nothing else.
For manufacturing you need a hammer with a chisel or a chainsaw. By making a recess of the appropriate size and placing the log on supports, you can learn an unusual and attractive product absolutely free of charge. All that remains is to fill the hole with soil and plant flowers.
- Garden furniture. An excellent solution, but not so easy to implement. First of all, you need to select a log of sufficiently large diameter. Then carefully process it with various tools:
- the first stage is an ax or chainsaw;
- second stage – chisel and hammer;
- the third stage is grinding and applying a protective coating.
- Decorative well. A very beautiful accessory for a summer cottage. The downside is that old wood is not suitable for manufacturing. You need to purchase high-quality round timber and build a log house from it.
Making a street bench
One of the simplest options for a cottage or country house is a rustic-style outdoor bench. The bench consists of two stumps instead of legs, and a wide board is installed on top as a seat. Such garden benches are usually installed near a fence or near the wall of a house, so they do not have a backrest. If the bench structure is quite long, then another stump is placed in the center - this will allow the board not to sag or crack.
To create a rustic bench you will need wood, stumps and poles. This is, as they say, waste material lying under your feet, which you can take either at your summer cottage or in some forest belt where sanitary felling is carried out. The base or legs of the future bench are constructed from stumps, and crossbars are made from poles in order to firmly fix the structure. The tree trunk is opened on a circular saw - this will be the seat. If you don’t have the appropriate equipment in your arsenal, then a simple unedged board will do.
If you wish, you can leave the dimensions unchanged, or you can shorten them. For example, a bench made of four pallets - three of them, stacked on top of each other, serve as a base and seat. And the fourth pallet is the back. Part of the support bars is removed from the pallet for the backrest, and the rigidity of the structure is ensured by additional wooden slats: one end is attached to the seat, the other to the backrest.
Quite high demands are placed on garden furniture if the materials used for the construction were not improvised materials, but purchased in a store (lining, decking boards, etc.). There are a few tips to follow to extend the life of your finished product.
- The material purchased for street furniture should be kept at the place of use for at least three days.
- Additional logs can be installed to distribute the load.
- To avoid cracks, it is recommended to prepare holes for screws in advance.
- If wooden beams will be used for the structure, it is recommended to cover it with a layer of paint, oil or varnish on all sides, and at the ends too.
- The decking board does not need to be covered with any protective layer, since its surface has already been treated and is ready for use. You just need to close the ends with special plugs.
Where is this furniture used?
Furniture made from logs has a specific appearance, which makes it suitable for use only in appropriate conditions. Most often, such products are found in garden plots, as part of landscaping elements for country houses.
The owners are happy to decorate recreation areas with products made from logs. At first glance they look rough and primitive. However, garden furniture of this type has a special appeal and creates a feeling of special comfort.
In addition to visual appeal, such products are distinguished by ease of manufacture. It does not require any special skills or knowledge of professional carpentry. However, skills in handling tools will be needed in any case.
The specific nature of furniture made from logs involves rough and extensive processing, requiring the use of a powerful and rather dangerous tool. This must be taken into account when deciding to make benches or chairs from logs.
Can they be used in the interior of an apartment?
There is no fundamental ban on the use of log furniture in an apartment. If the owner likes such products, there can be no objections. However, it is necessary to keep in mind that the appearance of chairs or benches is too specific, which does not allow a harmonious combination with other interior styles.
You will have to decorate the entire room in the same style, making all pieces of furniture from the same material. Otherwise, individual products will look inappropriate and even ridiculous, and it will not be possible to achieve the expected effect. Therefore, when planning to create an interior from logs, you must first calculate the amount of work and the amount of material required to implement the plan. Perhaps the results of the calculation will force you to reconsider your plans.
Bench with backrest with tongue-and-groove joints
The next project is an outdoor wooden bench with a backrest. It has a fairly strict appearance and will become a functional decoration in any garden or dacha. The vertical slats of the back give the massive structure visual lightness. Shaped armrests and a curved top bar add Japanese influences to a clean, classic look. It is simply created for carefree contemplation on shady alleys, and will look even more expressive surrounded by greenery and flowers.
If in the previous two projects we talked about how to make benches using simple carpentry joints, then here we will talk about the classic tenon-socket connection. It underlies all design elements of the project. You will have to make a lot of spikes and nests, so it is advisable to think about optimizing this process in advance. The simplest and most affordable option is to use a hand router and a saw table.
Advice! For accurate and quick selection of slots, use a homemade milling template with slots of the required sizes.
Drawing of a bench with a wooden back
Advice! Decorative antique finish perfectly complements the simple design of this wooden bench with a backrest. Use the brushing capabilities to texture individual structural elements - the top crossbar, the middle backrest and armrests. The combination of smooth and aged surfaces will create an original design contrast.
Prepare the details
According to the dimensions specified in the drawing, make the main parts of the bench. To quickly apply markings, use pre-prepared templates. Duplicate parts can be mass produced. After cutting, fasten all the identical parts into a pack and process their ends with a sander, this will significantly speed up the work process.
Make spikes
On the saw table, form tenons on all tenon pieces, following the dimensions from the diagram. Using a groove disc will make this job much easier. This can be done no less carefully with a regular saw blade, followed by trimming the waste with a chisel, as shown in the photo.
Mill out the sockets
Assemble the sidewall
Perform dry assembly of the sidewall. If the joints in the structure are not tight enough, fine-tune them using one of the methods we discussed in the article “Perfectly Fit Joinery Joints.”
Carry out sequential gluing of the structure
After checking the accuracy of the fit of the connections of the entire bench, proceed to sequential gluing of the base elements first, and then the back. After the glue has completely dried, attach the seat strips with self-tapping screws.
Option Next
You can make a lot of variations on the “garden bench” theme with your own hands; all you need is imagination and the desire to create comfort for yourself and your loved ones. Any man with little carpentry experience can assemble a bench from logs, because the manufacturing process is quite simple.
However, in order to improvise by making garden furniture with your own hands, it is advisable to know how to use a chainsaw. Without it, the manufacturing process will take much more time and effort. When working with a chainsaw, remember:
- Markings need to be done not only on the end side, but along the entire log.
- On a debarked log, about 1 cm will be “eaten” by a chainsaw, so draw 2 lines or a wider strip on it.
- To avoid removing excess bark, you should pull the string along the intended cut and cut parallel to it.
- The secured log is sawn much more accurately.
To decorate a bench, you can carefully walk along its flat part (seat, back) with a saw chain. Several transverse gouges will give the wood an antique feel.
Subsequent sanding will smooth out the sharp edges, making the bench comfortable to use. However, the look of the bench you created with your own hands will become more natural, more individual. In addition, technologies such as firing and brushing (passing over wood with a hard steel brush) are used to age wood.
Benches are a mandatory element of the design of a yard or personal plot. You can have a good time there after a hard day at work. In addition, the original and neat bench is a stylish decoration for the site. A do-it-yourself log bench is a great way to decorate your garden plot, as well as make comfortable garden furniture for a pleasant pastime. This bench combines practicality, functionality, durability and presentable appearance. In addition, if you follow the rules and recommendations, its production will not take much time.
Bench for a summer house made from broken chairs
If you have two old chairs and don’t have enough imagination to adapt them somewhere, then you can make a bench out of them. Only the same ones and strong enough will do. If they are loose, they will have to be repaired. The chairs are disassembled so that the backs and legs remain. After this, two chairs, or rather what is left of them, are installed side by side and their backs are connected using slats of the appropriate thickness.
Bench made from old chairs
To make the structure rigid, at a height of 20 cm from the floor, the structure is tied with the same slats along the entire perimeter. Subsequently, these slats will serve as a footrest, and if the bottom is sewn up, for example, with plywood, then you can store some things here.
We paint the completed structure
After the structure has been strengthened and sanded, it can be painted. In this case, ordinary paint is suitable, which can hide some flaws in the entire structure and especially in old chairs. All that remains is to cut out a sheet of plywood, lay foam rubber on it and cover it with some fabric. At the same time, one should take into account the fact that the bench will mainly stand outside until the coldest weather. Therefore, it is better to opt for, for example, leatherette. In any case, the material must be moisture resistant.
Finished bench made from strusses
Snag - an idea for a sculpture
Branched bends of roots, gnarled stems, powerful stumps - the best material for creating the image of realistic and fictional figures
For some, the curves are wings, while others recognize the silhouette of an animal in them. Do not limit your imagination, use wood in its natural beauty
Have you collected a collection of various branches and twigs? Try creating something more complex like this beautiful stallion creation. Thanks to movement, precise proportions and shapes, the sculpture seems to come to life before your eyes!
Notice the exotic image in the driftwood? Finalize the form, show its character to the maximum, making the figure noticeable to everyone
Old driftwood is an unusual and valuable material for impressive decorative items, furniture, and expressive figures. Most likely, we have not mentioned all the options for their use. Now you!
What other uses for driftwood can you imagine? Or maybe you already have a piece of art made from this original material at home?
Tips for caring for wood
Since wooden benches will be outdoors all year round, they can be affected by the elements. In order for the tree to last longer, it must be treated with special compounds against pests, which can be found in agricultural stores. You can decorate a bench not only with carvings, but also paint or varnish.
To create unusual benches from logs you will need a little more than 5 hours of work if you do it alone. Here, the seat with a fastened backrest is installed not on dug-in stumps, but on small round processed logs, knocked together. A strong jumper is nailed down between the poles, holding the entire structure.
Preparatory work
One of the most important elements of construction is the preparation of the drawing. It should include the following elements:
- Dimensions. The seat should have a width of about 50 cm and a back height of 40-50 cm. These dimensions can be increased, but the proportions must be respected. The distance from the ground should be about 50 cm.
- Product style. You need to decide on it in advance in order to think over the type of product and materials for decorating the shop.
- Accommodation. Depending on this parameter, you must select the type of bench. The product without a back is suitable for installation in the garden, and a massive bench can be placed near the house or in a gazebo.
- Choice of material. Various types of wood can be used for construction. However, it is better not to use coniferous species. The reason for this is the release of resin.
- Calculation of materials. Produced on the basis of a previously completed drawing.
Before starting work, it is recommended to treat the wood. This will protect it from the negative effects of the environment, insects and fungi.
Location
The first problem that needs to be solved is choosing a location for the bench. It affects the material of the structure. For example, for an old garden with large branchy trees, wood products are suitable; for a small area not heavily planted with trees and shrubs, small openwork structures are recommended.
If you look online for examples of photos of benches in the country, you will see that they are often an integral part of gazebos, verandas and summer areas. If you are planning to do something similar, then make sure that all the details are made in the general style.
Choose a place for the bench so that it offers a pleasant view. It’s unlikely that you’ll want to admire your neighbors’ fence or the walls of your barn.
It is advisable that the bench be located in the shade. It is placed under the crowns of large trees or under canopies. Remember that it acts as a place for rest and relaxation.
You can put benches next to the beds. There are several advantages here. Firstly, the owners of the site will be able to monitor the growth of the crop. Secondly, the bench is suitable for taking a few minutes’ rest from physical labor (digging, watering, harvesting).
Don't forget about decorative decorations. Have you made a simple bench with your own hands? Place flowering shrubs around it. Flower beds are also suitable for decoration. They are placed on a raised platform or a special platform is created from bricks, tiles or logs.
Wall panels
Eco-decor can be taken as the basis for a design project; it will look great. Let us note that the level of stylistic design depends only on talent, imagination and perseverance, since any products made from dry branches require careful implementation. Almost anything can be made from driftwood, scraps of wood, various large dry branches, thin tree trunks - furniture, lamps, decor and, of course, wall panels.
Branches in a picture frame
The theme of the autumn forest was repeatedly revealed by many artists, for example, Klimt. Trees with fallen leaves create a calming atmosphere that promotes relaxation. Meanwhile, such decor for a hallway, living room or bedroom made of dry branches reminiscent of a forest can be decorated with bright elements at any convenient moment; they will thematically enliven the interior and bring natural beauty into it.
Panel of twigs on a wooden base
To make panels from branches for your home, you will need flexible specimens that can be given any shape, and can also be easily placed along the wall. Fastening dry branches to the wall is ensured with the help of staples, self-tapping screws, followed by grouting the cap, and “liquid glass” glue.
Wall decor with tree branches and cuts
For small dry branches use a glue gun. This method will be invisible and look organic from the outside. Branches for decoration go well with modern furniture, complement the Provence style, shabby chic - they will always look good.
How to make a square bench?
To make a square circular bench you need to prepare 12 bars for the base.
- 4 of them should be small in size - tree diameter + 20-40 cm. They will become the base of the inner square, which will be adjacent to the trunk.
- Another 4 are also the same size, but much larger - diameter + 60-90 cm. This is the outer square.
- 4 bars that will connect the inner and outer squares. To calculate their size, it is necessary to subtract the length of the small one from the length of the largest bar (which is calculated above) and divide by 2 - the resulting number will be called A. Number B is the width of the seat, equal to 40-60 cm. Substitute it into the formula C equals the root of A squared + B squared.
After this, we assemble the inner and outer squares using corners and screws, and then connect them with small bars.
The next step in the step-by-step instructions is to cut the boards for the seat. The width of the board can vary from 20 to 30 cm, so their number may vary. You will need 6-8 boards, the length of which is 5-7 cm longer than the side of the outer square, and another 6 that correspond to the side of the inner square. All of them must be processed.
The boards are laid on the base, the distance between them is no more than 1 cm, starting from one side. The first 3-4 boards completely cover one side, then there are small ones and then large ones again. They are screwed on with self-tapping screws. All that remains is to make the legs and back - and the square bench is ready.
Features of surface cleaning from resin
When using softwood, proper surface cleaning of resin is extremely important. This can be done in various ways:
- Solvent. Resin removal can be done using acetone, alcohol or turpentine. The advantage of these substances is the rapid removal of resin and preservation of the wood structure. It must be mixed with water, applied to the wood with a soft brush and dried. All that remains is to rinse with warm water.
- Alkali. These include caustic soda, which is recommended to be mixed with acetone and water. This solution perfectly removes resin and resin. But to prevent alkali residues from destroying the wood, after treatment they should be thoroughly washed off and a paint coating applied.
- Ammonia. Effectively used to remove large resin drips. Ammonia should be mixed with acetone and then applied to the wood. Wash off after 20 minutes.
When processing wood, personal protective equipment must be used to prevent damage to the skin and eyes.
Driftwood and branches in the garden
Any wood is a material for creativity. A board with a greeting is laid out from thin branches.
The decor on the welcome board is attached with glue
Thick ones are used to make unique garden furniture.
A stylish chair will last longer if you remove the bark from the branches
Interestingly shaped driftwood will give your garden a picturesque look if you simply place it among the plants.
Don't pass by beautiful driftwood - it's very rare
And with the help of glue and screws, various animal figures are made from pieces of wood. But first, the bark is removed from the branches and they are lightened.
Step-by-step instruction:
- Soak the material in a solution of soda ash: 2 cups per 7 liters of hot water. Place a weight on top.
- After 3 days, remove the bark using a wire brush.
- Then immerse the branches in a bleach solution for 2 days: 1 glass per 7 liters of water.
- Dry in the sun for 3 days.
- Sand with fine-grit sandpaper.
Selecting material for drawing up figures is a long but exciting task.
Assembling a wooden bench
When designing a bench, it is necessary to take into account the main requirements:
Safety. The design must be reliable, so the material for it must be chosen of good quality. The fasteners must meet the fastening requirements and also be reliable.
- Convenience. Nothing should interfere with normal rest. It is convenient and comfortable to sit on.
- Appearance. She should always look great. At the assembly stage, you need to select not pieces, but whole material. Treat the wood with protective agents against external influences. The wood must be sanded, painted, that is, given a beautiful appearance.
