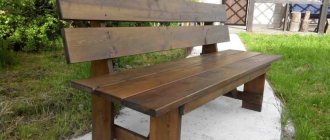
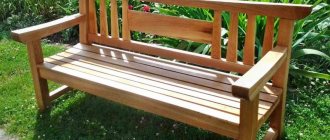
A garden bench is not just ordinary furniture designed for relaxation. With the help of this furniture you can decorate your garden plot, create entire compositions that will fit perfectly into the surrounding space of your garden or yard. It’s not difficult to make a garden bench with your own hands; the main thing is to choose the design of the furniture, its location and the material from which it will be made.
DIY garden bench
Why is wood preferred?
Given the variety of materials used to make garden furniture, the best option is wood. It is preferred for its ease of processing and affordability.
- In addition, the wooden bench is not heavy, so it can be easily moved around the site.
- Sitting on a wooden bench while drinking tea is much more comfortable than sitting on a metal or plastic surface.
- Due to its low thermal conductivity, wood does not heat up or cool down quickly. Even in hot weather, its temperature remains average.
If the technology for assembling wooden parts is correctly followed, the result will be a voluminous, strong and durable structure. All its elements can be easily mechanically affected. Even if you have no experience in making a bench, giving it the desired shape will not be difficult.
Under the influence of precipitation, as well as as a result of damage by various insects and bacteria, the bench can become unusable and rot. Therefore, it is very important to take proper care of it.
Assembling a garden bench from a pipe
A garden bench made of a profile pipe is considered more difficult to manufacture than, for example, a bench made of wood. But thanks to its practicality and durability, it still remains popular and one of the favorites among consumers.
To assemble it you will need:
Note!
DIY country washbasin - review of simple and complex designs (97 photos of the best ideas)
How to make a garden (construction) wheelbarrow with your own hands: detailed instructions with description + 85 photos of fresh ideas
How to make a hot smoked smokehouse with your own hands: drawings, dimensions, choice of material, photos of finished options
- rectangular pipe measuring 2.5x5.5 cm and 5 m long;
- soft metal sheet measuring 2.5x20.0 cm;
- soft metal sheet measuring 10x30 cm;
- flat head screws (26 pieces);
- screws 3 cm (4 pieces).
All elements are connected using a welding machine. If it is not there, then parts for the bench will have to be ordered from special workshops.
In addition to the metal frame, this bench also uses wooden slats. You can paint it either with paint or varnish. This will give the bench a more aesthetic and attractive appearance.
Requirements for a future shop
The constructed bench model should have the following properties:
- Comfort. To make the bench comfortable, it is better to make it with a back or armrests on which you can lean.
- Reliability. The bench must be safe when exposed to heavy loads. Therefore, it is necessary to use high-quality wood and fastenings.
- Moisture resistance and resistance to temperature changes. The bench is usually installed in an open space, so it will have to withstand all seasons of weather. Therefore, it must be free of defects and damage.
To ensure that the product meets all the required characteristics, only high-quality, well-dried material is used in its manufacture. Damp wood is unsuitable.
Requirements for creating a bench
In order to make a correct, strong, durable bench, it is necessary to take into account the following features of this work and follow certain principles:
- each bench should have comfort and convenience;
- its design should be so thoughtful and logical that it does not require unnecessary materials and tools for work;
- the size of the bench must fully satisfy those resting on it;
- to create a bench, you need to use materials available for work that can be easily found and brought;
- the selected material for a new bench must be of high quality, moisture resistant, and have high protection against temperature changes;
- Before making a bench, you should first familiarize yourself in detail with the information useful for this, and, if necessary, study the detailed drawings of the bench.
Materials for building a bench
- Boards;
- Supports;
- Beam for reinforcement;
- Marker, level, tape measure;
- Self-tapping screws;
- Nails;
- Wooden pins;
- Wood glue;
- Fine-grained abrasive;
- Priming;
- Brush;
- Varnish or oil paint;
Progress
- Preparing for work
- Creating the Front
- Double support front and rear
- Installing the lower support
- Attaching plywood on both sides
- Attaching the Bench Top
- Connecting pipes as armrests
Design ideas
To create a beautiful natural corner of nature on your site, when making a bench with your own hands, various styles are used:
- Original design. Homemade benches look wonderful with wicker fences. You can make the back in the form of a dense weave of branches.
- Moroccan style The product will be colorful if the details are decorated with carvings;
- Chinese style. The design is complemented with bamboo.
- British style. Involves making a bench from solid wood species such as oak and ash. They decorate it with intricate patterns.
Any wooden bench can be transformed with textiles. For example, pillows and bedspreads. It will feel like home.
Photos of original benches (ideas for cottages and gardens)
Everyone knows what ordinary benches look like—they’ve seen them more than once. But I don’t want the usual one - the simplest one. Especially if you have already started the process of decorating the site or are just planning it. Why not start from the bench? And then other decorations will follow. You just have to start.
In the garden or near the house I want to have more greenery: beautiful and different flowers. Flowerbeds and flower beds are good, but why not combine them with a bench.
Two flowerbeds of boards and a bench between them
What could be simpler? Two wooden boxes in which flowers are planted and between them a couple of planed and sanded boards. This bench can be placed near the wall, and a couple of long boards can be placed on the wall to create a backrest.
Not everyone likes flower beds made of wood: wood requires maintenance, and without it it quickly loses its appearance. It is especially difficult to care for a tree that is in contact with the soil. Instead of wooden boxes there may be, for example, stone or concrete cabinets.
Garden bench-flower bed
It’s very easy to make such a bench at the dacha with your own hands. You can find ready-made concrete flower beds or do something similar. You can buy a processed board, or you can do it yourself. Instead of a board, there can be half a log - depending on the style of the site. It is easier to secure the seat using a metal corner. It is attached to concrete using dowels, to wood - with self-tapping screws from below or through bolts.
If someone has large plants in durable flowerpots, you can implement the following idea. In this option, the bench covers the plants. To avoid surprises, flowerpots must be very durable...
Flowerpots as legs
There is a similar option for a bench made of boards and without plants: maybe you need to put it on the veranda or in the gazebo. The supports are made of boards of the same size, and the seat is made of timber.
Bench made of boards - a non-standard option
And more variations on the same theme: hollow building blocks are used as support. Treated bars are inserted into the holes. This is the seat of the bench. Just round the edges of the beam, or it will be uncomfortable to sit.
Bench made of hollow blocks and timber
For this garden bench, it is advisable to find large blocks with thick walls. If not, you need to securely fasten the blocks to one another. The whole task is to first secure the blocks (for example, with pins), and then attach the bars to them (with bolts or dowels).
Log benches
If your site is decorated in a rustic or ethno style, the standard approach will not suit you. It is best to use logs in this case - with or without bark - it’s your choice.
The seat for the bench is made of logs - a trunk of large or medium diameter sawn lengthwise. The back is either a smaller diameter trunk, or simply a cut closer to the edge. The legs can also be made from narrow pieces of logs (look at the photo below).
Log bench - quick and easy
The legs and seats are connected to each other with metal pins: a hole of slightly smaller diameter is drilled under the pin in both parts. The pin is driven into one of them, the second part is pushed in and is also driven in, but this time they hit the wood rather than the pin. To avoid leaving traces, lay a piece of unnecessary board and hit it with a hammer (or sledgehammer). Such a connection should be quite reliable, but to be sure, you can install two or three pins, or you can cut a little log, making a flat area of the same size on both parts being connected. By increasing the support area, you will increase the reliability of the seat fastening: after all, the log weighs a lot.
Bench option without backrest
Another interesting option in the “ethno” style is presented in the photo above. It is made in stone, but this bench can also be made from logs. The seat is a very thick board, the legs are a large part of a large diameter deck. A groove is cut in the deck for laying the seat. If you have a tool (you can make a cut with an axe, grinder or chainsaw), it’s easy to do.
Often in the countryside a work desk is needed. From a log you can make not only a bench, but also a table. A version of such an ensemble is shown in the photo. Only the tabletop is made of boards, all other parts are logs of different diameters or from halves.
Table with log benches
A greater degree of processing is inherent in the next bench in the same style. The back, legs, and armrests are made of thick and not very thick branches, the seat is made of sanded and treated (barked and sanded) unedged boards.
Option for a wooden bench for the garden or dacha
The other bench was made almost the same way. Only the boards and branches are located in a different direction and the result is a different look. A DIY bench of this type does not require much skill. In this case, the more careless the work, the more decorative the result.
Wicker back - not often seen
You can make a rest area and a bench around the tree. The designs are simple, making the flooring is generally easy.
Relaxation area under a tree
You can supplement the recreation group with a swing and a gazebo. And above the bench you can put a pergola - this is the “ancestor” of an ordinary arch - one of the types of light gazebo. And for complete relaxation, you can make a pond, fountain or waterfall.
Made of metal and wood
Few people will install completely metal benches in their dacha. They, of course, can be very beautiful, but in the summer they heat up to incredible temperatures, and when it gets a little colder, you can’t sit on them because they are too cold. Benches made of metal and wood do not have these disadvantages. The legs and supporting structure are made of metal, and the seat and back (if any) are made of wood. Moreover, there are also interesting shops in modern design.
Bench made of profile pipe
Rectangles are welded from the profile, jumpers are welded to the side walls, on which the seat boards rest. Simple, stylish, reliable, functional.
In a more advanced form - with armrests, a backrest, soft cushions on the seat, such a design may look like in the photo. The wide seat turns the bench into a sofa, and cushions - fabric-covered furniture foam - add comfort. The tables are made in the same style - a frame made of corrugated pipe and a tabletop made of boards.
One important point: if you make a seat or tabletop from several adjacent elements, they do not need to be butted end to end. There should be a gap of 3-4 mm between adjacent boards/bars. The wood swells and shrinks. In order for the surface to remain relatively flat during these processes, a gap is necessary.
Stylish benches made of metal and wood
If smoother lines are needed - for families with children - you can bend the pipes and make garden benches and a table with rounded edges. This garden furniture is completely safe. An ordinary round or corrugated pipe is bent, leaving the sides in the shape of the letter “P” with a wide back. The length of this backrest is the length of the bench. For the table, the dimensions are made a little larger: the legs and back are longer.
Table and bench made of pipes and boards
Make two identical blanks for the table and bench. Next, cut the boards to equal lengths. For the seat, about 40 cm, for the tabletop, at least 55 cm. They are fastened to the pipes with furniture bolts with a flat head. To prevent the caps from sticking out, drill a hole of a slightly larger diameter under them.
Read about the basics of planning a site here, and how you can decorate it - in this article.
Benches made of boards
The largest group is benches and benches made of boards. There are designs that are more reminiscent of sofas, especially if you put soft pillows on them - and you can lie down.
This garden bench is more like a sofa: if it is of sufficient size, you can lie down
Garden furniture in a modern style is easy to assemble: rectangles with partitions made of thinner boards, connected to each other.
Even the usual design of a country bench can become exclusive if you approach it with imagination: instead of legs and armrests, wooden wheels are used. The result is a designer item.
A bench made of boards with a back and wheels instead of sides - looks interesting
And the simplest possible is a board with legs in the shape of the letter “X”. Such shops were built centuries ago, and you can still see them today.
Traditional bench design
From the boards you can make a bench in a modern style: in the shape of the letter “P”. With this design, the main task is to ensure rigid fixation of the legs and seat: the pushing forces are not compensated for in any way. In this case, it is important to take a thick board or timber so that it does not sag. You can place the board “on edge”: this way the rigidity will be greater. To increase reliability, you can install corners from below.
Simple design, but looks modern
The photo shows an option with a 45° cut. Having a miter box or a circular saw makes it easy to achieve an accurate cut. By accurately joining the workpieces and fastening them, we obtain an angle of 90°. If the seat does not sag, it will last a long time...
An interesting and reliable version of the bench is shown in the photo below. The legs are assembled from boards of different lengths: each second is shorter by the width of the board for the seat. Interesting idea. It is easy to make such a bench: it is important to maintain the dimensions, and everything is connected very simply: with nails into the face of the seat.
Modern style bench
You might be interested in reading how to design and make garden paths.
Original benches
It seems like there’s more that can be thought of... but it turns out there’s a lot. For example, attach the seat to a large stone.
Bench made of stone and boards
Make a structure from bamboo trunks.
Made from bamboo, and whole
Or a stone.
Sitting in winter will be unpleasant, but beautiful...
Read about what kinds of swings there are (for adults and children) and how to build them here. And in this article you can read about the construction of a children's playground; sandboxes are written separately - here.
Bench options
No backrest. This is a simple shop. The manufacturing assembly process includes the following steps:
- Legs. Cut 4 pieces from the board. Saw off the internal corners to stabilize the bench. Using two bars, the legs are sequentially secured with wood screws.
- Supports. The legs are connected using a beam made of timber.
- Seats. Boards are placed on the supports, leaving a gap of one centimeter. Screw them to the ends of the legs. The edges of the seat should protrude by 10 cm.
- Strengthening. For stability, side strips of arbitrary length are screwed to the bench. To do this, use a marker to mark the points and grooves for the slats. Insert the planks and secure them with nails.
With log legs
Collection is carried out in the following sequence:
- Boards for sitting are cut to the same length. You can round the edges. Place the boards at equal distances. Make marks at the places where the legs are attached. Do not drill holes through the marks.
- The logs for the legs are made equal in length. Measure the distance between the holes in the boards for the seat. Measurements are taken on the first row of logs, and non-through holes are made. In all other rows, holes are drilled in a checkerboard pattern, with a mirror image. The logs are connected to each other using wooden pins treated with wood glue. The seat is attached to the legs.
Corner shop
Ideal option for a small area. The bench takes up little space. Made from two separate benches.
The assembly method is as follows:
- First step. Preparing parts from boards.
- Second step. Two separate benches are assembled from the parts. The legs are screwed on both sides of the support. The seat is nailed to the frame so that it protrudes about five centimeters from the edge.
- Third step. The benches are connected in the form of the English letter “L” using steel brackets.
Wooden pallet bench
Such a bench is assembled from pallets as follows:
- To make the back and seat, the pallet is cut into two parts. A little more for the seat, a little less for the back. They are fastened with self-tapping screws.
- To increase strength and stability, struts are attached to the resulting structure on both sides.
- Legs are made from the remaining boards and attached to the base.
How to make a bench with your own hands from wood
The design of this bench is quite simple, so even an inexperienced craftsman, for whom this will be the first time, can make it. Below is a step-by-step description of how to make a wooden bench:
- First of all, you need to draw a diagram of the bench. This will help make the manufacturing process easier and faster, without unnecessary deviations and corrections;
- The side parts of the wooden bench are assembled. To do this, first drill the necessary holes in which all fasteners and additional elements will be connected;
- The sidewalls are secured with nuts and bolts. A sealed washer is placed under the nut, which should not be tightened too tightly right away. After all, during the work you will need to adjust its density;
- connecting the side parts of the future bench. They must be fixed and connected with large-diameter self-tapping screws. Also for this purpose, fasteners that have a turnkey head are used;
- fixing all details. To connect the sides and back of the bench, you should not attach the parts closely. There should be a hole of about 5 mm between them. Next, all elements are tightened and fastened;
- leveling the joints of self-tapping screws in wood using putty. At this stage, sandpaper is also used to clean out all the flaws and irregularities of the structure being created. Then this tree should be impregnated with an antiseptic and covered with paint;
After complete drying, the wooden bench is ready for use.
Wooden bench made from old chairs
Sometimes there are chairs left on the farm that are useful for making a rather comfortable bench. If you have two identical chairs, you can safely assemble it.
The assembly process is divided into:
- Disassembling chairs. Only the parts with the back and legs are left.
- The backs are connected using a box of bars of the required section.
- They make a frame that will provide the bench with reliability. Install it at a distance of 20 cm from the floor.
- Cut out the seat.
- Install the seat on the frame.
You can add interesting ideas to any of the manufacturing methods based on your experience working with wood.
In the end, all that remains is to saturate your creation with special preparations for protection, and then coat it in 2 layers with waterproof wood varnish or oil paint for external work.
How to make a bench with a back
To create a bench with a backrest with your own hands, the craftsman will need the following tools:
- mitral and circular saw;
- pencil;
- tape measure;
- drill with an optimal set of drills.
The following is a list of necessary materials for the future bench (all boards should be 2.5 m long):
- boards measuring 2x3 (7 pieces);
- 2x4 boards (1 piece);
- boards measuring 2x6 (1 piece);
- bars measuring 2x2 (2 pieces);
- glue for woodworking;
- sanding material;
- a set of screws of 5 cm and 8 cm.
To begin assembling a bench with a backrest, start from the back legs. But first you need to make sure that all the necessary boards are labeled and numbered. This will prevent confusion and corrections during assembly. Next, the front legs are added to the rear legs along with a seat, support for the armrests with lower stretchers. All fastening elements must be level and fix each other.
Before starting assembly, it is advisable to lay out all the boards in the desired order and shape to make sure that everything matches and fits. Only then are the fasteners connected to the structural elements.
One of the last stages of creating a bench with a back will be fixing the lower slats to the base of the frame. The seat and the backrest are attached to them from above. To hide the fastening materials (screws), they are drilled from the bottom and back of the planks.
Photo of a homemade bench
How to build the front side
The front of a garden bench can be made by nailing to the base to form the front and sides. Combine this with the marks made earlier. Attach the L-shaped frame to the back and side walls with screws.
Both ends of the L-frame must be in contact with the corresponding walls. You need to make sure it is level with the back. Attach the ends of L to the back and sides with screws. Repeat for the bottom of the front section, but use a hammer drill to secure the bottom section to the floor (for concrete floors, concrete screws are recommended).
Measure and cut pieces of wood to fit between the top and bottom L on the front panel. Position the vertical pieces between the top and bottom plates of this front section and directly opposite the vertical pieces on the rear side. Hammer them into place and secure with screws.
Simpler, but more convenient
Before we say goodbye to wooden benches for the time being, let’s try to make a bench without a back more comfortable. The easiest way to do this is to make the seat concave. But then the “spreading” loads on the legs intensify, and the seat loses strength - bent beams hold the load many times worse than straight ones.
The simplest solution to the problem is a box-shaped power circuit. Its excessive overall rigidity in this case will allow you to save on material by using thin narrow boards for drawers (furniture ties, spacers and load-bearing beams), and on labor intensity by using overlay joints on steel fasteners. The rigidity of the seat is ensured by installing intermediate cross beams, see drawings in the figure:
Drawings of a simple comfortable bench without a back
Note: for another version of a universal bench without a back (home, utility, garden), see next. plot:
Video: homemade bench without back
Additional materials for the bench
If we talk about the full production of a bench, then you won’t be limited to just metal and wood. There is also a small list of materials and consumables that will be needed. They are listed in the following table.
| Materials, photos: | Description: |
| Primer paint for metal | The final coating of the metal may vary. Primer enamels are often used, which do not require surface preparation, apart from cleaning it. This paint is applied in several layers. You can even cover rusty areas with it, but we do not recommend doing this, since the service life of the protective layer will be reduced. |
| Grinder circle for cutting metal | For frame structures, the metal always has to be cut to the design dimensions. For cutting, abrasive wheels are used, mounted on a grinder or similar tools. Wheels made of the same material are used for grinding metal and processing welds. |
| Wire brush | Before painting, the metal must be cleaned. The task is to remove all the rust and expose its shiny surface. On this basis, even primer paint will adhere much better. |
Degreaser | Before painting, the metal is degreased. This will seriously increase the adhesion of the material and promote even application of paint layers. As a degreaser, you can use universal compounds, which are ordinary kerosene, or its light varieties, for example, white spirit. |
| Electrodes for welding | Electrodes are also consumables. Without them, the benches definitely cannot be assembled. |
| Set of metal drills | You will need to drill a little, but you should always have several drills of the required diameter in stock. Holes are made for bolted and screw connections. The wooden part of the bench is fastened in this manner. |
| Bolts and screws | Again, necessary to secure the wooden parts of the frame. Sometimes they are used to connect metal parts, although welding is the preferred method. |
Wood processing materials | We have combined them into one line because different options may apply. Let us note antiseptic impregnations, which significantly increase the service life of wood in the open air, impregnations for changing the color of boards (this includes oils, stains, glazes, waxes, etc.), protective compounds and paintwork materials that create a waterproof film on the surface. These properties may be combined in some materials. For example, oil from water qualitatively protects and transforms the color of wood, making it more saturated. |
Sandpaper for random orbital sander | The surface of the wood must be carefully treated to make it smooth, safe and pleasant to the touch. To do this, it is polished with abrasives of different fractions. |
This variety is accompanied by the following set of tools:
- Bulgarian.
- Carpenter's square.
- Electric drill.
- Sander.
- A hammer for knocking down scale after welding, and indeed this tool is always required.
- Clamps for preliminary fixation of parts.
- Brushes or a small roller for a more even application of paint.
- Welding machine.
- Tape measure, pencil, marker.
- To create curved parts, a pipe bending machine is required
Pipe bending machine Other
small things can also come in handy, which you will find out for yourself when you start assembling your bench.
Fastening plywood sides
Trim and attach the plywood to the outside of the frame.
You need to keep the edge of the plywood in line with the top of the frame. Trim and attach the bottom of the plywood to the interior frame. For the top side, it is best to cut a piece of plywood 20mm longer and wider than the plywood-covered frame.
Then you need to draw a line along the length of the top of the bench at a distance of 70 mm from the edge. Using a circular saw, cut this line to separate the top.
The next step is to attach the top side of the 70mm plywood to the top of the 600mm x 1200mm double back support using a regular hammer. This is the top of the bench that the pipes will be attached to.
Power circuits
The basis of any supporting structure is its power circuit. It's a kind of skeleton made of lines; perhaps imaginary or computer simulated. A fundamentally new power circuit event in technology; The basis for design is usually taken as a well-known standard, which seems most suitable for the given case. This “seems” is where all the developer’s experience is concentrated: if the initial power circuit is chosen correctly, the product will be reliable and durable even if it is made carelessly and with errors. And if not, then no matter how you “lick” the design and fine-tune it, the most cutting-edge materials with ultra-high technologies will not allow you to get a high-quality product.
Operational loads are applied to the initial power circuit (still in the mind, on paper or on a computer), and the places of their concentration are determined - focal points. Then the scheme is finalized, strengthened and, possibly, modified so that the loads from the foci spread over the “bones of the skeleton” as evenly as possible. Here, the designer’s experience is no less important than when choosing the initial design: the more uniformly the entire structure is loaded, the more reliable and durable it will be. Why, for example, are the DC-3, B-52, TU-96 aircraft and the R-7 rocket still flying with no end in sight? That is why. Finally, based on the calculated loads, the cross-sections of the parts are determined based on the given material, and their configuration for the purposes of design or, say, aerodynamics, is maintained so that the desired cross-section is no less than the calculated one, with a margin for the properties and quality of the material.
But let's get back to the topic. Such a simple and “oak” product in its very essence, like a bench or a bench, taking into account the strict requirements for its cheapness, manufacturability at home, simplicity of design and ease of use, it is better to make a bench in one of the following ways. power circuits (see figure and list):
Examples of power circuits for benches and benches
- Cantilever (item 1) - a series of beams form a seating floor that essentially just rests on supports. The fasteners “work” only to prevent the bench from spreading without putting load on the parts; Under the weight of those sitting, the fasteners are overloaded.
- Volume-beam (position 2) - in order to counteract the tendency of the supports to move apart under the weight of those sitting, they are fastened with a tie at the bottom. The fastening of the flooring to the side supports is already power-based and therefore necessary.
- Box-shaped (item 3) – 4 support-beam schemes combined into one: 2 longitudinal and 2 transverse.
- Support-beam (position 4) – the screed is raised up and simultaneously serves as a support for the seat.
- Truss (positions 5 and 6) - the jibs help the stresses spread, forming triangles of rigidity with the original elements of the circuit.
The cantilever scheme is the least material- and labor-intensive and the most convenient: an average amateur craftsman can make such a bench in 10-15 minutes, and dangle your legs under it as you wish. However, the flooring tends to sag and the “legs” of the bench move apart. There are ways to avoid this without wasting a lot of unnecessary material and labor, see below; However, this requires metal and welding. The possibilities for design delights are quite limited, but they also exist, also see below. After the support-beam bench, the cantilever bench is second in convenience: it is up to 2 m long and can be carried from place to place by one person. The backrest adjusts without serious difficulties.
A completely reliable three-dimensional beam bench can be made entirely of wood. In terms of strength, it is almost as good as the box type, but it requires less material and is more technologically advanced: in its manufacture, you can use metal fasteners without making carpentry joints. Design options are the same as before. case, but unlike it, it is difficult to attach the backrest: the load on it forces the screed to bend in the horizontal plane, which disrupts the distribution of loads throughout the entire structure. Quite comfortable: although you can’t swing your legs to the fullest, you can tuck them in.
The box bench is mechanically ideal: in its power circuit, both constant and variable loads of any direction are most evenly distributed; It’s not for nothing that the biplane box has survived in aviation to this day. In terms of the ratio of load-bearing capacity to the mass and volume of material used, the box bench is far ahead of the rest. The back is attached as desired, following the rules, which are discussed below. Complete destruction of any of the connections forming the box does not deprive such a bench of its suitability for use, so there is no need to rush into repairs if necessary. Convenience is the same as before. (volume-beam). The design possibilities are virtually unlimited. Disadvantages - bulkiness, increased material consumption and design complexity.
Note: a bench made of boards on logs or scraps of timber dug into the ground is also mechanically box-shaped, only in a visually subtle way.
A bench with a support-beam design requires minimal consumption of material and is the lightest: one up to 2 in length can be carried outside and brought back into the house by a woman. It can be made without metal fasteners using simple carpentry joints and glue that can be done by an inexperienced amateur. Disadvantages - you can’t attach a backrest, the bench leads from the first person to sit on it; You won’t really be able to tighten your legs if the support beam is designed correctly. Design possibilities are limited to wood carving, decorative metal plates and shaped cutting of legs. But the durability, if made without metal, is extraordinary: in museums of wooden antiquities there are benches that literally for centuries were dragged from the hut outside in the summer, and back in the winter.
Drawings of a support-beam bench of a traditional design are given in Fig.:
Drawings of a wooden bench with support-beam power circuit
The material of the sidewalls and support beam is a solid board or solid wood (a maple board with dowels or lamellas). If the thickness of the boards is 40 mm, then the length of the bench can be increased to 2 m; if instead of boards you use blocks from 50 mm, then the width of the seat can be increased to 45 cm. But in both cases, the legs and beam must be made of a solid board or block.
Truss power circuits are obtained from the initial ones by adding oblique connections. This makes it possible to achieve a more even distribution of loads and save material by increasing the amount of labor required and making it more complex. Here you need to remember: there are no trusses with the number of longitudinal connections less than 2. For example, a bench in the insert in pos. 5 in Fig. not truss at all. In it, the struts only help the legs move apart under load. Such a bench with a length of more than 50 cm, a width of less than 20 and more than 30 cm will not last long. How to make a garden bench with a truss power circuit, see for example. video clip:
Video: homemade wooden garden bench
Note: in volumetric structures, longitudinal connections that provide truss rigidity may also be implicit, i.e. not directly associated with the jibs. For example, in a shop at pos. 6 overall rigidity is provided by the backrest.
Sidewalls
If the bench has a back, the design of its side supports also takes on special significance. The load-bearing supports of the back, combined with the legs, can either strengthen the structure or weaken it. You can avoid thinking about this by making the bench box-shaped or close to it in terms of the design properties, see below, but you need to think carefully about the sidewalls for economical cantilever, volume-beam and truss benches.
