Finishing is the final stage of construction. It is incorrect to include insulation work in it. When it comes to tiling floors, walls, ceilings, installing doors and windows, painting surfaces, this can be called finishing. We need to somehow define the terms if we want mutual understanding. This article will focus mainly on the finishing inside the steam room, but the finishing of the washing room will also be partially touched upon. If the site contains thematic articles that cover a particular issue on the subject, read it, you will probably find useful information there, and for your convenience we have provided links.
Features of finishing the bath
A real bathhouse is a complex complex that includes:
- Steam room;
- Washing;
- Locker room.
If there is a lack of space, the first two rooms are combined in a single space, but if there are no problems with the dimensions of the building, a separate recreation room, a swimming pool and even a terrace are equipped.
But at the same time, the finishing of the bathhouse inside must comply with several requirements:
- A steam room requires resistance to hot steam and heat retention for a long time;
- For the washing room you will have to provide non-slip ones, however, this requirement applies to all rooms;
- For all premises it is important to create a comfortable environment, including protecting visitors from burns.
The aesthetic properties of finishing materials will also play an important role, as well as:
- Easy to clean;
- Environmental friendliness;
- Durability.
Wood copes best with these tasks, although a rest room or locker room can be decorated with other materials, for example, tiles.
It is necessary to take into account that even a bathhouse made of a nice rounded log needs interior finishing, which allows you to increase the service life of the building.
Projects
If the building is built without an additional second floor or attic, then usually 4 or 5 m2 are allocated for the steam room, 2 m2 for the sink, and 2-3 m2 for the dressing room. With this approach, a rest room is made from the dressing room. All this, of course, is purely individual, but practice shows that this is the optimal distribution of area.
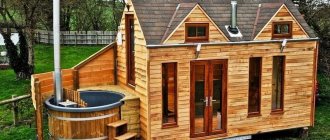
Mini-sauna structures take up little space, which is especially important for a summer residence. But they look homely, warm and cozy.
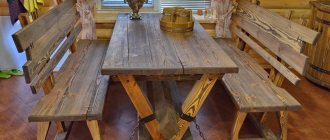
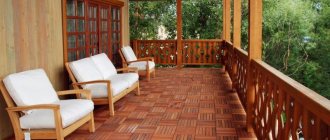
There is enough space in the dressing room for a table and a bench, and if you make a folding table, this will greatly facilitate cleaning and lighting the stove. The design with an attic allows you to create a relaxation room upstairs, but if the design plan includes a veranda, then this is a great place for drinking tea with the whole family.
The attic can be used as a utility room for storing prepared brooms, bath items, and tools.
- A structure that is planned to be used only in the spring and summer can be made frame, with one layer of insulation. A bathhouse that will be used all year round should be warm, made of timber or logs. The square shape is convenient because it can be attached to the house or it can be advantageously played up by its location on the site, for example, by planting it with fruit trees.
- Many people associate a bathhouse not only with a place for washing, but also with a pleasant conversation after the procedures. In this case, the size of the dressing room can be increased by combining the steam room with a washing room, then there will be only two rooms in the bathhouse. This is directly a steam room-washing room and a dressing room, combined with a boiler room where the furnace firebox will be located.
- So that users do not have to sit next to the stove, it is best to place the firebox near the door. The entrance door should not be in a corner, but in the center of the building or at the end of the first third of the length. In this case, the firebox will be located near the doorway, and the entire dressing room will be free.
- If the steam room combined with a sink occupies 4 m2, then the dressing room will also get 4 square meters, and this already significantly increases the space. This is quite enough for a pleasant and comfortable pastime. In this case, you can even put a sofa. As a rule, 3 by 3 meter bath designs do not include windows: for such a small room they are not necessary, but sometimes small windows are inserted. In summer, you can greatly increase the area for relaxation by using a veranda or terrace.
- It is very important to consider the ventilation system; it requires no less attention than a sauna stove. Properly arranged ventilation will ensure the distribution of thermal conditions and help timely drying of the premises, which is important. In a bathhouse without ventilation or with poor air circulation, mold and mildew may soon appear.
- The entire load falls on the stove-heater, through which air is taken in. Discharge occurs through the chimney. The main condition for ventilation is equal inflow and outflow of air. When arranging it, you must remember that the air must flow from the rooms in which people are located to the utility rooms.
- The ventilation grille must be at a height of at least 200 cm from the ground surface. Bath experts advise using forced and natural ventilation in the dressing room, arguing that this dramatically increases the efficiency of the process.
- It is believed that the air exchange should be threefold. If the volume of the room is 4 m3, then 12 m3 of fresh air should be supplied in one hour.
Finishing a steam room in a bathhouse
The decoration of a steam room in a bathhouse has a number of features related to the functioning of the room. The specifics of the steam room include:
- Sudden temperature changes;
- High humidity;
- Abundance of hot steam supplied in the form of a concentrated stream.
For finishing, a cladding board with the following properties is best suited:
- Low heat capacity;
- The ability not to absorb moisture;
- Pleasant color and, preferably, aroma;
- Resistance to rot and mold.
In this case, the selected material is not varnished or painted, since when heated they release harmful substances. An exception may be special protective coatings.
Materials for finishing the steam room
Linden copes best with the tasks. This wood retains all its pleasant properties, despite the not entirely comfortable climate. An additional advantage of this option for arranging a steam room is the light aroma that appears when heated.
The disadvantage will be the fragility of the material: over time, insects appear in it, and it itself begins to rot.
- Aspen is becoming the second most popular siding material. It is durable and strong, easily tolerates high humidity and temperature, and has no cracks through which steam will leak. Disadvantages include knotty wood, streaks of resin that can cause burns, and susceptibility to rot.
- Larch retains heat perfectly, is not afraid of moisture, and only becomes stronger over time. But this strength also has a downside: the material is very difficult to process, so you will have to stock up on quality tools.
- Cedar is very similar to larch in its characteristics, plus it gives a pleasant aroma, but the price of such a design can hardly be called budget.
- Birch will not be a very suitable option for finishing a steam room. It dries strongly, absorbs moisture well and decomposes quickly.
- Pine is practically not used, with the exception of rest rooms or locker rooms. It does not like high temperatures, it warps and forms cracks. In addition, pine too actively produces resins that can harm humans in high concentrations.
Particular attention is paid to the finishing of surfaces around the stove. To prevent fire use:
- Regular stainless steel or profile sheets;
- Red brick;
- Specialized kaolin clay tiles;
- Special heat-resistant boards made of mineral components bonded with cement.
It is best to cover the entire wall from floor to ceiling with similar materials, but if there is a shortage of funds, you can protect vertical surfaces from the floor to the beginning of the pipe.
We build a Finnish sauna with our own hands
The photo shows the sauna as a separate building, but an option built into a residential building is also possible
Although it is necessary to make a clarification here.
Russian bath is:
- At least 2 rooms - a washing room and a steam room, but many projects necessarily include a dressing room;
- A powerful oven that provides not only a sufficient amount of wet steam, but also hot water;
- Hence, an area of at least 15 square meters (the most common minimum size is 3 by 5 meters; there are many smaller options, but there you have to obviously give up something);
- Hence the massiveness, which means increased requirements for the foundation;
- Well, and, of course, a separate structure that must meet the requirements of building codes and regulations in relation to other buildings on the site: At least 4 meters to the nearest buildings;
- At least 1 meter to the fence and nearby green spaces;
- At least 3 meters to the edge of the roadway behind the fence.
At the same time sauna:
- There is only one room, which means it can be larger and more comfortable than a washing Russian bath;
- The sauna uses a large amount of dry steam and this is the main purpose of the heater; you don’t need a lot of hot water, hence the simpler and cheaper design;
- A sauna area of 9 sq.m (3 by 3 m) is already a lot, so it can be integrated into the overall design of a residential building.
Perhaps you will be attracted to build a sauna with your own hands according to the Turkish model - it is not so hot here, but there is a lot of water
The principles of constructing a sauna are very similar to the principles of constructing a bathhouse - the same choice of materials, the same care for the foundation and drainage.
Materials
When talking about materials, the type of wood for the interior upholstery and its quality are selected. Among the species at your disposal are hardwood and coniferous lining. For use in saunas, only hardwood is recommended.
So:
- oak - it provides strength and resistance to fungi and mold, but may seem too expensive;
- linden is the most common species for saunas due to the healthy atmosphere that linden creates inside;
- aspen - it is rarely used in saunas, as it loses color very quickly; aspen is very resistant to constant exposure to water, but there is never too much water in a sauna;
- alder - along with linden, seems to be specially created for saunas; alder is durable, very resistant to mold, and has healing properties;
The lining already structurally has very convenient joints at the ends of the panels, which makes assembly extremely simple and fast
ash - it can easily compete with oak lining in terms of its strength, but it is much more convenient to process and has a softer and lighter color.
But coniferous species - cedar, larch, pine, spruce - despite a lot of very attractive features, are not recommended for use in saunas.
The fact is that even after processing they retain a significant amount of resins, which at elevated temperatures will come out, and this is:
- the danger of simply getting burned when touched, and
- The danger of slipping is unacceptable for saunas (and baths, by the way, too).
Quality
The quality of the lining is divided into 4 classes:
- “Extra” (also called “Premium” or “Zero”) - maximum quality, when you do not find a single knot on the board, its color is necessarily uniform, and there is no remaining core of the original material;
- “A” - this class allows only one knot per one and a half meters of board length, but the color is still uniform without any deviations;
- “B” - here the quality is noticeably worse - 4 knots per 1.5 meters, cracks, contrasting color stains and spots are acceptable;
- “C” is the lowest quality with chips and cracks; such lining is not for saunas.
Profile view
The profile of the lining is a very important characteristic of it. A smartly selected user-friendly profile can significantly reduce construction time.
The construction market mostly offers 5 types of profiles, which are considered the most successful and reliable:
- Euro (example “A”) - this is the European standard, it has a special groove for draining water and an increased depth of connections;
- Soft light (“B”);
- Calm (“C”);
Choosing a convenient lining profile is the most important condition for assembling a sauna interior
- Tenon - groove and chamfer along the entire length (“D”) – the chamfer is increased along the entire length of the connection, which significantly increases its strength;
- Tenon and groove along the length (“E”) – no chamfer.
Insulation and waterproofing of steam room
Finishing a bathhouse with your own hands involves insulating the room before finishing.
Most often used:
- Cheap mineral wool;
- More durable basalt wool;
- Expensive, but high-quality cork agglomerate. It does not rot, serves for a long time, repels insects and bacteria, and does not cause allergies.
Expanded clay or sand is used to insulate the floor.
To preserve the walls and floors of the room, waterproofing is used. It is laid on top of the insulation and is aluminum foil or its modern analogue: a vapor barrier film.
Washroom finishing
The washing room is a cross between a shower and a rest room. Here you can relax after the steam room, stand under cool streams of water, apply skincare products, dream and relax.
- Tile or wood are perfect for finishing this room.
- Moreover, preference is given to coniferous species, which fill the room with the fresh aroma of resins and protect the wood from rotting.
The floor is often covered with strong, beautiful and durable tiles, but this option will not be very pleasant for bare feet. Wooden logs, which will have to be dried after each wash, can correct the situation.
Pouring a concrete foundation
It is possible to build a foundation using concrete pillars, but this will take a lot of money and time. Strip foundations are also very popular.
Unfortunately, this option is not suitable for a bath, because the load should be distributed evenly on the kidney. Therefore, you need to pour a foundation in the form of a lattice, the progress of work will be as follows:
- The first step is to remove the soil in the form of a lattice; the depth should be 30 centimeters. Next, a sand cushion is poured in; it needs to be well leveled.
- Then a reinforcing structure is laid on the sand; the rods must be placed 20 centimeters on adjacent steel rods. This is done to ensure that the corners of the foundation are strong and rigid.
- Formwork is created and installed 10 cm above ground level to protect against floods and rain.
- Now the concrete solution is being poured, it is better to order a concrete truck, then it will be delivered to you quickly and in large volumes.
- It will take 24-48 hours to completely harden, at which time you can begin to prepare the timber.
Dressing room decoration
The vestibule or rest room is located quite far from the steam room (if such a possibility exists), but high temperature and humidity will reach this room.
So here the same wood is held in high esteem, which can be combined with:
- Natural stone;
- Ceramic tiles;
- Porcelain tiles;
- Plaster;
- Glass wallpaper.
But when using the first three options for finishing the floor, it is necessary to provide a fluffy rug that protects your feet from the cold of the coating. And it is better to use materials with anti-slip coating.
The interior decoration of the bath does not tolerate fuss, so it is better to calculate everything well in advance than to worry about the lack of comfort later.
Interior of the dressing room
The dressing room in front of the sauna is the same as the hallway in the house, so it must solve the corresponding problems. Make sure you have benches and poufs, hooks, shelves and other small items for storing things. A cabinet for towels and a couple of closed drawers for keys or small equipment wouldn’t hurt.
Don't forget about a large mirror and a rug in the wardrobe area. Take care of good lighting, because before leaving the bath you need to get yourself in order. A small dressing table for various cosmetic accessories will come in handy.
85 small living room design ideas (photos)
