It's hard to find a person who doesn't love a Russian bathhouse. A lot can be said about the benefits of bath procedures: they have a restorative, rejuvenating and healing effect on the human body, give strength and strengthen the immune system.
Recently, baths are used not only for taking water procedures, but also for joint family recreation and in the company of friends.
That is why, during the construction and arrangement of this room, you need to pay special attention to every little detail and choose the right pieces of furniture and accessories.
This will help create a special cozy atmosphere here.
Peculiarities
The main feature of bath furniture is moisture resistance. This is a mandatory condition, since interior items are used in rooms with high humidity. Only the presence of this property allows products to withstand constant exposure to liquids without changing characteristics or appearance.
Wood is most often used to make furniture. At the same time, glue, coloring compounds, and varnishes are not used for the production of products. This is also due to the characteristics of the room in which the products are used. The fact is that due to constant exposure to moisture, such coatings quickly swell and become unusable, which negatively affects the external attractiveness of the furniture. The exception is dressing room furniture. Such products are not constantly exposed to steam, so they have a paint coating.
Features of creating a terrace in a bathhouse
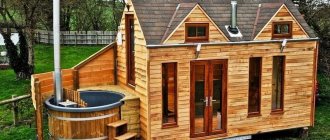
The veranda does not have to have a regular rectangular shape. The extension can be made in the form of an oval, semicircular or triangular structure. It will look beautiful and non-trivial. Such a building will become the highlight of the entire dacha. Conventionally, there are 2 types of bath terraces:
- open - a small building with a roof, used only in the warm season;
- closed - a full-fledged extension with windows, doors, thermal insulation, in which you can spend time even in winter.
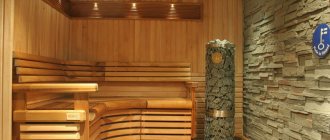
Interior of a steam room in a bathhouse
If you give preference to the second option, it is advisable to make an attic or loggia on top (i.e. on the second floor). This is permissible when the design features of the building allow it (solid foundation, sufficient area, etc.).
Bathhouse interior with shelves
It is not at all necessary to make the veranda from the same material as the bathhouse itself. The combination of brick and timber will look organic. Naturally, the best option is to build a terrace along with a bathhouse. However, if you think about building an additional building later, you will have to carry out the procedure of fastening the two foundations. Then the extension is made frame.
Interior of a bright dressing room with a samovar
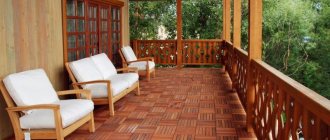
An example of an unusual design for a bath veranda. Making railings from bars is not only beautiful, but also cheap. They can be made from the remnants of lumber left over from the main construction.
As for the arrangement, you don’t need to place a lot of furniture on the veranda. It is enough to have a large table and benches (or chairs) on which guests can be seated
Pay attention to the insulation of the sockets: if the terrace is open, then when it rains, drops of water will get inside the room. To prevent them from causing a short circuit, you must purchase lockable sockets
Relaxation area on the second floor of the bathhouse
Primary requirements
Furniture for a bath must meet the following requirements:
- Moisture resistance. This is one of the main conditions for the use of interior items in the bathhouse.
- Resistance to aggressive biological environments. If this requirement is not met, mold and mildew will quickly appear on the surface.
- Environmental friendliness. Furniture should not contain harmful components and large amounts of resins. Only this guarantees the safety of its use.
- Low thermal conductivity. If the interior items do not meet this requirement, they will quickly heat up, which will make it impossible to use them in the bathhouse.
- Resistance to high temperatures and temperature changes. Since sauna rooms are constantly heated and cooled, the furniture must withstand such changes.
- Ease of processing. Products should be easy to sand, which guarantees their visual appeal without the use of paint and varnish coatings.
- Use only metal fasteners. The fact is that glue, liquid nails or other similar materials emit toxic fumes when heated. For this reason, it is not recommended to use interior items in the bathhouse, in the manufacture of which these compositions were used.
- Good ventilation. This guarantees a long service life of the products. If the furniture is poorly ventilated, rotting processes will soon begin inside the material and the products will become unusable.
It is best to make bath furniture to order from craftsmen who specialize in these interior items. Only in this case can you be sure of the quality of the products and their compliance with the specified requirements.
Bath set
Of course, a set of furniture for a bathhouse is selected depending on the preferences and financial capabilities of its owner. But the standard gentleman's set looks like this:
- Hanger. The shape and size can vary, but most often it is a wooden panel with several hooks. The calculation is as follows: per visitor 3 clothes hangers and a pair of hooks for bath accessories.
- Bench. This interior detail is intended not only for sitting, but also to provide a place where you can fold clothes. Often there is also a shelf under the seat. In some cases, chairs or armchairs are placed instead of benches.
- Closet. To be fair, it is worth noting that this element is not always present due to limited space. And yet, if the area allows, think about where you can install it. The closet can be used to store towels and cleaning supplies.
- Mirror. Ideally, the mirror should be full-length. But if this is not possible, then at least up to half.
What should be in the steam room? The entire “set” consists of a wooden shelf. Depending on the area of the bath and its shape, choose one of the following options:
If the bathhouse is small, then the seating shelf is 60 cm wide, and the length, as a rule, is either determined by the usual number of people present, or by the length of the wall. If the sauna is spacious, then a recumbent shelf is installed. Then its width will vary from 80 cm to 1 meter, and the length should be comfortable for all visitors. For maximum convenience, organize 2 or 3 tiers
It’s just important to remember that on the third tier the temperature will be much higher than on the first. More rational use of space - L-shaped or U-shaped shelves.
Shelves are the most important component of a bathhouse interior and making them yourself is absolutely simple and inexpensive.
If there is a need and space allows, then additional stairs are installed for convenience.
Varieties
There are several types of bath furniture, depending on the placement.
For the steam room
The main piece of furniture used in the steam room is shelves. It is a multi-tiered structure consisting of benches or shelves. You can sit or lie down on them to enjoy the treatments. The higher the tier is, the higher the temperature.
The steam room shelf must meet the following requirements:
- well-treated surface, which eliminates the risk of getting splinters when visiting the steam room;
- sustainability;
- ability to withstand increased loads;
- shelf width – from 50 cm, length – from 100 cm.
Only a shelf that meets these requirements guarantees the convenience and safety of its operation.
The following interior items are also used in the steam room:
Shelves for storing bath accessories
Essential oils, etc. are placed on them.
Headrests, footrests
These accessories provide comfort while in the steam room.
Stalls
They are used to place a basin, place a broom or place other equipment. You can also sit on the bench if all tiers of the main structure are occupied. When choosing benches, take into account that their legs should be located far from the seat, which reduces the risk of injury during these procedures.
For the waiting room
Dressing room - a room for changing clothes and storing clothes. The following interior items are used here:
Chairs, benches, etc.
They allow you to sit comfortably and change clothes properly.
Shelves for shoes
As a rule, the dressing room has small dimensions. For this reason, for this room it is best to use multi-tiered narrow shelves for shoes that do not take up much space.
Hangers
Such products allow you to hang clothes and hats.
Furniture for storing bath accessories, clean things, etc.
Usually a small closet, shelf or chest of drawers is placed in the dressing room.
For the rest room
The relaxation room is a place where you can relax after bath procedures, drink tea, have a snack, etc. Therefore, this room should be equipped with comfortable furniture. Unlike a steam room, there is no constant high humidity and high temperatures. Thanks to this, you can even place upholstered furniture and interior items with a paint coating here.
Typically, the following products are placed in the rest room:
Sofa, armchairs
They will help you sit comfortably in the room and relax.
Sunbeds, sun loungers
Such items replace the sofa. You can lie on them to recover after the steam room. For a comfortable rest, you can lay a blanket and a pillow on a sun lounger or chaise longue.
Table
Since a person loses a lot of fluid in the steam room, its deficiency must be quickly replenished. This can be done with the help of drinks, and they are consumed just at the table in the rest room. Depending on the size of the room, you can use a dining table or a small table.
Buffet, sideboard
These are interior items for storing dishes. If it is not possible to place them in the rest room, you can use a shelving unit or a small bedside table.
Additional products
In addition to the indicated interior items, the bathhouse uses:
Fonts made of wood
Their diameter is approximately 1.5 meters. Such products are used to cool down after a steam room. They are usually used if it is not possible to install a swimming pool in a bathhouse.
Basins, tubs
Devices for carrying out water procedures.
DIY bath furniture
Wooden bath furniture is easy to make with your own hands. To do this, you only need some skill in working with wood and drawings for a table, bench, or shelf.
To make a wooden bench or table, you need a hammer, a plane, a drill, a circular saw, cutters, and a sander.
The material for furniture in the rest room is 30*145 and 40*250 mm boards, wooden slats and antiseptics.
Drawings and diagrams for assembling furniture for a bathhouse with your own hands
For a relaxation room, the most important elements are a wooden table and benches. Their design is very simple, but before you start manufacturing, you should calculate its dimensions and create a drawing.
You need to take into account both the area of the room and the number of users. One person occupies a table 60 cm wide. In this case, another 70 cm of area around the table is required so that a person can freely stand up and sit down. As a result, the following sizes of wooden furniture are obtained:
- double table - round or square, 60 cm to the side or in diameter;
- a three-seater can only be round, its diameter is 80 cm;
- the four-seater has dimensions of 85 by 125 cm;
- five-seater - can be round with a diameter of 100 cm, or rectangular with dimensions of 135 by 85 m.
Having chosen the appropriate size, determine the installation method. The surface of a wooden table can be fixed on 1 leg with a cross, on 2 legs if it is a rectangular table, or on 4 legs if it is large enough. In the latter case, the legs can be either straight or crossed.
Taking into account the shape and required dimensions, a drawing is developed. You can use a ready-made diagram with suitable product dimensions. Assembly is carried out according to the drawing.
Manufacturing technologies
Bathroom furniture made of wood is often made by hand. The simplicity of the design allows even a beginner to cope with the manufacture. Well, if you have some experience, you can use a more complex drawing and decorate a wooden product.
The procedure for assembling a table for 6 people with cross-shaped legs is as follows.
- Wooden boards with a cross-section of 145*30 mm are sawn into 4 fragments 1.2 m long. Then oblique cuts of 45 degrees are made on future legs. To do this, step back 10 cm from the edge, mark an oblique line to the opposite edge of the cut and saw off along the mark.
- Wooden parts are carefully sanded. Then the boards are treated with an antiseptic composition.
- The blanks are folded crosswise in the center so that the cut ends of the boards are in the same plane. Then fix it with a clamp and mark the fastening points. A minimum of 2 bolts are required where the boards intersect.
- Holes are drilled for the bolts and the legs are secured. 2 spacers are made from 145*30 boards, which are attached flat to the legs.
- A tabletop is cut from boards with a cross-section of 40*250 mm - fragments 1.75 m long. The boards are sanded and treated with an antiseptic. Then wooden slats 77 cm long are sawn in half and also primed. The boards for the tabletop are fastened together with crossbars. Fasteners - self-tapping screws. The finished wooden tabletop is placed on legs and secured with self-tapping screws. The tabletop can be given any shape using a saw.
A simple wooden bench for a bathhouse is also easy to make.
- For the seat, 3 boards with a cross section of 30*120 mm and a length of 1.5 m are selected. The boards are fixed one by one with a clamp and a groove is made using a cutter, 100 mm deep along the length. On 2 boards there is one groove, on 1 - two.
- A wooden plank with a cross-section of 10*20 mm is cut into fragments and a length of 1.46 m. The slats and grooves are treated with glue, boards are placed on the planks and the resulting wooden panel is clamped with a clamp.
- The bench will require sidewalls. Blanks 420 mm long are cut from a 30*260 mm board, and semicircular cutouts of 50 mm are made on both sides. In the center of the sidewall, select a groove for the longitudinal board - 30*100 mm.
- For a longitudinal wooden beam, 2 protrusions 10 cm long and 10 cm wide are cut out on a workpiece 1.24 m long. The protrusion can be rounded. Wooden boards are sanded, all cuts are rounded with a milling cutter. Then all parts are impregnated with primer.
- The protrusions on the longitudinal beam are installed in grooves on the sidewalls and connected with self-tapping screws. Then the seat is placed on top, leveled, and fastened with self-tapping screws to the longitudinal board.
More complex products will require more time and experience to produce.
Stylistic design
Bath furniture is designed in the following styles:
Classical
This furniture has a strict design and clear lines. The items are not luxurious, but provide comfort to the premises. However, they cannot be called cheap. They look elegant and sophisticated. To make furniture, smooth boards of the same dimensions are used.
Antique
They are massive interior items with rounded backs, edges, and unusual cutouts. Products are artificially aged to give the desired look.
Materials
Not all furniture is suitable for use in a bathhouse. Thus, some materials are categorically not suitable for use in rooms with high humidity, which should be taken into account when choosing products.
Allowed
Wood is the optimal material for interior items for a bathhouse. It is characterized by low thermal conductivity, environmental friendliness and safety of use.
The following types of materials are used for bath furniture:
- Linden. Moisture-resistant material that is easy to process. When heated, it emits a pleasant odor that has a positive effect on the respiratory and nervous system.
- Pine. Material with increased moisture resistance. Pine contains a large amount of resin, which begins to release when heated, which provides a pleasant aroma for interior items. In addition, this substance leaves beautiful stains on the surface of furniture, merging into intricate patterns, and forms a protective film, increasing the service life of the products. However, due to the large amount of resin, pine cannot be used in a steam room. The fact is that this substance can cause burns on the epidermis.
- Larch. A tree that can withstand high temperatures and temperature changes. It is distinguished by high density and visual attractiveness. The main disadvantage of the material is the difficulty of processing. For this reason, as a rule, only small products are made from it, which include basins and tubs.
- Spruce. Wood that is easy to work with. It is used to make affordable and visually attractive furniture. However, a large number of knots, as well as a tendency to rot, allows the items to be used only in rooms with low or moderate humidity.
- Oak. High-strength material that is resistant to external negative influences. It is distinguished by its visual appeal, but has a high cost. In addition, oak is too massive, so furniture made from it is used mainly only for the rest room in the bathhouse.
- Aspen. Moisture resistant material. Its main drawback is that it cannot withstand increased loads. For this reason, aspen is used to make small interior items.
Prohibited
It is not recommended to use furniture made from the following types of wood for a bath:
- Ash. Such wood does not have moisture resistance, resistance to high temperatures and temperature changes.
- Poplar. It is not resistant to aggressive biological environments. In addition, poplar is susceptible to rotting.
In addition, the following materials are not used for bath furniture:
- Plastic. When heated, this material releases harmful substances, which can cause poisoning and other health problems. In addition, plastic melts under high temperatures.
- Metal. The material heats up quickly, which can cause burns when using furniture. In addition, it is susceptible to corrosion, therefore, it will quickly become unusable when used in a bathhouse.
The following interior items should also not be used in the bathhouse:
- With paint coating. As already mentioned, it will quickly become unusable under the influence of moisture and high temperatures. Furniture with this coating can only be placed in the dressing room and rest room.
- Wicker interior items made of natural rattan. Such products will also quickly become unusable due to external negative influences.
- Massive, poorly ventilated furniture. Such products are susceptible to rotting.
- Interior items upholstered in artificial or genuine leather. These products are not comfortable to use after a steam room, as they cause discomfort upon contact with the wet epidermis.
Preparation of material and working tools
Once the assembly drawing for a specific piece of furniture has been developed and the appropriate material has been selected, you can proceed to the next stage - preparing the lumber for the manufacture of the structure.
In order for wooden bath furniture to be functional and safe, it is necessary to thoroughly clean and process all the constituent elements of the structure. The dimensions of each part are maintained strictly in accordance with the drawing, and the connecting elements are identical to each other.
Taking into account the special operating conditions in the bathhouse, lumber is treated with protective antiseptic and polymer compounds that prevent rotting and destruction of the wood.
Important! Wooden furniture for saunas and baths is not coated with varnishes containing hazardous compounds that are released into the air when the surface is heated.
The work will require hand and power tools, which will allow you to quickly prepare the main structural elements and perform high-quality assembly. These include:
- grinding machine;
- screwdriver;
- jointer for leveling surfaces;
- plane;
- electric jigsaw;
- screwdrivers;
- ruler, square, construction pencil.
Selection rules
When choosing furniture for a bath, consider the following points:
- Material. Interior items for a bath should be made of wood. The best option is linden.
- Fastener material. As already mentioned, you cannot use furniture made with glue, liquid nails and other similar means.
- Dimensions. In this case, it all depends on the size of the premises.
- Hue. It must match the overall color scheme of the premises.
Expert opinion
Ivanov Konstantin Vladimirovich
Bath attendant, work experience – 10 years
I recommend using bath furniture made from linden. The fact is that this material is resistant to moisture and high temperatures. In addition, it is easy to process, so the surface after sanding is smooth, which minimizes the risk of splinters. Another property of linden is that when heated, it emits a pleasant smell. Wood vapors have a positive effect on the human body and improve skin condition. It is for these reasons that I recommend using linden furniture for a bathhouse.
Furniture for a bath is interior items that provide comfort in the steam room, dressing room and relaxation room. The main thing is to choose the right products.
Wood species
Well, we talked a lot about the types of furniture, but we didn’t say anything about the types of wood. Let's look at the breeds most often mentioned in questions.
From linden
We always tell our readers that linden is a very unstable tree because it has soft wood. This makes it vulnerable to fungi and decay. But this same circumstance makes it an excellent material for processing - it is easy to cut even with a sharp knife.
Bath furniture made from linden will find its application in the steam room - linden makes excellent shelves, and also, by the way, bath utensils - all kinds of ladles. Or, for example, a headrest like the one in the video below.
Is it worth processing? Unless with ordinary impregnations based on linseed or other natural (drying!) oil or oil with beeswax.
Where there is no elevated temperature, and therefore there is no threat of resin release from conifers, you can experiment with other species. Unless, of course, you want to do something carved, then linden will show its best side.
From aspen
Aspen is very similar in its technical characteristics to linden. Is that its characteristics are a little better, with the exception of one drawback that is not typical for linden - aspen quickly darkens in the steam room.
Aspen darkens from water
Therefore, not everyone chooses it, although it is a good wood, and aspen bath furniture would also perform very well in a steam room. In the washing room too (this also applies to linden) - you can make benches from aspen, but it is advisable that you make sure they dry after the procedures.
In other rooms it is better to opt for more durable species. We think so.
Rattan
Nowadays rattan is not only natural. Therefore, those who want to purchase beautiful wicker furniture for a bath veranda, for example, must decide for themselves which rattan is preferable for them.
Essentially, it's a matter of budget. Natural rattan is made from palm trees, artificial rattan is made from PVC. The difference is noticeable.
Furniture for a rattan bath can be anything according to the owner’s taste. PVC is safe in this case, since it is not subject to particularly strong heating or cooling, and it is not afraid of humidity anyway. Natural rattan is also resistant to humidity and temperature.
Wicker furniture is usually placed either in the garden or on an open veranda, but it is also acceptable to place it inside an enclosed veranda.
From pine
But no one came up with artificial pine, because there is still a lot of natural pine. So much so that it is also the cheapest wood on the market.
It is possible to make furniture for a bathhouse from pine, unless we are talking about a steam room. The release of resin from the shelf is unlikely to please the owner. But the bench in the washing room may well be made of pine, because in the washing room the temperature is significantly lower, and resinous rocks are less susceptible to rotting.
IMPORTANT! However, keep in mind that pine absorbs a lot of water, which causes it to swell and may crack when dried. It is worth thinking about water-repellent impregnations.. Otherwise, any furniture for baths and saunas made of wood can be made of pine, even the frame of an upholstered
But if you are planning to do this yourself, then it is worth considering that coniferous species, on the one hand, are economically beneficial, and on the other hand, there is a slight difficulty in processing them precisely because of their resinousness (as well as knottiness)
As for the rest, any furniture for baths and saunas made of wood can be made of pine, even the frame is soft. But if you are planning to do this yourself, then it is worth considering that coniferous species, on the one hand, are economically beneficial, and on the other hand, there is a slight difficulty in processing them precisely because of their resinous content (as well as knottiness).
FAQ
Is it possible to put ordinary upholstered furniture in the relaxation room in the bathhouse?
Despite the fact that there is no such high humidity as in a steam room, the room cannot be called dry. For this reason, it is best to use wooden furniture here, and equip it with pillows for comfortable seating.
What material is best to choose headrests and footrests for a bath?
Like other furniture, these products must be made of wood. To make the headrest comfortable, you just need to put a towel on it.
Is it possible to use only shelves in a steam room and not install additional benches?
Yes, if the space of the room does not allow. In this case, you can simply bring a wooden stool for the basin.
What material is best to choose basins and buckets for a bath?
The best option is wood. The metal heats up quickly, so it is easy to get burned on it.
How to find out whether bath furniture meets the specified requirements or not?
To do this, you need to check quality certificates. Only they guarantee the safety of using products.
Bath hanger
Option 1
Bath hanger
To create a hanger you will need:
- flat board 400x20 mm and 50 cm long;
- 4 wooden knots with a Y-shaped branching with a diameter of 30 mm;
- plane;
- sandpaper;
- drill;
- stain;
- screws, nails or wooden dowels for fastening.
Branches should be chosen that are strong, with a dense texture, and without traces of rot. It is not necessary to look for knots of the same shape, the main thing is that they match in thickness. The length of the workpieces should not exceed 30 cm, and the length of the branches should not exceed 3-4 cm. The bark from the branches must be removed, and the workpieces are thoroughly dried in the shade.
Branches
Step 1. Each workpiece is planed on one side with a plane along the entire length to approximately ¼ of the thickness of the branch. This side of the branches will be attached to the base.
Sanding a branch
Attaching branches
Step 2. The ends of the branches on the workpieces are treated with sandpaper, rounding off the cuts.
Branch arrangement option
Step 3. The board is sanded, then covered with stain along with the branches and dried.
Step 4. Lay out the knots on the board and mark the attachment points with a pencil. If wooden dowels are used as fasteners, 2 holes are drilled on the smooth side of the workpieces - bottom and top at a distance of 5 cm from the ends of the branches.
Step 5. Holes for dowels 2 cm deep are also drilled in the board according to the markings, after which the branches are fastened to the base. When using nails or self-tapping screws, the caps are recessed into the wood by 1-2 mm, and then covered with heat-resistant putty to match the color of the wood.
Option 2
Bath hanger diagram
To work you will need:
- 3 boards 1120x100x20 mm;
- 6 boards 1500x120x20 mm;
- 1 board with a section of 200x20 mm for the shelf and sides;
- self-tapping screws 35 mm;
- wooden dowels 10x30 mm;
- wood plugs;
- stain;
- sandpaper;
- hacksaw;
- jigsaw;
- drill;
- hammer;
- tape measure and square;
- pencil;
- hooks
The manufacture of such a hanger is carried out in three stages: first, the frame is assembled, then a holder for hooks is made, and the shelf is attached last in the upper part of the frame.
Step 1. The wood is thoroughly sanded with sandpaper or a sanding attachment. Boards 1500 mm long are laid out on a flat surface parallel to each other, leaving a distance of 8 cm between them. The edges are aligned.
Sanding wooden boards with sandpaper
Step 2. Fasten the future frame of the hanger with three horizontal crossbars made of boards 1120 mm long. The upper cross member is located flush with the ends of the boards, the other two - in increments of 50 cm. All frame elements must be perpendicular. The screws are screwed in from the side of the crossbars, recessing them slightly into the wood.
Step 3. Start making a holder for hooks: cut a piece 1070 mm long from a 200x20 mm board, sand the ends. Now you need to secure the holder to the frame, but the hooks can be screwed in after installing the hanger.
Step 4. The holder is placed under the frame, laid parallel to the top crossbar at a distance of 10 cm from the top of the structure. Fasten with self-tapping screws, screwing 2 into each vertical board. This fixation of the holder gives the frame additional rigidity.
Step 5. From the remaining board, cut out a shelf 1070 mm long and cut out two side panels with a jigsaw, as in the diagram. All cuts must be sanded. Next, markings are made for the dowels: with a pencil, they mark the lines where the shelf fits to the sidewalls and the sidewalls to the frame boards, and points are placed on the lines for drilling holes.
Fastening the shelf and sides
Step 6. Drill holes according to the markings, insert dowels into the shelf, attach the shelf to the sides, and then to the frame itself. Additionally, the shelf is secured on the sides with self-tapping screws, the heads of which are covered with plugs.
Step 7. Determine where the hanger is attached to the wall, drill holes for fasteners in the wall and cross boards, install and fix the hanger.
Attaching the hanger to the wall
This is how you can furnish your bathhouse or sauna with homemade furniture. All the examples are quite simple, so even a novice master can cope with them. And even if everything doesn’t work out perfectly, hand-made furniture will make your stay in the bathhouse much more enjoyable!
Similar hanger design, assembled in the same way
