How to decorate doors with MDF panels yourself
Published by: Arthur Kanapatsky 0
Today, iron and metal entrance doors in houses have practically become a necessary element - they help a person to feel safe. However, despite the rather menacing appearance, the externally metal door does not look very attractive. In order to correct the situation, the door is finished with MDF panels. At first glance, cladding MDF doors seems difficult. After reading the article, you are convinced that decorating doors with MDF panels with your own hands is not a difficult process at all.
Why is this necessary?
It is imperative to trim the slopes of the doorway. First, to create an aesthetic appearance, because when removing the old box, the slopes were probably damaged. The next reason is the need to hide the installation process. Polyurethane foam does not look the best.
Pay attention! If the polyurethane foam is not hidden from direct sunlight, it will literally crumble within 3-4 years. If it comes to the front door, then this is fraught with, at a minimum, the formation of drafts, and, at a maximum, easy penetration of intruders into the house.
The designed slope must meet certain aspects:
- no condensation formation;
- neat appearance;
- improving door thermal insulation;
- resistance to temperature changes;
- easy care and washing without loss of appearance.
Advantages of MDF finishing
MDF is a medium-density wood-fiber board used for finishing the front door outside and inside. Suitable for cladding doors made of iron, metal and steel - even steel doors with MDF finishing look amazing, impressing the most demanding aesthetes.
Why should you give preference to this particular material?
- Wide choose. Modern manufacturers willingly please the consumer by providing us with numerous options with a variety of colors and textures. It is possible to finish with materials that imitate natural ones - thus, entrance doors with MDF finishing acquire an elegant appearance. Design options are widely presented in the photographs provided by the manufacturer - choose your unique option, completely transforming the appearance of the hallway.
- Durability. Wood-fiber materials will retain their presentable appearance and useful qualities for many years. They perfectly tolerate various mechanical loads and are not afraid of temperature changes and sunlight. Compared to upholstery made from leatherette (easily torn and fading before our eyes), MDF boasts a combination of beauty and practicality.
- Safety. The panels contain absolutely no substances that can harm human health, unlike some other facing materials.
- Easy care. No difficulties are expected - forget about expensive detergents, delicate procedures - you just need to periodically wipe the panels with a damp cloth. In addition, MDF does not absorb unpleasant household odors at all - no additional care is required.
- Ease of installation. It is possible to finish with MDF panels without involving specialists. All you need is the necessary tools and extreme accuracy, then finishing the MDF door will be quick and successful.
- Sound insulation and thermal insulation. The materials will provide you with a cozy, warm hallway - it is possible to add a layer of insulation on the outside.
- Acceptable price. Depends on the specific type of panels, however, in general, they belong to the average price category.
- Possibility to install slopes made of similar material.
Kinds
In total, there are three types of panels: veneered, laminated and vandal-proof:
Natural Veneer
MDF panel covered with natural veneer.
This is due to the fact that the sawdust panel itself is covered with a thin cut of wood, resulting in such a naturalistic imitation.
Despite the fact that veneered models are the most spectacular and environmentally friendly, there are also significant risks. Thus, the type of panels with veneer is the most capricious of all presented, since it does not allow cleaning with ordinary water, does not withstand mechanical influences, is easily scratched and does not tolerate sunlight. Of course, caring for veneered MDF panels is easier than caring for wood, but not much.
Laminated
MDF panel covered with lamination. Lamination occurs by gluing a special coating onto the panel that imitates the color and, in some cases, the texture of the selected material. This option is the cheapest due to the fact that it is easy to produce and does not require any particularly rare materials.
The film reacts well to ultraviolet radiation, however, it is not able to withstand high humidity or strong temperature changes.
Anti-vandal
MDF panel covered with plastic (vandal-proof). The anti-vandal surface is obtained by applying several layers of plastic, as a result of which the MDF panel acquires many additional positive qualities.
This variety has only one drawback - cost. Not every person is ready to pay a tidy sum for MDF, even if it is covered with such a wonderful material. This type has no more disadvantages.
Panel installation
Before you begin the finishing work, you should prepare the tools and the doors themselves in order to avoid additional problems after installation.
First, let's get rid of the cracks around the doorway - polyurethane foam is perfect. Carefully fill in all the holes and cracks, and after drying, cut off the excess elements with a knife. Next, the surface is well treated with a primer.
The doors themselves should be freed from any additional elements: we remove the locks, handles and peephole. In addition, if there was casing that you now want to replace, it must also be completely removed using a spatula or knife. If you plan to use glue or liquid nails when installing the panels, pre-prime the surface for better adhesion. If the door is metal, treat it with an anti-corrosion agent. Also, in the MDF panel itself, you should carefully select and cut a hole where we will install the lock later.
Let's move on to installation. First, the doors should be removed from their hinges - in principle, it is possible to carry out installation work while hanging, but this increases the risk of distortions (getting rid of them is quite labor-intensive work). They are laid on a flat surface, providing the most comfortable working conditions. All areas are sanded, all unnecessary elements are removed - old paint, traces of corrosion, remnants of previous upholstery. The panel should also be prepared - wipe it thoroughly from the wrong side to avoid peeling.
Special mounting adhesive is applied to the door base - it should lie in waves, and the edges must be coated very well - this way the panel will be securely fastened. The adhesive itself is chosen based on the type of materials used. It is better to mark in advance the location of all possible connectors. The panel is laid on the surface and begins to be pressed, having first leveled it as much as possible - everything must be in its place, otherwise you will have to do the work twice. If you want to play it safe and additionally fix the MDF with self-tapping screws, drill holes around the perimeter of the surface and insert small self-tapping screws (it is important to prevent them from coming out from the back side). When using screws, immediately drill out the areas reserved for handles and locks.
Installation of extensions on studs
In this section we will talk about another way to measure the dimensions of the extensions. They need to be inserted one by one into the seats of the door frame and using the sharp side of the rule to draw a wall line.
Rule
You must act carefully. If you inserted additional elements in the position in which they will be fixed, then the marked line must be symmetrically moved to the other side of the board and only cut along it. But you can insert the board rotated, then the line will immediately be in its place. Further, all circumcision operations are identical to those described above.
Step 1. Using a small-diameter drill (should correspond to the diameter of the finishing nails no more than one millimeter), drill holes at a distance of approximately 20 cm in the end of the extension adjacent to the door frame.
In the photo - the finishing nail next to the finisher
Step 2. Insert the nails into the drilled holes until they stop. Before this, you need to bite off the caps with pliers; the carnations are inserted with the sharp end outward.
Step 3. Carefully insert each accessory element one by one into its place in the door frame. Using a hammer, drive the sharp protruding ends of the nails into the door frame through the wood spacer. Take your time; before fixing, firmly press the additional element against the side of the protruding seat of the box. If you are inattentive and miss a gap, you will have to remove the additional element and start all over again or seal the gap with sealant that matches the door. Both options are highly undesirable. In the first case, because you will have to pull out the “wrong” nail and drill a hole for it in another place. The fact is that the incorrect fastening is located a few tenths of a millimeter from the correct one. And in this case, the nail will never make a new hole for itself, but will always slide into the existing one. In the second case, any sealing of cracks with sealant will not go unnoticed and will indicate the low professionalism of the performer.
Installation diagram
Step 4. Wedge the extensions on the back side, secure their position with tape or spacers to prevent them from bursting with foam.
Step 5. Clean the surfaces from dust and dirt, moisten them with an ordinary water spray (spray).
Wetting and cleaning the surface
Step 6. Blow the gap with sealant over the entire plane. After the foam has cooled, carefully cut off the protruding part.
Foam application
Sheathing materials
Purely decorative techniques are not suitable for restoring the surface of the door, since they are cosmetic in nature, especially when it comes to the entrance door leaf, which is exposed to the most intense effects of temperature and moisture. Finishing the sash with appropriate materials will not only restore the attractiveness of the product, but also improve its sound and heat insulation properties.
- Laminate – finishing boards 7–8 mm thick, made from high-density wood-fiber boards. The back side of the lamella is covered with a layer of waterproof paper, and the front side is covered with a moisture-proof film and a decorative layer. Laminate imitates the look of wood, stone, ceramics, which allows you to choose options to suit any interior. The material is characterized by good sound and heat insulation properties, but is quite hygroscopic, therefore it is used more often for interior cladding.
Finishing lamellas have gained great popularity due to their very affordable cost and durability. They are extremely undemanding in care - just wiping with water or mild detergents is enough.
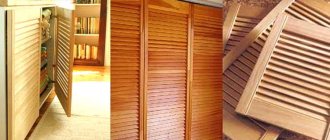
- Lining - narrow wooden slats with special grooves for strong and easy fastening. The thickness of the products ranges from 6 to 20 mm, the length is 1.5, 3 and 6 m. During production, they are treated with antiseptic agents. The level of sound and heat insulation of the lining is significantly higher, and hygroscopicity is lower.
For external work, it is recommended to use boards made of coniferous wood - pine, larch; for internal work, more valuable species are used - cedar, ash, beech. The products retain the natural color and pattern of the wood, which adds a lot to the beauty of the front door.
- MDF panels are produced by pressing small wood chips. To cover the door leaf, a 16 mm thick plate is used, covered with a polyvinyl chloride film or anti-vandal. The material is characterized by mechanical strength and high heat and sound insulation, is not susceptible to fungi and is resistant to moisture.
- Plastic – narrow lamellas are made of polyvinyl chloride with special additives that increase the material’s resistance to low temperatures, moisture and ultraviolet radiation. The panels are extremely low maintenance, durable and easy to install. However, the mechanical strength of the material is low, so it is recommended to use it for interior work.
The panels are available in two versions: seamless and suture, in the form of lining.
Kinds
Wooden doors are distinguished by several characteristics: by the method of opening, the number of leaves, filling, functional purpose, location and method of transformation.
According to the method of plowing, they are distinguished:
- Swing – capable of opening in one or two directions. These can be internal or external canvases, solid or glazed. Pine doors can have any design, including carvings. Swing products are well suited for installation in rooms where there is the necessary space.
- Sliding doors are capable of opening in both directions, which is why they are so often used to organize office spaces and hypermarkets. Some modern houses are also equipped with sliding doors made of wood, which are decorated with glass inserts.
- Folding - designed to save a small space, so they can be installed even in a narrow doorway. Their opening principle lies in the ability to unfold and fold using two or more parts.
Doors are also distinguished according to the following characteristics:
- Speaking about the number of leaves, we can divide doors into single-leaf, double-leaf and one-and-a-half-leaf. Their number depends on the width of the doorway. Double-leaf structures are necessarily supplied with bolts, not counting those related to the model.
- Based on the filling of the door leaf, the door can be solid or with glass. Glazed models are designed to let additional light into the room and visually expand it, while solid options are needed for complete isolation.
- Based on their functional purpose, we can distinguish door panels intended for residential or public buildings, as well as special doors that have additional capabilities. Some of them can withstand fire, others withstand impacts and bullets, and others withstand moisture and volatile chemicals.
- Based on location, products can be divided into entrance and interior. And according to their intended purpose, they are sealed, fireproof, protective and soundproof.
- Wooden structures are also distinguished by their water resistance. They can be of increased or normal water resistance.
- Based on the method of transformation, there are doors-partitions, side doors and retractable doors. They can be made in the form of a screen or blinds - it all depends on the room itself.
- Wooden panels are also divided by size. They depend on the width and height of the doorway, and therefore can have standard or individual indicators.
- The colors of pine products can be very different: white, black, brown and other shades. Unpainted models that emphasize the naturalness of the array look best.
How to cover doors with laminate
Sheathing a door leaf with laminate can be done very quickly and easily, since the material is simply glued to the surface of the leaf.
- The door is removed from its hinges for ease of operation and placed on a flat surface.
- Locks, door handles and peepholes, if any, are temporarily removed.
- Laminate boards are cut to size.
- An adhesive composition is applied to the surface of each lamella - liquid nails or Moment glue, for example. The lamellas are placed on the canvas, lightly pressed down and left until completely set.
Other options
Other options for finishing the door gap:
- Tile. The method is convenient, but not the most successful. You will have to pay close attention to the choice of tiles, and the question also arises of how to lay it above the doorway, despite the fact that it is important to ensure the adhesion of the adhesive. And laying tiles without certain skills is difficult.
- Artificial granite - this option will create good aesthetics, but even at the first attempts to wash it, this beauty will fade in the eyes of the owner, because often such materials have a rather deep structure.
- Decorative plaster. It looks original, fresh, special, but only if it was applied by a specialist.
How to sheathe MDF boards
This is the most expensive finishing method, but also the most durable. It is usually used when decorating steel entrance doors. MDF panels can be installed either directly on the surface of a steel sheet or on existing cladding - leatherette, for example.
- Holes are drilled around the perimeter of the vestibule - that part of the sash that covers the door frame. The step is 20 cm.
- Along the perimeter of the canvas itself, a series of through holes are drilled through both steel sheets in increments of 20 cm. The diameter is 3 mm, the same as in the previous case.
- The inner MDF cover is fixed with screws, and then the outer one. The length of the screw should be a couple of millimeters less than the thickness of the sheet.
- The door fittings removed for the duration of the work are being installed.
Since the MDF panel usually represents the entire facade of the door, it is recommended to invite an assistant to install it.
What it is?
MDF linings and thermo-MDF products will help save old doors and significantly improve new ones. Doors to the house are the most important element that performs many functions. They must be durable, protect from extraneous sounds and decorate the room
It is also important to choose the right interior doors. It is thanks to them that the rooms are separated from each other, giving us the opportunity to live separately
MDF door trims are used for both entrance and interior openings.
MDF is made from pressed sawdust, which is impregnated with special wood resin. Thanks to the resin, the sawdust sticks together and stays together. Thus, from small chips and resin, a fairly strong plate is obtained.
Several of these plates are usually used to make door trims. If you lay a layer of energy-saving material between them, you get a so-called thermal pad. It helps keep the room temperature constant.
Features and purpose
Decorative overlays not only perform the function of original door design, but also have other important characteristics:
Protects the door from damage. Some materials change for the worse over time. Metal structures become rusty, and doors also experience various mechanical impacts. Protective panels will extend the life of the door, absorbing and even reflecting harmful influences.
- Helps you save money. Solid products made from natural materials are significantly more expensive than their metal counterparts with overlay panels.
- To increase the level of security in the home, armored linings are used, which are made in the form of a cast, fixed structure. The armor plate is installed on door locks, each model is created according to an individual sketch and has no analogues
- Overlays designed specifically for the comfort of pets are often attached to interior doors. The vandal-proof pad is designed to prevent pets from sharpening their claws without damaging the furniture in the room. To ensure that the scratching post for pets is not too conspicuous, it is hung on the door posts.
- In order to create additional heat and sound insulation, linings are installed on the front part of interior doors. Such models consist of several layers, for which a sound-absorbing function or the function of maintaining the temperature in the room is assigned.
An innovation in the arrangement of the room was the door sills. They look like small rollers with a common base running under the bottom of the door. The rollers tightly fill the space between the door and the floor on the inside and outside of the doorway.
What size do these door trims come in?
MDF is quite easy to process. It cuts easily, without any significant effort. Therefore, it is possible to make even a complex, curved cut on a product - but this does not seem to be an insurmountable task. Due to the plasticity of the material, door panels can be made of any shape. MDF overlays are usually made to order according to the size of the door opening. Their production is possible not only for standard ones, but also for those with non-standard dimensional parameters.
Advantages
MDF linings protect doors from street dust and precipitation. They have soundproofing properties, and therefore maintain the comfort and peace of mind of the home owner. MDF is an environmentally friendly material that is safe for human health. That is, you can safely use it not only for entrance doors, but also for doors to the living room or even to the children's room.
MDF overlays are also widely used for decorating doors. They are relatively inexpensive and can provide a stylish and modern look to your home. If your doors are old but still strong, then there is no need to spend extra money to replace them with new ones. You can simply decorate them with MDF overlays. Your old doors will take on a luxurious look and shine with new colors. MDF overlays can be decorated in different ways.
How to cover doors with clapboard
It is recommended to first keep the material in the room for 2-3 days for acclimatization.
- The door leaf is removed from its hinges and laid on a flat surface. The fittings are removed.
- The lining is cut in accordance with the parameters of the door and the installation method: vertically, horizontally, diagonally, or even in the form of some kind of pattern.
- Sheathing begins from the edge - depending on the method, sequentially connecting the elements together and securing them with finishing nails.
- After installation is completed, the surface of the material is varnished.
If you need to sheathe a metal sheet, then at the first stage you should attach the sheathing. Narrow wooden slats are secured with self-tapping screws, and wooden slats are mounted on them. You can use special gluers to attach the panel to the surface of a steel sheet, but this method fixes the lining quite rigidly, and subsequently the material can be deformed.
Opening type
It is clear why the skylight needs to be sheathed, but they are far from all standard; there are many options. Coming out of this, the finishing materials also differ. Options:
- Rectangular skylight. Sheathed with any material, including plastic panels. Moreover, it may not simply be a place of passage to another room or into the house, but an important part of the design solution of the room.
- Arch. A similar option is not used in every room, because it is appropriate only in certain styles. A similar solution is suitable in this case if the rooms are decorated identically and there is no need to divide them at the physical level. For finishing, you should choose materials that do not stand out very much against the background of the rest of the room, otherwise they will “heighten” the clearance. It is curious that in modern interiors, in addition to traditional round arches, ellipsoidal, trapezoidal, and even asymmetrical arches are made. They can be easily finished with plastic panels, which cannot be said about tiles.
- Imitation of an arch. This method is also called lazy, because an “arched” finish is formed in an ordinary rectangular opening; it will not be difficult to complete.
- Door clearance without door. It is easiest to install the finishing here, but the main task in this case is to choose the right material, then the finished skylight will look organic.
Slope finished with plastic panels
Advantages of building materials
Finishing a door opening is a labor-intensive process that requires precision and following advice. Therefore, it is possible to make this kind of cladding yourself. Slopes can be finished with panel materials, the variety of which can satisfy any needs. Often finishing work is carried out with plastic, wooden panels, plasterboard, but MDF panels are considered the most successful.
Advantages of MDF panels
Since this finishing building material has numerous advantages:
- Availability of material.
- Easy to install.
- Aesthetic appearance.
- The density of the material creates additional sound and heat insulation.
- Environmentally friendly. Fiberboard is made by pressing wood chips under the influence of temperature and pressure. The core binders of the fibrous material use carbide resins, which are harmless to humans. Consequently, MDF is an environmentally friendly building material that can be safely used for cladding both exterior and interior structures.
- The color palette allows you to satisfy any request. You can choose the colors of the panels from wenge to bright shades.
Doorway lined with MDF slopes
But like any building material, MDF panels are not without disadvantages:
- Weak resistance to mechanical damage. If the MDF panel is deformed, the damage cannot be restored.
- Does not withstand significant levels of humidity.
Therefore, finishing door slopes with MDF panels should not be done in conditions of high humidity.
Do-it-yourself MDF front door slope (video)
Choosing the right size
Dimensions must be measured very carefully, because the final figures may be significantly or slightly different from the standard ones. And this should definitely be taken into account. The owner needs to measure the height and width of the opening (empty), as well as the thickness of the wall. Practice shows that such manipulations require experience, so it is better to focus on custom-made doors.
In this case, an experienced measurer will come to the site, who will take into account all the nuances of the situation and accurately select the necessary parameters. By directly contacting the manufacturer, it is much more profitable and convenient to order non-standard interior doors. And with proper calculation of dimensions, craftsmen will be able to carry out correct installation without any problems.
Installation of slopes using a frame method
Slopes from fiber panels can be made using the frame and glue method. Do-it-yourself installation of slopes from MDF panels using a frame method is carried out using the following technology:
- Along the edges of the slope, both inside and outside, use dowels to secure wooden slats, which must be covered over time with MDF panels. The bars should be level. To avoid distortion of the structure between the skeleton and the opening, wedges must be driven in.
- Cut 3 sheets from MDF (2 for vertical mounting and 1 for horizontal mounting).
- The parts should be attached to the opening and points for cutting should be marked.
- Trimming should be done strictly to the size of the door opening.
Installation of wooden slopes
- Apply liquid nails to the inner edge of the panel and attach to the frame.
- The panels should be aligned so as to achieve a minimum gap between them.
- Fixation can be strengthened using self-tapping screws that are screwed into the upper and lower parts. The screw caps are decorated with special elements.
- The final point is attaching the platbands.
If the depth of the opening does not exceed the width of the MDF, then in this case it is possible to fix it in a seamless manner by installing it vertically.
Preparatory moments
All the benefits that come from lining the slopes of external doors with MDF panels can be demonstrated during installation. Therefore, before starting work, you can study a video of exactly how slopes are made at the front door. Wood fiber panels come in 2 options:
- Designed for finishing work (they have an L-shape).
- Wall panels.
Measuring the doorway
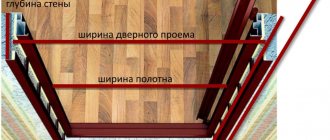
Most novice craftsmen have a completely natural question about how to sheathe the slopes of an MDF entrance door correctly. First you need to do some detailing. To make door slopes from MDF, you need to take the dimensions of the opening, which should be drawn on paper. Based on the transferred data, each element should be schematically depicted. It is recommended to take into account the following points:
- Presence of a threshold.
- The order of placement of parts.
- Opening width and angles of inclination.
After installing the door, all gaps between the wall and the frame must be sealed with foam. After the foam has hardened, all excess should be cut off.
Installation of slopes using the adhesive method
If preference is given to the glue method, then you should familiarize yourself with the tips for installing the front door and MDF slopes. Work algorithm:
- First of all, for the glue method, you need to plaster the slopes.
- It is recommended to treat the prepared surface with a primer. After priming, the surface must be waited until completely dry.
- Install beacon profiles according to level. To install profiles on slopes, apply a solution and level the beacons in all directions. Give the solution time to set.
- The solution is applied to the slopes and leveled along the beacons with a spatula. After the manipulations, the slopes should be left for 2 days until the solution completely sets.
- The inside of the part is coated with glue and pressed to the surface.
- When all the elements are installed, the resulting joints are sealed or covered with overlays.
Important! After completing all the manipulations, you can proceed to the exterior decoration of the door structure. For this purpose, it is possible to cover the surface with platbands or level the surface using putty. On the Internet there are photos, videos and reviews that describe in detail the entire step-by-step process of the frame and glue method.
