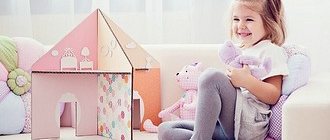
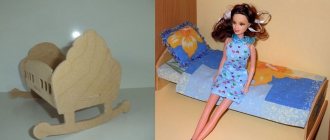
Hi all! Tell me, when you give your baby a toy, do you think about where it will live? Believe me, the baby is definitely thinking about this. And all because he projects his life onto them. He plays during the day, just like a toy, but evening comes and the little one has to go to bed. What about his ward? What to do with it? To give your child pleasure, continue playing and teach your little one to be orderly, let's find out today how to make a doll house out of a box with your own hands.
Preparing to create an apartment for a doll
Before you start working, decide what exactly you will create. The box itself already has “walls”. All that remains is to make them look like their place of residence. The size of the house can be different: it can be two-story or one-story, with one or several rooms; furnished with homemade or purchased furniture.
What materials and tools will be needed for the work:
- Cardboard boxes;
- Glue;
- Colored paper;
- Scissors;
- Pencil;
- Ruler.
When everything you need is collected, you can start tinkering.
Child sized villa
To create a structure in which a child can fit, you need to use a large box or sheets of corrugated cardboard. Its foundation, consisting of four walls and a roof, is the work of adults or older children. And decorations and decorations can be done together with the owners.
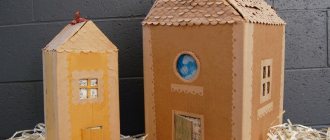
First house
I recommend practicing in a small one-room house. Then it’s not such a shame to throw it away, and the children quickly get bored with everything. Look how cute and cozy they are, even though they are small. Pictures enlarge by clicking.
But what a cute little house, even without wallpaper it already looks decent, but what if you hang curtains, throw in a couple of pillows, and lay down a carpet? By the way, the easiest way to make a carpet and pillows is from felt. And you don't have to sew! You can simply glue the felt with a moment or a hot gun.
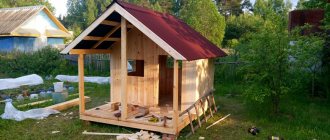
As soon as you get bored, you can build either a castle or a country villa. You already have experience, your hand is full.
How to make a craft with your own hands
By spending a little time working with your children and giving free rein to your imagination, you can build many original designs. And we will tell you how to do this further.
“Building” a house
From me a detailed master class with photos. Hope it helps you!
- Let's start by collecting all the boxes to imagine what our model will look like.
- If the boxes are not the same size or you want to complicate the task for yourself and your baby and make holes for windows and doors, then it’s worth making a drawing.
- It is advisable, before firmly connecting all the parts of the house, to prepare each box separately. What needs to be done for this? Cover the walls, floor and ceiling of each “room”. Cut out windows and doors. To cover a cardboard box, wrapping paper, oilcloth, wallpaper, colored paper, fabric, etc. are suitable. A combination of different materials and colors will look nice.
- After all the boxes are ready, you can glue them one to another according to a pre-planned pattern. The easiest way to glue is with hot glue.
- All that remains is to decorate the doll’s apartment, fill it with furniture and beautiful things. To decide how best to do this, consider what kind of doll you are building it for. For example, Barbie loves pink colors. Her style is that of a princess. This should all be reflected in furniture, furnishings, chandeliers, photographs and other details. You can not only make curtains on the windows, but also decorate them with miniature bows, etc. Agree with curtains the house immediately becomes cozy!
- Don't ignore the roof either. It can be covered with fabric or paper. You can even print out a colored roof background and glue it to cardboard. And there are other options: from buttons, from disposable plates, from colored cardboard.
Beautiful tiles are made from cardboard
The little one's help will depend entirely on how interested the parents are and involved them in the process. Therefore, show your creative processes, prepare your baby with a fairy tale or an interesting story. Assign him a certain task or ask him for advice on a craft.
How to make a children's playhouse from cardboard sheets
You can make a play complex for your child from ordinary sheets of cardboard. You will need a lot of them. The size of each cardboard piece should be approximately 80x100 cm. You will also need:
- stationery knife;
- adhesive tape (it is better to use a wide one);
- ruler;
- pencil.
You need to cut out the details of the future house from dense material, as shown in the photo below. After this, all that remains is to insert them into each other into the slots made.
Furniture
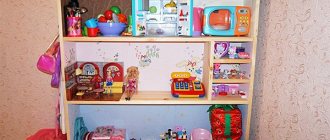
Of course, dolls simply need furniture! And playing with an empty house is not interesting. What can you think of?
Bedroom furniture
Bedroom furniture can be made from paper using the origami technique, glued from cardboard and laid out, but the most comfortable and beautiful option is upholstered furniture made from cardboard, foam rubber and fabric. You can glue everything using regular PVA, although it will take a long time to dry. Instead of foam rubber, you can take padding polyester or batting, or in extreme cases, cotton wool.
Bed MK
Step-by-step photos of production - enlarge when clicked:
Armchairs
Photos enlarge by click
Kitchen
The kitchen can be filled with a refrigerator, stove, countertop, beautiful chandelier and dining table. Cardboard and ice cream sticks are also suitable materials.
If you have a 3D pen, you can make furniture out of plastic.
Cardboard plate
Lockers
Cabinets, shelves, and a refrigerator are simply made from cardboard. Easy to glue with hot glue.
Furniture for kitchen
Furniture - chairs, a table - very beautiful ones made from ice cream sticks. You can cut such sticks with large scissors, but be careful, they can crack in half. You can glue with instant or hot glue.
Little things for the kitchen
You can put a bird in a cage in the kitchen, or put a box of fruit or flowers. Detailed master classes in the photo. Enlarge on click.
Fruits, vegetables, dishes
The easiest way to make fruits, vegetables, and dishes is from plasticine . To prevent the product from getting dirty and losing its shape, it is coated with transparent nail polish.
You can make vegetables from salt dough - they dry out and look like they came from a toy store. Play do is also used to make food, but my play do cracks after it dries. Therefore, I prefer to make salt dough: 1 glass of flour + 1 glass of fine salt + water, knead a very stiff dough.
Also a very good option is air self-hardening plasticine (new material). It is cheap, bright, and when it hardens it is elastic, somewhat similar to hard rubber. We sculpt as from ordinary plasticine and leave to dry overnight.
Self-production
Here are a few arguments in favor of making your own dollhouse:
- Saving. Store-bought or custom-made dollhouses cost a lot of money. Doing it yourself will save you a certain amount.
- Individuality and uniqueness.
- The ability to create a house of the required size and shape.
- Develop design qualities and creativity by designing the interior decoration of rooms.
- Have a nice time with your child. After all, joint activities strengthen family relationships.
Features of material selection
The choice of materials for building a house with your own hands should coincide with financial capabilities, the amount of free time and the level of skill.
- Paper . Scrapbooking paper is suitable for these purposes: it is thick, does not fade, and has a wide selection of textures and prints. Ready-made diagrams can be printed on regular office paper.
- Cardboard . Ideal options would be binding, beer, corrugated three-layer. The latter is more difficult to cut, but more affordable (for example, household appliances or weighted candies are usually packaged in it). The rigidity of cardboard allows you to add more floors to the project.
- Boxes . Their characteristics do not differ from the previous material. One large or several medium-sized ones, always whole boxes, are suitable for work.
- Plywood . It is distinguished by its availability, ease of processing, the ability to implement complex projects, and its price-quality ratio. At the same time, it requires certain skills in working with sawing tools and precise design. The recommended plywood thickness is at least 6-7 mm. You should definitely pay attention to the E0 marking - its presence confirms the low formaldehyde content.
- Tree . The material is more expensive and difficult to work with, requiring expensive tools. Suitable for making large-sized multifunctional shelving houses.
Comparative characteristics of materials:
| Material | Price | Durability | Complexity |
| Paper house | Very cheap | Low | Very easy |
| Cardboard house | Cheap | Low | Easy but requires patience |
| House made of boxes | Very cheap | Low | Very easy |
| Plywood house | Moderately expensive | High | Medium difficulty, requires tool skills |
| Wooden house | More expensive than average, but cheaper than store bought | Very high | Complex, cutting on professional equipment is desirable |
Features of working with plywood
Dollhouses made of plywood are lightweight, environmentally friendly, and relatively low in cost. But, unlike houses made from boxes, plywood houses are stronger , can withstand heavy loads and will last longer. When choosing this material, it is necessary to take into account the features of its processing.
- The tool for cutting parts must be very sharp and selected in accordance with the thickness of the sheet: up to 1.5 mm - can be cut with a knife, 1.5-6 mm - with a hand jigsaw, over 6 mm - with a jigsaw.
- It is advisable to saw the sheet along the grain. In the case of a transverse direction, it is recommended to make several cuts along the entire length of the future cut, which will reduce the likelihood of cracks and chips.
- Finished parts should be carefully sanded.
- It is better to connect parts using wood glue. The connection will be stronger if the fibers of the bonded surfaces are in the same direction.
- For nails and screws, you need to pre-drill holes and place washers under the heads.
Compliance with these rules will make the work easier and protect against unnecessary consumption of material.
Connecting rooms
It is more convenient to connect the walls with wide masking tape. It does not damage the cardboard when removed, does not make the work sloppy and does not interfere with decoration. Adhesive Moment Crystal will help fix cardboard walls relative to each other: it sets quickly and leaves no marks.
To connect the walls to each other you should:
- Coat the cut of the side wall with glue and press it tightly against the edge of the rear wall, trying to maintain an angle of 90 degrees.
- Cover the resulting corner with masking tape on the outside and inside, so that the middle of the adhesive tape is at the junction of the walls.
- Similarly, attach the second side wall, forming a U-shaped frame for the future house.
- Coat the cut of the floor part with glue on three sides, press it to the edges of the walls, while simultaneously adjusting the internal corners of the house.
- Reinforce each joint between the floor and the wall with adhesive tape on the outside and inside.
- Apply glue to those sections of the inner wall that will be attached to the floor and the back of the house.
- Press the part strictly perpendicular to the floor and parallel to the side walls of the house (check the distance between the walls below and above with a ruler, adjust if necessary).
- Cover the resulting corners on both sides of the partition with masking tape.
Pasting the corners on both sides will make the structure stronger and fix the shape more rigidly. To ensure a tighter fit of the tape to the surface, it is recommended to forcefully iron the gluing areas with the edge of a ruler or plastic card.
Required tools and materials
Making a dollhouse from plywood is possible for anyone with minimal skills in working with tools, desire and patience.
To build a house you will need the following tools and materials:
- plywood 6-7 mm thick;
- narrow wooden slats;
- small nails or a construction stapler;
- jigsaw (can be replaced with a manual one);
- drill with a thin drill bit;
- sandpaper for processing the edges of parts;
- wood glue;
- mounting tape;
- a simple pencil and tape measure;
- decor for decorating a finished house.
The amount of material is calculated according to the drawing and depends on the size of the project.
For example, a small tabletop house will require 4-6 main parts, while a multi-story floor house can use 4-6 sheets of plywood. For an accurate calculation, the finished sketch is disassembled into its components, and a detailed drawing is constructed for each element.
After the parts are completely laid out on paper, the total area of the required material is calculated.

