Category: Repair ( 1 ratings, average: 2.00 out of 5)
Published 03/19/2020 · Comments: · Reading time: 9 min · Views: Post Views: 12,212
The repair work can be completed by installing cashing on the door openings. They hide minor flaws that appear during installation, such as cracks in the door leaf and wall. Racks come in various shapes, from different materials and mounting options.
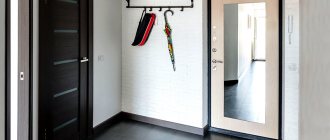
Interior examples
Owners of modern apartments and private houses give their preference to plastic and wooden building materials.
In practice, interiors look great where the finishing of interior doors is made of PVC and wooden trims. Here are detailed instructions for installing wooden cashing:
- Preparation. Using a knife, clean the doorway from any protruding foam. Then check the position of the wall and door frame with a level lath. If irregularities are observed, then eliminate them using the methods described above.
- Tags. Install the planks so that the rounded corners of the door frame are visible, and the straight corners coincide with the corners of the decorative frame. Attach the strips and use a pencil to mark points at a distance of 3 mm above the box. If the location of the cash suits you, then install it.
- Attach vertical strips to the marks; the points must be placed at the required height for their subsequent fastening.
- Trim vertical elements at a 45 degree angle.
- Secure the vertical trims with self-tapping screws or nails, then the horizontal ones.
If you carefully install a wooden cash register, the interior will noticeably change, becoming more solid and rich. Interior doors will acquire a completed appearance and will look much more interesting.
The following instructions will allow you to correctly install PVC trims:
- Measure and apply markings to the cashing mounting profile. It is a plastic product equipped with latches for fastening the front profile.
- Cut the planks at a 45 degree angle. The mounting profile can be cut 10 mm shorter than the front profile. This makes it easier to take measurements.
- Attach the mounting profile to the wall with self-tapping screws.
- Measure the front from the floor to the corner of the door frame. Do not forget to take into account the thickness of the connecting elements. Usually it has a value of 3 mm.
- Vertical frames should be cut at an angle and secured in the mounting profile using latches.
- Install connecting elements into the cut corners. Cut the front profile at a 45 degree angle. Then install it in the designated place.
Thanks to the attractiveness of the fittings, the joints look beautiful. There is no need to use silicone caulk to mask gaps.
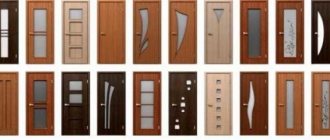
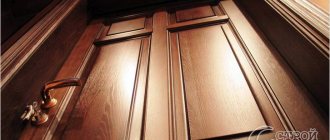
Doors with wooden lining:
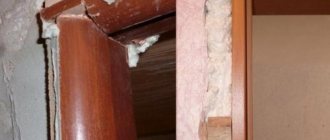
Doors with plastic lining:
You can install cash on interior doors with your own hands, without involving experienced craftsmen
It is important to prepare the necessary tools, take advantage of the advice and recommendations of experts, and follow the instructions. If you are patient and careful, you can add a piece of beauty to the interior door and the interior of the room
Elimination of defects
An unpleasant moment is the visibility of the nail head or screw. They are slightly recessed into the body of the cash, and sealed on top with sealant of the desired color. You can use a wax corrector.
On uneven walls, due to the curvature of wooden planks, joints diverge. During installation, the joining elements are additionally connected with a finishing nail.
Wide strips from 100 to 120 mm help to hide large defects around the door frame.
Methods of fastening platbands
Installation is carried out using finishing, liquid nails, self-tapping screws, and “beaks”.
Using finishing nails
This type of fastener is widely used due to a number of advantages:
- stealth;
- ease of installation;
- no experience required.
For work, use thin nails about 4 centimeters long and up to 1.5 millimeters in diameter. The distance between them should be 50 cm. Points are marked on the slats with a simple pencil.
After fixing, the nails can be puttied to match the color of the wood, so that the nails will not be visible
At the marks, nails are driven in so that they fit 20 mm into the box. If the caps are narrow, then they can be left or, if desired, trimmed with side cutters. The resulting small depressions are masked with a wax pencil of a suitable color.
The disadvantages of working with finishing nails are:
- Difficult to dismantle. Due to the peculiar structure of the head, it is almost impossible to get nails.
- Less strong connection than regular nails.
- When choosing this fastening method, also keep in mind that such nails are intended for finishing where there is no bending load.
Liquid nails
This method is ideal for MDF framing. It is performed quite simply and does not require specific skills or dexterity.
Liquid nails are used to install MDF trims
Liquid nails are applied to the underside of the decorative element and attached to the wall. For the glue to set, you need to hold it for a few minutes and then secure with tape.
This type of fastening is good because it leaves no marks on the outside of the slats. However, the fastening strength is not as high as when using conventional nails.
Fastening with self-tapping screws
This method is characterized by reliability. It is used for wooden products.
Wooden trims are secured with self-tapping screws
Even a beginner in construction can handle a self-tapping screw. To do this you just need to follow the instructions:
- Find self-tapping screws with a diameter of 6 millimeters and a length of 2 centimeters.
- Place marks on the front side of the planks 50 cm wide from each other.
- Drill small holes in the marked places, and then drill them out a little. This will hide the screw heads.
- Screw in the screws. If desired, they can be disguised under putty or decorative overlays.
Fastening with beaks
“Beak” is the name given to the casing, which in appearance resembles the Russian letter “G”.
Beak-shaped clypeus
This method is very simple. It consists in placing the largest section of the part in a recess specially designed for this purpose and snapping it into place.
The disadvantage of fastening with “beaks” is the gradual delamination of the structural element. Under the influence of the fastening itself, the planks begin to collapse at the joints. As a result, there is a need for additional fastening with glue.
Liquid Nails
Another method of attaching platbands involves the use of special glue. The most popular option is the so-called liquid nails. This composition provides quick adhesion to almost any surface.
Let's look at how to properly fasten platbands without ordinary nails. To do this, it is necessary to initially determine the exact position of each element. After this, apply a small amount of glue to the back of the plank and press it against the wall. If glue oozes out from under the casing, wipe it off immediately. It is advisable to apply only a few dots to prevent spreading.
You can secure the platbands either completely without nails, using glue, or by combining these two methods, this will ensure greater structural strength.
Fastening platbands with liquid nails simplifies the process
Installation of platbands
Taking measurements necessary for installing platbands.
Installation of platbands should always begin on the side of the door into which the door leaf opens. This is because there are door hinges on this side, which makes it impossible for the trim to be installed flush with the door frame.
Therefore, in order for the door hinges to move freely, a small indentation has to be made on this side of the door. Moreover, it is done not only from the hinge side, but also from the opposite side, so that the installed platbands look symmetrical. On the back side of the frame, you can install trim on the door without any indentations.
Depending on the material of the platbands, the optimal method of fastening is chosen. To fasten wooden products, you can use liquid nails or ordinary small copper-plated or galvanized nails.
Liquid nails are best used if the wall surface is perfectly level, otherwise it is better to choose regular nails. If the platbands are dark in color, it is better to take copper-plated ones, and if they are light-colored, it is better to take galvanized ones. You can also attach it with glue, but if in the future you need to dismantle it for some reason, then with this type of fastening you will have to break the old platbands rather than dismantle them.
It is preferable to glue plastic trims. They do not require perfectly aligned walls; their flexibility is sufficient to hide small unevenness. And their cost allows you to break them during dismantling without regret.
Tools for installing door frames.
Laminated trims cannot be distinguished from wooden ones by appearance. But to install them, you need special equipment. If you simply try to nail the planks, the material will be damaged. Therefore, during installation, holes for nails Ø1-1.5 mm are first drilled, and you do not need to drill through them, but leave 2-3 mm undrilled.
Installation begins from the sides. Choosing the left or right side of the door depends entirely on your taste.
At first, it is better not to nail the planks thoroughly, but only attach them with two nails, hammering them halfway: one nail at the base, the second in the middle.
Having finished installing the vertical strips, you need to install the horizontal ones. It is also better to attach it first with two nails, but only hammering them along the edges.
Having installed all three trims, you need to adjust their location to avoid gaps between the planks. The adjustment is carried out by lightly tapping the sides of the planks with a hammer, and if the gaps are large, then you need to carefully pull out one nail and install the plank in the desired position.
Having completed the adjustments, you can proceed to attaching the planks. The pitch of fastening nails may vary and depends on how the door is used. If the door will be used frequently, then it is better to choose a fastening step of 15-20 cm, but if it is a balcony door or a door to a closet, then fastening with a step of 50 cm will be enough.
If you do not have sufficient experience in the installation operation, then it is advisable, before installing the trim, to measure all the sizes of doorways in the house and start installation from the largest one. In this case, if something goes wrong when sawing or installing the trim, the incorrectly cut strips can be remade for smaller doorways, thus avoiding the need to purchase additional material.
If, despite all your efforts, the platbands do not fit together perfectly and there are small gaps at the joints, do not be upset. Buy a special mixture at a hardware store to remove chips on furniture. This mixture is made on the basis of beeswax, so it is enough to heat it over low heat, bringing it to the consistency of plasticine. Then the resulting cracks are filled with this heated wax, and when the mixture hardens, it is polished with a piece of felt and painted with acrylic paint selected to match the trim.
If you don’t rush and follow the technology exactly, then installing the trim on the door will be an easy and pleasant completion of the installation or repair of the door. Good luck!
Design
Every person, when buying a door, wants the opening into which the structure will be installed to look perfect: the frame and door panel stand straight, and the trim frames beautifully frame the entire structure. Some people do not tolerate excesses, and they prefer simple door designs with flat or arched platbands around the perimeter of the opening, while others want to emphasize their individuality by installing doors with beautiful figured platbands.
how to insulate the wall behind the radiator
But figured platbands are not the only way to help emphasize the peculiarity of the door design. There are other methods with which you can transform the door leaf. Very often, additional elements are used as decoration in the form of overlays located in the upper part of the casing - capitals.
The capital as a decorative element has been known since ancient times. Essentially, this is the upper part of the column, stylized with elements (flowers, leaves, curls) characteristic of a certain architectural style. In modern design, this decorative element is actively used to transform door structures in a classic style.
Capitals of various shapes and figured carvings allow you to visually increase the height of the opening, while adding solidity and high cost not only to the door structure, but also to the opening. They are installed, as a rule, only from the front part of the opening - on the reverse side there are platbands without them.
In appearance, the capital with a platband resembles an antique column. The overlays are located in the upper part of the vertical strips, forming a single composition with them. Between the capitals there is a platband similar in design. Sometimes, as an overlay, another decorative element is added to the top bar - a cornice. This decorative element has a beautiful figured protrusion that resembles a visor in appearance. The cornice goes well with the capitals, but even without them, framed by simple planks, it looks no worse.
Not only can you decorate a door structure with the help of capitals and cornices; there are also other decorative techniques. One of these techniques is framing the door using carved trims.
In addition to the usual pattern applied using a sharp tool, the surface of the planks may also contain a pattern made using the burning technique. Such platbands, as a rule, cost more than usual, but the price for such beauty is quite justified. Using carved trim in your home, you can create your own unique style, as well as add a special atmosphere and comfort to the room.
Installation of doors in aerated concrete and in a wooden house
Stages of installing doors in aerated concrete
To carry out such work, it is necessary to prepare welding and buy a metal corner with a shelf width of 3.5 to 5 centimeters (the choice depends on the weight of the door and the expected loads).
Next, it is necessary to trim the metal corner so that when welding the joints of individual parts, it can cover the doorway along the entire perimeter on both sides. To strengthen the two frames together, it is necessary to weld the embedded parts, and the shank must have a thickness of at least 3 millimeters and a width of 5 centimeters. These elements are placed at the places where the door frame is attached. The door frame is fixed using screws on previously installed lintels.
For reliable fastening, you should use 12-centimeter self-tapping screws, which are screwed into each of the tires. It should be noted that the door will also be attached in these places, so the screws should under no circumstances overlap each other. At the next stage of installing doors in aerated concrete, use a building level to align the door frame, and then fix its position using wooden wedges.
The final fixation of the door leaf is carried out using screws up to 15 centimeters long or dowels.
After this, it is necessary to coat all the cracks with sealant or blow out with foam.
Installation of an iron door in a wooden house
You can install a new front door with your own hands in just three steps:
- dismantling the old structure;
- doorway preparation;
- installation of an iron door.
The old entrance doors to the apartment are dismantled like this (mostly wooden):
- Provided that the door leaf worked on collapsible hinges, we pry it open with a crowbar or other lever. This way the panel will rise and jump off the loop. Provided that the hinges are not dismountable: you need to unscrew the screws that hold the door in the frame using a screwdriver or screwdriver.
- It is not difficult to dismantle an empty box with your own hands if it is made of wood. To do this, fasteners (visible) are unscrewed: screws, anchors, nails are pulled out. If the box is firmly held in the opening and cannot be removed, its side posts are sawed off and torn off with a crowbar. After which the lower and upper parts can be removed without any problems.
- If a metal box is being dismantled or a wooden box is attached to the opening with anchors, then it is easier to saw them off with a grinder, just like metal posts.
- Next, the opening is cleaned of old insulation, remnants of plaster, protruding fasteners and other things. Provided that the doorway for the new door has been previously correctly measured, its size should exceed the perimeter of the frame by a couple of centimeters. This is necessary so that there is enough space to align it in the opening. If you made a mistake in measurements earlier, you will have to work hard to widen the passage with a grinder with a circle on the stone. If the opening is too wide, it can be narrowed by additionally applying cement mortar.
A metal frame can be attached to a doorway in two ways:
through technological holes in the box profile;
using special mounting plates.
We put the input structure:
A door frame without a leaf is installed in the opening. Wood wedges are placed under it, which are necessary for fixing, adjusting its position and to ensure technological clearances.
- Having adjusted the position of the box, they begin to drill holes in the wall through the previously made holes in the profile: 15-20 cm deep. Anchors are inserted into the drilled sockets, and the position of the racks is checked again. When positioned correctly, the anchors are twisted and covered with decorative elements matching the color of the box.
- Next, the door leaf is hung on pre-lubricated hinges and all the fittings are attached. The canvas is covered, and the gaps around the perimeter of the rack are checked, which should not exceed 4 mm.
- The functioning of all latches and locks is checked. Inaccuracies are eliminated with wedges. Holes are drilled for the second pillar, which we also secure and check for smooth movement of the door leaf and locks.
- The technological gaps between the box and the wall opening are filled with foam, which must dry for at least 24 hours. After which the remaining foam is cut off, and the surface of the wall is puttied. Installation completed.
Mounting the door block on plates is one of the most common methods and is somewhat simplified for doing the work yourself. Often, metal structures are equipped with mounting plates with prepared holes for fasteners, which are welded directly to the frame.
Adviсe
Installing platbands is not a difficult task, but it requires a sufficient amount of time, effort and skill. It is difficult for beginners to take into account all the details, but there are standard tips thanks to which the installation of platbands can be carried out with minimal errors or without them at all.
Knowing all the installation details and having prepared the necessary tools and materials, you can install almost any platbands, the main thing is that you have the time and desire to do this work yourself.
To learn how to install platbands on doors, see the following video.
Required tools and materials
When installing extensions, a minimum set of tools is used:
- level;
- roulette;
- pencil;
- saw or jigsaw;
- plane;
- hammer;
- sharp knife.
Necessary materials:
- polyurethane foam;
- fasteners (screws, nails or “liquid nails”);
- additional strips.
As a rule, extensions are purchased together with the door leaf, but if the doors are not going to be replaced, but only plan to close the slopes, for the manufacture of extensions they use:
- wooden planks;
- pieces of MDF;
- long pieces of chipboard;
- plastic.
If natural wood is used, it is pre-treated with antiseptic impregnations to extend its service life.
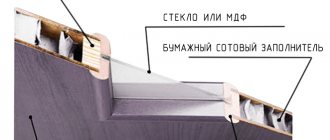
Homemade panels made from regular MDF will differ from factory ones, since in industrial designs the interior between two thin fiberboards is filled with cellular material.
Chipboards are inferior to wood and MDF in appearance and durability, but chipboard boards can be used indoors.
Plastic is rarely used as a material for making accessories. And if it is still used, then especially durable, metal-reinforced PVC panels are selected.
Extensions can be made of natural wood, chipboard, MDF panels or plastic
How to choose?
Many manufacturers produce door designs with ready-made platbands, which allows you not to think about matching the door strips. But this doesn't always happen. Sometimes, due to various circumstances, you have to do the selection yourself, and in order to choose the right planks that fit most naturally into the existing interior, you need to take into account some nuances.
When selecting platbands, first of all, you should think about the size. Wide trims should be chosen if it is necessary to hide large defects around the perimeter of the box that arise not only during the installation of the box, but also during the finishing of the walls.
Very often, when replacing old planks with new models, it is not possible to purchase platbands of the same width due to the fact that the wallpaper cut does not reach the wall border or the gap between the wall and the frame is much larger than 30 mm. In this case, there are two options: either finish the walls again, which is not very profitable, especially if the renovation was not part of your plans, or buy wider planks than before.
The purchase of planks less than 64 mm wide can only be justified by a narrow door leaf or layout features. The closer the opening is to a perpendicular wall or furniture, the narrower the plank should be. A wide plank with such a layout will only visually reduce the space, especially if it is installed end-to-end.
Not only the width, but also the length of the slats must be taken into account when choosing platbands. In order to correctly calculate the length, you need to know the parameters of the door frame. The planks should be 10–15 cm longer than the vertically installed elements. As a rule, in hardware stores you can see planks 215–220 cm long.
It is equally important to select platbands taking into account the material from which they are made and color. The material and color of the platbands must completely match or be as close as possible in structure and tone to the door leaf and baseboards, otherwise the design will not look very organic. It is also permissible to choose colors that contrast with the door leaf and baseboards.
The choice of platbands based on material should be justified by the style of the room. Wooden trim and MDF panels will look good in rooms with a classic style, and for rooms decorated in a modern style, practical plastic panels are more suitable.
The type of room also affects the choice of platbands. Almost all materials are suitable for rooms with moderate humidity. For entrance doors it is better to use metal trims. The lining of kitchen and bathroom openings can be decorated with ceramic platbands, especially if the adjacent walls are decorated with a similar material.
For interiors decorated in Baroque and Provence styles, the best option would be wide (from 90 to 120 mm) figured platbands with a clearly visible pattern.
Step-by-step technology of work - measurements and installation
It is recommended to start framing the doorway with platbands:
- after completing wallpapering work;
- when equipping doors with platbands on both sides after pasting two adjacent rooms;
- before laying the baseboard.
You need to start work on the side of the door structure into which the leaf opens. That is, from the side where the door hinges are located. The measurement reference will be the strip covering the box on the side where the hinges are located, since because of them the platband is not installed flush with the box. This indentation should be equal along all three lines. To attach the trim on the back side of the door, it is not necessary to make an indentation.
So, the order of work:
- With maximum accuracy, we measure the length of the vertical bar installed next to the hinges. The distance resulting from the indentation is added to the length. The point obtained as a result of the measurements will be the beginning of the line along which the excess is sawed off from the workpiece at an angle of 45º.
- To make the opposite casing, we take measurements in the same way, but separately. It is not a fact that the distance from the floor to the required point will be equal.
- We attach the sawn planks with two nails. We attach one of them at the base, the second about a meter later.
- We place a blank for the top strip under the unfixed upper ends of the vertical trims. We mark on it the points required for perfect sawing at a 45-degree angle, and saw off with a miter saw or a simple mechanical saw.
- We fasten all three components.
The base of the door frames usually rests on the floor, but sometimes a kind of bedside table-stand is placed under the door frame.
We determine the installation step of the studs or nails ourselves. Carpenters recommend driving in galvanized or copper nails every 15 cm if those who like to slam the door actively use it. With careful use, from an aesthetic point of view, the optimal step is 50 cm.
If the sawing angle is slightly off, cracks will inevitably appear at the joints. Those who were unable to avoid this due to inexperience do not need to despair. Failures can be masked with sealant. To do this, you need to stick regular mounting tape on both sides of the gap on the platbands. Preferably in several layers. Then fill the gap with acrylic composition of a suitable tone.
We offer you a quick way to accurately mark:
Proper installation of interior door frames guarantees considerable savings. Entrance doors are cashed in the same way, however, the platbands are attached mainly only from the inside, since the outer frame is already on the frame. The work is not complicated, but meticulous, and without knowing the nuances you can ruin a lot of material. By the way, carpenters advise inexperienced home craftsmen who want to become proficient in this direction to start with the largest opening, so that in case of failure, they can frame the door with smaller slats. Well, having gained practical experience, you can take on complex tasks.
Installation of door frames
As already mentioned, the method of fastening the platbands is chosen based on its reliability and the evenness of the wall surface. Wooden or MDF planks are attached with screws, glue or nails. If the wall does not fit very smoothly to the frame, then you should refuse to attach the planks with glue.
How to install platbands on interior doors and where to start? And they begin installation from the side where the canvas opens. It is on that side that there are hinges that prevent the plank from being installed flush with the frame and in this case it is necessary to indent it. It must be the same on all three sides. If there are no loops, then this question disappears by itself.
Joining planks at an angle of 45 degrees
The most common way to install door frames is at an angle of 45 degrees. Installing them yourself involves using a miter box to evenly trim the plank. This joining method is used for platbands with a relief or rounded shape. Since not everyone has a miter box, then a regular protractor is perfect for marking. The required height of the vertical planks is measured directly from the floor covering. You need to start from the hinge side, taking into account the width of the indent. The lowest point of the corner is marked on the poster and a mark is placed.
The plank is placed in a miter box and a part is sawn off from the set mark at the required angle. Now the blanks need to be slightly baited with nails, the caps of which are removed with wire cutters. One nail is driven in at a small height from the floor, and the second at a height of 100 cm.
The protrusion length of the nails remains somewhere around 5 mm, after which the trim is attached to the box. In the place where the nail is located, a wooden block, previously wrapped in fabric, is placed on the platband and the strip is carefully set with a hammer.
When the vertical strips at the bottom are mounted on nails, you can begin marking the upper vertical strip. To do this, the vertical trims on top are slightly bent, and the horizontal part is placed under them. Using a pencil, mark the required angle line. The excess part is cut off and the plank is ready for fastening.
Joining planks at an angle of 90 degrees
Only flat platbands are installed at an angle of 90 degrees. The cut areas must be lubricated with acrylic-based varnish before attaching them.
In addition, you can make the upper horizontal platband in the form of a protruding lintel. To do this, its edges should protrude a few centimeters beyond the vertical slats. Thus, they will be installed at an angle of 90 degrees with horizontal seams.
Installation of plastic platbands
How to install plastic trim on a door with your own hands? Some people put them on glue, but this method is not reliable, so their installation is mainly done using a profile.
To do this, you should adhere to the following installation diagram:
- The profile is cut to the required parameters of the door. Even if it is shorter by 5 mm or 1 cm, it’s okay, it will still hide behind the cash;
- On one side of the door you need to cut 2 long and 1 short element. Cut their ends at an angle of 45 degrees.
If you purchased a cheap Chinese door, then you won’t be able to attach the profile with self-tapping screws, since they won’t be able to be tightened securely due to the thin metal of the frame. Then the profile is fixed directly to the wall, but it is desirable that it be without plaster. If the structure is strong enough, then the mounting profile is attached directly to the box.
You need to start screwing the profile not from bottom to top or top to bottom, but from the center. When screwing in the screws, use a plumb line to check the evenness of the profile.
After the profile is screwed on, the strips are cut to the required length and the upper ends are sawed off at an angle of 45 degrees. The workpiece is inserted into the groove of the vertical profiles.
The corner fittings are placed on the cut of the platbands and the installation of the upper horizontal strip begins. It is cut on both sides at an angle of 45 degrees and joins the vertical strips. Thus, the fittings will hide the joint between the planks.
Joining the plinth and platband
In this case, it is not the platband that is cut, but the plinth that is adjusted. If it is plastic, then it fits beautifully with the platband using special decorative plugs. If the plinth is wooden, then it is sawed at an angle of 45 degrees so that the adjacent side is aligned in thickness with the plank.
Telescopic models
The simplest is to attach telescopic trims to interior doors. It is made without nails, but can be supplemented with glue for greater strength. Installation features are directly related to their design. The fact is that the edges of the platbands, when connected, coincide with the edge of the extension or loot. The principle of coupling is “tongue and groove”.
Telescopic trims are attached strictly to the groove of the box strip
In other words, one part goes inside the other. Thus, in order to install such products, you just need to saw off the excess and join the parts. The protrusion of the element fits into a recess in the door frame. Then you need to set the required distance, which is adjusted by the size of the recess.
Regardless of which installation method you choose for a particular situation, you should be careful, since one awkward movement can ruin the entire structure. If there are unevenness on the wall, it is necessary to first level them so that there are no gaps, this applies to absolutely all models of platbands, regardless of the material of manufacture and configuration.
We recommend watching the video:
Interior doors
As a rule, extensions are installed on the side opposite to the door hinges. But when installing interior door extensions, there may be a case when they will have to be installed on the hinge side. If so, then you need to first check whether the additions will not interfere with the opening of the door.
If, when the door is completely open, there remains a gap between its edge and the edge of the door frame equal to the thickness of the trim with a margin of 2-3 mm, there is no problem: we install the trim using any of the methods described above.
If the edge of the door is adjacent to the edge of the frame, you need to install backing boards, having first knocked down the plaster from the slopes. This should not be neglected: just 1.5 mm of “pressing” the sash to the door will eat up 10 degrees of its opening angle, not to mention the fact that the door will soon be damaged.
Read about the full cycle of installing an interior door here.
Do-it-yourself fastening and insertion of fittings: awnings, handles, locks
To attach the hinges to the door, mark 200 mm at the top and bottom of the end of the door leaf. We fix with a pencil the places where the canopies begin. Place the loops between the marks so that the edge of the loop bar aligns with the edge of the end of the fabric.
Having made loops in two places, we draw them along the perimeter of the canopy with a knife.
This marks the boundaries of the loop surface. It is advisable to run the knife several times and go a little deeper. When the contour of the loop is clearly marked, use a chisel to remove the top layer of covering under the canopy.
Do-it-yourself lock mortise and door hardware installation
We do this carefully so as not to damage the coating outside the perimeter of the canopy. The hinge should fit into the recess flush with the surface of the door. Then, having previously marked the holes, we fasten the canopies with “original” self-tapping screws.
We attach the hinges to the box in the same way. At the same time, we take into account that the distance from the top of the frame to the beginning of the hinge will be greater by 3 mm, and from the bottom by 10 mm (these are gaps). We recommend watching photos and videos of installing interior doors with your own hands.
Arched double doors in the living room
We choose a place for inserting the handle and lock. As a rule, door handles are installed at a distance of about a meter from the bottom of the door leaf. You can insert the lock a little higher or lower for your convenience.
Having stepped back the required distance from the edge, we place the lock body against the canvas. Mark where the door handles will be. Using pens and a drill, we cut out a hole slightly smaller in diameter than the handles.
On the end surface of the door we outline the perimeter of the recess for the lock.
Using feathers (feather drills), we make a recess for the lock mechanism. It should fit completely into this recess. As in the case of hinges, use a chisel to remove the layer around the perimeter of the plate covering the lock.
Massive wooden doors to TV room
When all the holes are prepared, install the handle and lock, fixing their position with screws.
In the same way, but on the box, we cut out a recess for the strike plate and make a recess for the lock tongue. Having attached the bar, we check how the latch works when closing the door. If the calculation is correct, we finally screw the striker. It’s worth watching educational photos and videos on how to attach the fittings to the doors.
Step-by-step installation instructions
Experts advise that before installing an interior door correctly, you should decide on additional elements, such as trim and fittings. After all, the type of trimming and further work with the installation of the canvas depend on their configuration. Therefore, before installation, you must carefully study the following instructions:
Door handle installation
In order to carry out all the work on installing handles correctly, you need to know exactly what type of this element of fittings you purchased. After all, for each type there is a certain installation technology, and it should be followed. Let's look at how different types of door handles are installed.
Installation of handle-bracket
To complete the work you will need: an electric drill, wrenches with a diameter of 10 and 13 mm and fasteners. The procedure is as follows:
- The distance from the floor to the handle should be about a meter;
- Using a drill, drill through holes 1 mm larger than the diameter of the studs;
- The nuts are screwed onto the studs and special inserts are inserted;
- Put on the bushings and install them in the hole located on the outside;
- The nuts should protrude beyond the end of the handle by 1–3 mm;
- Install the gasket, tighten the bushings, inserts and tighten everything;
- Attach the inside of the handle;
- Use a wrench to turn the plug, pulling it toward the door.
Installation of the pressure element
Let's look at how to install a latch handle on an interior door with your own hands without outside help. To do this, perform the work in the following sequence.
Mark the height of the handle and the center of the end from which the field for the latch extends. Drill holes for both elements, which are always located on the same axis. Using a chisel and hammer, knock out the platform for the face plate. Insert and secure the latch using self-tapping screws.
The decorative trim is screwed off from the handle, the latter is installed on the inside of the structure and secured to the door with screws or self-tapping screws. Screw the cover onto the base of the handle itself. The inner part of the structure is inserted into the door by 25 - 40 mm and directed towards the screw, which must necessarily fall into the groove. Then they move on to installing the lining, for which they mark the middle of the hole along the latch line, but already on the box.
To determine the installation location of the strip, lubricate the tip of the latch with toothpaste or chalk and, pressing the handle, close it with some holding, and then release it. In this case, the latch should touch the box. After the door is opened, a mark appears on it and there is a place where the bar is installed. They trace its outline, and for the “dog” they make a hole with a chisel and screw on the bar.
Dimensions
There are four significant circumstances that influence the dimensions of the platband: the dimensions and location of the opening, the shape of the planks and the size of the gap between the wall and the frame.
The optimal width is 6.4 cm (64 mm): it is enough to close the gap and cover a small part of the wall. Planks with a width of more than 64–70 mm with standard dimensions of the door structure look somewhat rough, which is why manufacturers produce most models of platbands in exactly this width.
The size of the gap between the wall and the frame is an important indicator when choosing the width of the platband. When installing a door of standard dimensions, it is not always possible to install strips 64–70 mm wide - you have to choose narrower models. There may be several reasons for this:
In any case, the width of the platband should be several millimeters greater than the width of the gap. According to SNiPs it is 30 mm. As a rule, 40 mm is enough to hide structural details and beautifully frame part of the wall.
The width of the strip also depends on the shape of the casing: for flat models it is 64 mm, for products with a semicircular surface – 70 mm, and for figured casings with a relief surface, the width ranges from 85–150 mm.
For telescopic platbands, the width parameter is within different limits: the standard width for such models starts from 60 mm and ends at 80 mm. The optimal width is 75 mm. Due to their structure, telescopic platbands, in addition to width, also have other parameters: the thickness of the strip and the length of the groove element.
Telescopic bars are produced by manufacturers of different sizes. For models with a flat surface type this is:
For planks with a drop-shaped surface:
The first number indicates the width of the strip, the second the thickness, and the third the length of the mounting edge.
