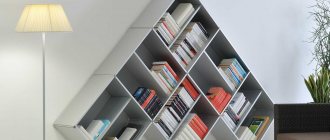
A do-it-yourself shelving unit made from a profile is a modern solution to many problems associated with both the creation of simple technical storage systems and the ergonomic distribution of living space developed by a fashion designer. Thanks to the use of new technologies, wooden shelving that is prone to destruction is being replaced by lightweight and strong metal structures. Increasingly, they can be found in warehouses, archives, libraries, garages, and greenhouses. Such storage systems can withstand heavy loads. Not subject to rotting. Resistant to mold fungus. Do not ignite.
Advantages of metal profile structures
Racks made of metal profiles have a number of advantages that can be used both at home and in the office, shops, and warehouses.
- Simplicity and accessibility of installation/dismantling. To assemble a metal collapsible rack, the participation of specialists is not required. The work can be performed by any person who has minimal skills in handling carpentry tools.
- Metal profile structures can withstand significant weight. The shelf is assembled without an additional strip in the middle (stiffening ribs) with a maximum load of 60 kg. One stiffening rib will be needed at 90 kg, and a shelf with two additional parts at the base will support a weight of 120 kg.
- Low cost. Moreover, this applies both to the metal profile itself and to work with it.
- Long service life. Metal, especially after special treatment, is one of the most durable materials. The main danger is contact with water. But the use of galvanization or special polymer dyes can solve this problem.
- Aesthetic appearance. The shape and size of the structure are selected taking into account the needs and characteristics of a particular room.
Shelves can be made:
- free-standing;
- mobile;
- wall
The latter, in turn, can be rows of shelves on four vertical supports or racks, which, using hanging brackets, are attached only to two vertical supports attached to the wall.
Sheathing with plasterboard
To cover the frame, gypsum board with a thickness of 6.5–9 mm is used. In rare cases, for shelves on which heavy objects will be placed, you can use 12 mm gypsum board. The blanks are cut strictly “in place” - individually for each individual frame element. They are attached to the metal profile with metal screws with a countersunk head. It is advisable to recess the heads into a sheet of drywall, preventing it from cracking. The fastening frequency is 120–150 mm between screws.
After covering the entire gypsum board frame, the edges are processed with a plasterboard plane. After this, a perforated corner is glued to the corners of the structure using adhesive mastic or putty, which will prevent the structure from chipping and cracking. All joints between gypsum boards are opened using a retractable construction knife and then taped with sickle tape. After this, the surface is puttied with gypsum putty for drywall: “Rotband”, “Knauff”, “Vetonit LR” or similar.
After the putty has completely dried - at least 24 hours, the surface is treated with a sanding block with an emery net. Remove dust and prime with acrylic deep penetration primer 2 times.
The surface prepared in this way is ready for further decoration: wallpapering, polymer decorative films, applying decorative plaster or painting with acrylic paints.
Pantry rack
No matter how diligently and carefully you try to keep in order the many boxes, tools, and other necessary things in a small pantry, it is impossible to do this without a properly organized storage system. Only if each item occupies its designated place will you be able to find everything you need at any time. And then, after using it, put it back in its original place. The best solution for organizing a storage system is to build simple shelving made of metal profiles along the walls. In our case, they can be arranged in the shape of the letter U. Thus, the room will be used most effectively, ensuring easy access to any place on the shelves of the rack.
Preparatory stage
First of all, it is necessary to calculate the dimensions of the future structure. Based on this, purchase the required amount of materials to create a rack. When preparing a plan or drawing, you need to take into account a number of requirements that will help you avoid design errors:
- The length of the rack must be at least 15 cm shorter than the wall along which it will be installed.
- The height of the system is calculated taking into account the height of the room and the length of the profile.
- The height of the shelves should be planned depending on the height of the items stored on it.
- Taller items should be placed on lower shelves.
- The width of the shelves should be less than 1 m.
- Choose a material that can support the expected weight that will be stored on the shelves.
- Use shelving beam profiles for better adhesion of structural parts.
For the rack you will need to purchase:
- Guide profile (PN) 40x50 mm - 13 pcs., which equals about 38 m.
- Rack profile (PS) 50x50 mm - 12 pcs., which is equal to 34 m.
- Screws with dowels 60 mm – 56 pcs.
- Self-tapping screws with press washers 4.2x16 mm – 88 pcs.
- Plywood for shelves 12 mm thick - 8.2 m2 (4 sheets 1.5x1.5 m).
- Self-tapping screws GM 3.5x25 mm – 96 pcs.
- Double-sided tape PP 50x10m – 20.4 m (2 pcs.).
When creating a rack, use the following tools:
- roulette;
- pencil or chalk;
- square;
- building level;
- metal scissors, jigsaw;
- perforator;
- screwdriver
If possible, use a laser level and a laser rangefinder. Make sure to use special glasses and protective gloves to make your work safer.
Work order
- Use a tape measure to mark the height of the shelves in the center of the room. Then use a laser level to draw horizontal lines.
- Attach guide profiles to the walls along the marked lines. Drill holes at the marked points and insert dowels. Use glue to strengthen the fastenings. Install the profiles onto the screws.
- Proceed with assembling the frame of the first row of shelves. First attach the façade parts. Then install short support pieces to reinforce the shelves. The frame of the shelves of the bottom row should be installed on temporary PN legs. Their task is to maintain the correct position of the shelves until assembly is completed. The rack profiles (PS 50x50), which are installed in the middle, will later be secured together with the plywood using self-tapping screws.
- According to the dimensions, mark the plywood for the shelves and cut out the blanks. Tip: to make cutting plywood convenient, place the sheet on the PS.
For one shelf you will need: 9.5 m of a 40x50 mm guide profile, 5.2 m of a 50x50 mm rack profile, 2.05 square meters of 12 mm plywood. And also 24 self-tapping screws, 14 screws with dowels, 22 self-tapping screws with a press washer.
- Attach the plywood to the profile frame. Use self-tapping screws.
- Build the remaining shelf levels in the same way. Use temporary support legs.
- Next, make and install the shelves on permanent racks. In this case, it is no longer practical to use a solid support. Fasten the parts using self-tapping screws.
The rack is ready. Since our design will be used indoors, that is, the product will not be exposed to high humidity and temperature changes, additional processing and finishing will be unnecessary.
Drawings and dimensions
First of all, it is worth mentioning the collapsible frame options. Such models are very mobile. Their parts are connected with bolts. The storage can be easily moved to the desired location. But there are also non-demountable frame racks.
To join their parts use:
- welded joints;
- self-tapping screws;
- nails (this is determined by dimensions and material).
When large in size, such assemblies are virtually stationary. It is not only impossible to take them out through a door or window, but even to disassemble them. It will only be possible to break it, so dismantling is fraught with many difficulties.
As for the console versions, such racks do not have sidewalls. But it provides for attaching the shelves to the solid rear wall.
As for folding models, they are closer to a stepladder. The dimensions are relatively small, and you can’t count on decent capacity. However, the mobility is even higher than that of the collapsible versions, and this largely compensates for the low capacity.
As for the shape, rectangular and triangular types of shelving are optimal for both the pantry and other rooms. A rectangle is generally a classic shape. You just need to choose whether to install square legs or extend the supports to support the entire structure at once
When drawing up a diagram, you should pay attention not only to the geometry, but also to the dimensions of the storage unit itself.
The height is mainly limited to 2 m. In this case, even most people of average height, without stepladders or stools, can reach the top shelf. As for the depth, it is entirely determined by the size of the objects laid out.
Hanging or protruding things are not very good, but a huge half-empty space is unlikely to be a rational choice. To store books, magazines, and flowers, you need shelves 0.3 m wide and 1 m long.
For garages and sheds, for garden tools, for wallpaper and for illuminated seedlings, it is recommended to use shelves 0.4-0.5 m wide. They can also be used to stack:
- tires;
- canisters;
- spare parts for cars and garden equipment;
- metalworking, carpentry and entrenching tools;
- fasteners;
- various clothes.
Particular attention should be paid to the shelving in the bathhouse. All of them must be mounted not only on the floor, but also on the wall, because otherwise it is impossible to ensure reliability
It is unlikely that anyone will like falling from a shelf to the floor. All such products must be made of wood and carefully polished.
This is what a rack cabinet looks like with a height of 1716 mm, a rear wall width of 1038 mm and a single section width of 324 mm. But this is a homemade budget class shelving unit. The depth of the shelves reaches 500 mm. Their length is 1550 mm. For work, plywood with a thickness of 1.5 cm and pipes measuring 2.5x2.5x0.2 cm are used.
Hanging racks
Wall-mounted racks, or, as they are also called, wall racks, are simple structures made of perforated metal profiles, brackets (brackets) of various sizes, on which special or any shelves are installed. These are very convenient, easy to assemble, reliable systems. Their main advantage is versatility, the ability to create shelves of any size, color and shape. With the right choice of components, the load on one shelf of the rack can reach 100 kg. Wall-mounted shelving is widely used to equip garages, offices, warehouses, home wardrobe systems, offices, living rooms, and storage rooms.
In what rooms are plasterboard shelves installed?
Universal gypsum plasterboard shelves can be installed in any type of room:
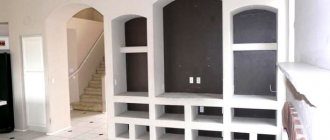
- in the living room - most often, shelving is placed along the entire wall, because in such niches it is very convenient to install various equipment;
- in the nursery - plasterboard shelving in the child’s room is often installed in order to zone the space, which will make it possible to better separate the sleeping area from the play area (this idea should be taken into account by parents who need to equip a room for two children);
- in the kitchen - usually in the kitchen such shelves are left open, because this way it will be more convenient to use them for their intended purpose (such a structure should be well strengthened from the inside, because the dishes are quite heavy);
- in the bathroom - in a room of this type there are always not enough shelves, and so that they do not take up extra space, it is recommended to make them hanging;
You can read about how to make hanging shelves with your own hands in our article.
- in the corridor - here it is better to install closed shelves, which are useful for storing various items; if necessary, mezzanines can be made;
- in the bedroom - in such a room you can install shelves of any type, first of all, it will depend on the dimensions of the room.
Plasterboard niches in a children's room
Hanging rack for garage or balcony
A perforated profile allows you to select and buy components from which, like a construction set, you can build the desired wall rack. If you plan to place the structure in a garage or on a balcony, we recommend using galvanized metal materials. This coating will protect the product from the destructive effects of moisture and temperature changes. The length, width and number of shelves of the structure can be changed depending on your specific needs and the free vertical surface that you have at your disposal.
Preparing the necessary materials
In order to assemble a hanging rack measuring 1.2x1.2 m, you will need to purchase:
- one horizontal rail 1.232 m long;
- 3 vertical guides, each 1.2 m long;
- 9 shelf brackets of 31.5 cm;
- 6 solid shelves 60x31.5 cm;
- 4 screws with dowels for attaching the horizontal rail to the wall.
To complete the work, you will only need a hammer drill, a building level, a tape measure, a pencil for marking and installing screw fasteners, as well as personal safety equipment (glasses, gloves).
Afterword
The shelves vary in design features. You can make them wavy, multi-story, high-tech, and so on.
But the main thing is that they turn out to be reliable and durable. If there is something you don’t understand, then here you will find photo and video materials with which you can understand in more detail this easy, but requiring certain skills, process.
By the way, the price for selling such shelves will be quite low. The cost of 1 m² of plasterboard structure (including frame, screws and plasterboard) is approximately 400 rubles - it is not difficult to calculate how much your future structure will cost.
Manufacturing Features
To make a rack from a metal profile with your own hands, you need to consider that:
- The structure should be 150 mm less than the total length of the wall;
- The height is selected to the ceiling of the room or to the length of the purchased profile;
- The weight of the cargo placed on the shelves will affect the profiles of the rack beams and their dimensions;
- Shelves should not be wider than 1 m;
- The rack can store different items in size, weight and composition;
- The height of the shelves is selected according to the height of the objects, from approximately 300 to 500 mm, and their height at the bottom is always greater than the top;
Drawing of a simple shelving
After determining the dimensions of the structure and the option for its manufacture, a drawing is developed.
General view of the metal rack
Preparation of materials and tools
When making a metal rack you will need:
- Rectangular pipe 30x50x3, or 20x50x3, for frame posts;
- Perforated profile for shelving 25x50, for frame shelves;
- Board 25 mm thick for making shelves, plywood 20 mm thick or metal sheet 2-3 mm thick.
Tip: Boards should be prepared in advance. To do this, they need to be covered with several layers of drying oil and then painted.
- The amount of material is calculated according to a drawing developed in advance by summing up all the lengths of the structural elements and determining their mass;
- To make a collapsible rack you will need fasteners - bolts and hooks.
Tools you should prepare:
- Welding equipment or electric drill for assembly;
- Hacksaw;
- Grinder for cutting workpieces and cleaning welds;
- Electrodes;
- Drill;
- Ruler and tape measure;
- Construction level;
- Paint;
- Primer;
- Cutting wheels;
- Marker;
- Self-tapping screws.
Tools for assembling a rack
Rack manufacturing option
Assembling the rack
Before starting work, the profiles for the shelving are laid out on the floor for ease of assembly of the structures.
Further, the technology on how to make a rack from a profile suggests the following assembly order:
- Using a tape measure and marker, mark the required length of the blanks
- Using a grinder, all the elements for assembling the frame are cut according to the marks. Cutting of parts, if necessary, can be ordered at the place where the profile was purchased;
- The constituent elements are connected to each other according to the drawing. To increase the strength of the structure, all joints need to be welded. But in the absence of welding, it is possible to use a bolted connection;
- When assembling the structure, it is necessary to control the location of the elements in order to avoid the appearance of curvature of the frame, which will later be very difficult to correct;
- After assembling the rack stands, the frames for the shelves are assembled. At the beginning they are smaller in height;
- Places for attaching shelves are marked on the racks and frame;
- The shelves are welded to the vertical elements. They must be positioned strictly horizontally;
- An anti-corrosion agent, primer and paint are applied to the finished frame.
Advice: If you are assembling a rack from plasterboard profiles, which will be periodically assembled and disassembled, you should fasten its elements with bolts.
Shelves can be made of metal sheets, boards, chipboard sheets. For this:
- The boards are covered with drying oil and painted;
- Dries well;
- The dimensions of the shelves are measured along the frame. The boards should be firmly in place;
- All parts are screwed with self-tapping screws to the frame.
How to attach?
Of course, it’s up to you to decide, but the following shelf options are most often used in garages:
- hanging - mounted on the wall, the most convenient option for small rooms;
- stationary - created taking into account the layout of a specific garage and cannot be disassembled; fixation can be either on the wall or to the ceiling and floor;
- mobile - recently you can increasingly find this option; rollers are inserted at the bottom of such a rack, which ensure the mobility of the structure.
In any case, stock up well on self-tapping screws and bolts - there is no need to spare them, because the main goal when creating shelves in the garage is to ensure reliable storage of even the heaviest parts and objects.

