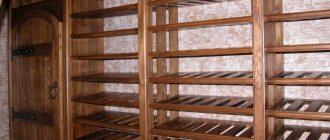
The use of plasterboard for the manufacture of shelving in residential premises has firmly won its fans, since this material provides endless possibilities for both the functional organization of room space and the formation of a unique design.
Design and decoration of a plasterboard shelving unit in the living room Having detailed information on how to make a shelving unit from plasterboard sheets, a set of standard tools and the skills to perform simple construction work, anyone can transform their apartment, make it comfortable and efficient.
Plasterboard shelving in the interior of an apartment
When creating the interior of your own apartment, installing a variety of shelving is an excellent way not only to create a unique design, but also to significantly increase the functionality of the living space, since with their help you can solve a number of important problems at once, such as:
- zoning of the premises, this is especially true for small apartments or modern studio apartments;
An example of zoning a room with a plasterboard partition with shelving - obtaining additional space both for storing things and household supplies, and for arranging audio equipment and a TV;
- the opportunity to inexpensively decorate rooms through a non-standard shape, organizing lighting, implementing color schemes and arranging decorative elements on shelving.
Drywall is an ideal means for constructing shelving, since its properties and processing technologies make it possible to create a functional interior in an apartment with your own hands at minimal cost. With it you can create:
- figured and arched designs of partitions with shelves;
- convenient built-in niches made of plasterboard;
- functional wall cabinets made of plasterboard.
Construction of a wall cabinet made of plasterboard
The use of various combinations of materials provides additional opportunities for implementing your own design projects when planning a living space. The plasterboard base of the structure in combination with built-in spotlights or a glass shelf surface can not only organize space in the living room, but also give the room’s interior an elegant style.
Stylish ideas
When a heating or decorative element has already been purchased, all that’s left to do is to correctly place the TV above the fireplace in the interior, or choose a different location for it
It is very important to do everything so that the hearth is the central element, but at the same time the TV itself does not seem superfluous in the design
To achieve this task, you can do the following:
- To decorate rooms in a modern style, you should choose products that will have glass, stone or metal elements. If you choose wood, there is a possibility of making the interior inharmonious.
- In rooms with a classic style, a TV built into a wooden frame will look ideal, while the floor material should be identical, that is, made from the same species.
- You can make the interior of a living room with a fireplace and TV more interesting and stylish by painting the wall behind the fireplace in a contrasting color, laying it out with ceramic tiles, marble, or artificial stone.
- In addition, no one forbids placing the TV and other objects on the wall along a diagonal line.
- If you want to make the interior as unique as possible, then you should work on changing the shape of the wall itself, then the TV will definitely fit into the concept.
No matter how designers claim that a living room with a fireplace and TV looks bad, and ideally these elements should be placed in different rooms, such interior design still has a right to exist. The main thing is to think through the concept completely and not give up on the desire to bring your ideas to life.
How to make a quality rack: tips
The beginning of the work, of course, is a thorough design, determining the functionality, location, manufacturing method, as well as the finishing option for the future shelving set. For high-quality production of plasterboard, it is recommended to consider the following tips:
Diagram of a plasterboard shelving arrangement
- A rack made from a plasterboard profile will be more reliable than one that uses wooden blocks as a frame. The metal profile makes it possible to form various shapes, including bends and semicircles, so it is recommended to use it for the implementation of complex structures.
- If the arrangement of heavy objects is required, then the best solution would be to install a frame made of a double profile, as well as laying gypsum plasterboard in two layers. It is recommended to strengthen the frame by placing cross bars more frequently. This will give the structure additional rigidity.
- The use of moisture-resistant plasterboard will guarantee the durability of the shelves not only in rooms with high humidity, but also in residential areas where wet cleaning is often carried out.
An example of using moisture-resistant plasterboard when installing shelving - Reinforcing the joints of plasterboard sheets will provide good protection of the coating from cracking, so this procedure is necessary.
- A partition with built-in shelves separating the zones of the room requires additional fastening of plasterboard along the ceiling for greater stability.
Taking these points into account when installing plasterboard shelves and partitions, the construction result will be not only reliable, but also durable. The video shows the step-by-step process of making a plasterboard shelving unit.
Types of structures
Racks vary in shape, depending on the installation location (corner, straight wall), purpose (decorative, utility), size, number of sections, etc.
They can be made stationary, placed in the most convenient place without the possibility of moving, and mobile - when, if necessary, the furniture can be easily moved to another place or taken out during repairs/moving.
The size of the rack is chosen based on the tasks set - the number of utensils to be placed, the dimensions of the room, etc. In very small rooms, you can build a hanging structure, attaching it to the wall or making it so that it is a continuation. Metal profiles are ideal for this.
Shelving - as a way of zoning space
It is not at all necessary to place furniture only along the walls. If the apartment is spacious, this interior element can be used as a fence to divide the space into functional zones.
The most common installation options:
- Between the kitchen and dining room;
- Between the dining room and living room;
- Between the living room and bedroom.
This solution allows you to visually delimit the space, creating a feeling of privacy in every part of the apartment. Moreover, through shelving, made in the same style as the interior, looks more interesting than solid shelving with a back wall.
Rack - as a way to hide utilities
This type of furniture can be used as a way to hide pipes or other communications that spoil the appearance. The convenience is that there is no need to build a massive structure. It is enough to do it on the pipeline section/sections. The advantage is that the rack, unlike a regular false wall, can be used as additional space to place items in it: from flowers to children's toys.
Required tools and material
Making a shelving unit from plasterboard with your own hands is not difficult, and any apartment owner who is used to furnishing his home on his own can do it. To do this, you will need the following materials and tools for drywall:
- Drywall. Depending on the location and planned load, the following types of gypsum plasterboard are used, varying in thickness and quality: Wall 12.5 mm, used for standard structures in residential premises;
- Moisture-resistant 12.5 mm, recommended for shelves in rooms with high humidity, for example, in the kitchen or bathroom;
- Thickened 18 mm, installed on a shelf surface with planned large loads;
- Thin plasterboard 6.5-9.5 mm, used for curved structures.
Existing dimensions of metal profiles for installation of plasterboard sheets
- Guide PN 50/40 and rack PS 50/50 are used for wall structures that do not provide for the placement of heavy objects;
- Dowels 6x40 mm for attaching the frame to the base;
- Cordless or electric screwdriver for securing drywall and assembling metal frames;
- Putty for finishing joints and surfaces;
Scheme for fastening profiles for plasterboard with self-tapping screws
- Vertical, more than 80 cm long and horizontal building level, for convenient work its length should be less than the width of the shelves;
As can be seen from the list above, in order to make shelving from plasterboard you need to have a standard set of tools, which, as a rule, is available in any home, and the materials for manufacturing are affordable.
That is why assembling the racks yourself is not only possible, but also economically justified.
Design
Step-by-step instructions for making a shelf begin with creating a diagram. Before making a shelf from plasterboard, the design, purpose and location of the shelf on the wall are determined. After creating a sketch, measurements are taken of the section of the wall where the future structure will be placed.
The finished plasterboard structure can take the form of a built-in niche or a protruding decorative surface. In the first case, the shelves are mounted into the wall during the process of assembling partitions or leveling the surface, in the second - on a flat wall surface.
USEFUL INFORMATION: Installation of spotlights in drywall
Step-by-step instructions for assembling a plasterboard shelving unit
When the initial preparation has been completed and the necessary tools and materials have been prepared, you can begin the actual installation. You can make a rack from a profile using the following algorithm.
Design and layout
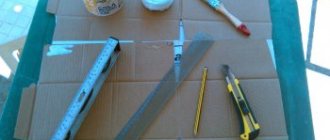
Initially, a detailed design of the future structure is drawn. It is necessary to carefully consider the location, functionality of the shelves and their sizes, as well as what the finishing will be. If this is a complex curved partition, then it is advisable to make patterns from thick cardboard. Marking on site is done using a tape measure, square and building level.
Ready-made plasterboard shelving project Starting from the floor, the attachment points are sequentially transferred to the walls and ceiling, if this is provided for in the project.
Surface preparation
This process boils down to the following steps:
- Cleaning the shelving area from old plaster or wallpaper.
- Cleaning cracks and filling them.
- Sanding the surface followed by priming.
It should be noted that markings on the walls are done on the prepared surface.
Frame assembly
Technologically, the procedure for forming the frame differs depending on the type of rack. If the frame is screwed to the wall, then:
- Initially, the guides are installed on the wall and attached to it using dowels;
- then the guides are fixed symmetrically to each other on the floor and ceiling using either dowels or self-tapping screws, depending on the material;
Drawing with dimensions of a simple plasterboard shelving - PS profile racks are placed into the resulting base of guides and secured with self-tapping screws;
- the profile for the shelves is cut to size and also screwed with self-tapping screws in the planned places.
If the frame is made separately, then its assembly occurs regardless of its location and only then is it secured with screws or dowels. All actions to install the frame under the drywall must be performed strictly level, observing right angles. The exception is curved structures.
Sheathing with plasterboard
The finished base of the rack is sequentially sheathed with gypsum boards, pre-cut to size. Fastening is done with drywall screws in increments of 12-15 cm.
An example of covering a wall-mounted shelving unit with plasterboard. As a rule, the side surfaces are covered first, and then the shelves are directly sewn up. For protection, corner metal profiles are installed at the corners, secured with self-tapping screws.
Finishing of the finished structure
All seams between sheets of drywall must be carefully sealed - puttied and glued with reinforcing mesh. Each layer of putty applied requires complete drying so that the surface does not crack in the future. Before painting, it is recommended to sand the surface with fine sandpaper and prime it with a liquid compound.
If you plan to use alternative materials as the finishing coating for the rack, then during preparation you should follow the manufacturers' instructions.
Thus, a plasterboard shelving is one of the options for solving the issue of optimal organization of living space, available for self-production.
By showing creativity and imagination, even the smallest apartment can be turned into a corner of coziness and comfort by installing functional and beautiful shelving.
Stages of work
It is necessary to construct a plasterboard shelving unit by dividing the work into several separate stages. Before performing them, it is worth considering separately whether you have enough qualifications for successful implementation.
Perhaps it would be much more rational to transfer some stage to professionals. In any case, everyone needs to know the basic nuances of the work, at least to be able to control the implementation.
Preparation
Any business should begin with thorough preparation. In the case of installing a plasterboard rack, we are talking about drawing up a drawing of the future structure. In this case, it is necessary to reflect the most important aspects, starting with general dimensions and ending with approximate fastening points. At the same time, it is worth placing the material used in the room where the work is planned. This will allow you to equalize the humidity levels, and let the sheets themselves be at hand. At the same stage, you can mark out the work site, but you must be careful and strictly observe all the dimensions obtained when drawing up the drawing.
Frame installation
After applying the markings, you can begin installing the frame. The main labor costs here will be when installing the guides, which are attached to the ceiling and floor of the room (provided the rack is installed at its full height). In this case, you will first have to make a series of holes using a hammer drill, then install dowels and then attach the structural elements themselves.
Next, the guides are connected by bulkheads, the location of which is determined by the parameters of future shelves and the intended purpose of the rack. The higher the weight, the more often it is worth placing auxiliary elements. It is proposed to fasten them together using a special cutter, which will not only simplify, but also speed up the task.
Sheathing
When the supporting frame of the structure is ready, the time comes to cover it with gypsum boards. There are no particular difficulties here - the material is cut to the required size and screwed on with screws.
To cut sheets of drywall, you can use a simple method - draw the desired part and, using the rule for the screed as a limiter, make cuts along the marking lines. Then the rule is placed under the sheet so that the slot is on its edge, and with a confident movement of the hand the material is broken clearly along the line. As mentioned above, when sheathing you need to use a special bit with a limiter.
At this point, the main stages of work on creating a plasterboard shelving can be considered complete. All that remains is the finishing stage in accordance with the chosen design solution.
Photo examples of plasterboard shelving design
List of resources used
When working with drywall, the following tools are required:
- metal scissors;
- drill;
- knife with removable blades;
- pencil;
- level;
- roulette;
- hammer;
- screwdriver;
- putty knife.
Materials you will need:
- galvanized partition and arched profile;
- screws and dowels;
- gypsum board sheets;
- perforated corner;
- mounting grid;
- putty;
- skin
